• Photography
  • About
  • Contact
  • Light Writing

Scott W Gonzalez

  • Photography
  • About
  • Contact
  • Light Writing

Cropping a Full Frame

Good morning,

I just found out that my A7iii which is a full frame camera can be used as a crop sensor camera with a camera setting. It doesn’t maintain the 6000x4000 pixels it becomes a 10mp image at 3936x2624 pixels. The images appear to be the same whether I crop them to 10mp or if I just take them at 10mp. So a 300mm lens will become a 450mm. I already wrote about crop vs full frame here Crop Sensor vs Full Frame — Scott W Gonzalez

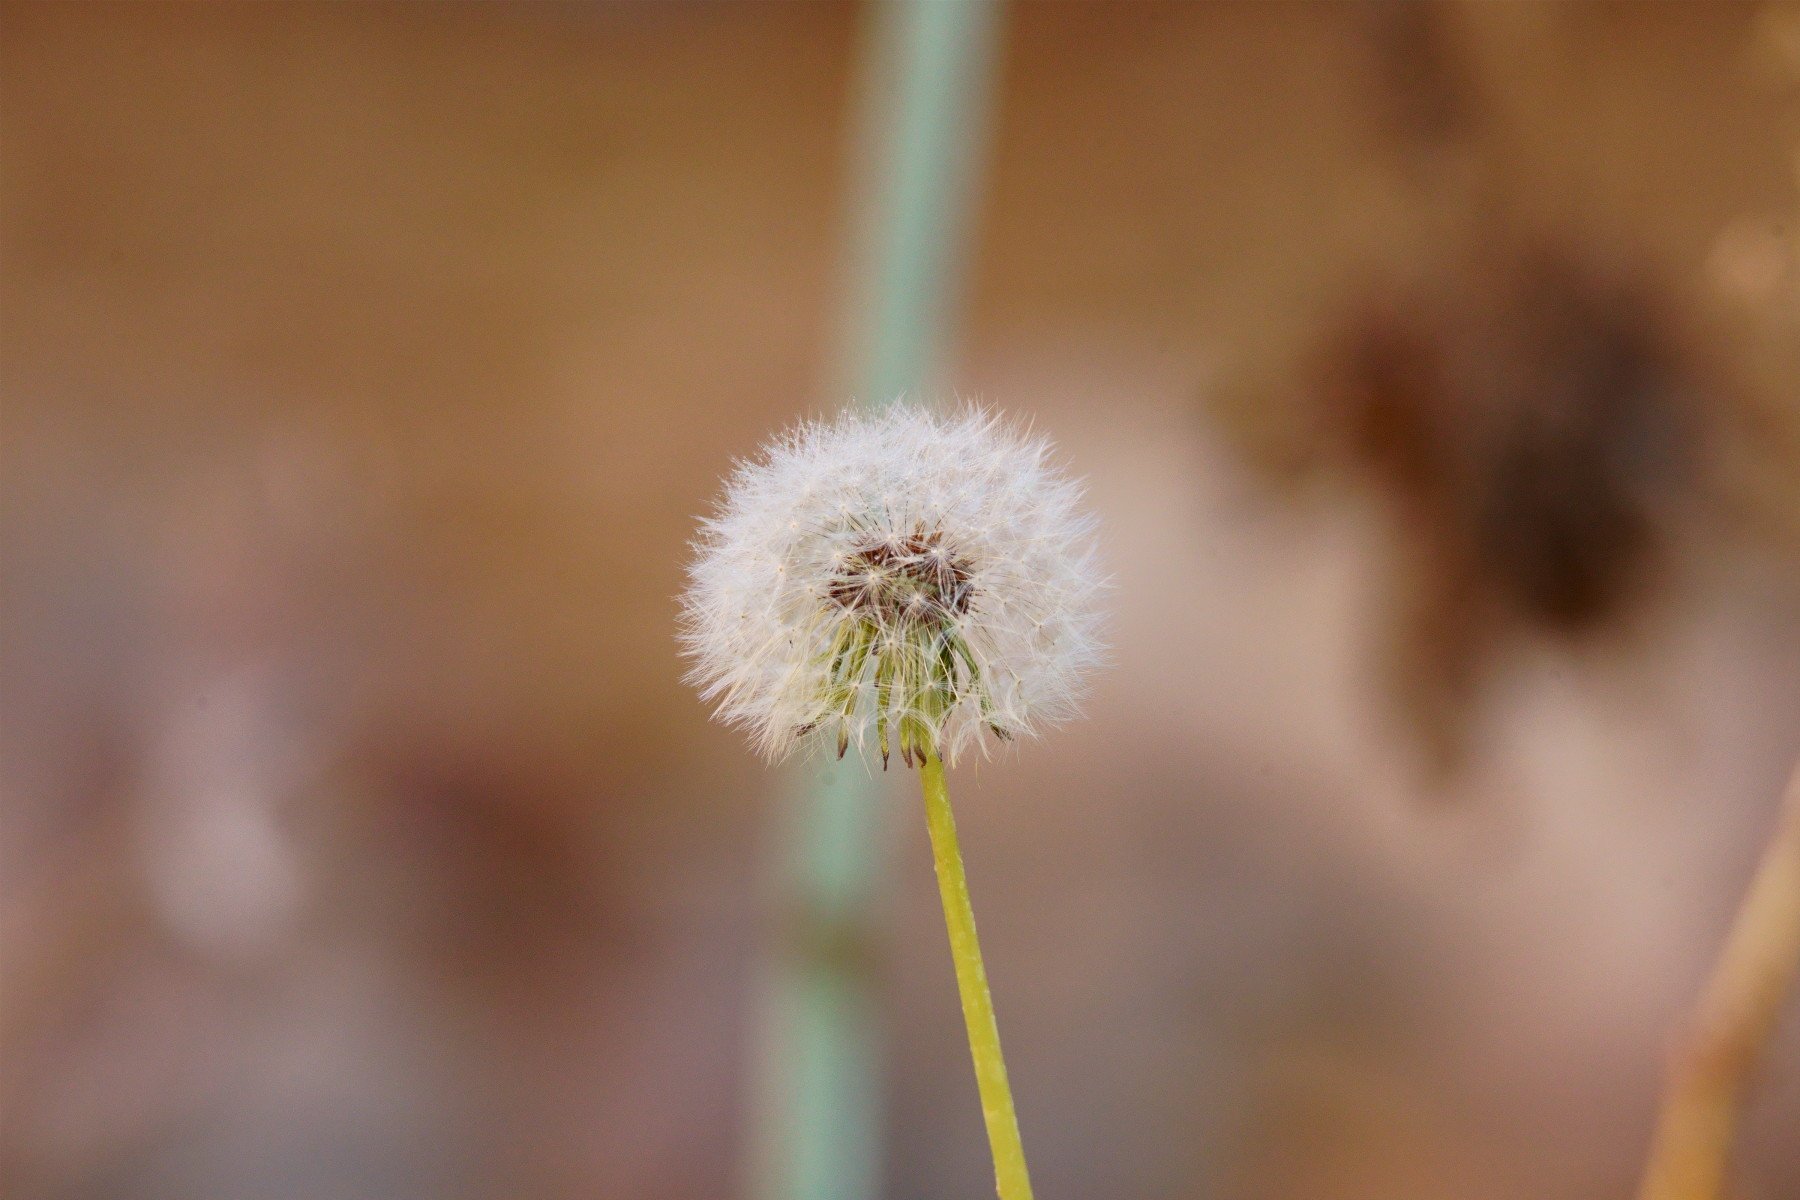
I recently got a new lens that is used for all these images. A Tamron 150-600mm so the images are going from a 600mm to an effective 900mm. I will talk about the lens at another time. All I can say about it is damn.

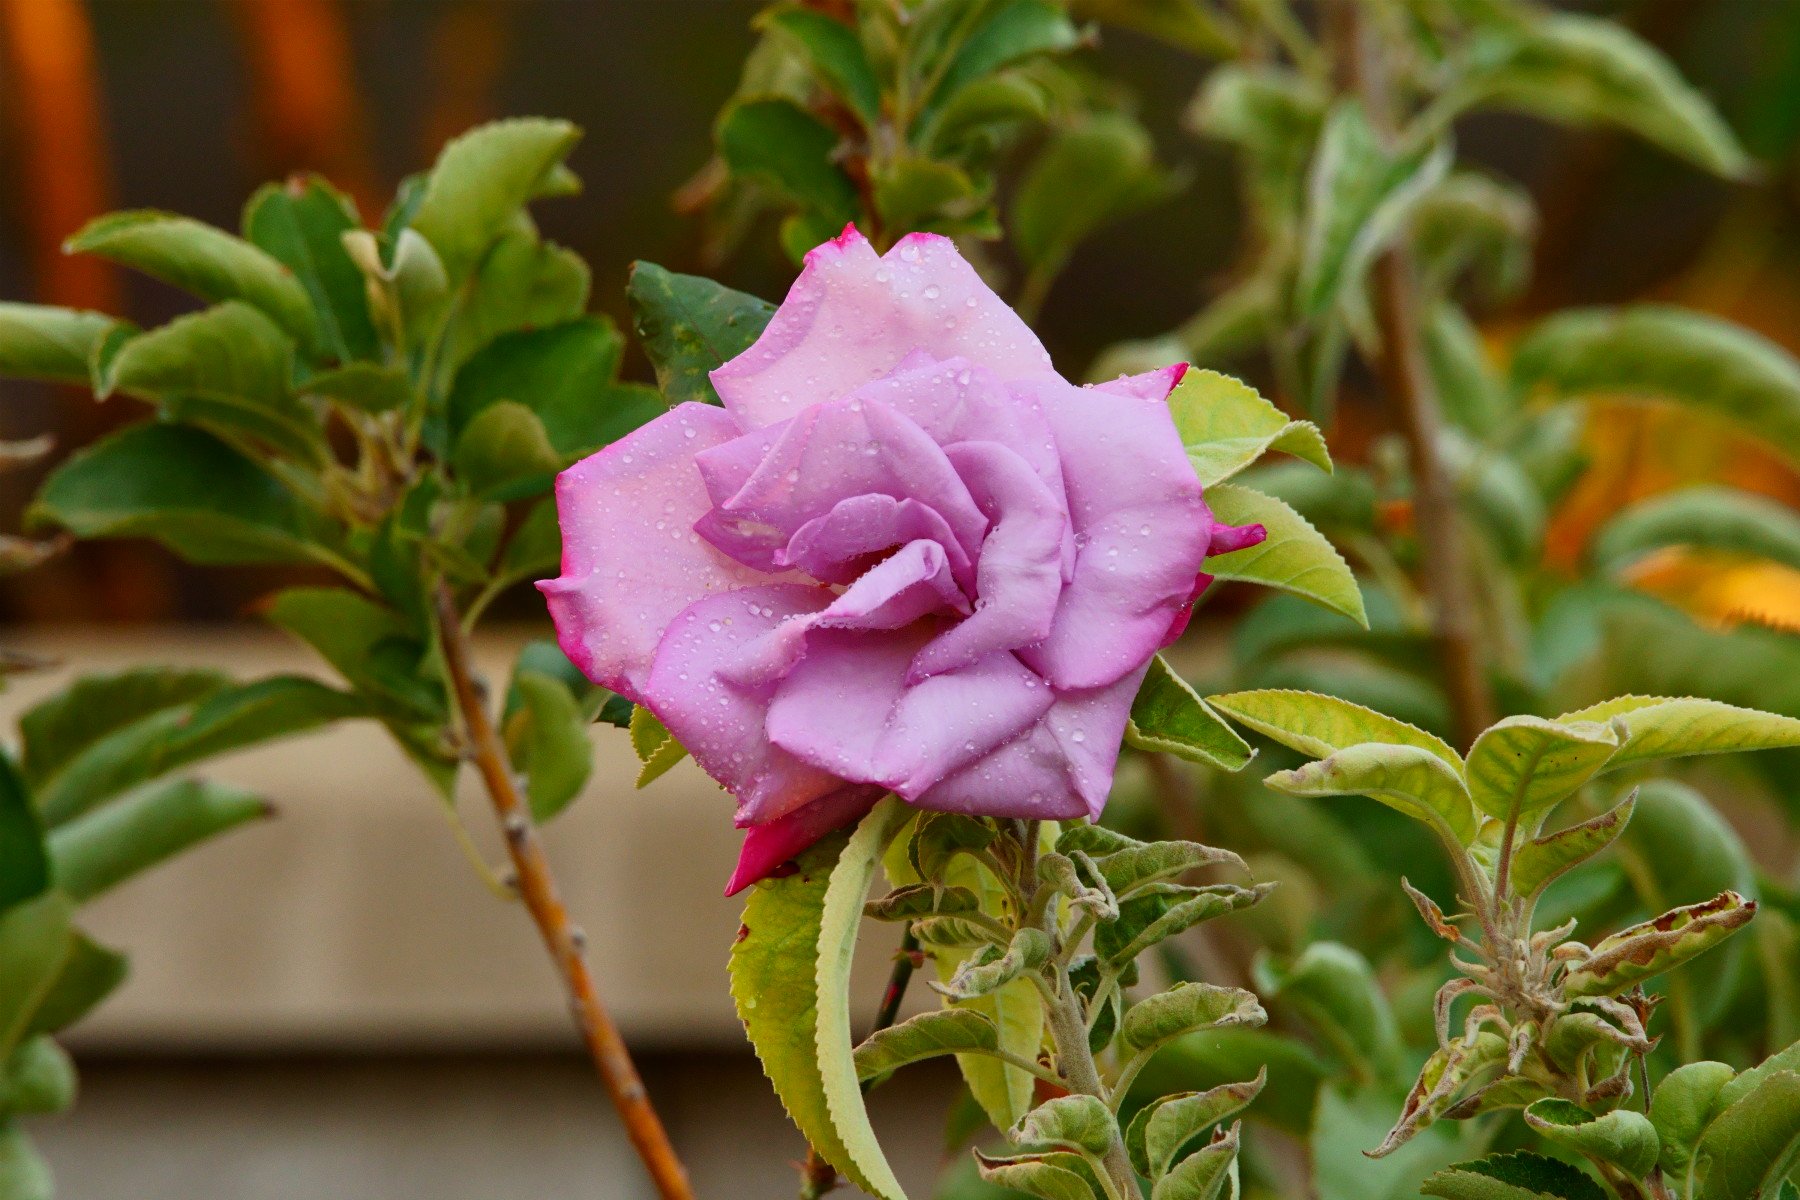
I know that the A7iii and the a7Riii do it and I can only guess that Sony’s other FF cameras do too. I did a little checking there are Canon and Nikon FF cameras that have the option too. Below are some uncropped pictures from from my yard. The first is at an actual 600mm and then an effective 900mm.
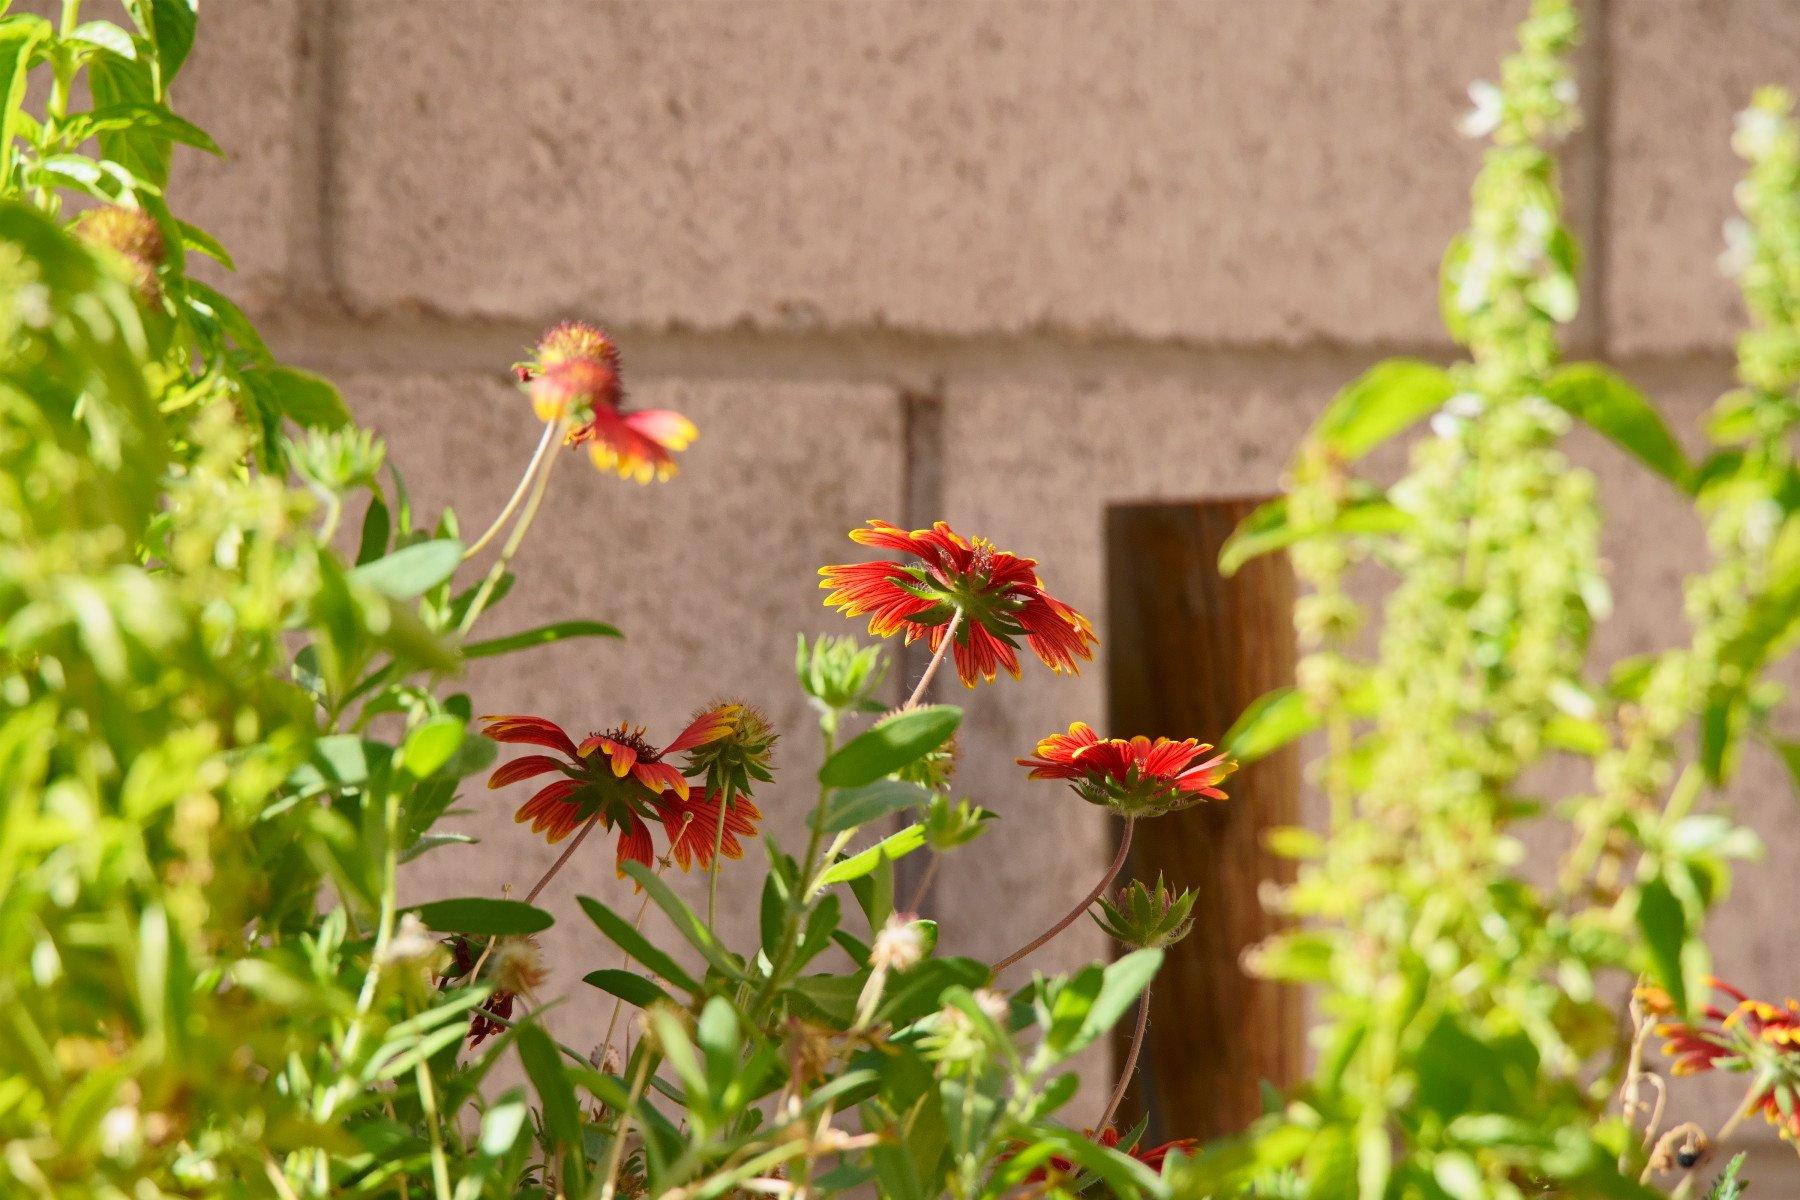
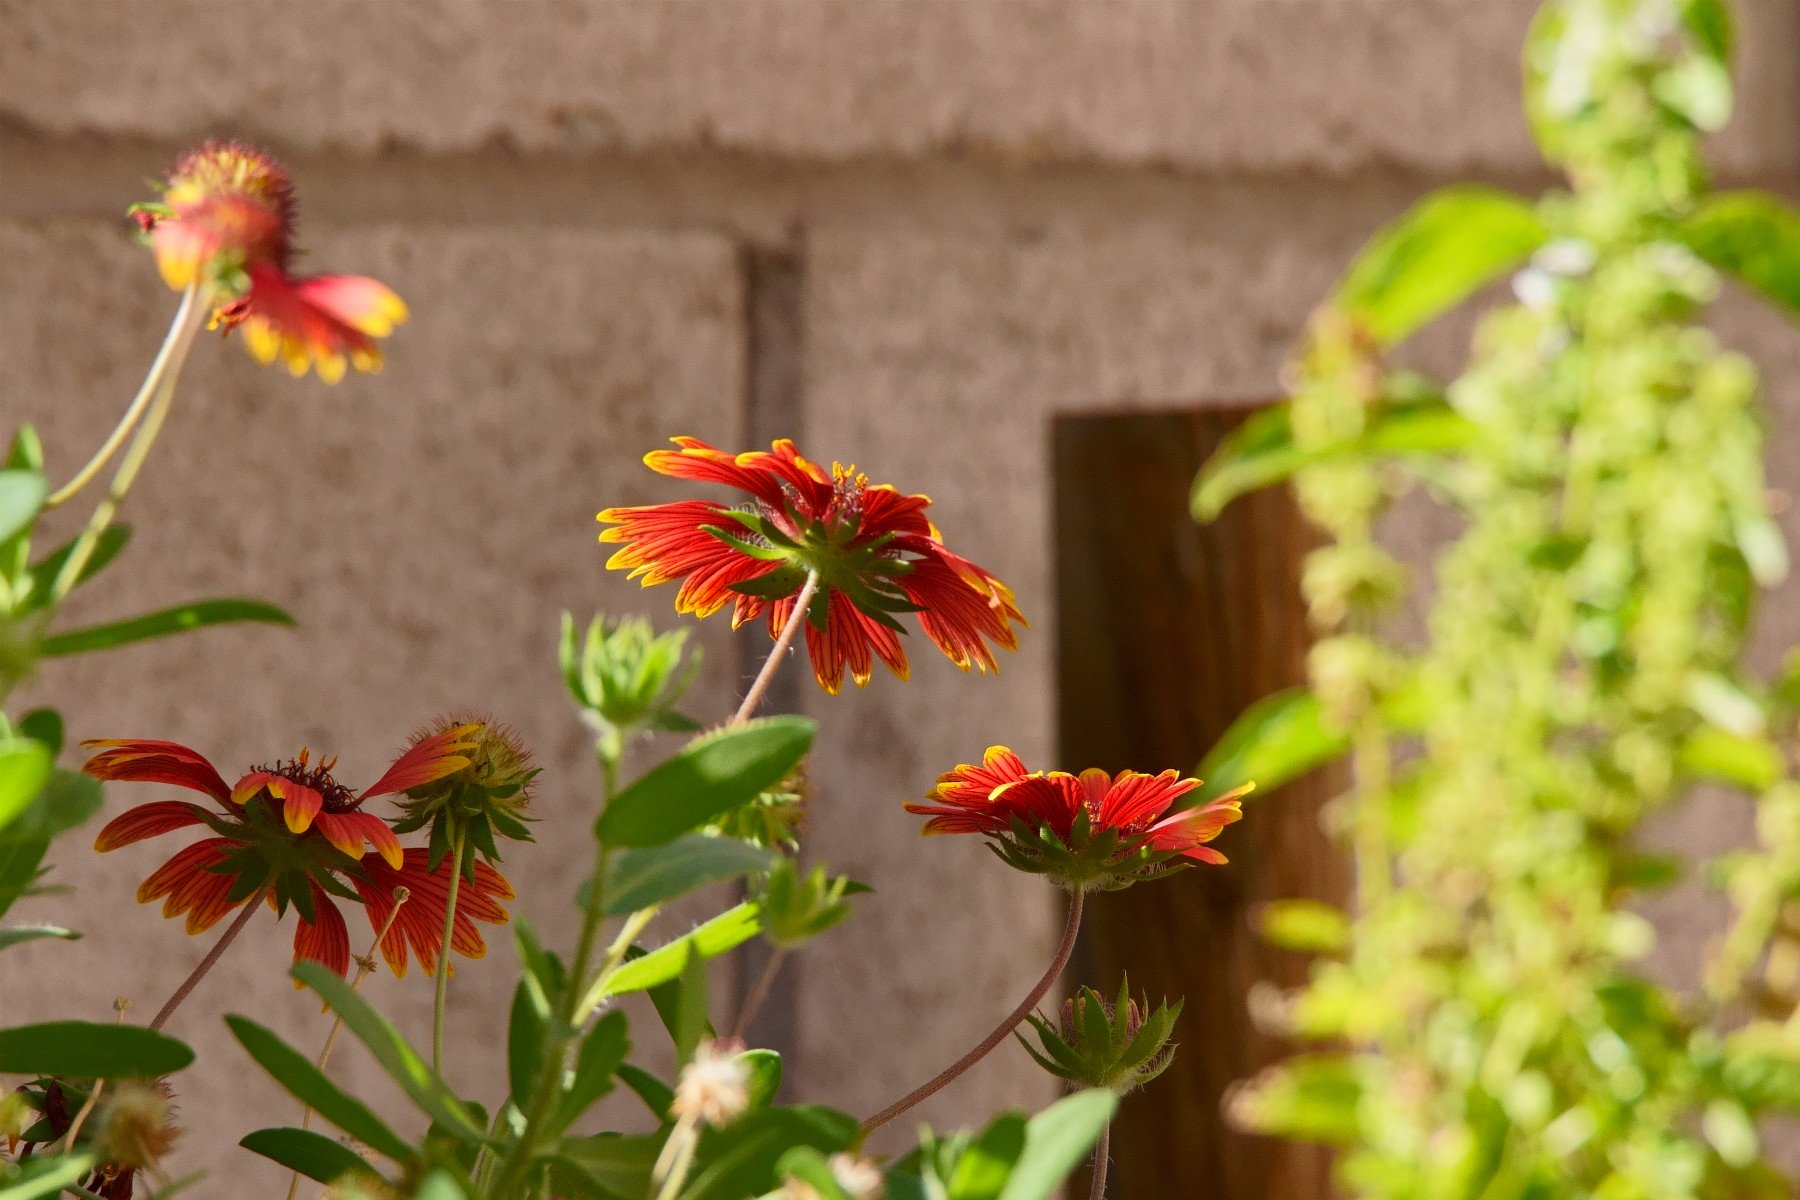
DSC06271.JPG
DSC06278.JPG
DSC06284.JPG
DSC06286.JPG
DSC06289.JPG
DSC06287.JPG
DSC06271.JPG DSC06278.JPG DSC06284.JPG DSC06286.JPG DSC06289.JPG DSC06287.JPG

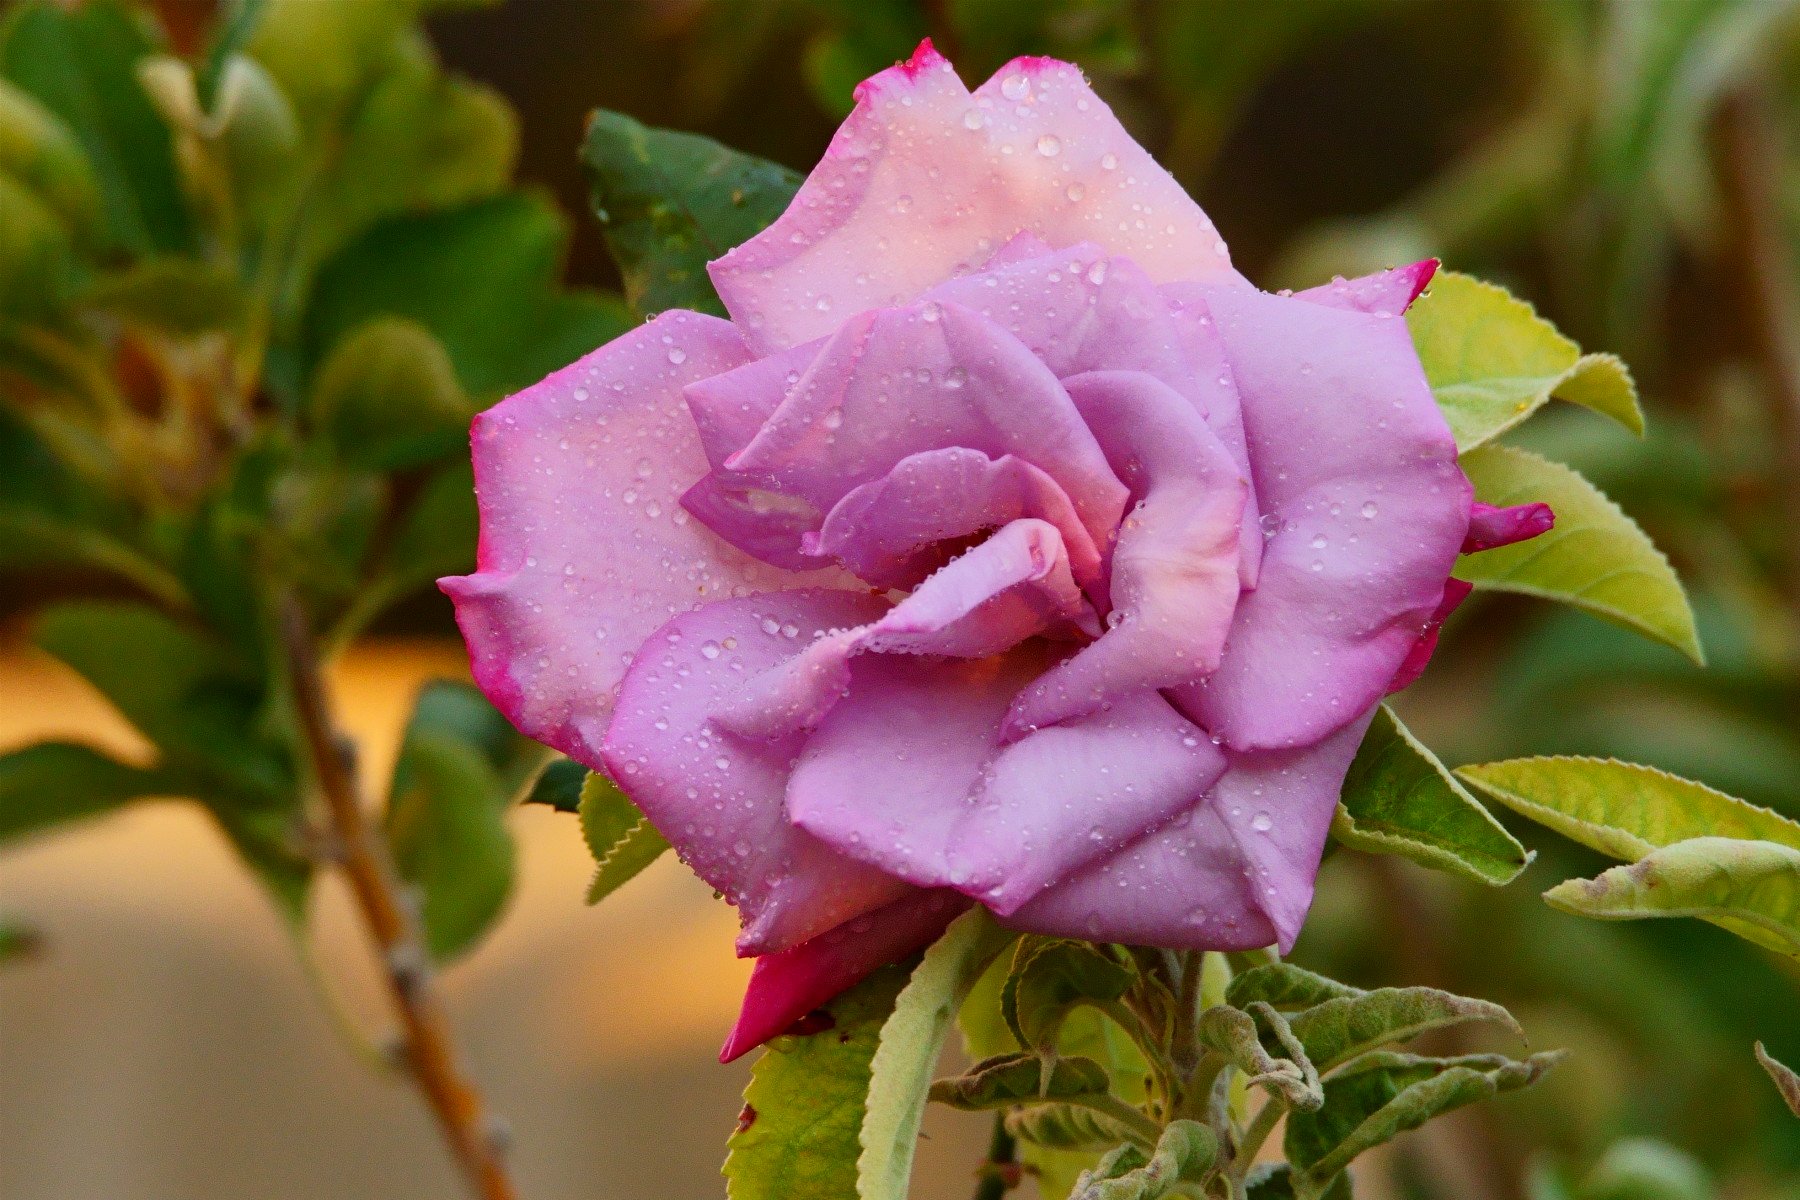
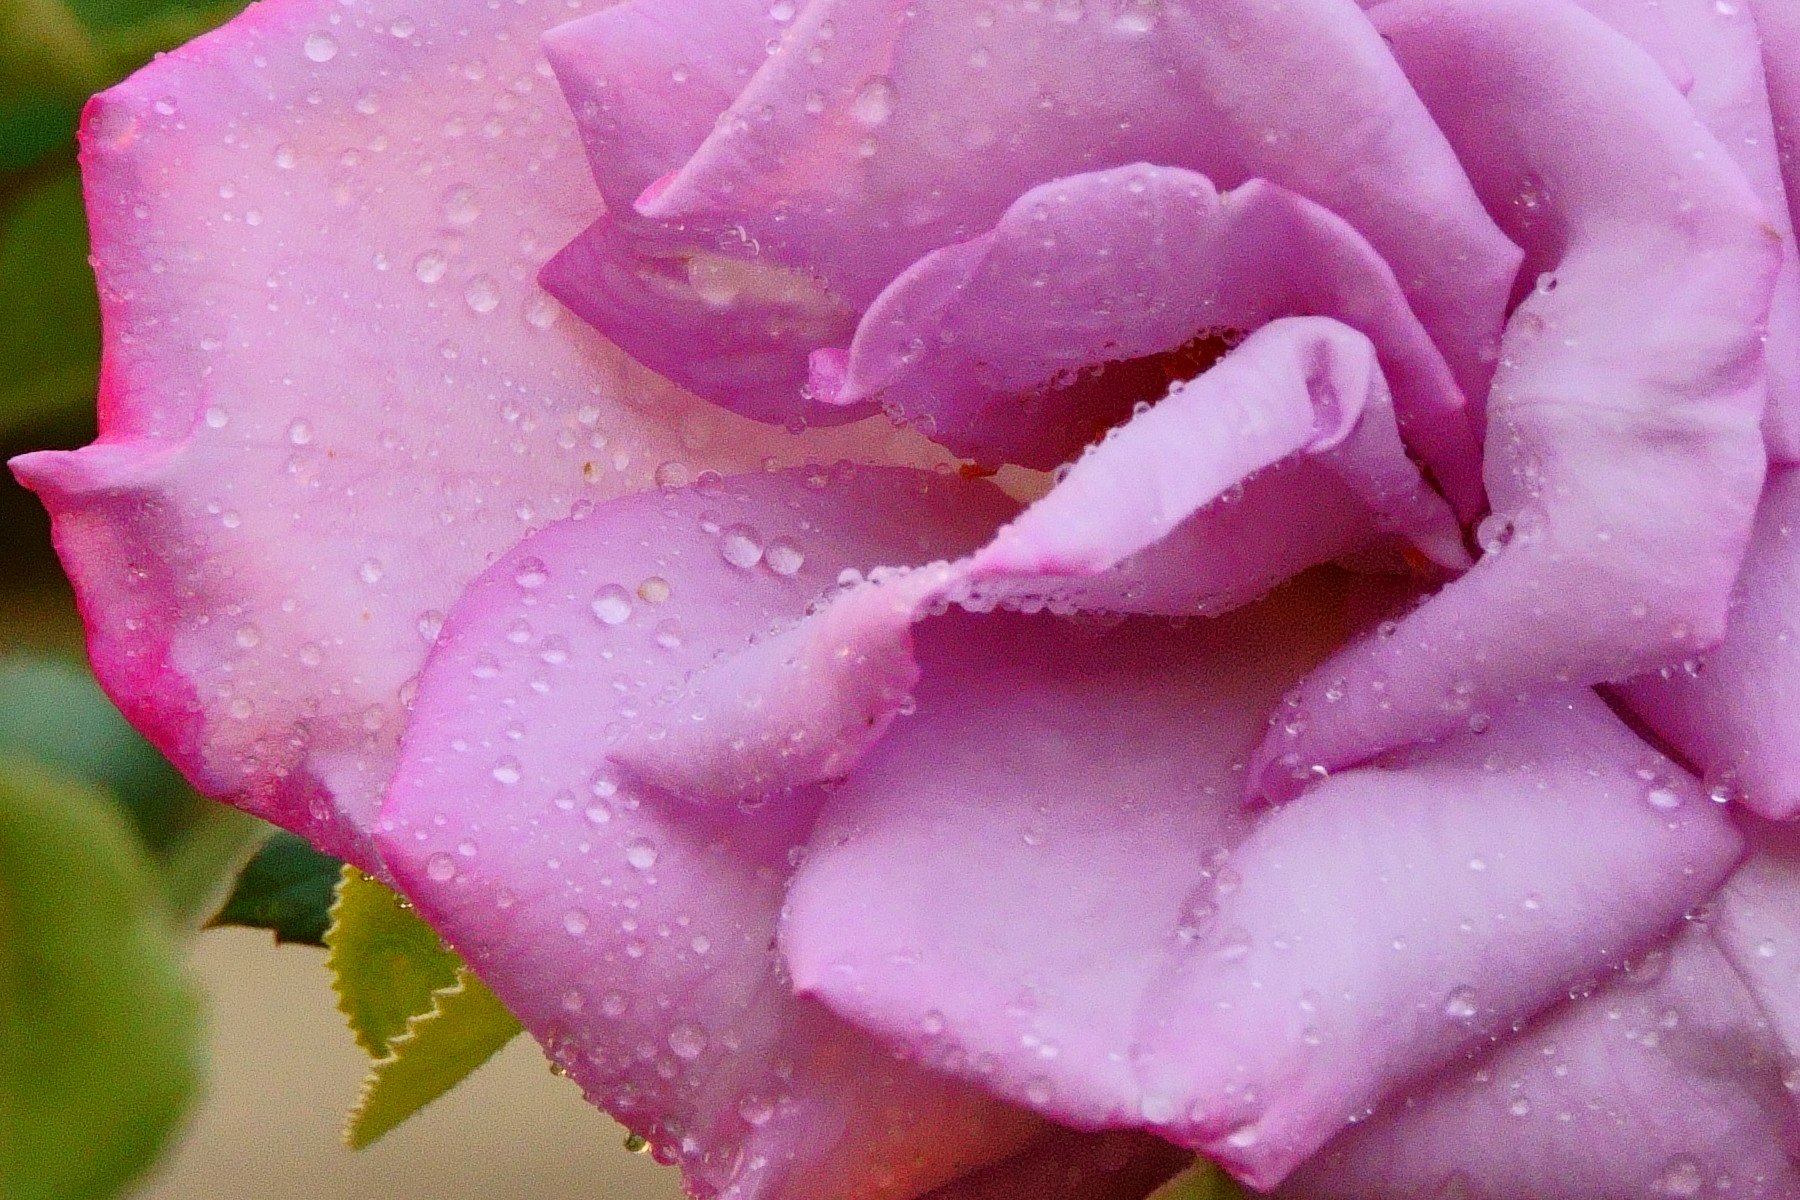
It comes in real handy when you want to get a little closer to your subject. In all reality it is not changing the optics, it is like cropping the image to a 10mp image in the camera instead of doing it in post processing. To show this I took the rose pictures and cropped them to 1800x1200 without resizing them. They are below.
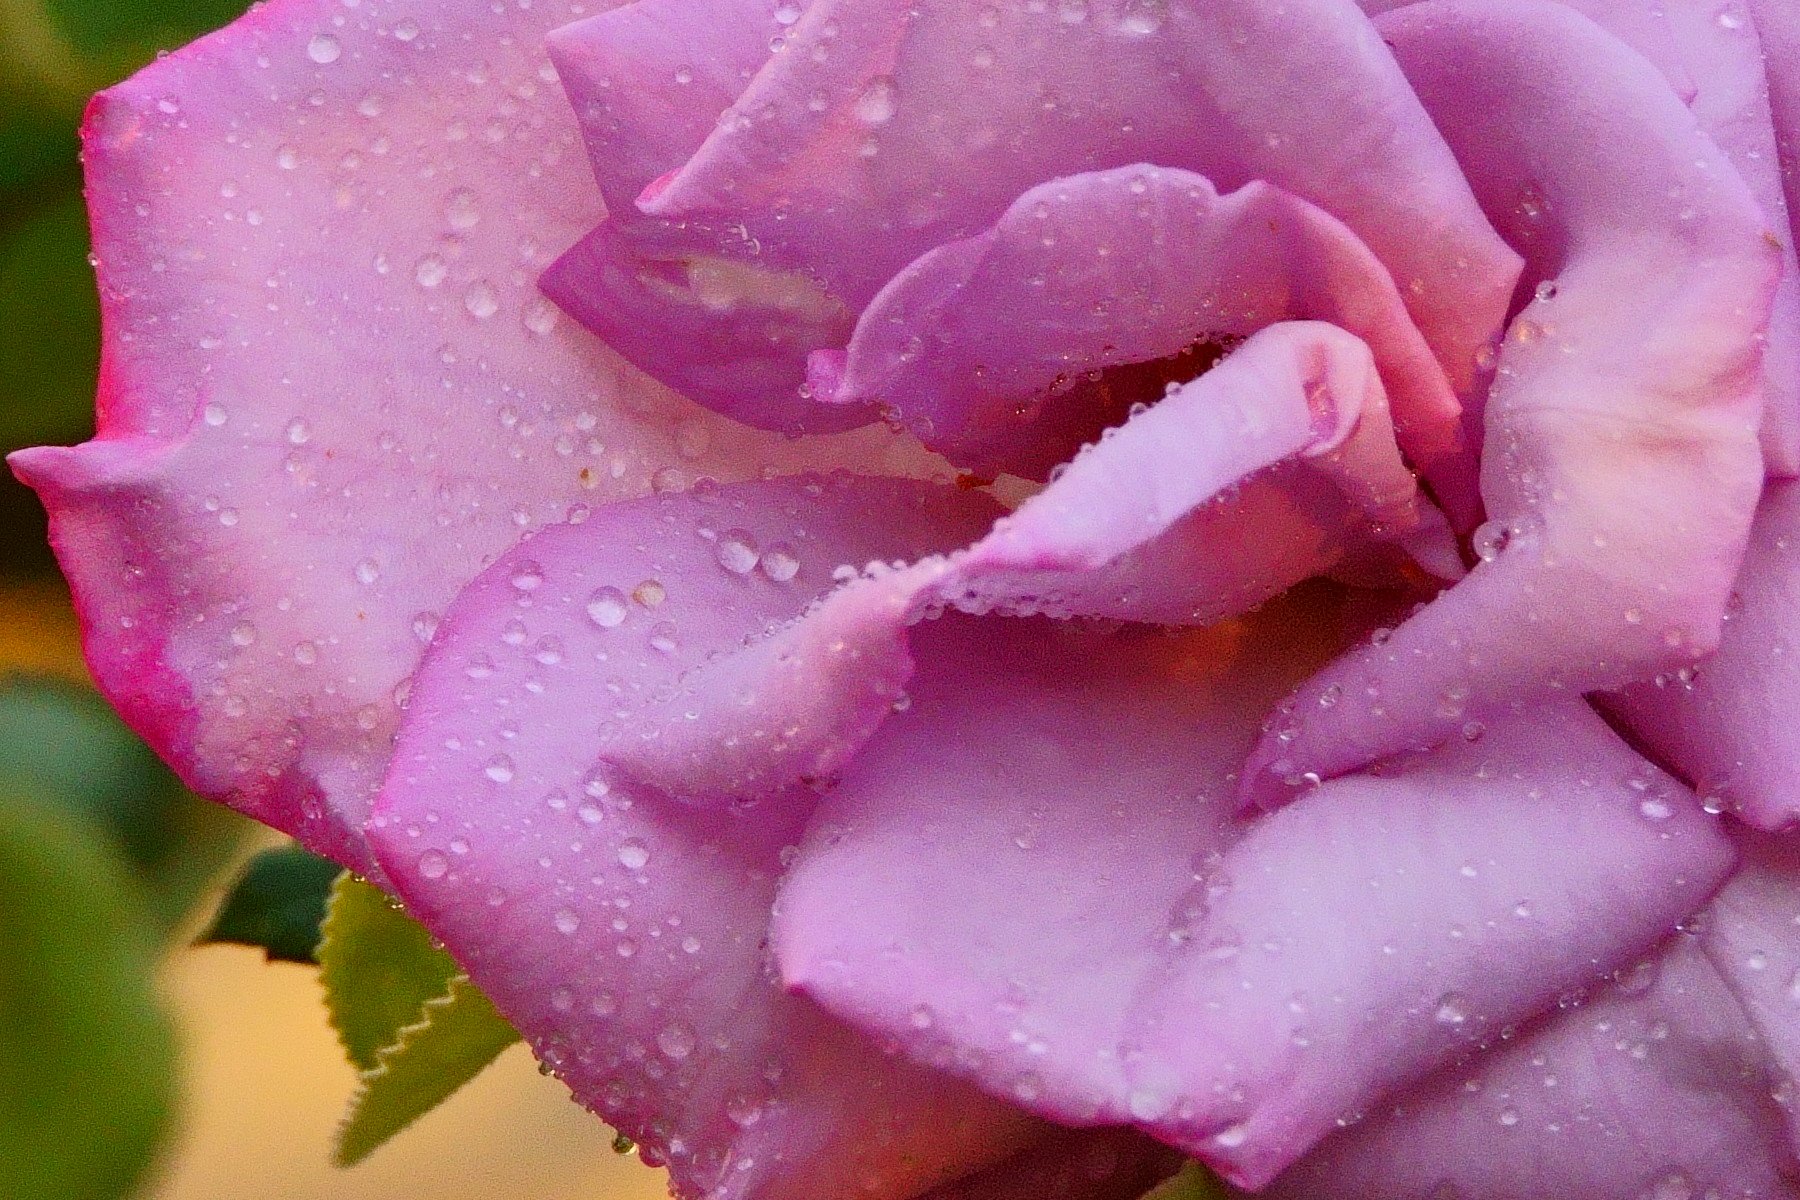
DSC06287 crop.JPG
DSC06289 crop.JPG
DSC06287 crop.JPG DSC06289 crop.JPG

The only reason that I know which is which is from the sun on the wall and even with that I had to look at them uncropped to make sure. It is super useful if you don’t want to do the cropping in post. One less step.

~Scott

tags: crop sensor, teaching, full frame, camera, post process, crop
Thursday 11.04.21
Posted by Scott W Gonzalez
 

Flash 5 (color change)

Hello,

Today I am going to write about changing the color of flashes.

There are a few ways to do it.

The WB can be changed with a global image change. Daylight will keep it about the same, Cloudy and Shade will make it a more yellow/orange. Fluorescent will make it Purplish and Tungsten will make it Blue.

Another option is to change the color of the light coming from the flash by bouncing it off of something or by putting a filter over the flash. This is what I want to write about.

The short is paper or gels can change the color of the flash in select areas.

White lilies on a blue background, colors have been changed by 2 flashes with blue and red paper over them.

White lilies on a blue background, colors have been changed by 2 flashes with blue and red paper over them.

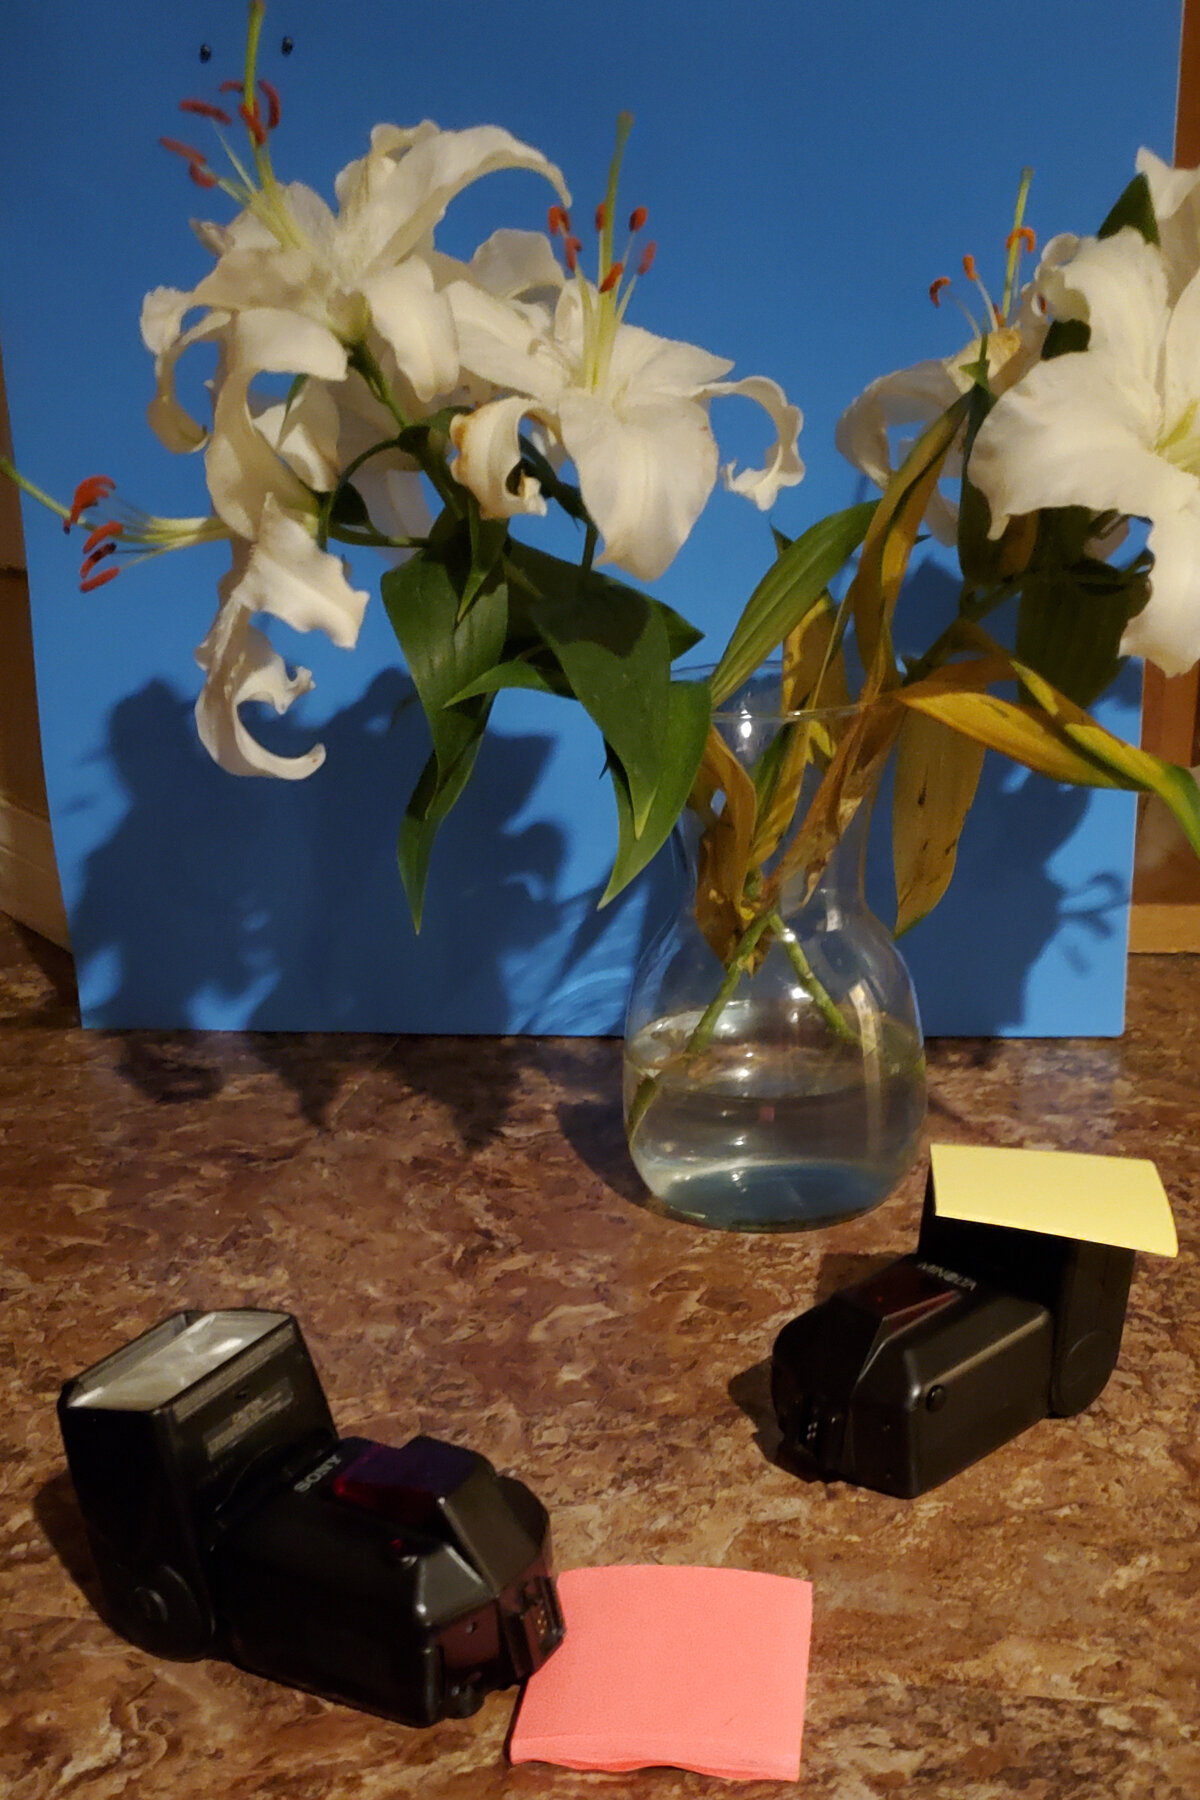
The above image is an example of changing the colors how (more or less) I wanted. The flash with the blue is on the ground pointing up towards the center of the forward facing flower. The red covered flash is being held and is facing down towards the center of the top flower. Below is a similar set up with yellow instead of blue and a picture with the supplies used.

_DSC6075.jpg
20210820_001249.jpg
_DSC6075.jpg 20210820_001249.jpg

The light from the flash with a yellow Post It was a wide flash and impacted all of the rest of the image. The blue of the background mixed with the yellow of the light and appears green. I used multiple pink Post It notes to get a red color which appears more orange because red and yellow make orange.

Clear gels can be found at stores, I have found construction paper and Post It notes do the job.

I originally figured this out years ago on a bored night off. I put a pink and a blue Post It over 2 flashes and again with lilies that I bought for my Wife.

Post It Lilies.jpg

Notice that there is some overlap that leads to a purple on the petals.

Go out and experiment.

~Scott

tags: learning, blend, flash, color, teaching
Wednesday 08.25.21
Posted by Scott W Gonzalez
 

Appreciating and learning from others

Hello it has been too long, I hope everyone is staying safe and healthy.

Sometimes I come across pictures from other photographers and am stunned by them. It is usually in part because the type of photography that they do is not my usual type. I find some astrophotography amazing, along with some macro. I dabble in each as can be seen in my Celestial and Macro galleries. I feel that I am better at landscapes and cityscapes than anything else. So I look at other photographers work to admire and figure out how they took the images so I can do something in that genre of photography.

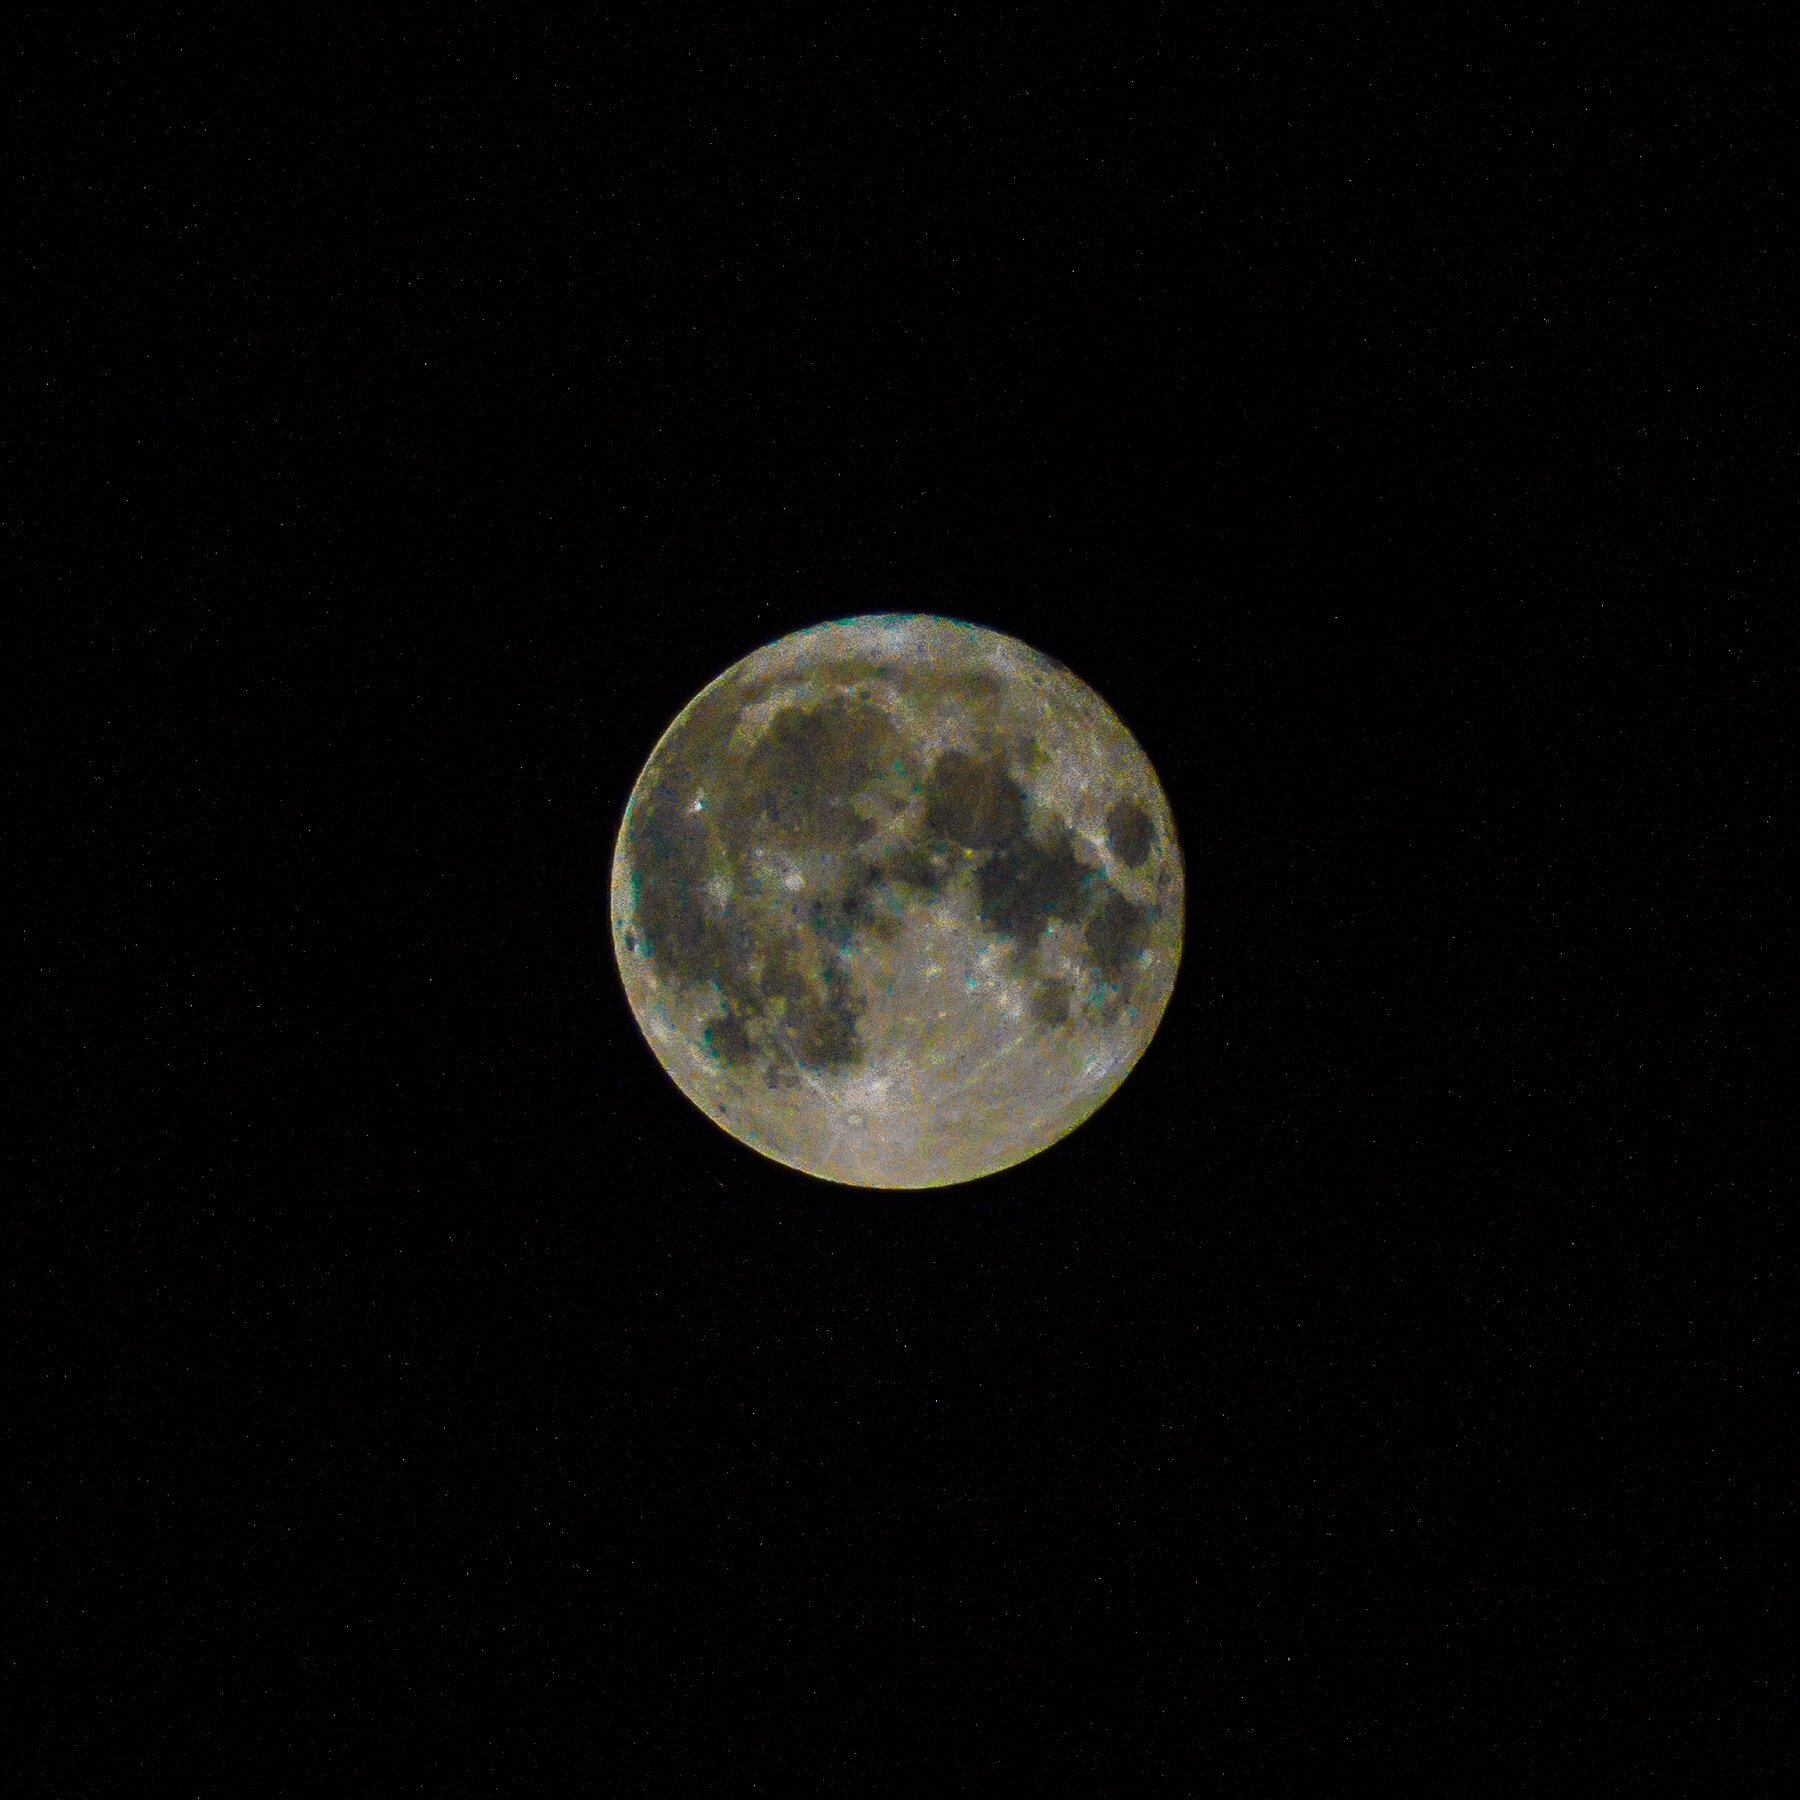
Lately I have been seeing pictures of the Moon that have color in them and I figured that it was from using an HDR process. Through Twitter I have been coming across more of them including ones from Cory Schmitz (@TheAstroShake) a co-founder of PhotographingSpace.com. There is an abundance of information about astrophotography there. So I asked how he got the color in the Moon and he explained that it was increasing the saturation in a RAW file that is not overexposed. I took his advice and an it worked like magic.

_DSC3621-5.jpg
_DSC3621-6.jpg

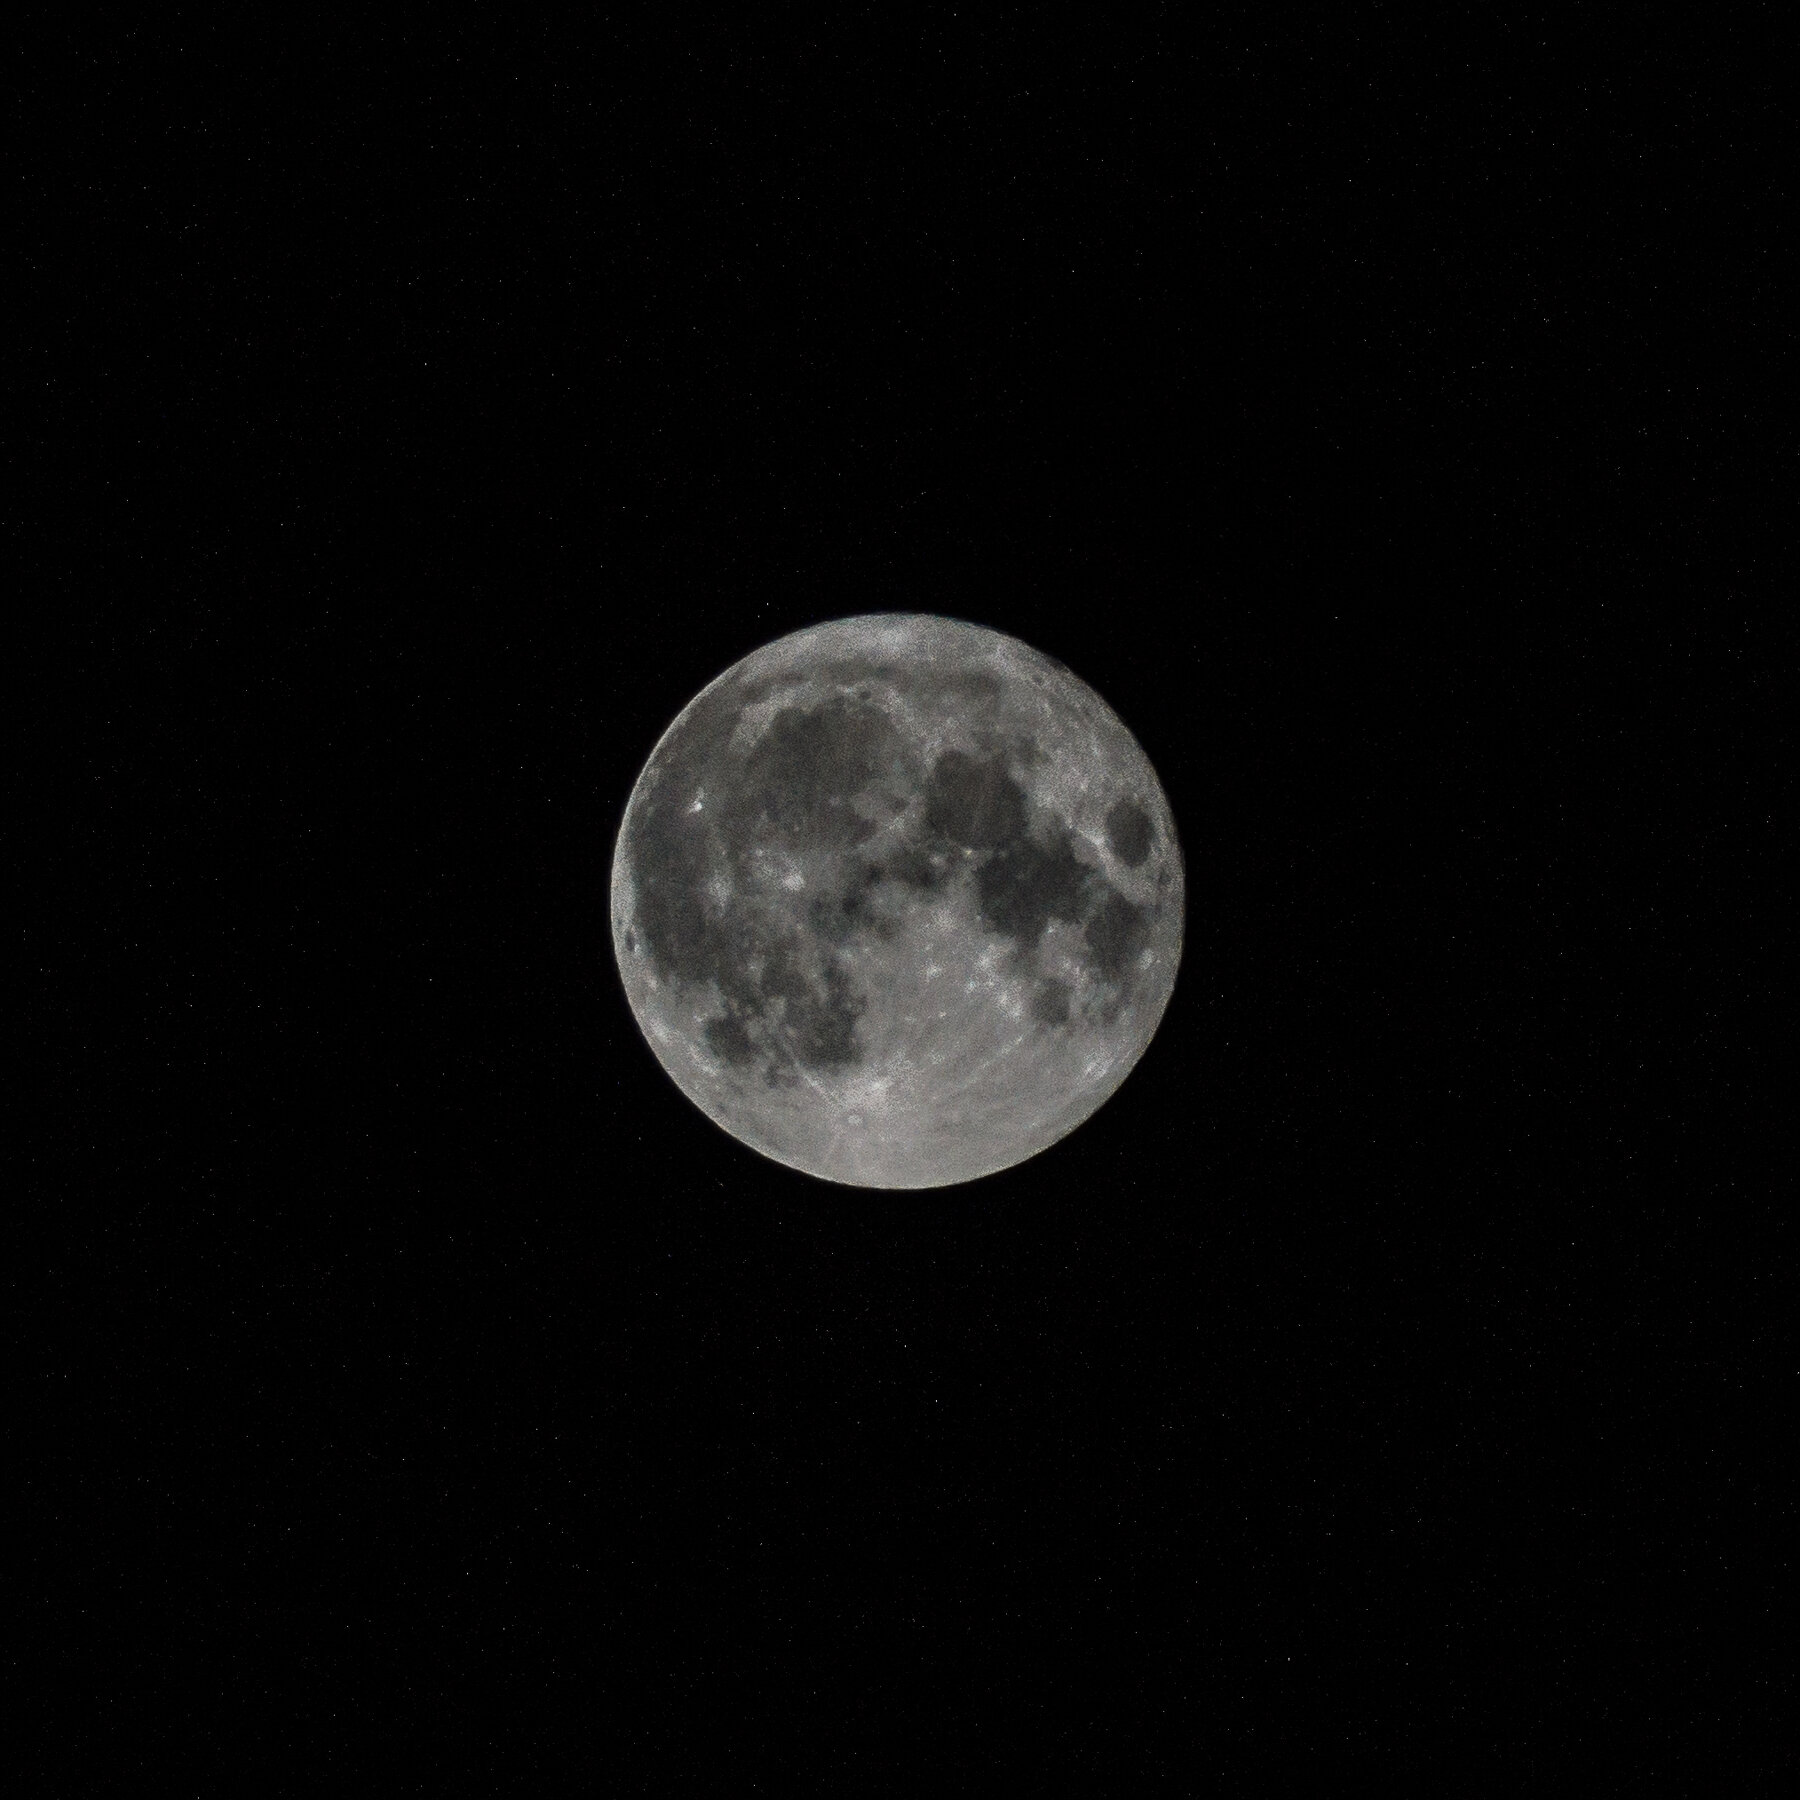
The images above are the same picture the only difference is that the Saturation and Vibrance are set at 0 on the first copy and at 100 on the second. Something so easy was outside of my grasp because it is not my usual type of photography. Always learning and asking questions are things that can be done to better ourselves.

Stay safe, wear a mask, and learn something new.

Scott

tags: learning, teaching, question, ask, other people, editing
Saturday 10.24.20
Posted by Scott W Gonzalez
 

Sunglasses

Hello,

So the other day I went driving for a bit and ended up outside of Red Rock Canyon which is closed due to the pandemic. There were wildflowers all over though so I decided to take some pictures. It started off East of the entrance and close to the road meaning close to my vehicle. I got the pictures that I wanted then drove to see if I could frame things differently. I ended up walking for a few minutes and realized that I took off my CPL (polarizing) filter and left it on the passenger seat. I also enjoyed the way that the sky looked and didn’t want to lose it so I didn’t go back to the vehicle.

This was just East of the entrance with a CPL filter on. More are in the Red Rock folder

This was just East of the entrance with a CPL filter on. More are in the Red Rock folder

So instead of going back and losing the cloud dispersion I took off my sunglasses and put them over the lens. They aren’t as good as a CPL but they can work in a pinch. They can also work as an ND filter.

Taken with sunglasses instead of a CPL filter. If you compare the two images the strength difference can be seen. I deleted the ones I took without the CPL or glasses.

Taken with sunglasses instead of a CPL filter. If you compare the two images the strength difference can be seen. I deleted the ones I took without the CPL or glasses.

I am not saying get rid of your CPL and ND filters. I am saying that sunglasses can be used in a pinch.

Depending on the camera and glasses it is possible to wedge them together.

Depending on the camera and glasses it is possible to wedge them together.

There are a few caveats, the polarizing effect only works if they are polarizing lenses, effectiveness is proportional to the size of the glasses and the size of the lens opening, the more scratches on the glasses the more imperfect the image will be, and the glasses probably will change what your WB should be. Those are the major ones.

If you have any stories or images of how you have used something related to photography for another purpose please feel free to share.

~Scott

tags: improvise, ND, CPL, polarizer, neutral density, photography, learning, teaching, landscape
Sunday 05.03.20
Posted by Scott W Gonzalez
 

Meteor Showers

Good morning,

With a meteor shower just recently passing and one coming up, I thought that I would write about how I take meteor shower images. They happen every month or so, for example the shower that happened recently was the Leonids in mid November and the Geminids are coming in mid December. If you are not familiar meteor showers are loosely named by the constellation they appear to radiate from. Leonids radiate from Leo, Geminids radiate from Gemini.

This was done a while back, iso 100, f3.5, 28mm, 140 seconds.

This was done a while back, iso 100, f3.5, 28mm, 140 seconds.

So what I do just do a long exposure of the sky with a remote and a wide angle lens. I pick a spot in the sky and stick with it. I have tried changing the spot in the sky without much luck. I have watched multiple shooting stars go just outside of the frame so I moved it over to capture those and the next ones close by were outside of the frame on the other side. It takes some luck. I prefer to have some foreground in the frame, that is me though.

The better part of having the camera on a set and forget type of control is that you can enjoy the meteor shower. Seeing dozens of meteors streak across the sky is something to behold even if you don’t catch a single one on a sensor.

The Geminids are coming up on the 13th/14th of December so if you can find a dark spot I recommend going out and seeing them and not just to photograph them. I know that I will be. If you do capture any I would love to see them.

tags: astrophotography, long exposure, learning, teaching, wide angle, celestial, meteor
Saturday 11.30.19
Posted by Scott W Gonzalez
 

Making a pinhole camera

Today I am going to talk about pinhole cameras and go over how I changed my camera cover into one.

To start a pinhole camera is basically a tiny hole that takes the place of the lens and has been around for longer than photography. It used to be used as a drawing aid, and later was used with film and light sensitive paper. Now when I say a tiny hole I am not talking about f22 or f32 I am talking around f160-f200.

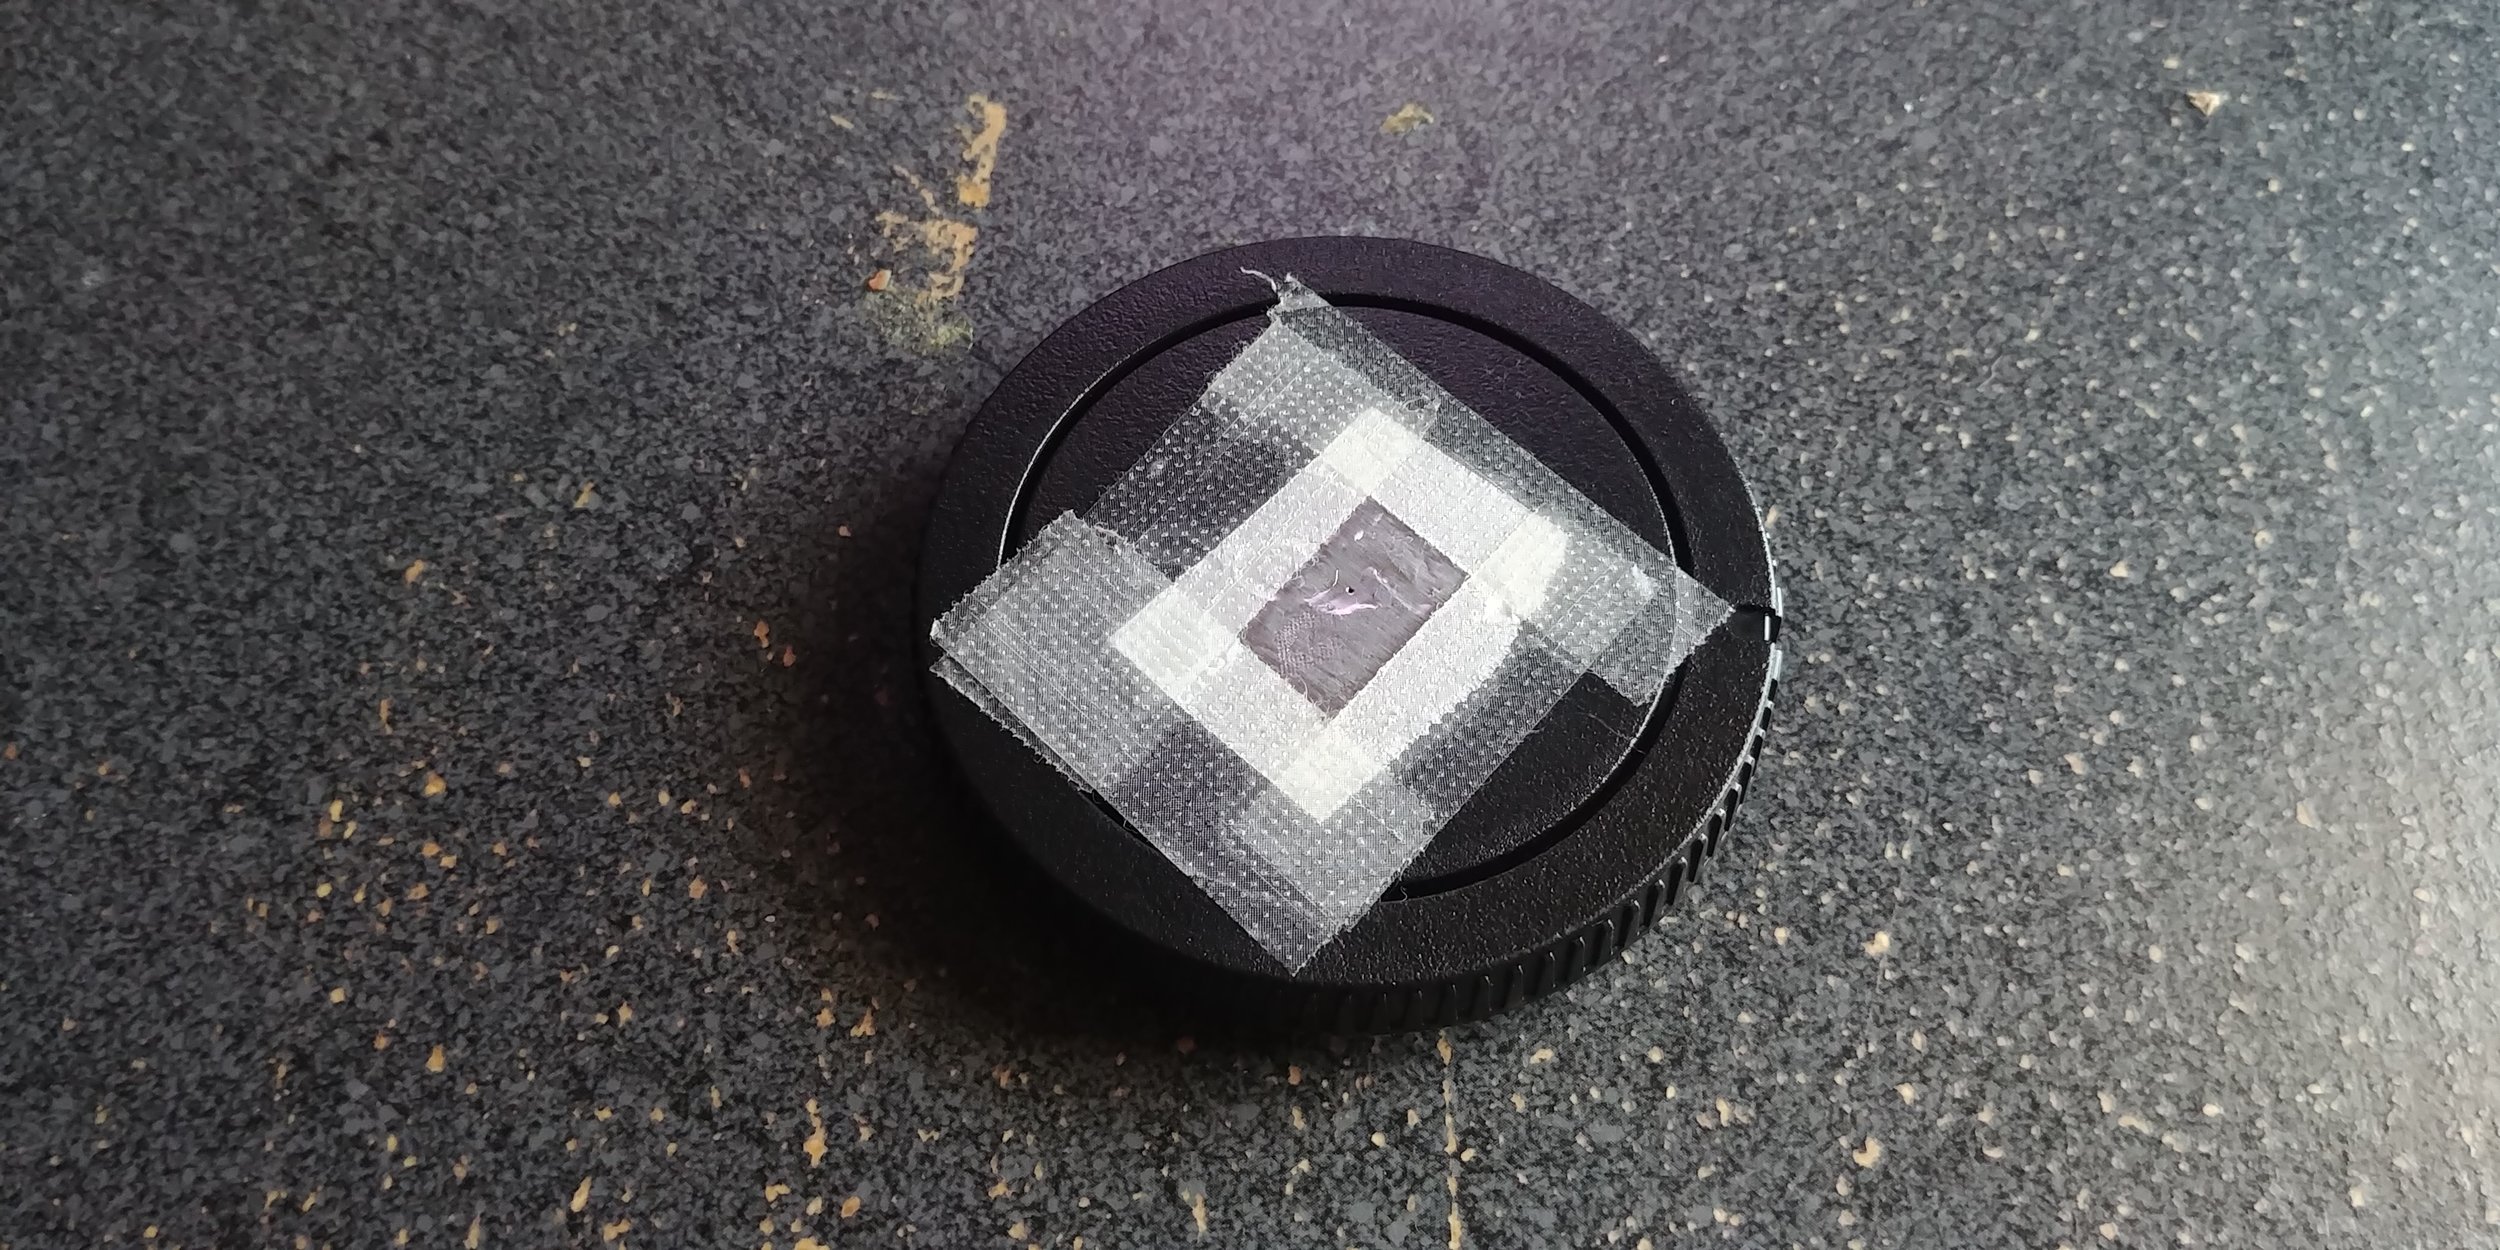
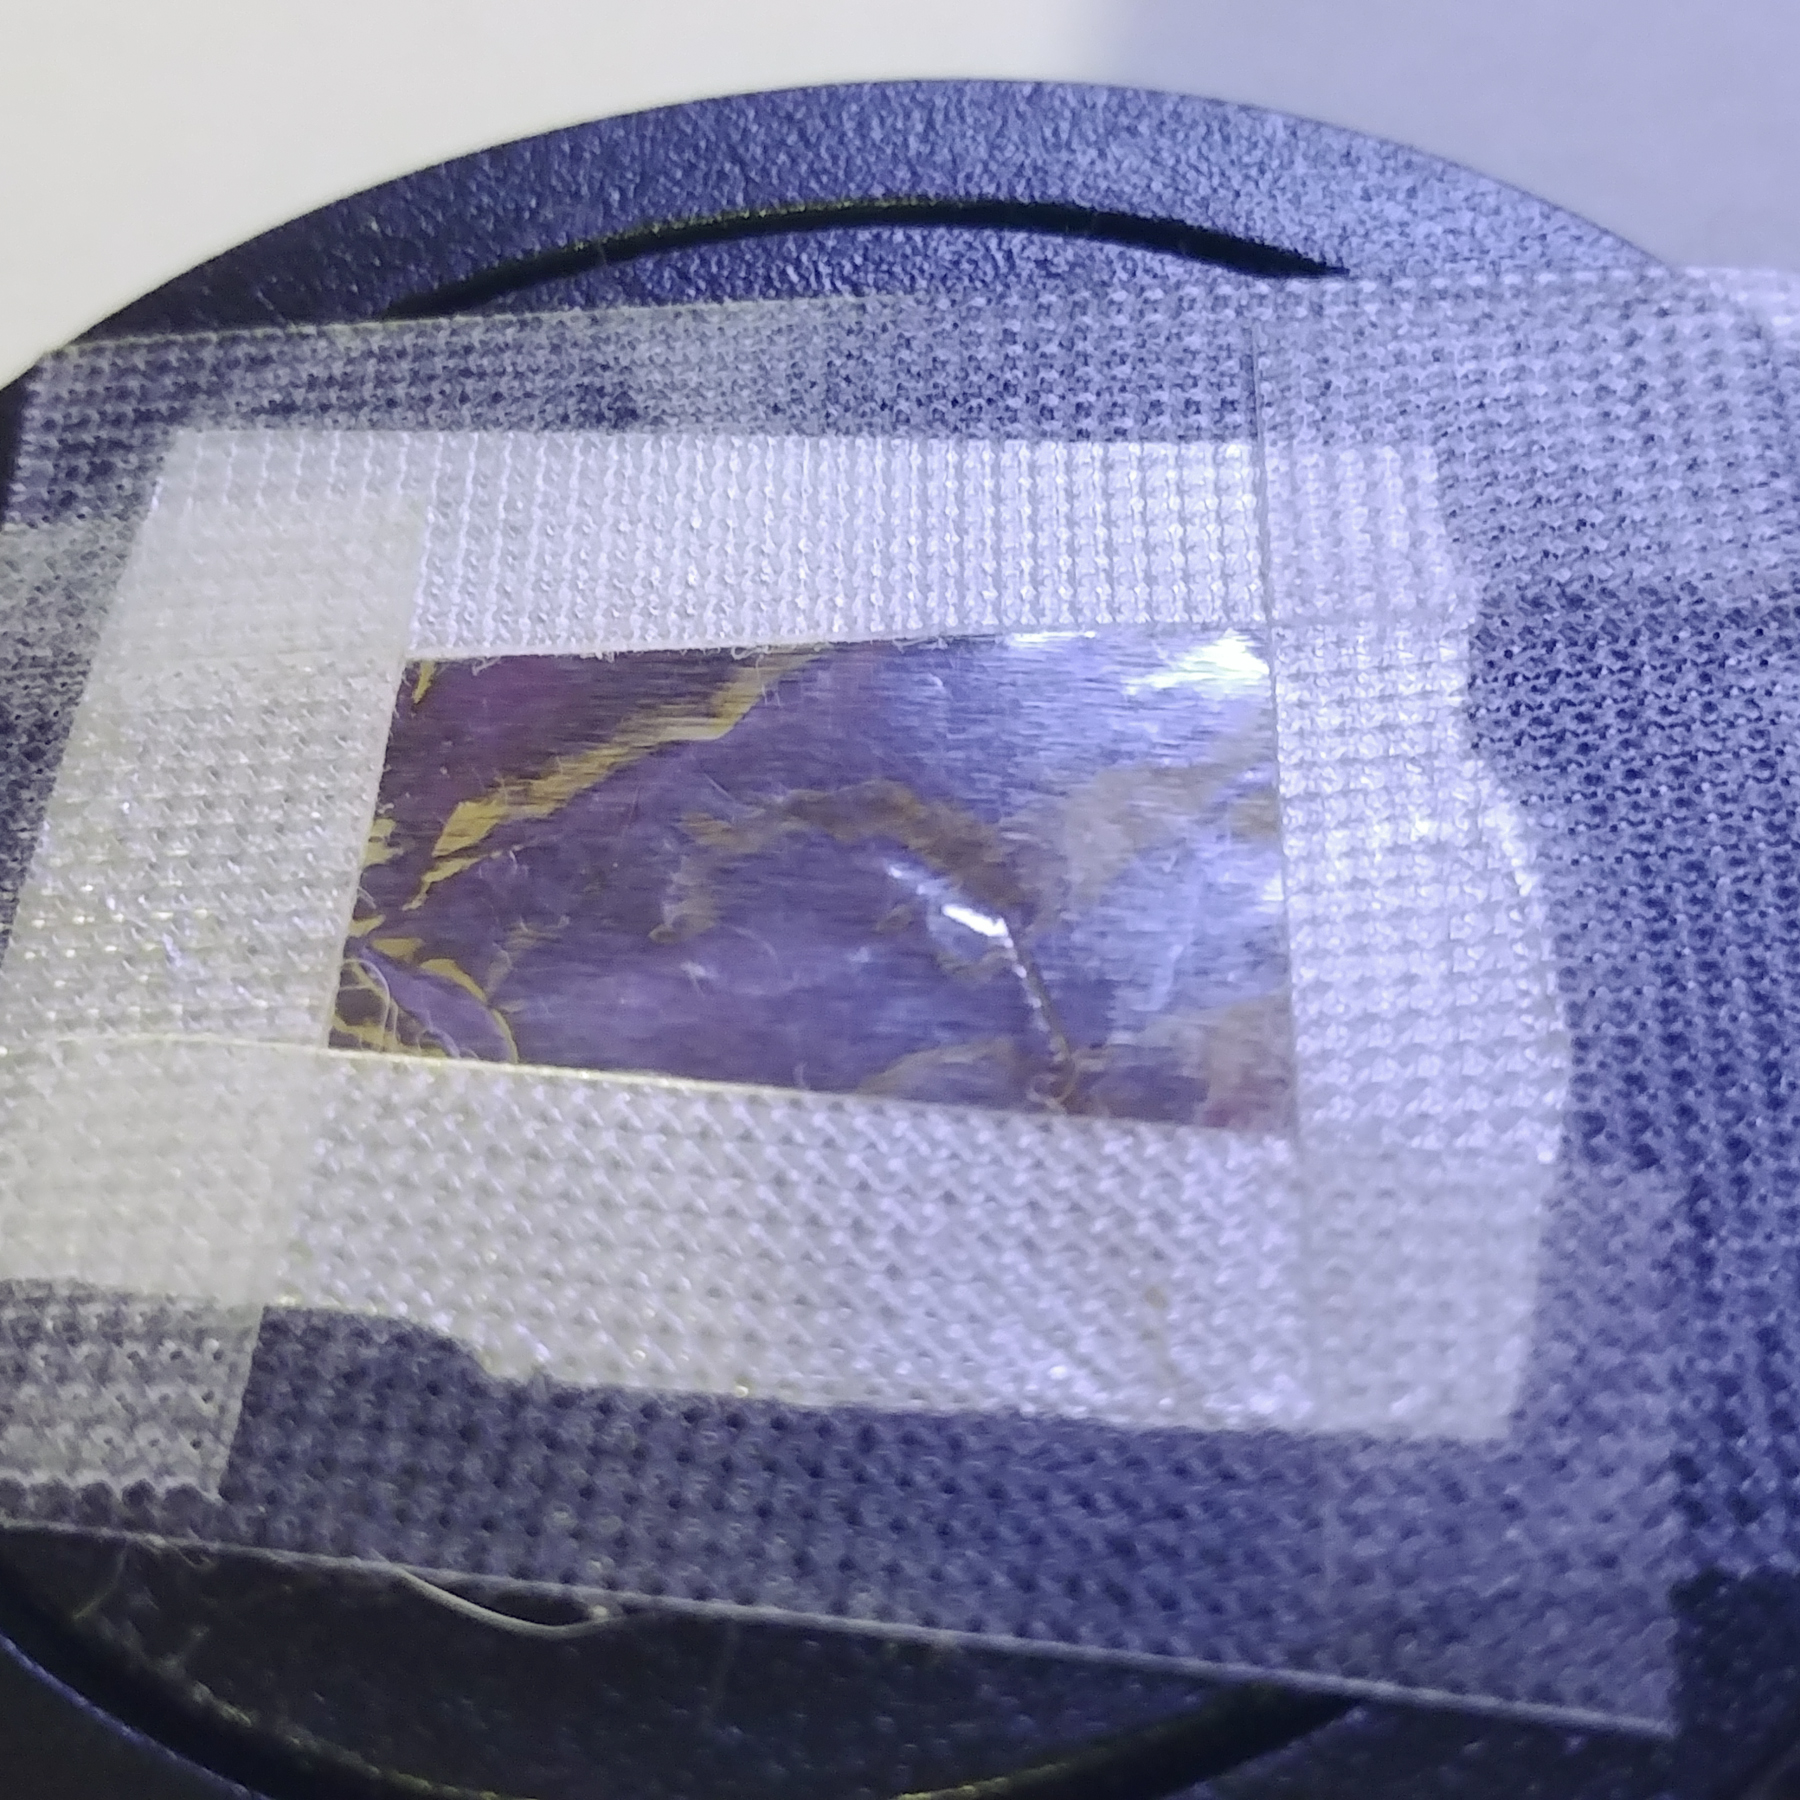
My DIY pinhole “lens”

My DIY pinhole “lens”

With the aperture being so small the images generally turn out blurry because of the high diffraction. Diffraction in photography is basically light waves interfering with or bouncing off of each other because they are all trying to get through a small opening. It is way more complicated than that but that idea should suffice for my purposes here.

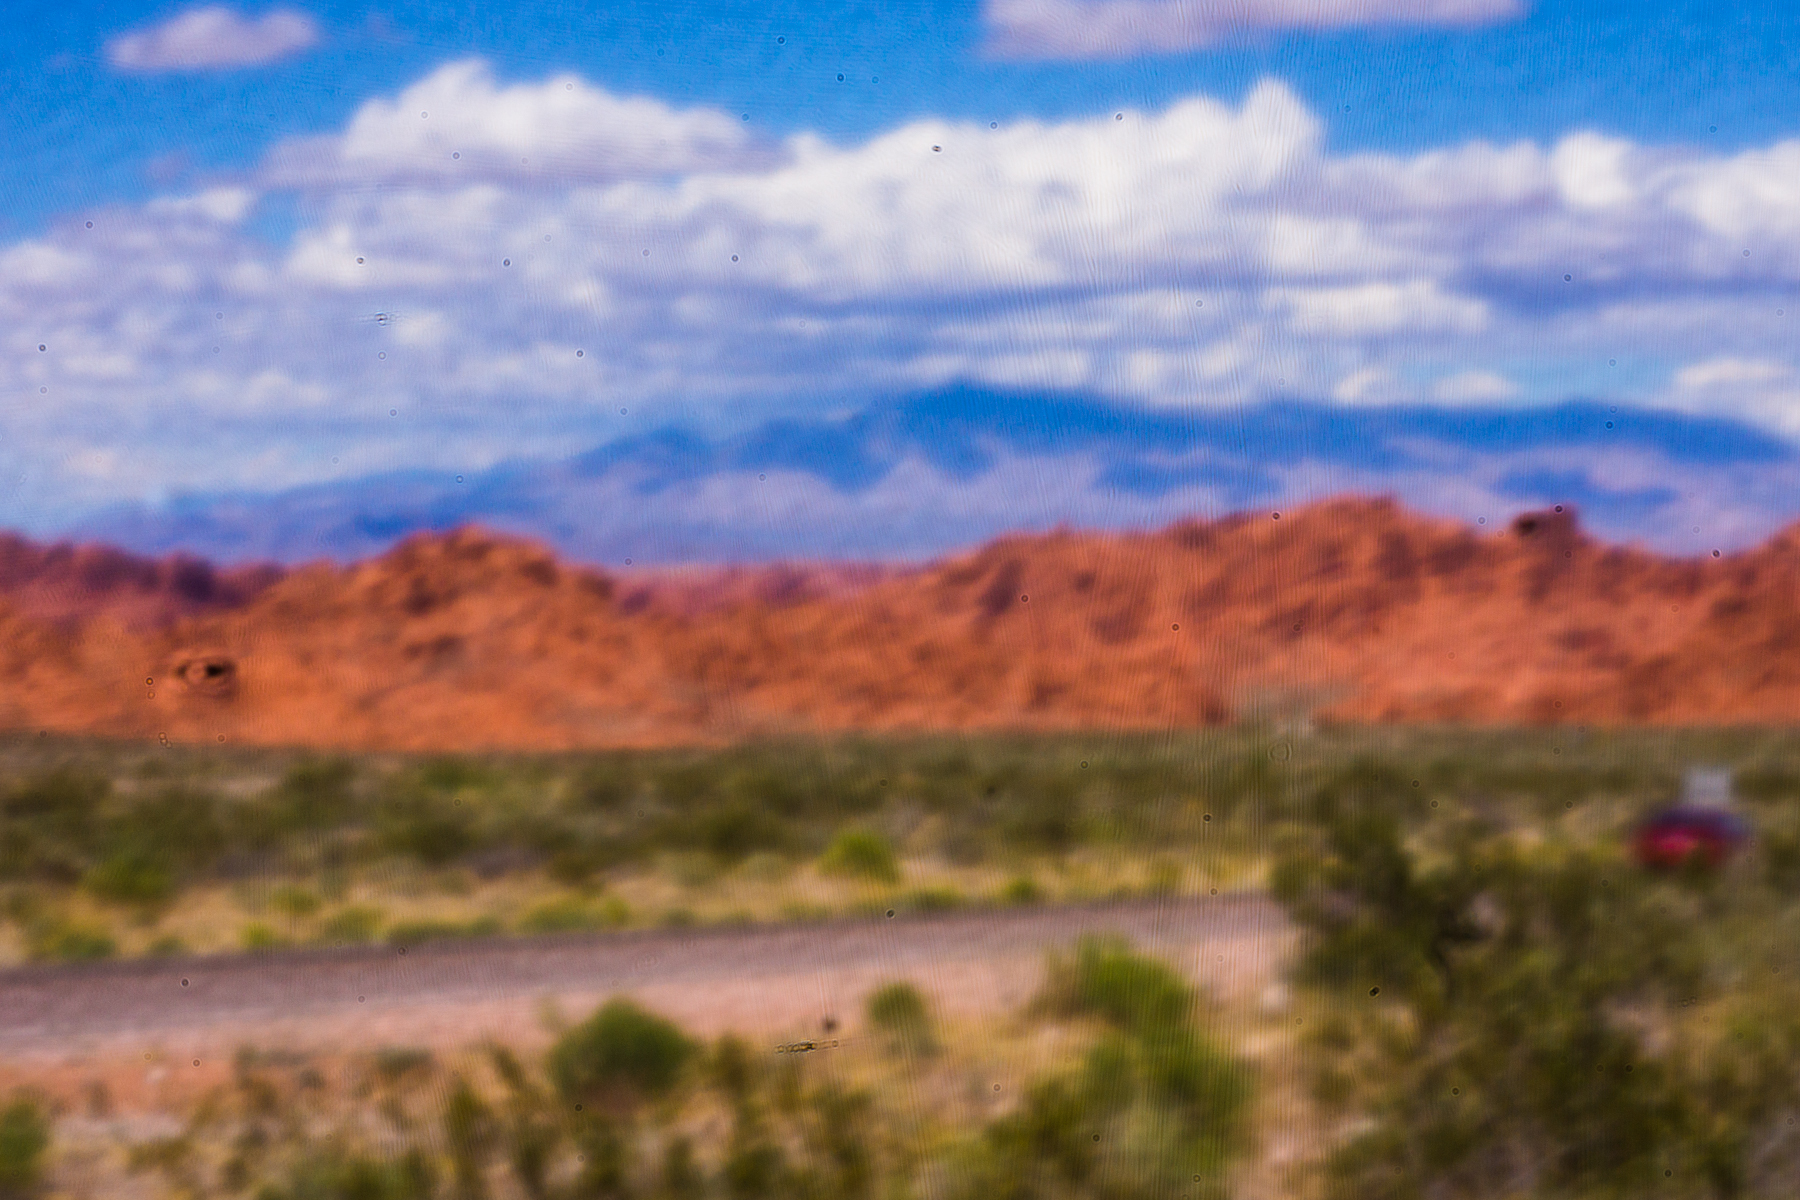
Valley of Fire State Park taken near the West entrance with the pinhole. With the size of the hole I made it is around an f200 and around 60mm this exposure was 1/5

Valley of Fire State Park taken near the West entrance with the pinhole. With the size of the hole I made it is around an f200 and around 60mm this exposure was 1/5

The same view a couple of minutes later at 60mm and f8 1/400. There is a 13 stop difference between the two

The same view a couple of minutes later at 60mm and f8 1/400. There is a 13 stop difference between the two

The pinhole, I feel is more like an Impressionistic painting than a photograph. One other thing with the pinhole is that if there is any dust on the sensor it will be very visible.

The pinhole cap that I have is old and beat up so I am going to redo it taking snaps along the way to show how it is done.

On to the making of one. Supplies needed are 1) a camera body cap 2) a drill with a 1/4 inch or so bit 3) fine grade sandpaper 4) foil 5) small gauge needle 6) tape

To start drill the hole in the center of the cap (it doesn’t need to be exact but get it close as you can) and sand off the rough edges (which can be seen on mine). Wash it and let it dry while getting everything else.

To start drill the hole in the center of the cap (it doesn’t need to be exact but get it close as you can) and sand off the rough edges (which can be seen on mine). Wash it and let it dry while getting everything else.

Cut a piece of foil big enough to cover the hole and then some.

Cut a piece of foil big enough to cover the hole and then some.

Tape it down tight, I have used medical tape and electrical tape. Electrical tape is better looking in my opinion any long lasting tape will work. If you run your finger over the foil an outline of the hole should appear.

Tape it down tight, I have used medical tape and electrical tape. Electrical tape is better looking in my opinion any long lasting tape will work. If you run your finger over the foil an outline of the hole should appear.

After finding the smallest pin or needle that you can get your hands on, insulin and subcutaneous needles work well they are less than half a mm this is a 27G needle which is 0.4mm hole, gently poke a perpendicular hole as close to the center of the…

After finding the smallest pin or needle that you can get your hands on, insulin and subcutaneous needles work well they are less than half a mm this is a 27G needle which is 0.4mm hole, gently poke a perpendicular hole as close to the center of the body cap as you can.

Put it on you camera and try it out.

It’s fun and gives a different look and feel for photography. If you try it share your pictures I would like to see them.

~Scott W Gonzalez

tags: DIY, pinhole, cap, body, art, impressionism, camera obscura, teaching, learning
Friday 05.31.19
Posted by Scott W Gonzalez
 

Flash 4 (Ceiling bounce flash)

Good evening,

Tonight I am going to go over one of the easy things that can be done with most flashes. Bouncing them. Stop don’t throw your flash on the ground. I am talking about the light off of something else then onto the subject. I slightly discussed this in my first Flash post some months ago. That was dealing with the on camera flash though. For this I used a hot shoe flash, a Sony HVL-F56AM to be precise.

It can tilt and swivel either separately or in conjunction with each other.

It can tilt and swivel either separately or in conjunction with each other.

So to bounce the flash off of the ceiling you just tilt the head to face the ceiling. It can either be done connected to the hotshoe or not and triggered remotely.

_DSC3923.JPG

Above we have Grumpy Bear with the flash pointed directly at him. The light looks harsh nearly over bright, detail has been lost in his fur, the high points (cheeks and snout in his case) lost color, and the shadow behind him is prominent.

_DSC3922.JPG

Again I have taken a picture of Grumpy Bear. This time with the flash pointing nearing straight up at the ceiling. The scene is more evenly lit albeit a bit darker. His fur detail is easily visible, the shadows are more naturally where one would see them during the day (under his chin mainly), the high points aren’t overly bright, and he appears closer to the color that he is.

Neither of these pictures to me is perfect, I was going straight out of the camera and did not adjust them at all. I am sure that if I did I could clear up some of the faults of each. I am a firm believer in getting it right in camera. It would be easier and look better to just brighten up the second image than to darken the highlights. Tilt or ceiling bounce is not hard and with practice it is easy.

tags: flash, teaching, photography, bounce, hotshoe, off camera, ceiling, tilt
Tuesday 04.30.19
Posted by Scott W Gonzalez
 

Macro and tripods

Good morning,

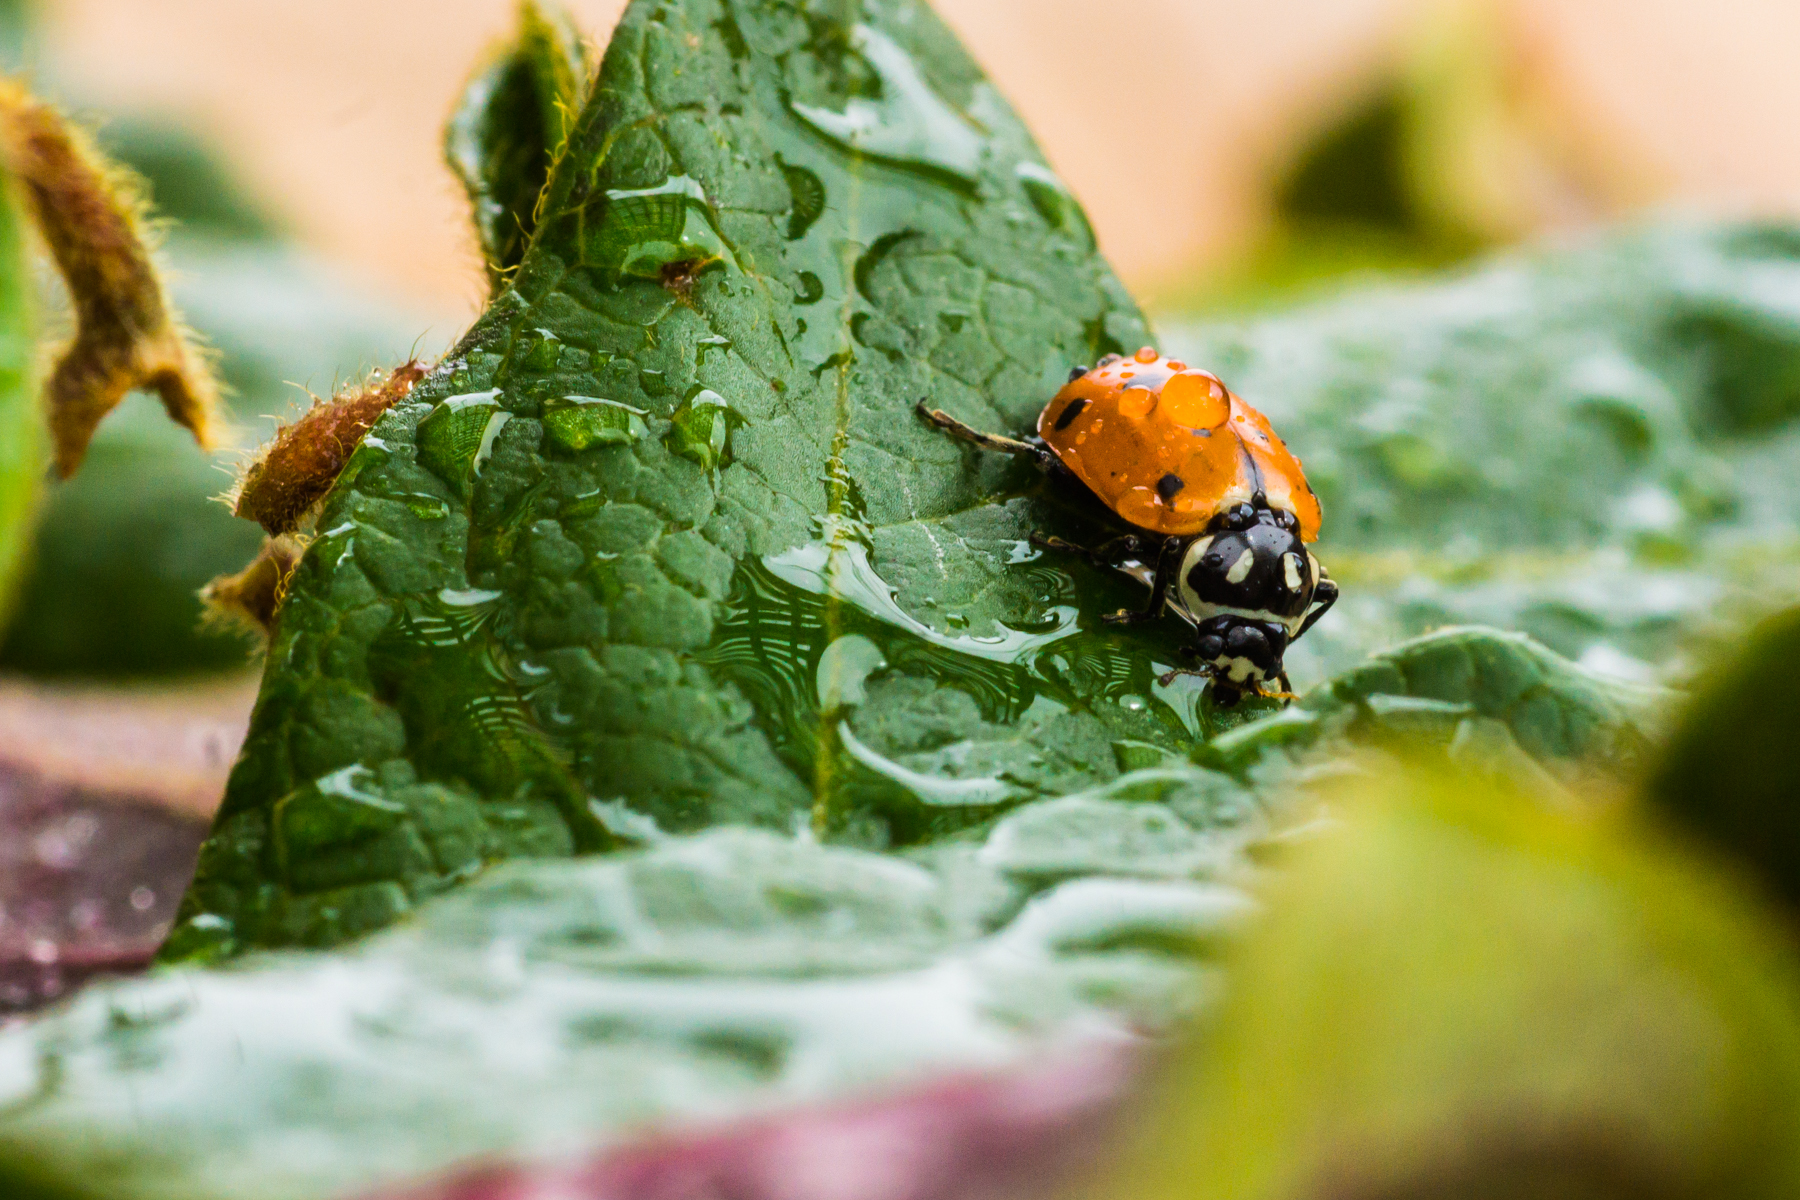
So I am trying to get back on schedule with these updates and I am finding that it is not the easiest thing. So with it being spring and all I have done my usual of getting a container of ladybugs for the garden to help control pests and to give the girls a couple of days to have ladybugs nearly on demand. They had their fun and I got to take some pictures using my macro lens. If you want to short version of this post here it is “Tripods can make macro photography easier.”

Now the idea for macro seems like it is easy. It did to me when I got my first true macro lens some years ago. After using it for a little while I realized that the closer to the lens one gets the smaller the depth of field gets. I recall taking a picture of my dog tags to test the lens and was not prepared for only 2 letters to be on the plane of focus.

This was at 50mm at f2.8

This was at 50mm at f2.8

Because such a small slice of area is on focus, hand holding a camera for macro images can be difficult. So I suggest using a tripod and if you want to get really fancy there are sliding tripod heads that make moving the camera for this type of work easier. I have yet to use one myself because I do not shoot a ton of macro, I have seen them though and they appear to make the process easier.

Now back to the ladybugs. So we let some ladybugs go, it was still a bit chilly out so they were moving slow. This was perfect for taking pictures of them.

_DSC1523.jpg
_DSC1539.jpg
_DSC1550.jpg

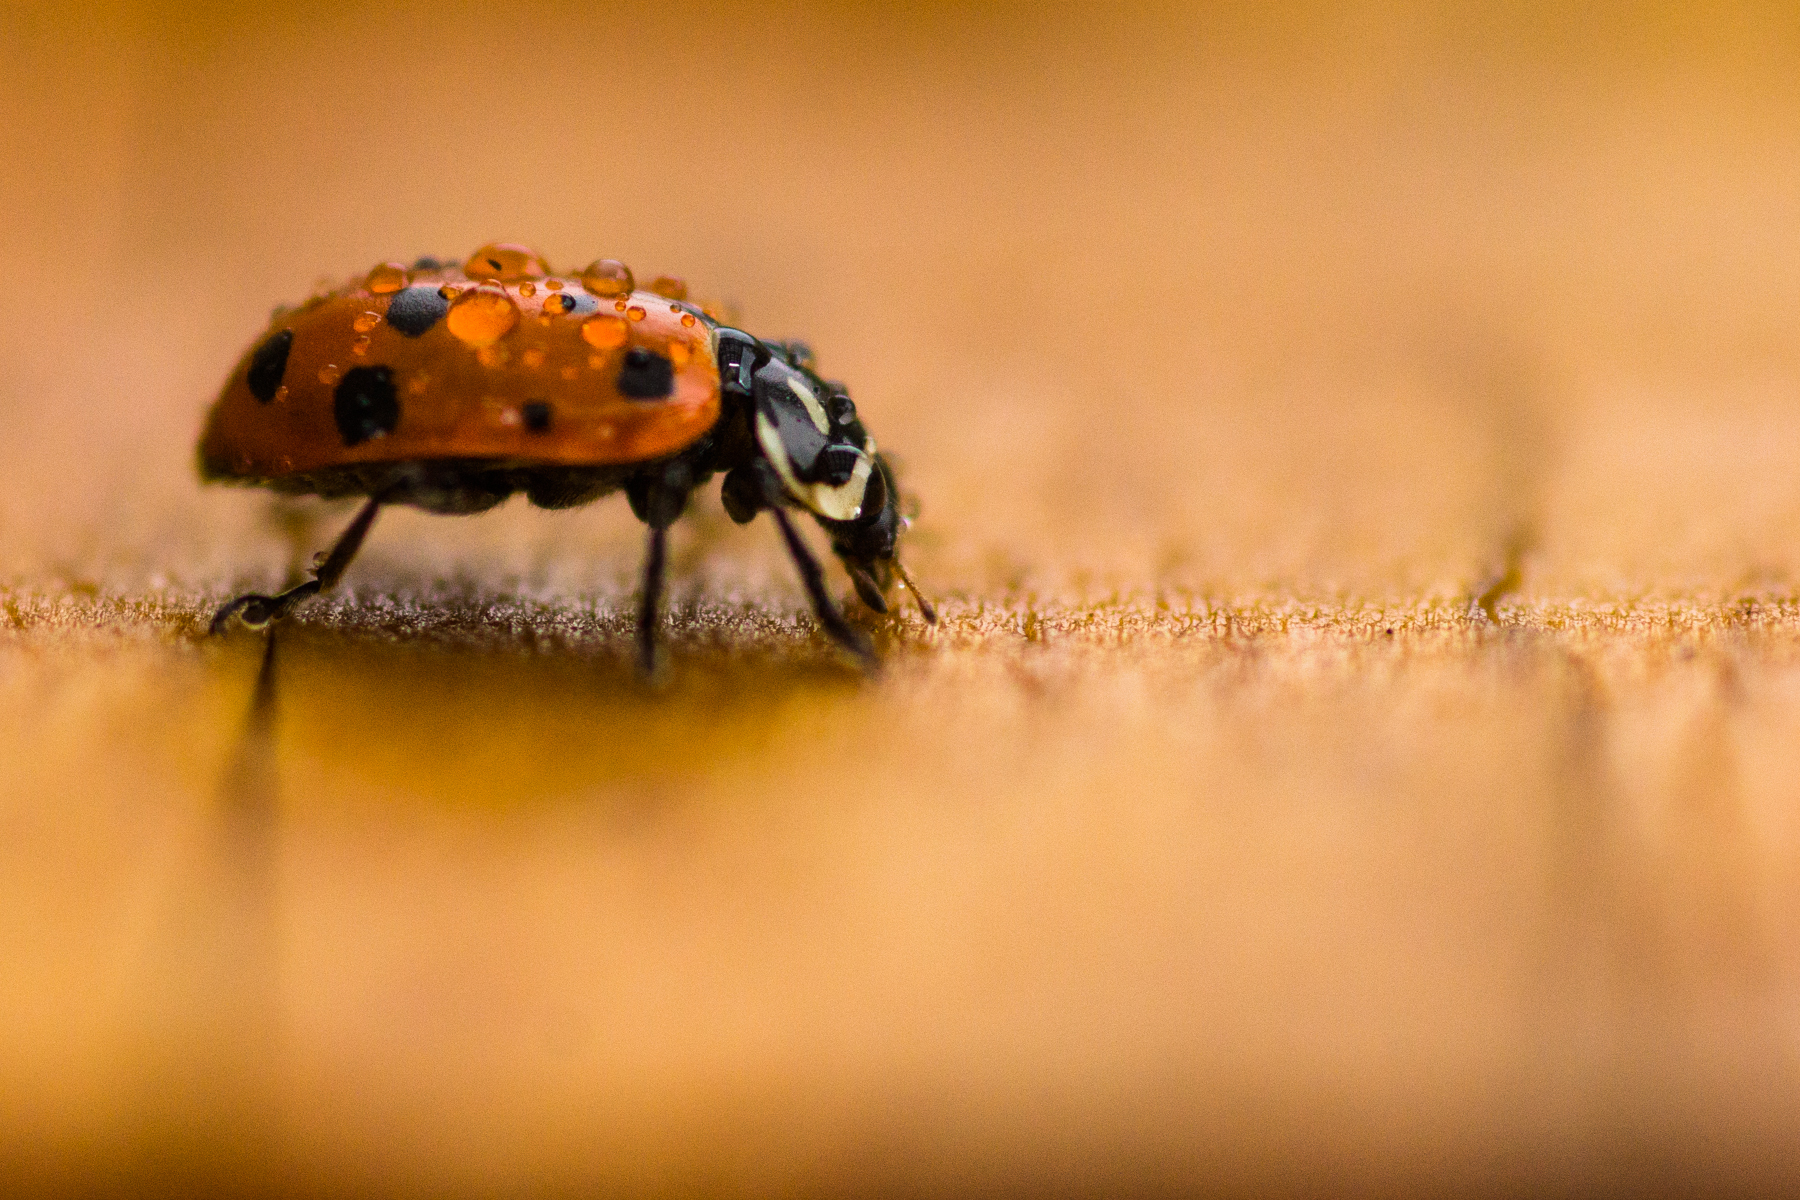
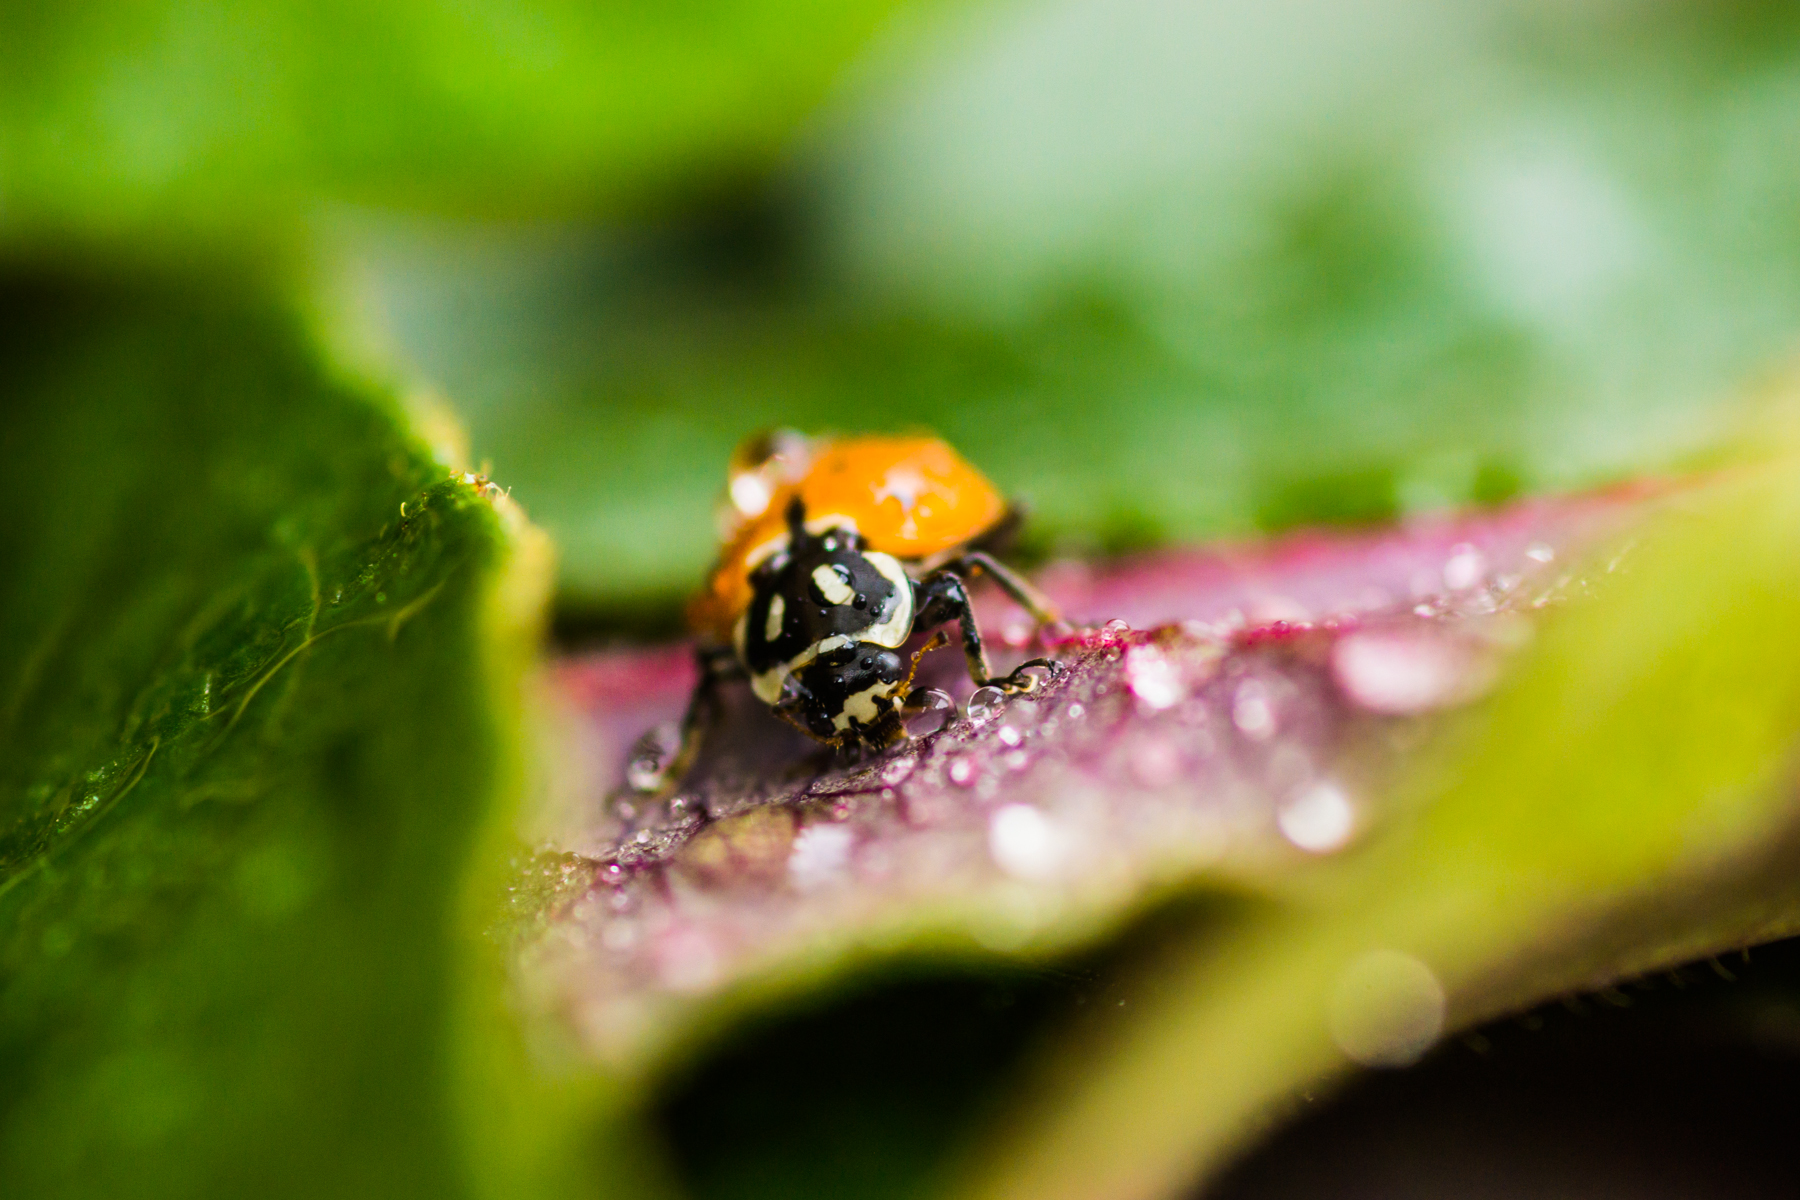
The first image was one of them walking and was shot at f4.0 and the small area of focus can easily be seen on the wood. I had multiple images where the ladybug moved just outside of the focus area. The second image is also at f4.0 and the whole ladybug isn’t in focus. The third image is was taken at f13 and a little farther away and now large portions of a leaf are in focus. When working with such a small area of focus and slow of not moving subjects a tripod helps maintain the focused area where you want it.

Hope you enjoyed the blog have fun with the new knowledge.

~Scott

tags: macro, photography, specialty, learning, teaching
Wednesday 04.03.19
Posted by Scott W Gonzalez
 

Eclipses

Good morning,

There is an eclipse coming up on the 20th. I am hoping that it is not cloudy and I can see/photograph it. This is not my first go around with an eclipse. I have some photographs posted in the Celestial section on here. The set up for a Lunar and a Solar eclipse are a little different. I am just going to go with the Lunar right now.

There are a few ways to shoot an eclipse, a telephoto lens will capture it and show it off by filling the frame, a regular lens can capture some more of it and possibly a tight foreground, a wide angle can get a sprawling landscape with the moon in it as well. There can be a combination and photoshoping of multiple of these.

210mm and cropped to fill more of the frame. Without anything around it is rather plain.

210mm and cropped to fill more of the frame. Without anything around it is rather plain.

Here is the blood moon that everyone raves about at 300mm and cropped as well.

Here is the blood moon that everyone raves about at 300mm and cropped as well.

I like these and the memories associated with them however there is not much depth to them. What we can do to add more depth is add buildings, cars, or some other foreground interest. There is also another option. Long exposure.

This is a 6415 second exposure of a lunar eclipse at 50mm.

This is a 6415 second exposure of a lunar eclipse at 50mm.

Notice above I only have about half of the eclipse in the frame. If I would have been using a wide angle or super wide I could have gotten the whole thing in. The batteries probably would not have lasted the double the length of the exposure though. Make sure your batteries are charged completely.

Another option is to take multiple pictures and put them on a background in photoshop with layers. Spacing is key here and an intervalometer comes in handy for that part. I haven’t done this technique, I do plan on trying it. It should be roughly the same as the layer masks that I discussed back in December using car trails.

Good look with viewing the eclipse. I should have some pictures of it if the clouds stay away.

~Scott

tags: celestial, lunar, moon, eclipse, long exposure, telephoto, teaching, learning
Wednesday 01.16.19
Posted by Scott W Gonzalez
Comments: 1
 

Fireworks

I hope everyone that celebrates it had a Merry Christmas, or a Happy Hanukkah, Kwanza, Solstice, Yule, Bohdi Day, Pancha Ganapati, or any of the many other holidays celebrated in the Decemberish time. If I missed yours it is nothing personal.

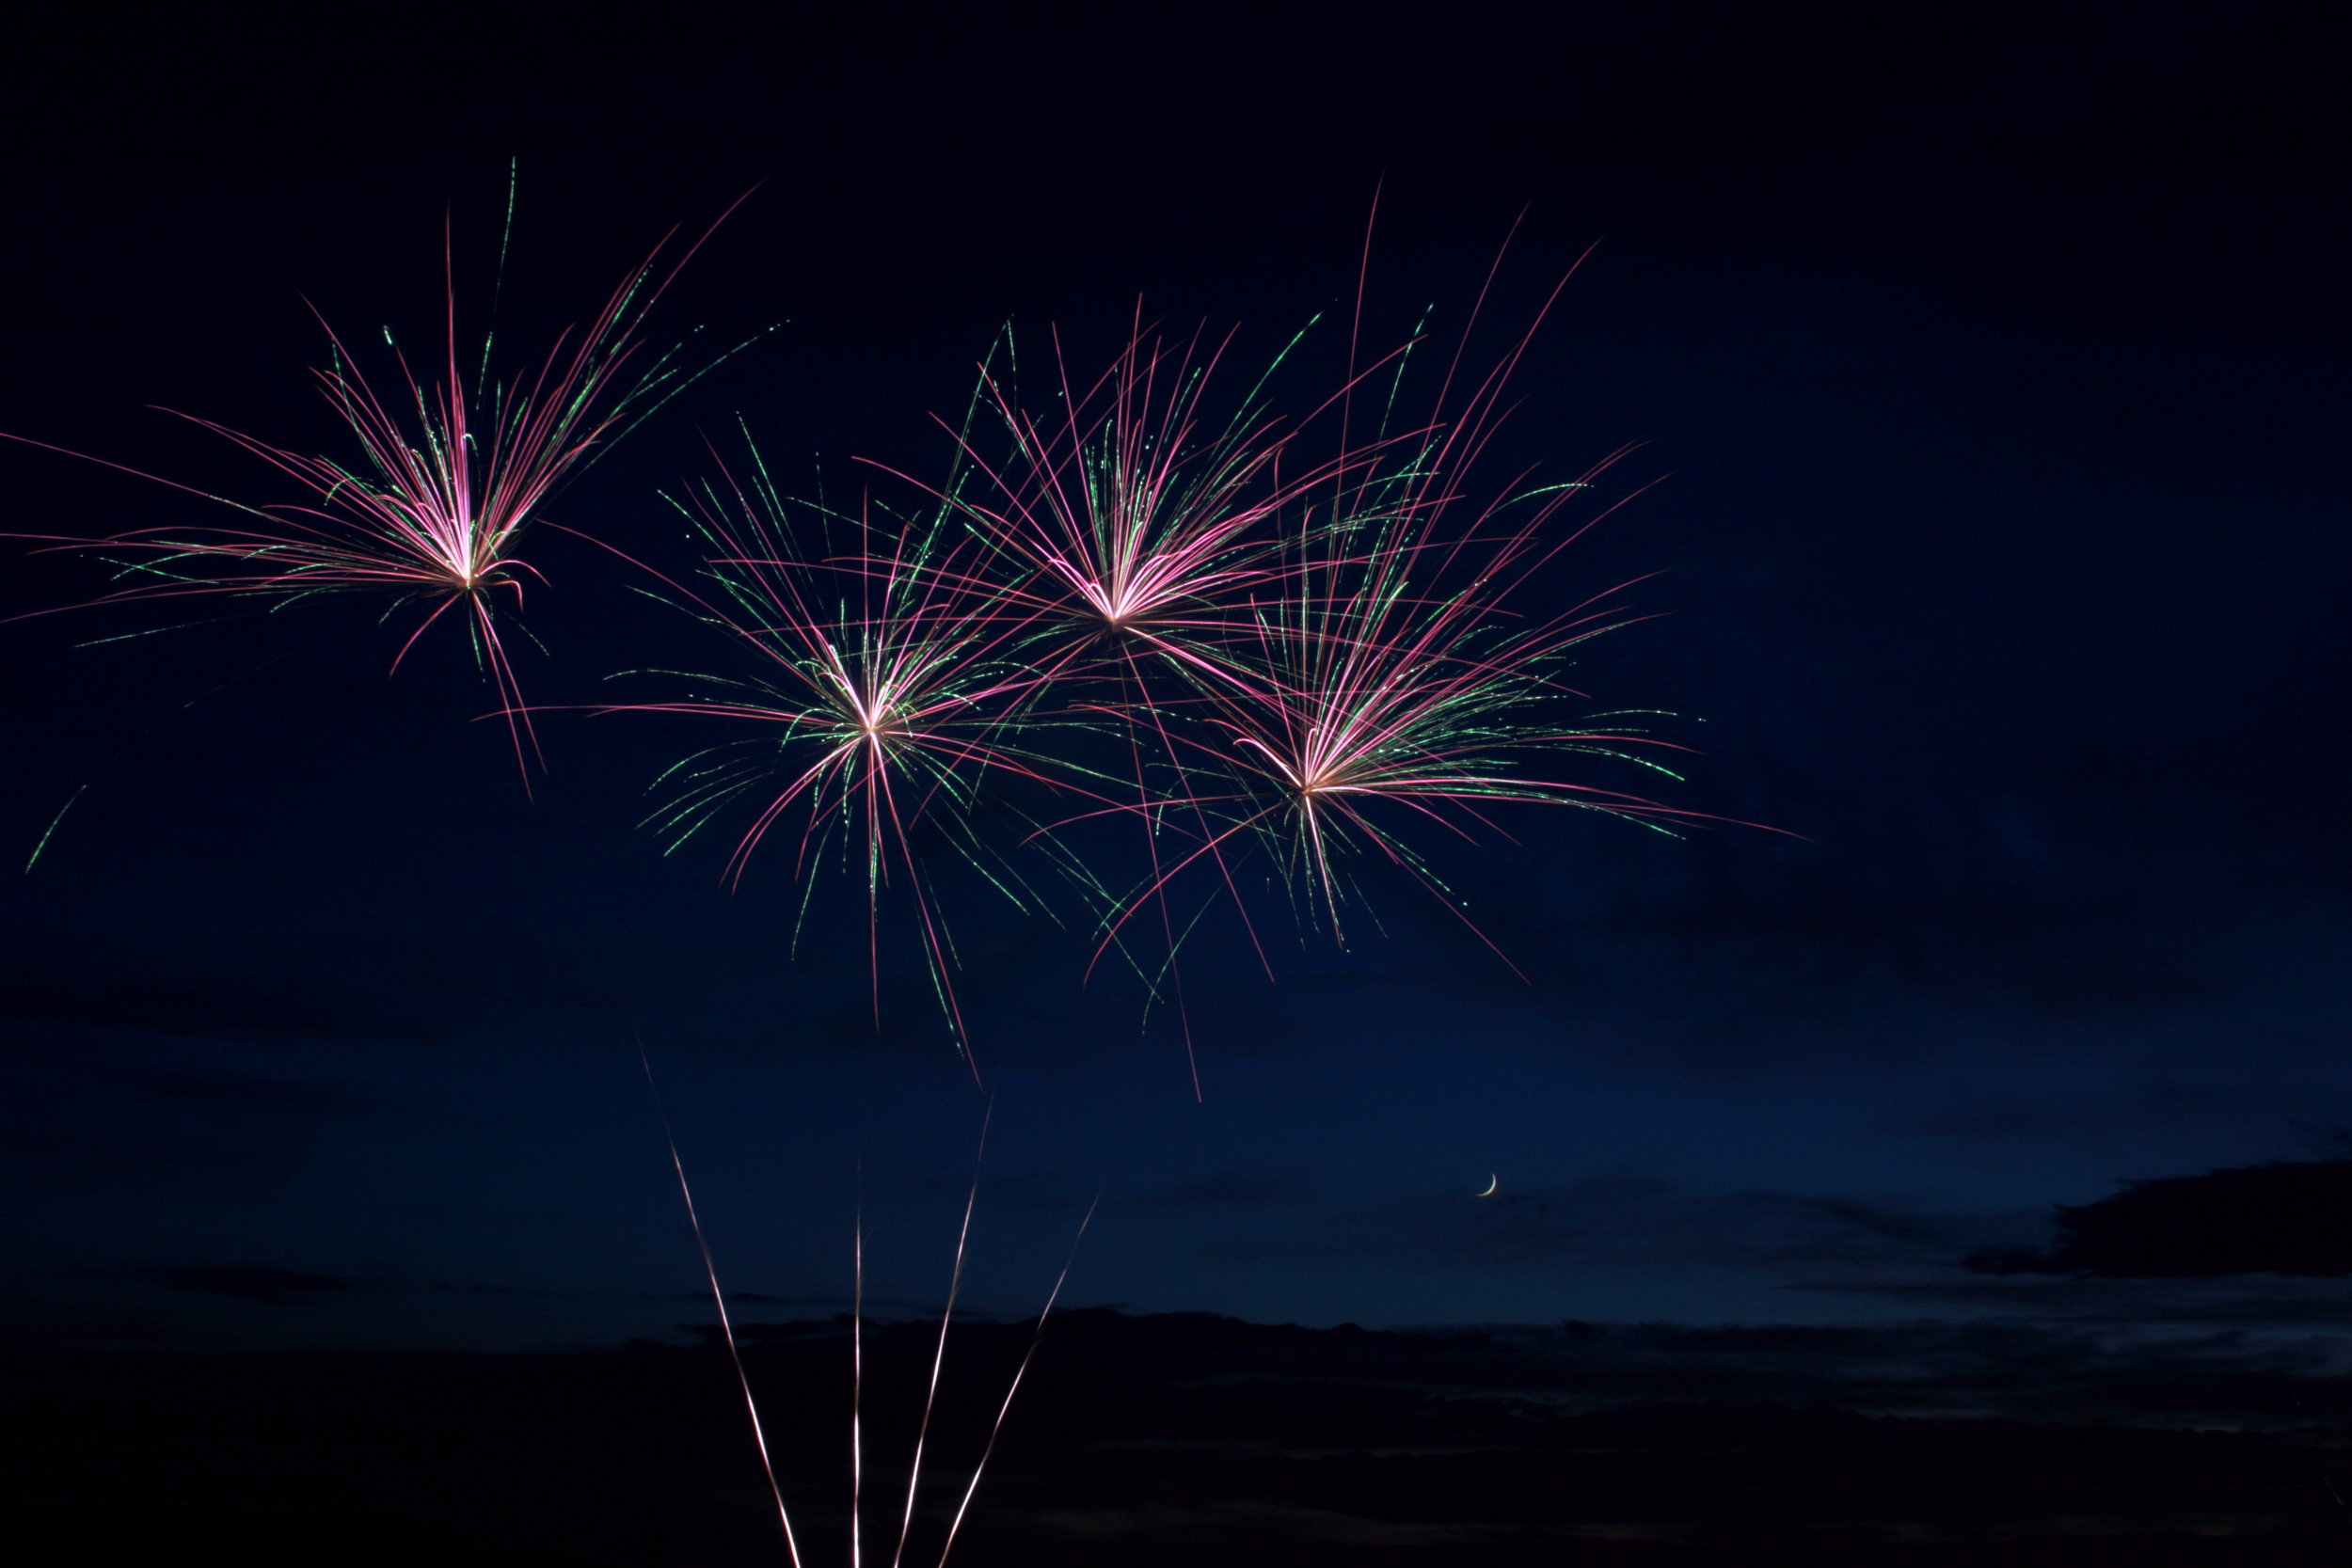
So on to the topic, fireworks and how to capture them. As usual I recommend a tripod and a remote. It can be done without either it is more hit and miss. I will get an idea of where the fireworks will be exploding and if possible set up before nightfall. This is easier to do during the 4th of July than New Year’s Eve. This helps with setting up background and foreground if desired. Generally the fireworks are far enough away that focusing on infinity works well enough, if you aren’t a fan of that then focus on a building nearby the launch site then lock your focus. For aperture I use f8-f11 to keep the focus area large and a low ISO to keep the noise down. Here is where the tough decisions come in. If it is windy then a faster shutter speed will keep the definition of the fireworks better. Notice below the firework trails are being blown to the left and gravity is having it’s hand at pulling them down too.

iso 100 f6.3 11 seconds. I had a larger aperture to get more of the foreground lit.

iso 100 f6.3 11 seconds. I had a larger aperture to get more of the foreground lit.

Now I use a bulb setting so that I can control the shutter better. Sometimes I want a single firework other times I want multiple and often I am deciding while the shutter is open. If a set shutter speed is used the only way to control it would be to put a black card/think paper of the lens during the exposure. The few times that I used that technique I didn’t really enjoy it and took away from enjoying the show. It is an option though.

Another decision that needs to be made is whether a foreground interest will be in place. If so a way to do it is with two separate exposures. One of a properly exposed foreground then one of the fireworks. I recommend taking them around the same time so the blending process is easier. Using a rear curtain flash is also an option depending on how far the subject is.

iso 100 4 secs at f14

iso 100 4 secs at f14

Above notice that the lines are more defined, it was at least partially because of the faster shutter speed. I can’t recall if or how fast the wind was that night so that is out of the equation.

If you have the means a reflection adds more interest to the image,

If you have the means a reflection adds more interest to the image,

Fireworks.jpg
_MG_7757.jpg
_MG_7751.jpg

Above I took caught a picture with my Father in law and my nephew watching the fireworks. The first one is the composite, the second is the original, and the third is the orange firework. The same idea can be used with different foreground.

Lighting pictures are not hard once you know how to do them. Reading about it is one thing doing it is completely different. So with the New Year coming in there are usually some fireworks which is a good chance to try this technique out. Have a Happy New Year everyone. I would love to hear some comments or questions.

tags: photography, learning, teaching, fireworks, explosion, blend, exposure, example, experiment, editing, fun
Saturday 12.29.18
Posted by Scott W Gonzalez
 

Car Trails

Good evening,

So I realized after publishing the last blog that I am late on it and owe you all one. So car trails were brought up. Once you know how to do them they are easy and it becomes more placement of the subject and background than anything else.

The main needs are a steady camera, a long exposure, cars, and a darkish location.

Here is an 8 s exposure at f18. The camera was sitting on the median and I used a self timer because I did not have a remote.

Here is an 8 s exposure at f18. The camera was sitting on the median and I used a self timer because I did not have a remote.

Ideally a remote shutter and a tripod will be added. It gives some more control over the image. Instead of being limited to guessing on when a car will come into the frame, like I did in the above image, the shutter can be triggered when you want without disturbing the camera. Having a tripod will let you place the camera where you want for the image you are trying to create.

Below I had a tripod and remote shutter. So I was more focused on other aspects of the image than just when the car was coming into the frame. I knew the Milky Way and Luxor light were in the frame. I also placed the bush, that is illuminated by my tail lights to give the image more depth. On a side note that is not the sunrise, it is the lights from Las Vegas.

A tripod mounted 30 second exposure. The car was traveling relatively slow so I did a longer exposure.

A tripod mounted 30 second exposure. The car was traveling relatively slow so I did a longer exposure.

I have not gotten a really good capture of it but keep in mind that flashing lights from emergency vehicles can add a bunch of interest to a car trail image.

While getting ready to pull out I saw the flashing lights coming my way so I quickly grabbed my camera and set it on my dash, no timer and I had to stop it from sliding around on the dashboard. Not a sharp image it does show the lights well though..

While getting ready to pull out I saw the flashing lights coming my way so I quickly grabbed my camera and set it on my dash, no timer and I had to stop it from sliding around on the dashboard. Not a sharp image it does show the lights well though..

So have fun with it. Grab your gear after nightfall and find some cars hopefully with their headlights on.

PS if you have any questions about photography that you want me to tackle let me know in the comments or through the contact page.

tags: cars, lights, camera, photography, learning, teaching, long exposure, night
Monday 12.24.18
Posted by Scott W Gonzalez
 

Layer Masks

Good morning,

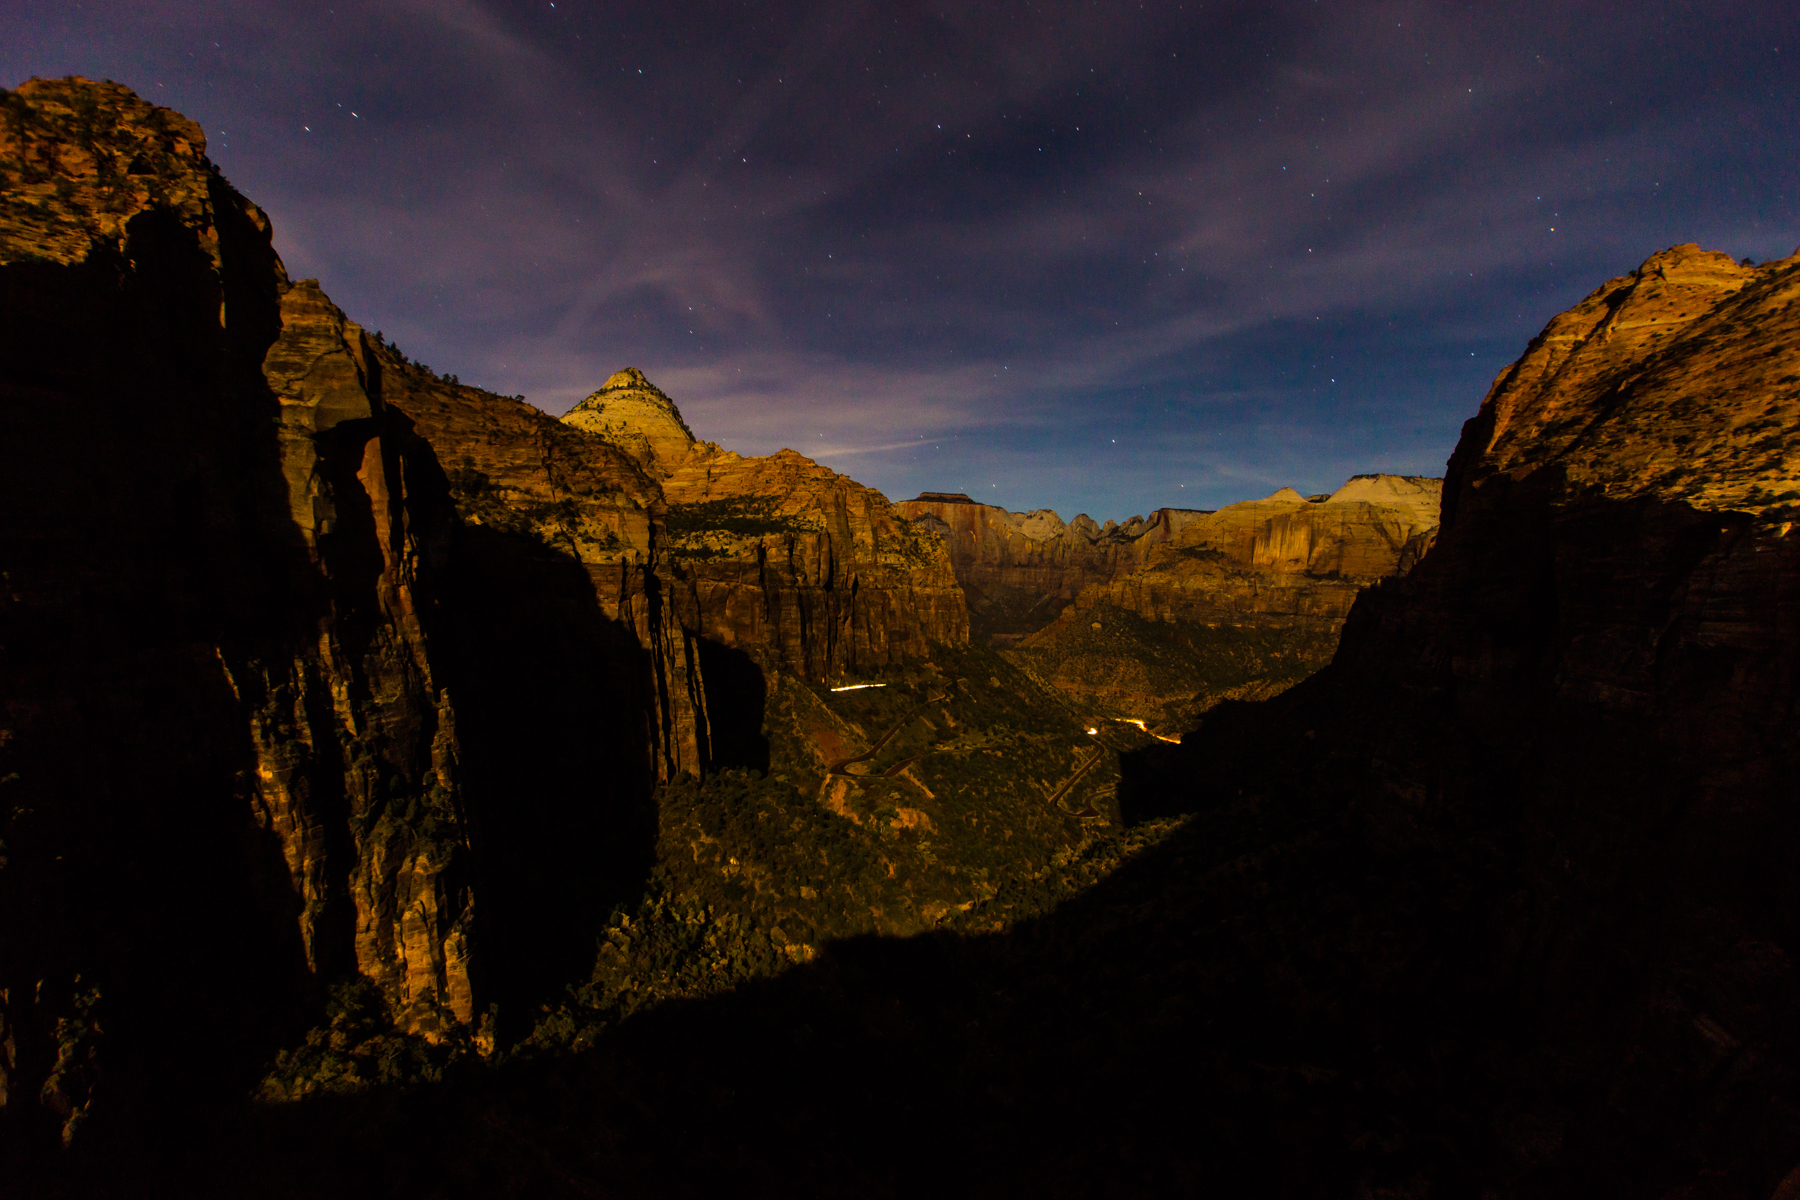
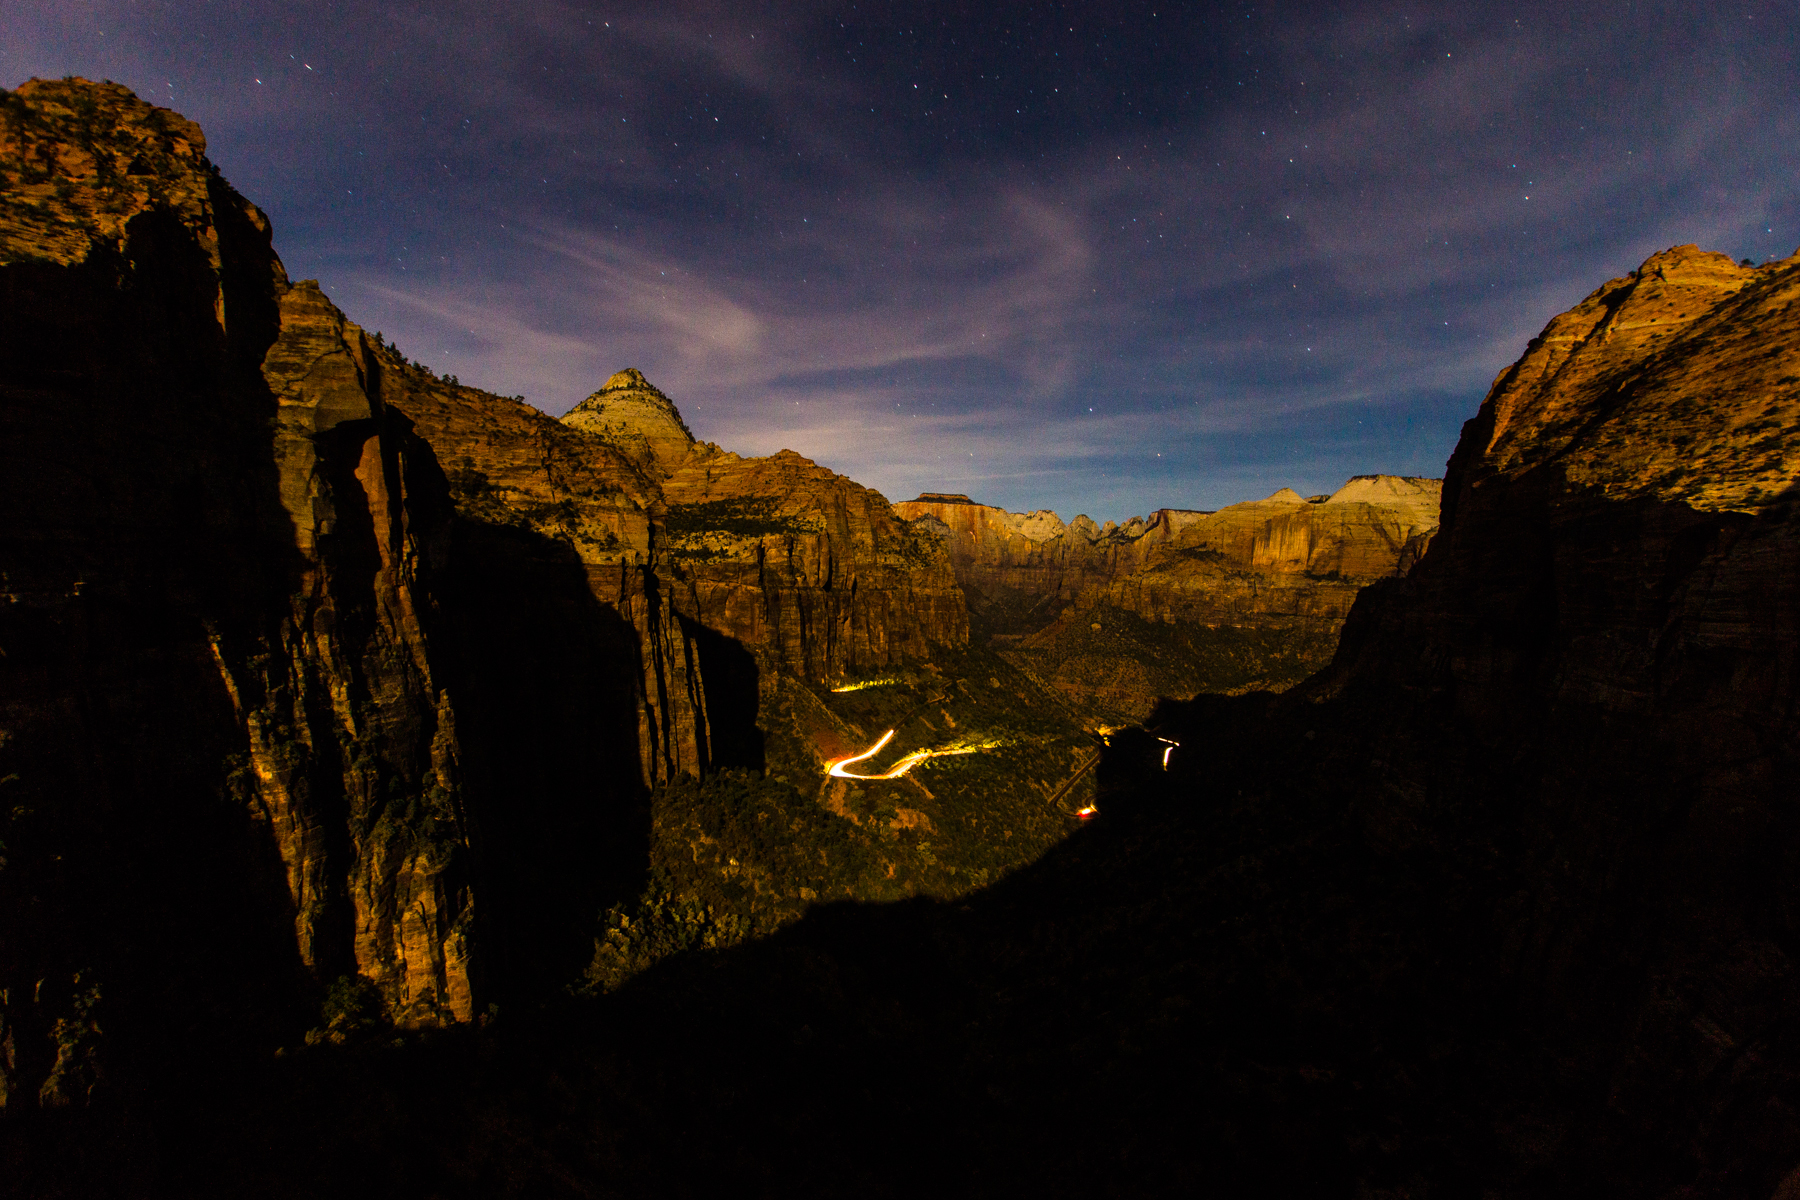
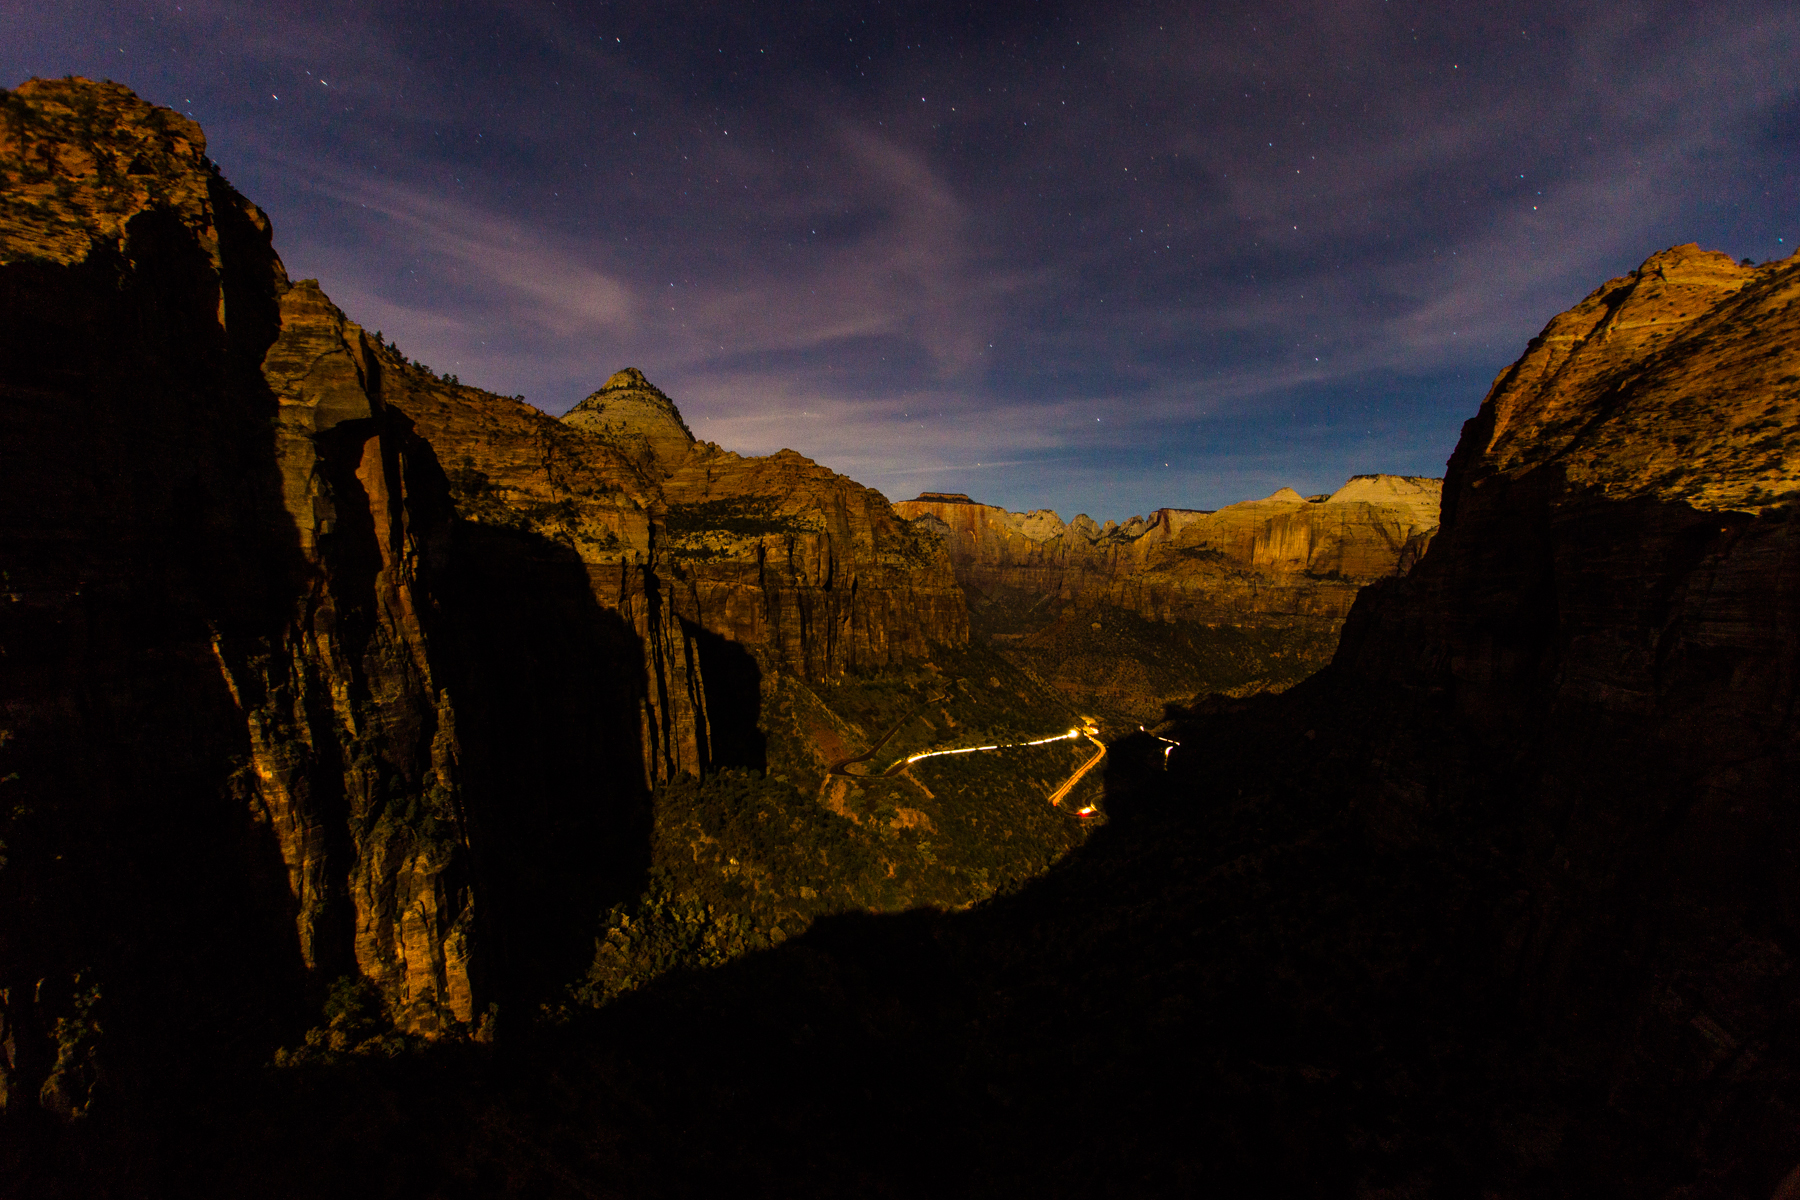
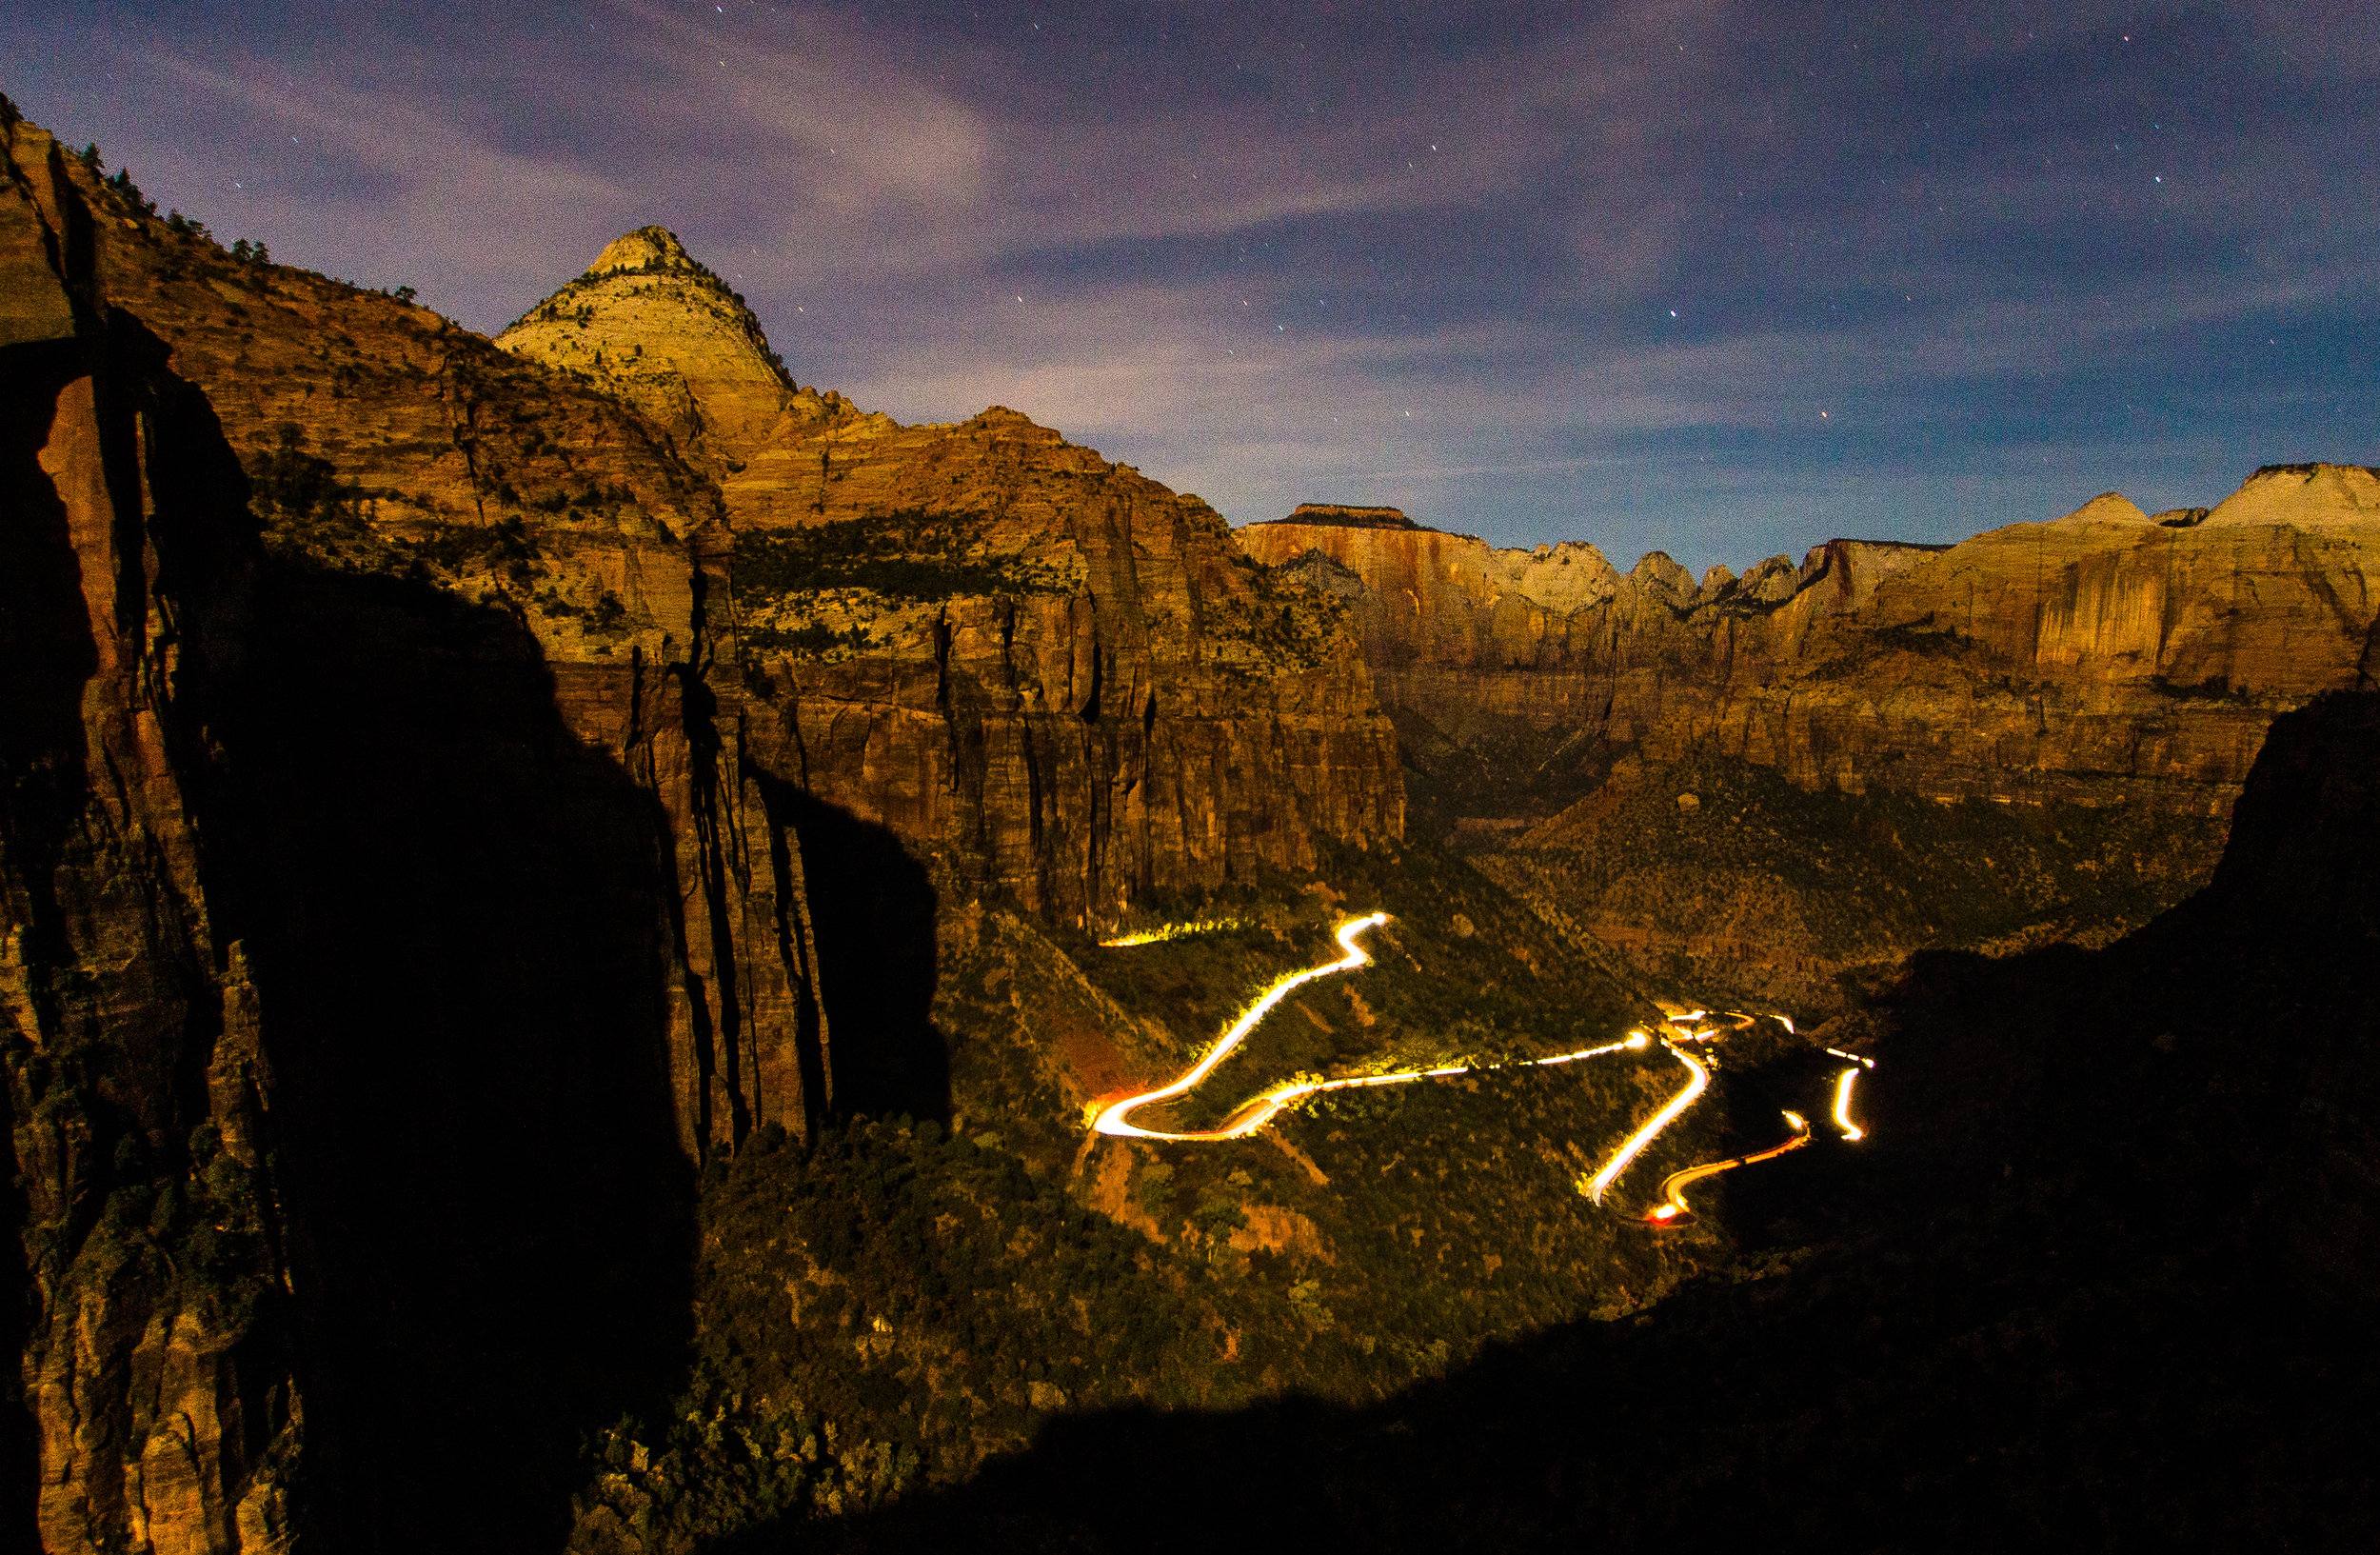
So a while back I went hiking with my daughters in Zion National Park, we completed the Canyon Overlook Trail. Impressive for a 5 and 7 year old. While looking over the Canyon I noticed the road and thought to myself “that would make a great night shot with car trails.” Since then I have seen pictures of it on photo sharing sites, and my first thought was “damnit I was going to do that.” In October I went camping and got a chance to take one myself. I feel that it turned out pretty decent.

It was a near full moon so the canyon was visible except where the shadow was.

It was a near full moon so the canyon was visible except where the shadow was.

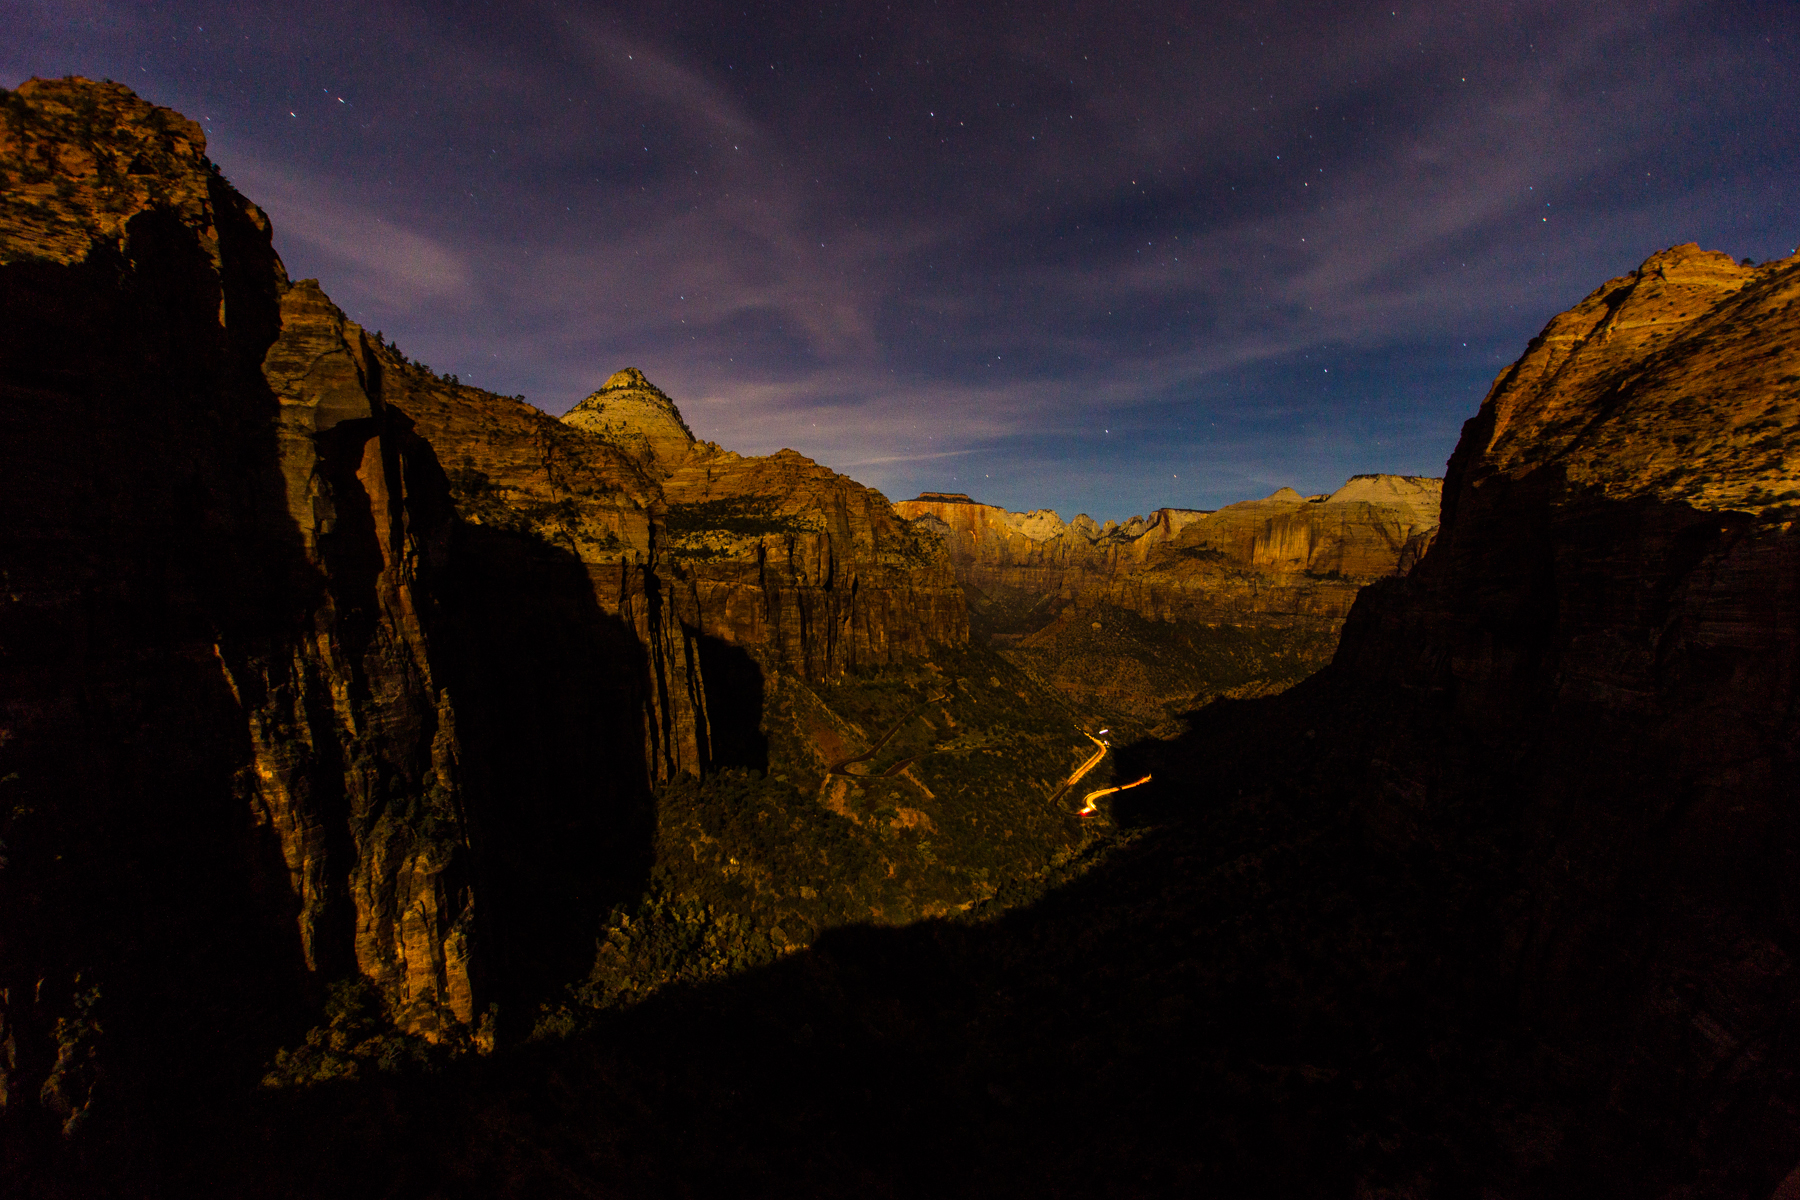
So I went up there with my friend Drew. Sadly I forgot my remote so I was left with 30 second exposures with a self timer. Not exactly what I wanted but it worked. Around 40 pictures were taken and the cars were not cooperating. With the bright moon and about an hour of shooting the shadow of the mountain had moved from covering nearly half of the drive to covering about a quarter of it. So I chose the last shot to use as the background or base layer.

Here we have the base layer.

Here we have the base layer.

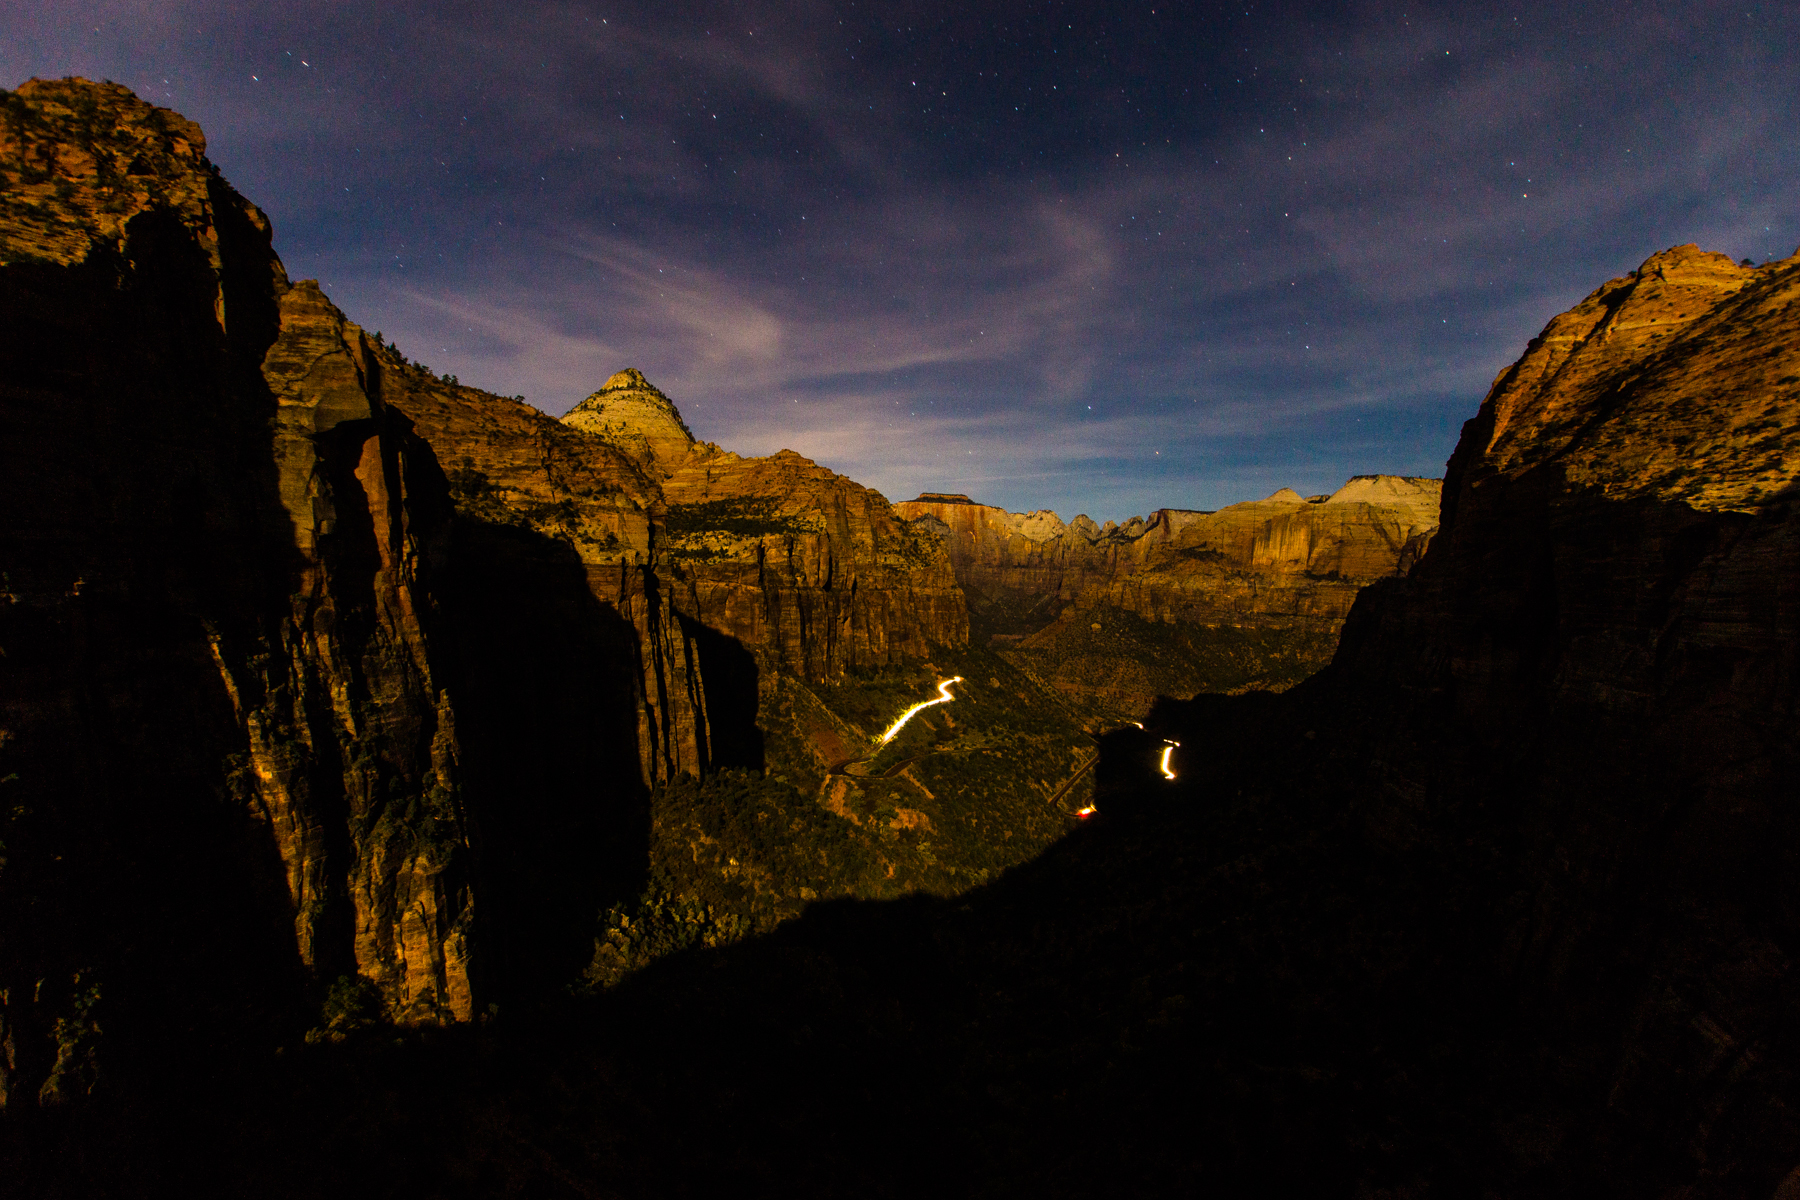
Then I added the other images onto it complete the light trail for the most part. Below are 4 of the images that I took.

_DSC6095.jpg
_DSC6096.jpg
_DSC6101.jpg
_DSC6106.jpg

So I cut and pasted each image onto the base layer and chose “lighten” in the blending option for each. I wanted the sky, canyon, and mountains to just be one image. Layer masks is the way to go to complete that task. In the “Layers” window there is a button that is a square with a circle in it called “Add Layer Mask.” Clicking it seems to do nothing except adding a white square next to the layer that you are on (It doesn’t work on the background layer). If we hit the “B” button then we can paint the layer and it will either hide of show what is beneath the layer we are working on. To toggle back and forth between hiding and revealing hit “X.” Alternatively if you want to see through most of the layer below hold “Alt” while clicking the Add layer mask button. You will have a box that is black next to the layer.

To sum up. I cut and pasted the pictures onto the background image, changed them to lighten, added layer masks, then painted the masks to keep the car trails that I wanted. Leading to this image below.

Complete.jpg

Photoshop is daunting with all of it’s options of what to do. I still only know maybe a quarter of what it can do. Layers and masks are a big part of what I use it for and from talking to other photographers it is a major thing to know and understand. I hope this helps you on your path to understanding photoshop.

~Scott

tags: photography, learning, teaching, photoshop, layers, masks, processing
Tuesday 12.11.18
Posted by Scott W Gonzalez
 

Layers

Good morning,

So I started writing a blog talking about how I made one of the more recent pictures that I posted and realized that the actions that it took had not been explained. Like layers. So I use photoshop and lightroom. They have become familiar and if you are a student or a teacher they have a discount on the software. I am not sure if it works with the subscription plan that they have now though.

So layers if you are not familiar are like putting a bunch of pieces of paper on top of each other. Depending on the paper it might not do all that much. If it is construction paper then you only see the top sheet, if it is tracing paper then you can see a few sheets down, if it is celluloid then the only part that you can’t see is the part that has writing or drawing on it. It depends on how you treat the layers in photoshop and if you use a mask (layer masks will be discussed at a later time).

Let’s start with a star trail stack. After taking the images using a sturdy tripod or mount go into photoshop, cut and paste the images on top of each other. This will make layers starting at 1 with a Background. You could also got to File>Automate>Photomerge and pick auto. I have not had much luck with it I have met people who have. The results are similar though.

_MG_8606.jpg
_MG_8607.jpg
_MG_8608.jpg

These three images add up to about 14.5 minutes of exposure. I put the same settings on all of them when converting to jpeg then stacked them in photoshop. After you do that then you will only see the top layer. There is a drop down menu in the layers tab/window that should say “normal.” The trick here is to go to that drop down menu and pick “lighten” for everything except the background. The parts of the image that add light will show up through the layers.

3.jpg

Above is all three images stacked with the “lighten” setting then I went to Layer>Flatten Image which will put all the layers together into one that can be saved as a tiff or jpeg. Notice that the sky got brighter from the light pollution, being near a bright city doesn’t work well with astrophotography. This will work with other times when trying put together multiple images, car trails, I even heard that it will work with water to mimic a long exposure (I haven’t tried it though). So grab a sturdy mount, a remote, your camera then go out and shoot.

~Scott
tags: teaching, astrophotography, stars, long exposure, photoshop, layers, stack, trail, editing, education
Saturday 11.17.18
Posted by Scott W Gonzalez
 

Flash 2 (Fill Flash)

Good evening,

So this is just a quick one. Fill Flash or using a flash in bright lit scenes to brighter the dark parts. Most often used in my experience is during a backlit portrait. Nice bright landscape that you want to include in the portrait or selfie except that the subject is too dark so you change the exposure to make the subject brighter then the background is lost in highlights. Fill flash to the rescue.

_DSC5553.jpg
_DSC5555.jpg

First one is no flash and the second one is with the built in camera flash. I had to change ISO from 800 to 200 because the shutter changed from 1/400th to 1/100th of a second. The settings in post are identical. If I wanted I could probably have made the non flash one better, I feel that it is better to get it right in camera than to try and fix it later in post.

Until next time. So grab your camera, pop the flash up, don’t fear those backlit portraits, then go out and shoot.

~Scott
tags: flash, photography, learning, teaching, fill flash, backlit, background
Thursday 10.04.18
Posted by Scott W Gonzalez
 

Flash 1 (probably)

Good evening,

Tonight I am going to talk about flash photography. It is a huge subject hence the "1" in the title. There is so much that it is intimidating, at least it was for me. I recall trying to do everything with natural lighting because it was more "real." I was doing it because flashes can be expensive, the flash that comes with the camera isn't good, and it was another thing to learn. Well after learning a little it was fun, I could make the light do what I wanted instead of placing my subject to suit the natural light.

The reason that it is intimidating is because there are new equipment and new terms to learn. For example; bounce lighting, fill lighting, background lighting, wireless, umbrella, soft box, remote lighting, reflected light, catch lights, ring lights, etc. 

It is best to start with the simple and go from there. Mind you I am not going to cover all that I listed in this post.

So the flash that we have built in to our DSLR usually sucks and gives a mugshot type image. See below.

Notice the shadow on the background that is 4 ft away, the flat lighting where depth in my face is lost except at the wrinkles in my skin.

Notice the shadow on the background that is 4 ft away, the flat lighting where depth in my face is lost except at the wrinkles in my skin.

Now this might sound and seem discouraging to the built in flash and that is not my intent. I am just trying to make the flaw known so it can be worked around. There are multiple modifiers out there from mirrors that bounce the light off of the ceiling (doesn’t work outdoors), to softeners that basically turn the flash into a small softbox (more on that later), to filters that change the color of the light, and other items to “fix” the flash.

The camera flash can be used as a fill flash in backlit situations, in documenting subjects, street photography, and my favorite as a trigger for wireless flash photography.

Again this is the same built in flash with a modifier. There is more depth to my face and the wrinkles appear less prominent. The coloring is better in my opinion too but that can be changed in post. The shadow is still there, it not as obvious thou…

Again this is the same built in flash with a modifier. There is more depth to my face and the wrinkles appear less prominent. The coloring is better in my opinion too but that can be changed in post. The shadow is still there, it not as obvious though.

So in the second image I used an inexpensive modifier, a piece of wax paper set at about a 45 degree angle in front of the built in flash. Some of the light bounced off the ceiling and most of it went through the wax paper. Both of the images were shot in jpeg with the WB set to flash. I will go more into discussing flashes at a later time. So grab your camera then go out and shoot.

~Scott

tags: flash, photography, built in, teaching, learning, photo
Tuesday 09.18.18
Posted by Scott W Gonzalez
 
Newer / Older

Powered by Squarespace.