• Photography
  • About
  • Contact
  • Light Writing

Scott W Gonzalez

  • Photography
  • About
  • Contact
  • Light Writing

Fireworks

I hope everyone that celebrates it had a Merry Christmas, or a Happy Hanukkah, Kwanza, Solstice, Yule, Bohdi Day, Pancha Ganapati, or any of the many other holidays celebrated in the Decemberish time. If I missed yours it is nothing personal.

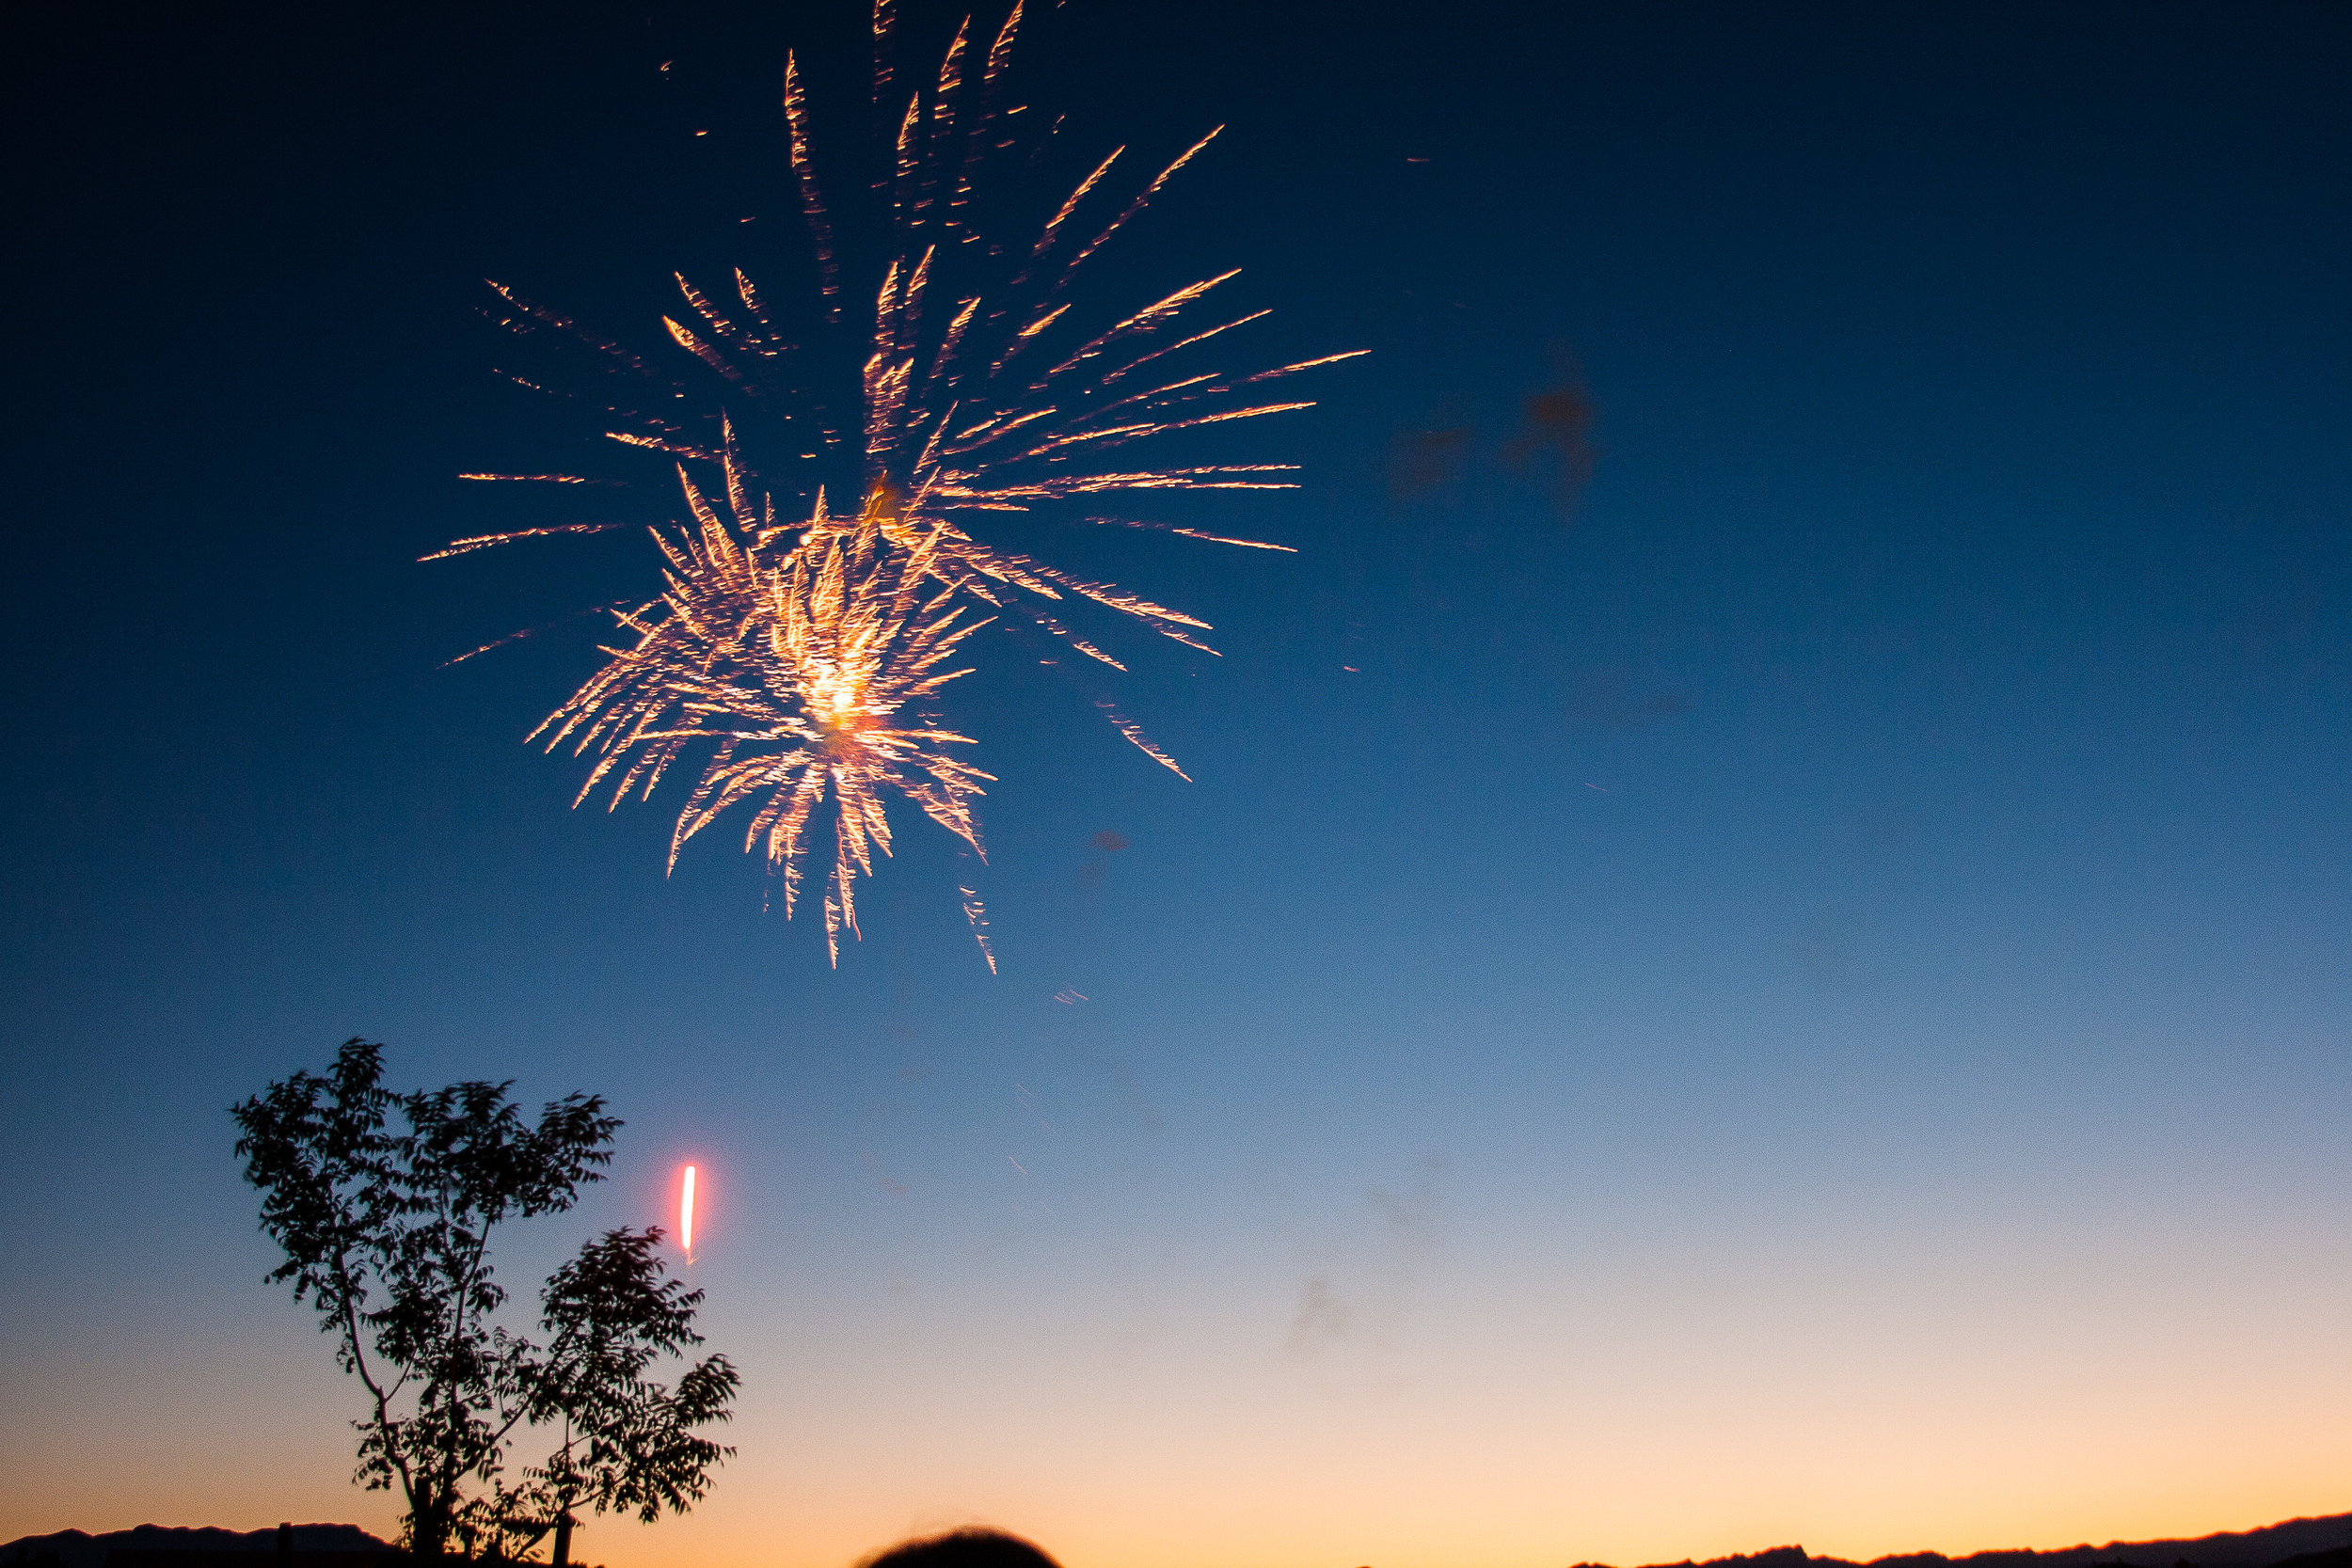
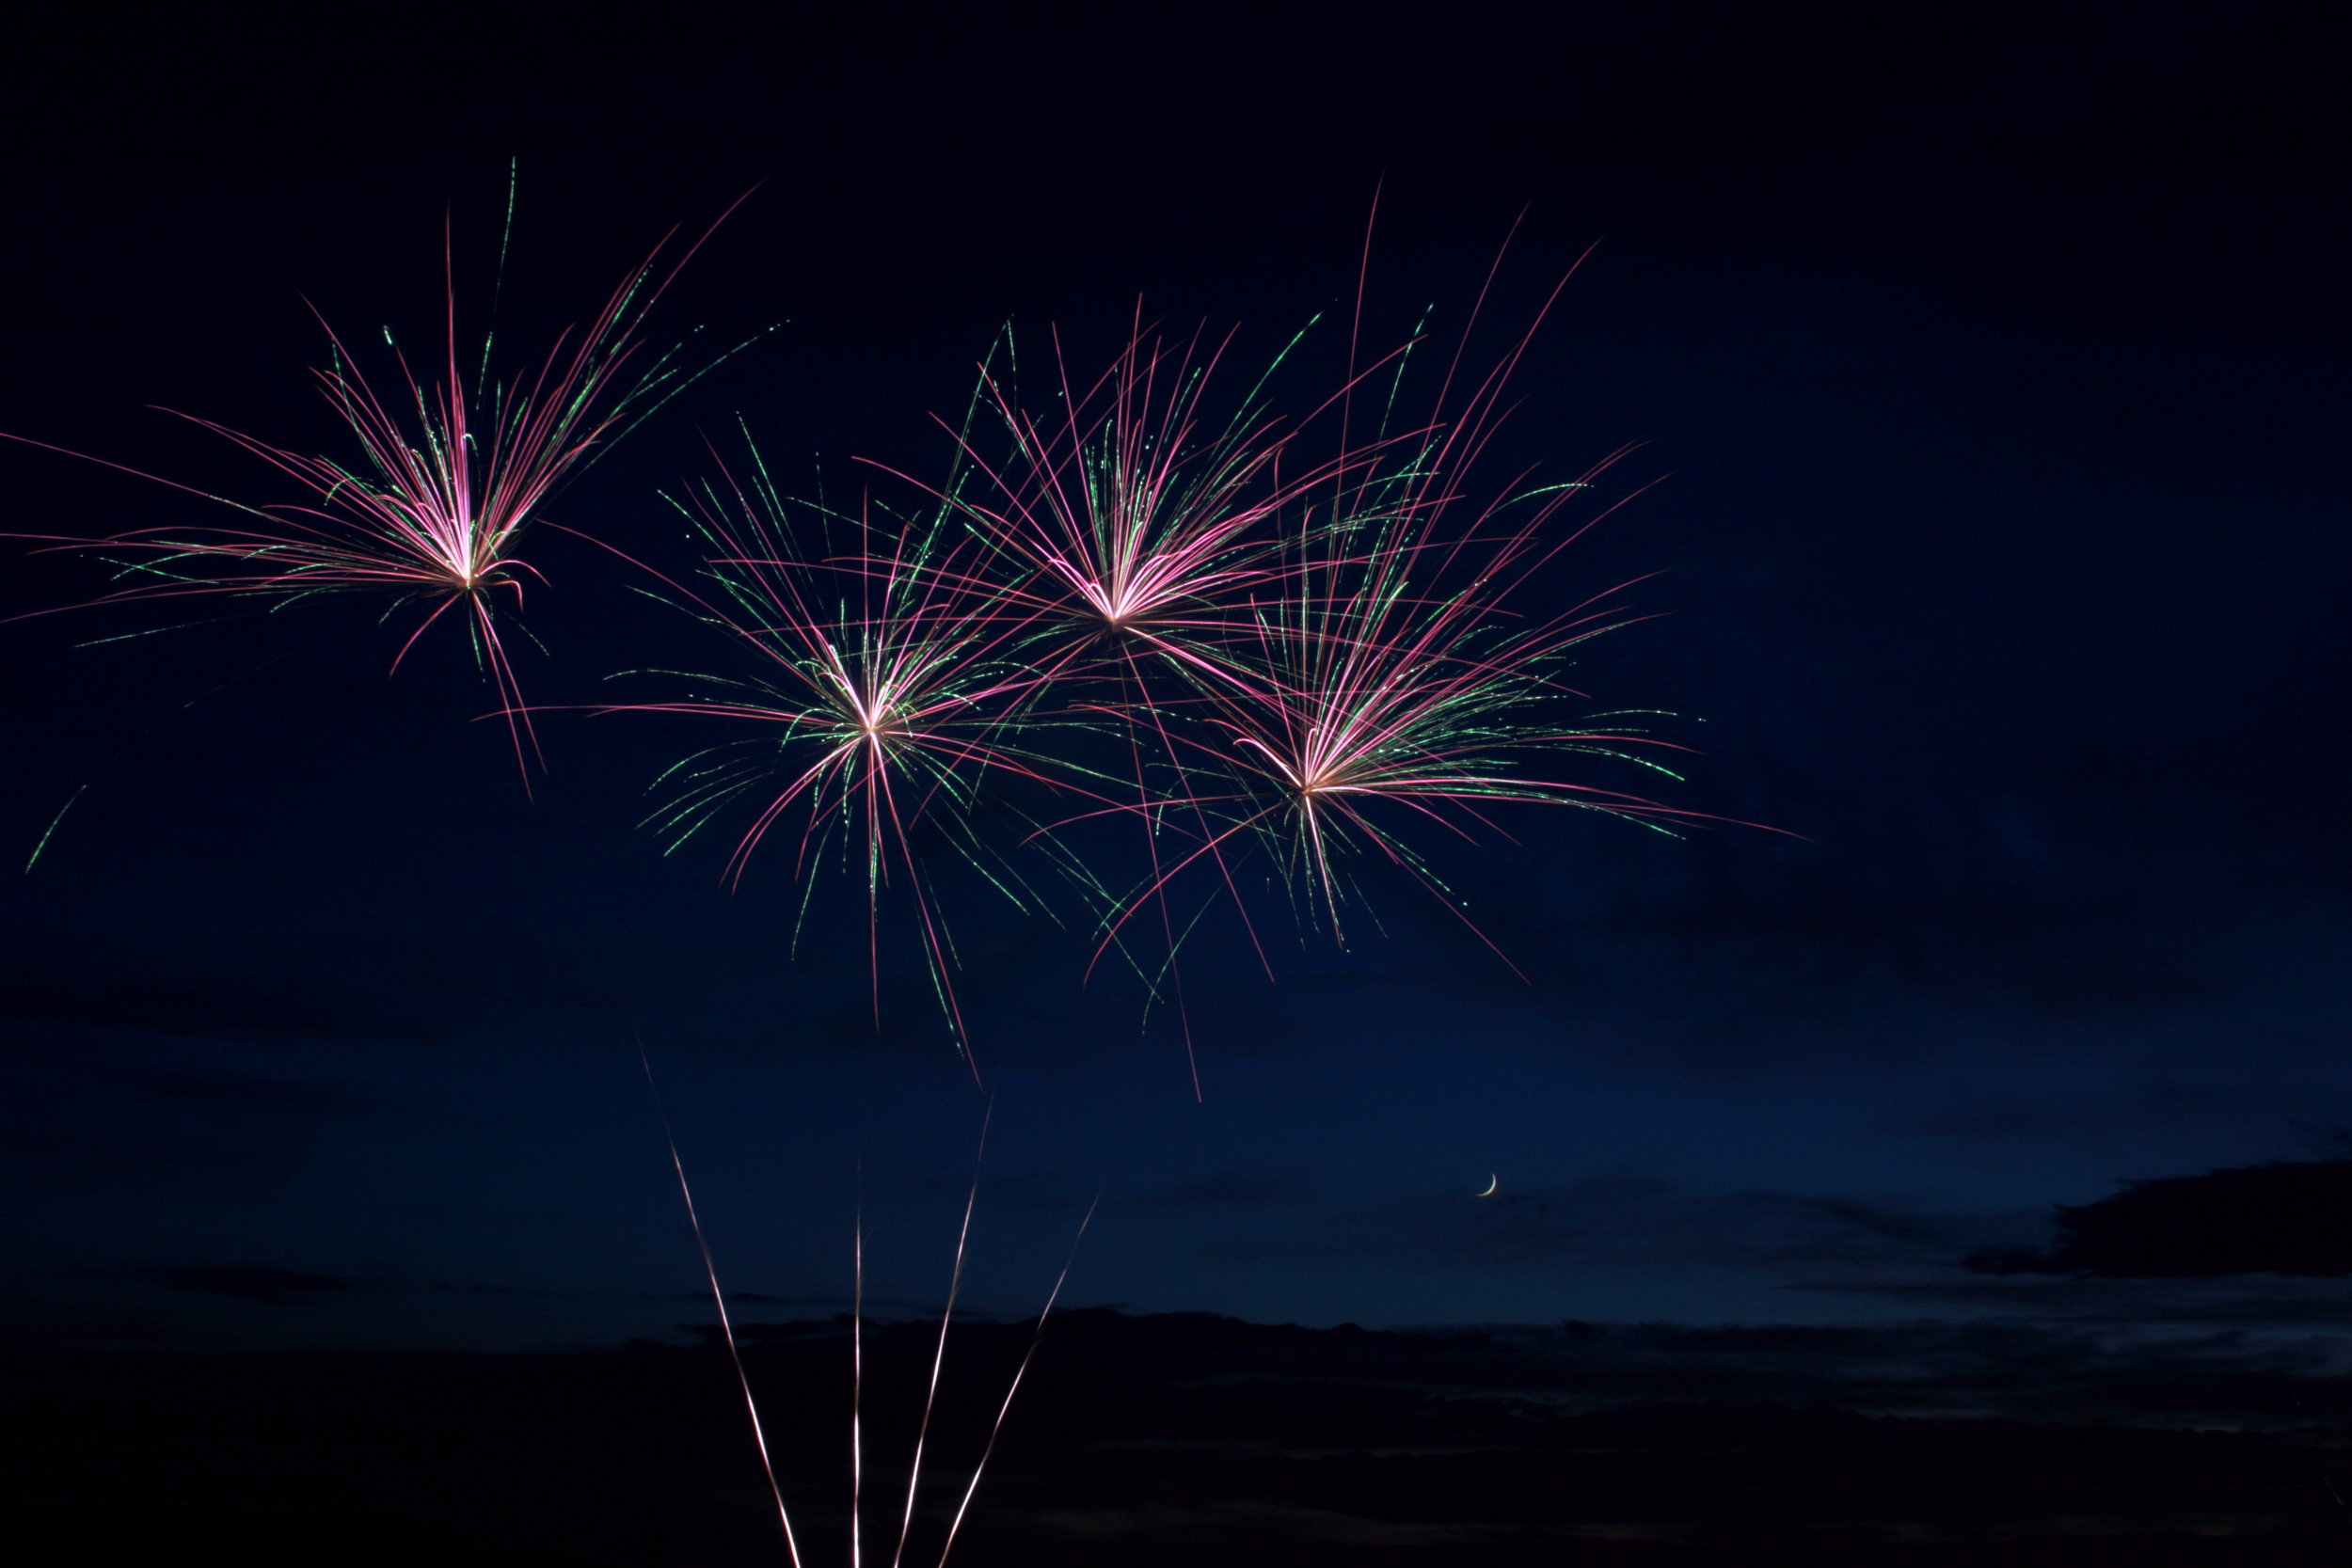
So on to the topic, fireworks and how to capture them. As usual I recommend a tripod and a remote. It can be done without either it is more hit and miss. I will get an idea of where the fireworks will be exploding and if possible set up before nightfall. This is easier to do during the 4th of July than New Year’s Eve. This helps with setting up background and foreground if desired. Generally the fireworks are far enough away that focusing on infinity works well enough, if you aren’t a fan of that then focus on a building nearby the launch site then lock your focus. For aperture I use f8-f11 to keep the focus area large and a low ISO to keep the noise down. Here is where the tough decisions come in. If it is windy then a faster shutter speed will keep the definition of the fireworks better. Notice below the firework trails are being blown to the left and gravity is having it’s hand at pulling them down too.

iso 100 f6.3 11 seconds. I had a larger aperture to get more of the foreground lit.

iso 100 f6.3 11 seconds. I had a larger aperture to get more of the foreground lit.

Now I use a bulb setting so that I can control the shutter better. Sometimes I want a single firework other times I want multiple and often I am deciding while the shutter is open. If a set shutter speed is used the only way to control it would be to put a black card/think paper of the lens during the exposure. The few times that I used that technique I didn’t really enjoy it and took away from enjoying the show. It is an option though.

Another decision that needs to be made is whether a foreground interest will be in place. If so a way to do it is with two separate exposures. One of a properly exposed foreground then one of the fireworks. I recommend taking them around the same time so the blending process is easier. Using a rear curtain flash is also an option depending on how far the subject is.

iso 100 4 secs at f14

iso 100 4 secs at f14

Above notice that the lines are more defined, it was at least partially because of the faster shutter speed. I can’t recall if or how fast the wind was that night so that is out of the equation.

If you have the means a reflection adds more interest to the image,

If you have the means a reflection adds more interest to the image,

Fireworks.jpg
_MG_7757.jpg
_MG_7751.jpg

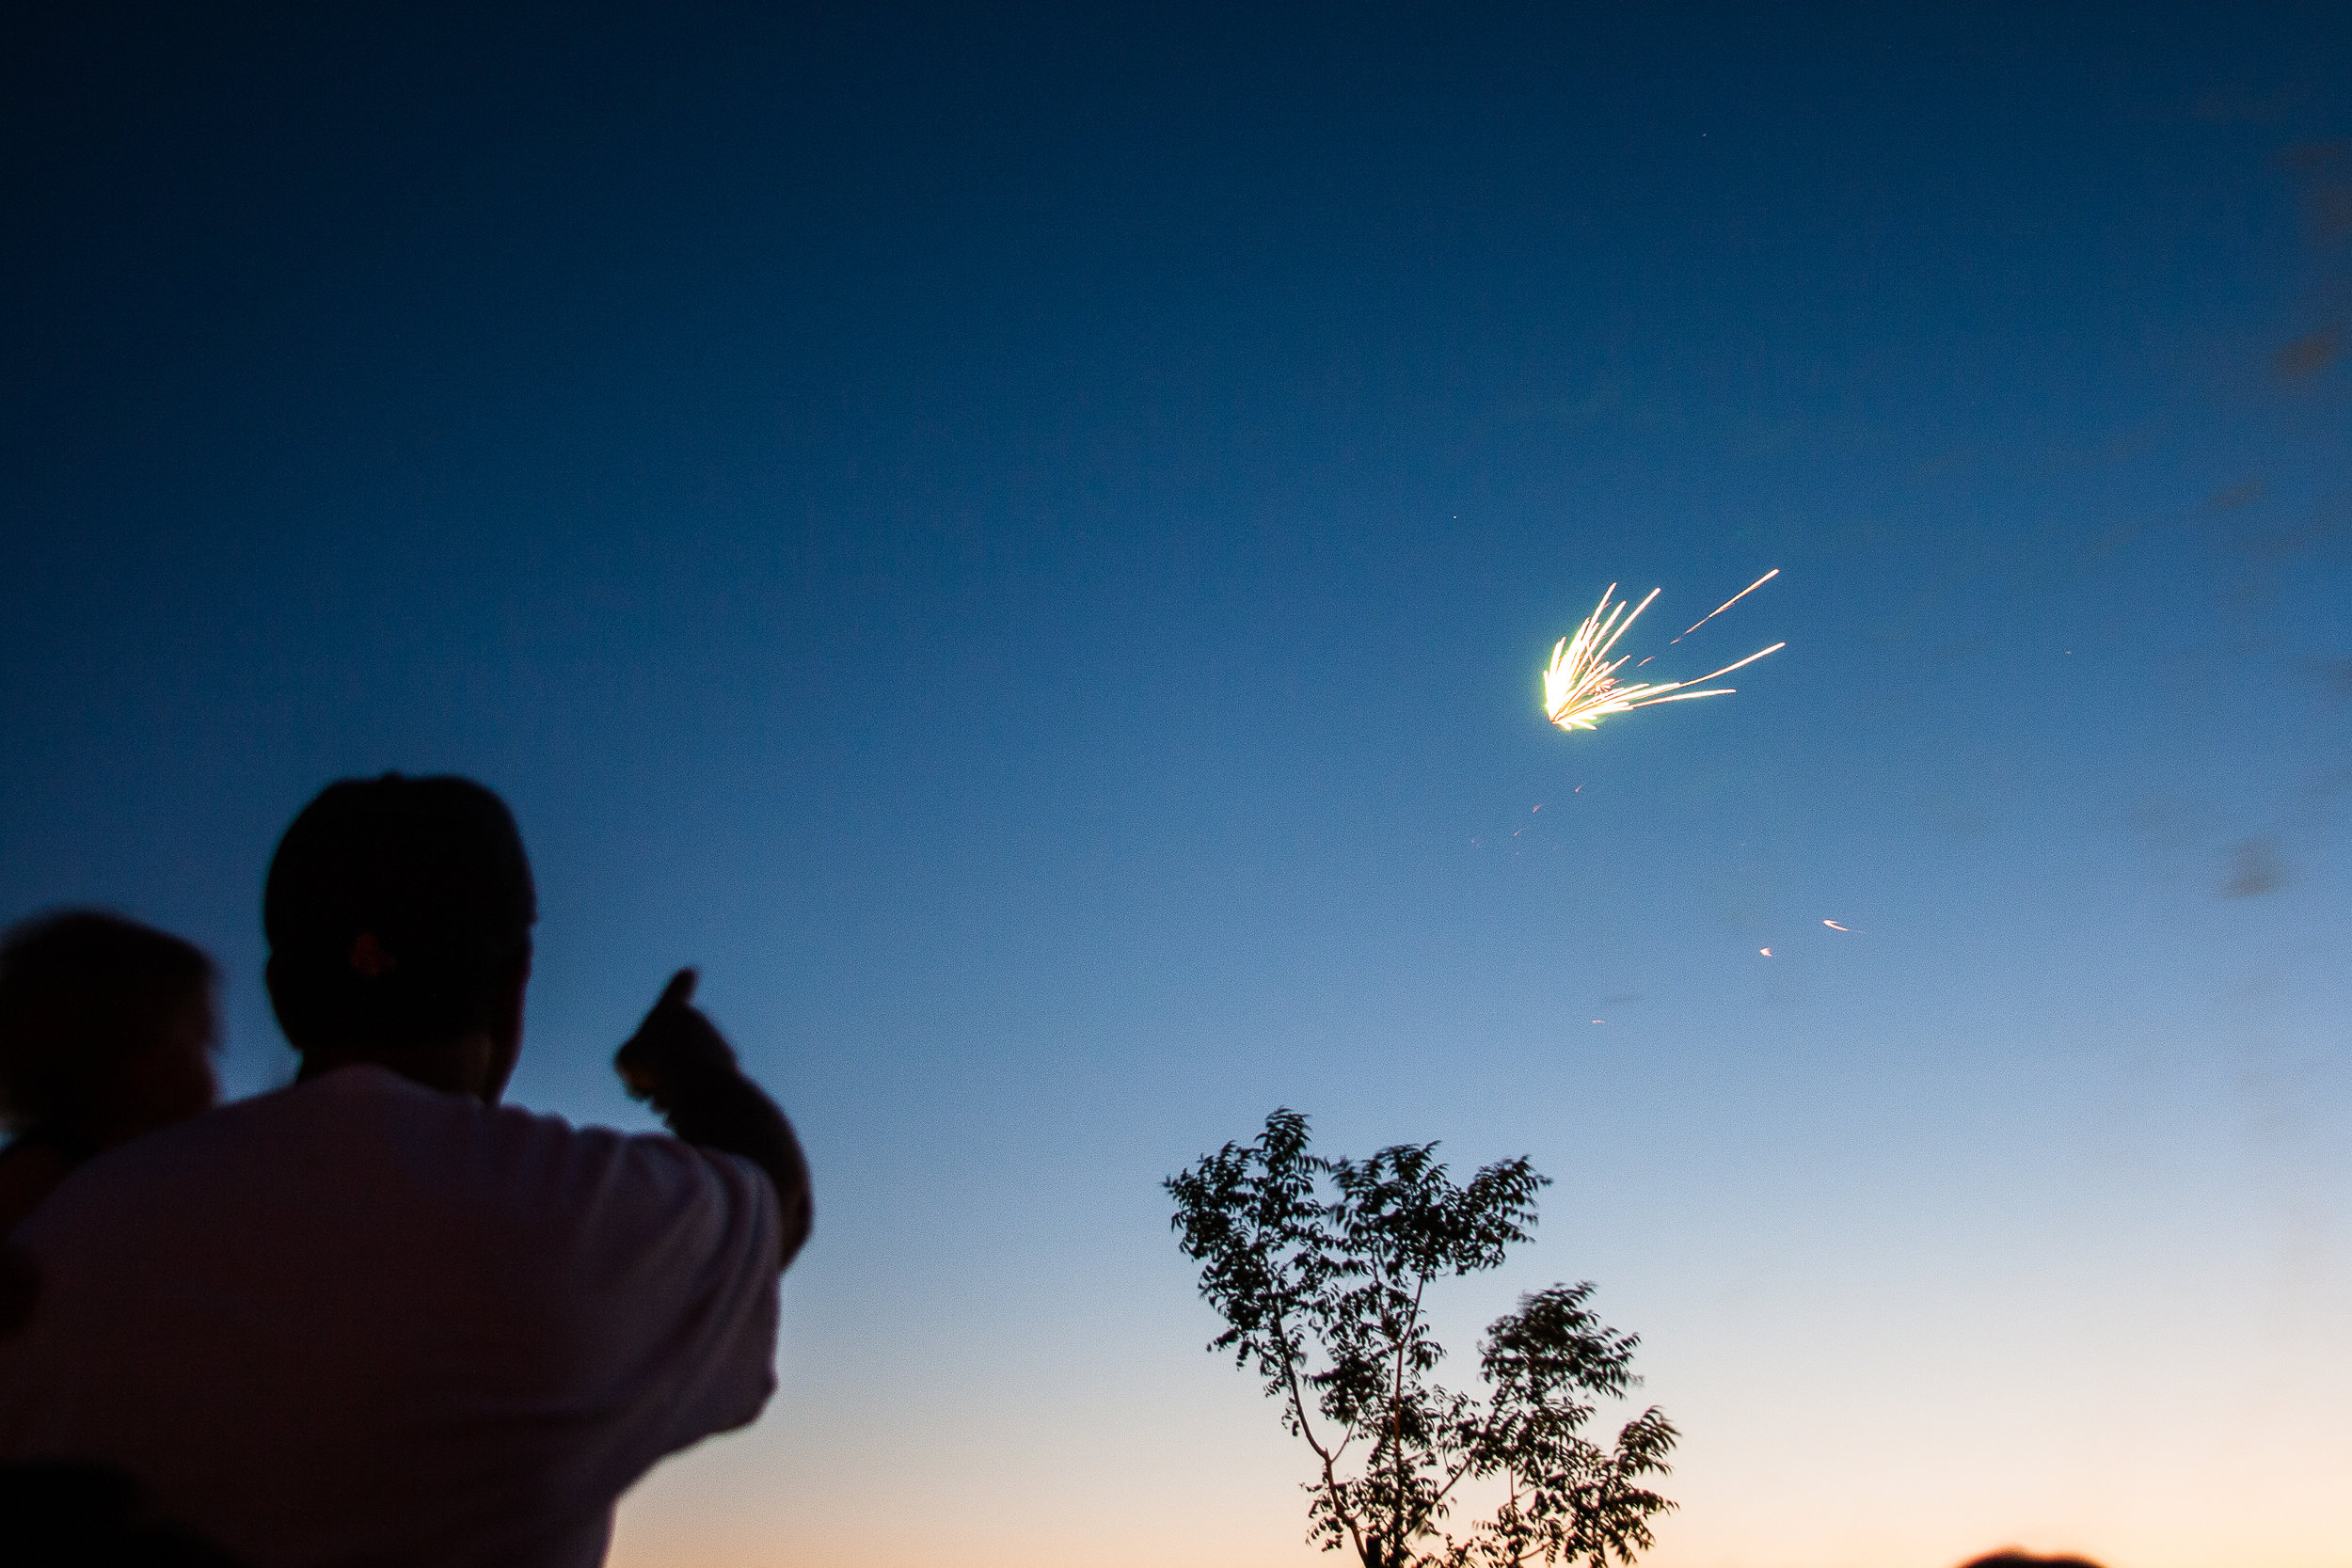
Above I took caught a picture with my Father in law and my nephew watching the fireworks. The first one is the composite, the second is the original, and the third is the orange firework. The same idea can be used with different foreground.

Lighting pictures are not hard once you know how to do them. Reading about it is one thing doing it is completely different. So with the New Year coming in there are usually some fireworks which is a good chance to try this technique out. Have a Happy New Year everyone. I would love to hear some comments or questions.

tags: photography, learning, teaching, fireworks, explosion, blend, exposure, example, experiment, editing, fun
Saturday 12.29.18
Posted by Scott W Gonzalez
 

Filter: Neutral Density Filters aka ND

Good Evening,

Today the little ones and I went to Red Rock Canyon. I brought along some ND filters to show what they can do.

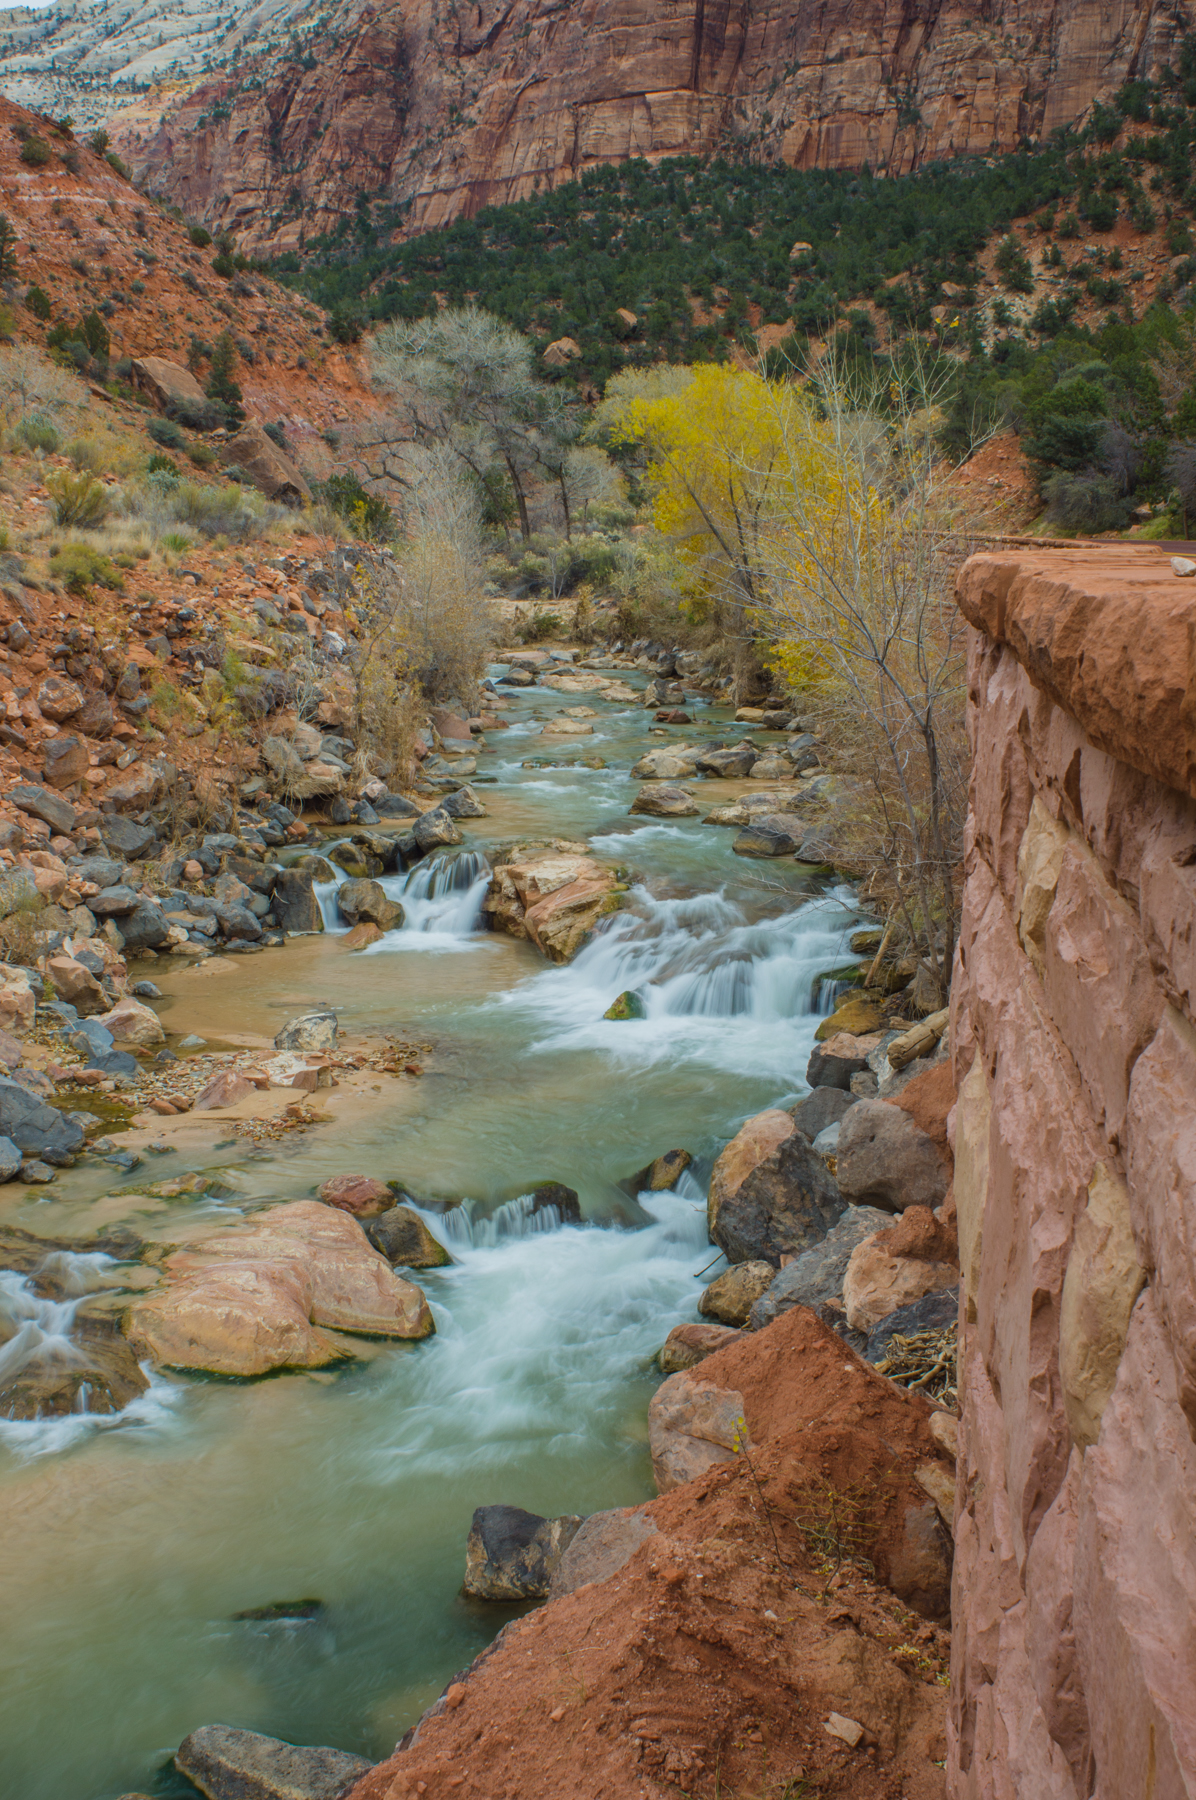
ND filters are basically like putting sunglasses on a camera. They darken the whole thing. There are a few reasons to want to do this. Wanting to use a large aperture to have a shallow depth of field, wanting a long or longer exposure time, making flowing water silky, removing people from a busy location. They come in different strengths. Just like CPL filters they can be costly and we can buy one set for our largest thread lens and then step rings for the rest of the lens. Ultimately we want a filter that darkens the frame evenly without adding a color cast.

I did not use an ND filter for either of these images. I was testing a new lens and seeing what I could get out of it. I was planning on taking some water images today but alas didn't get the chance as there hasn't been any recent rain. This does gi…

I did not use an ND filter for either of these images. I was testing a new lens and seeing what I could get out of it. I was planning on taking some water images today but alas didn't get the chance as there hasn't been any recent rain. This does give an idea of what an ND filter can do to a scene though.

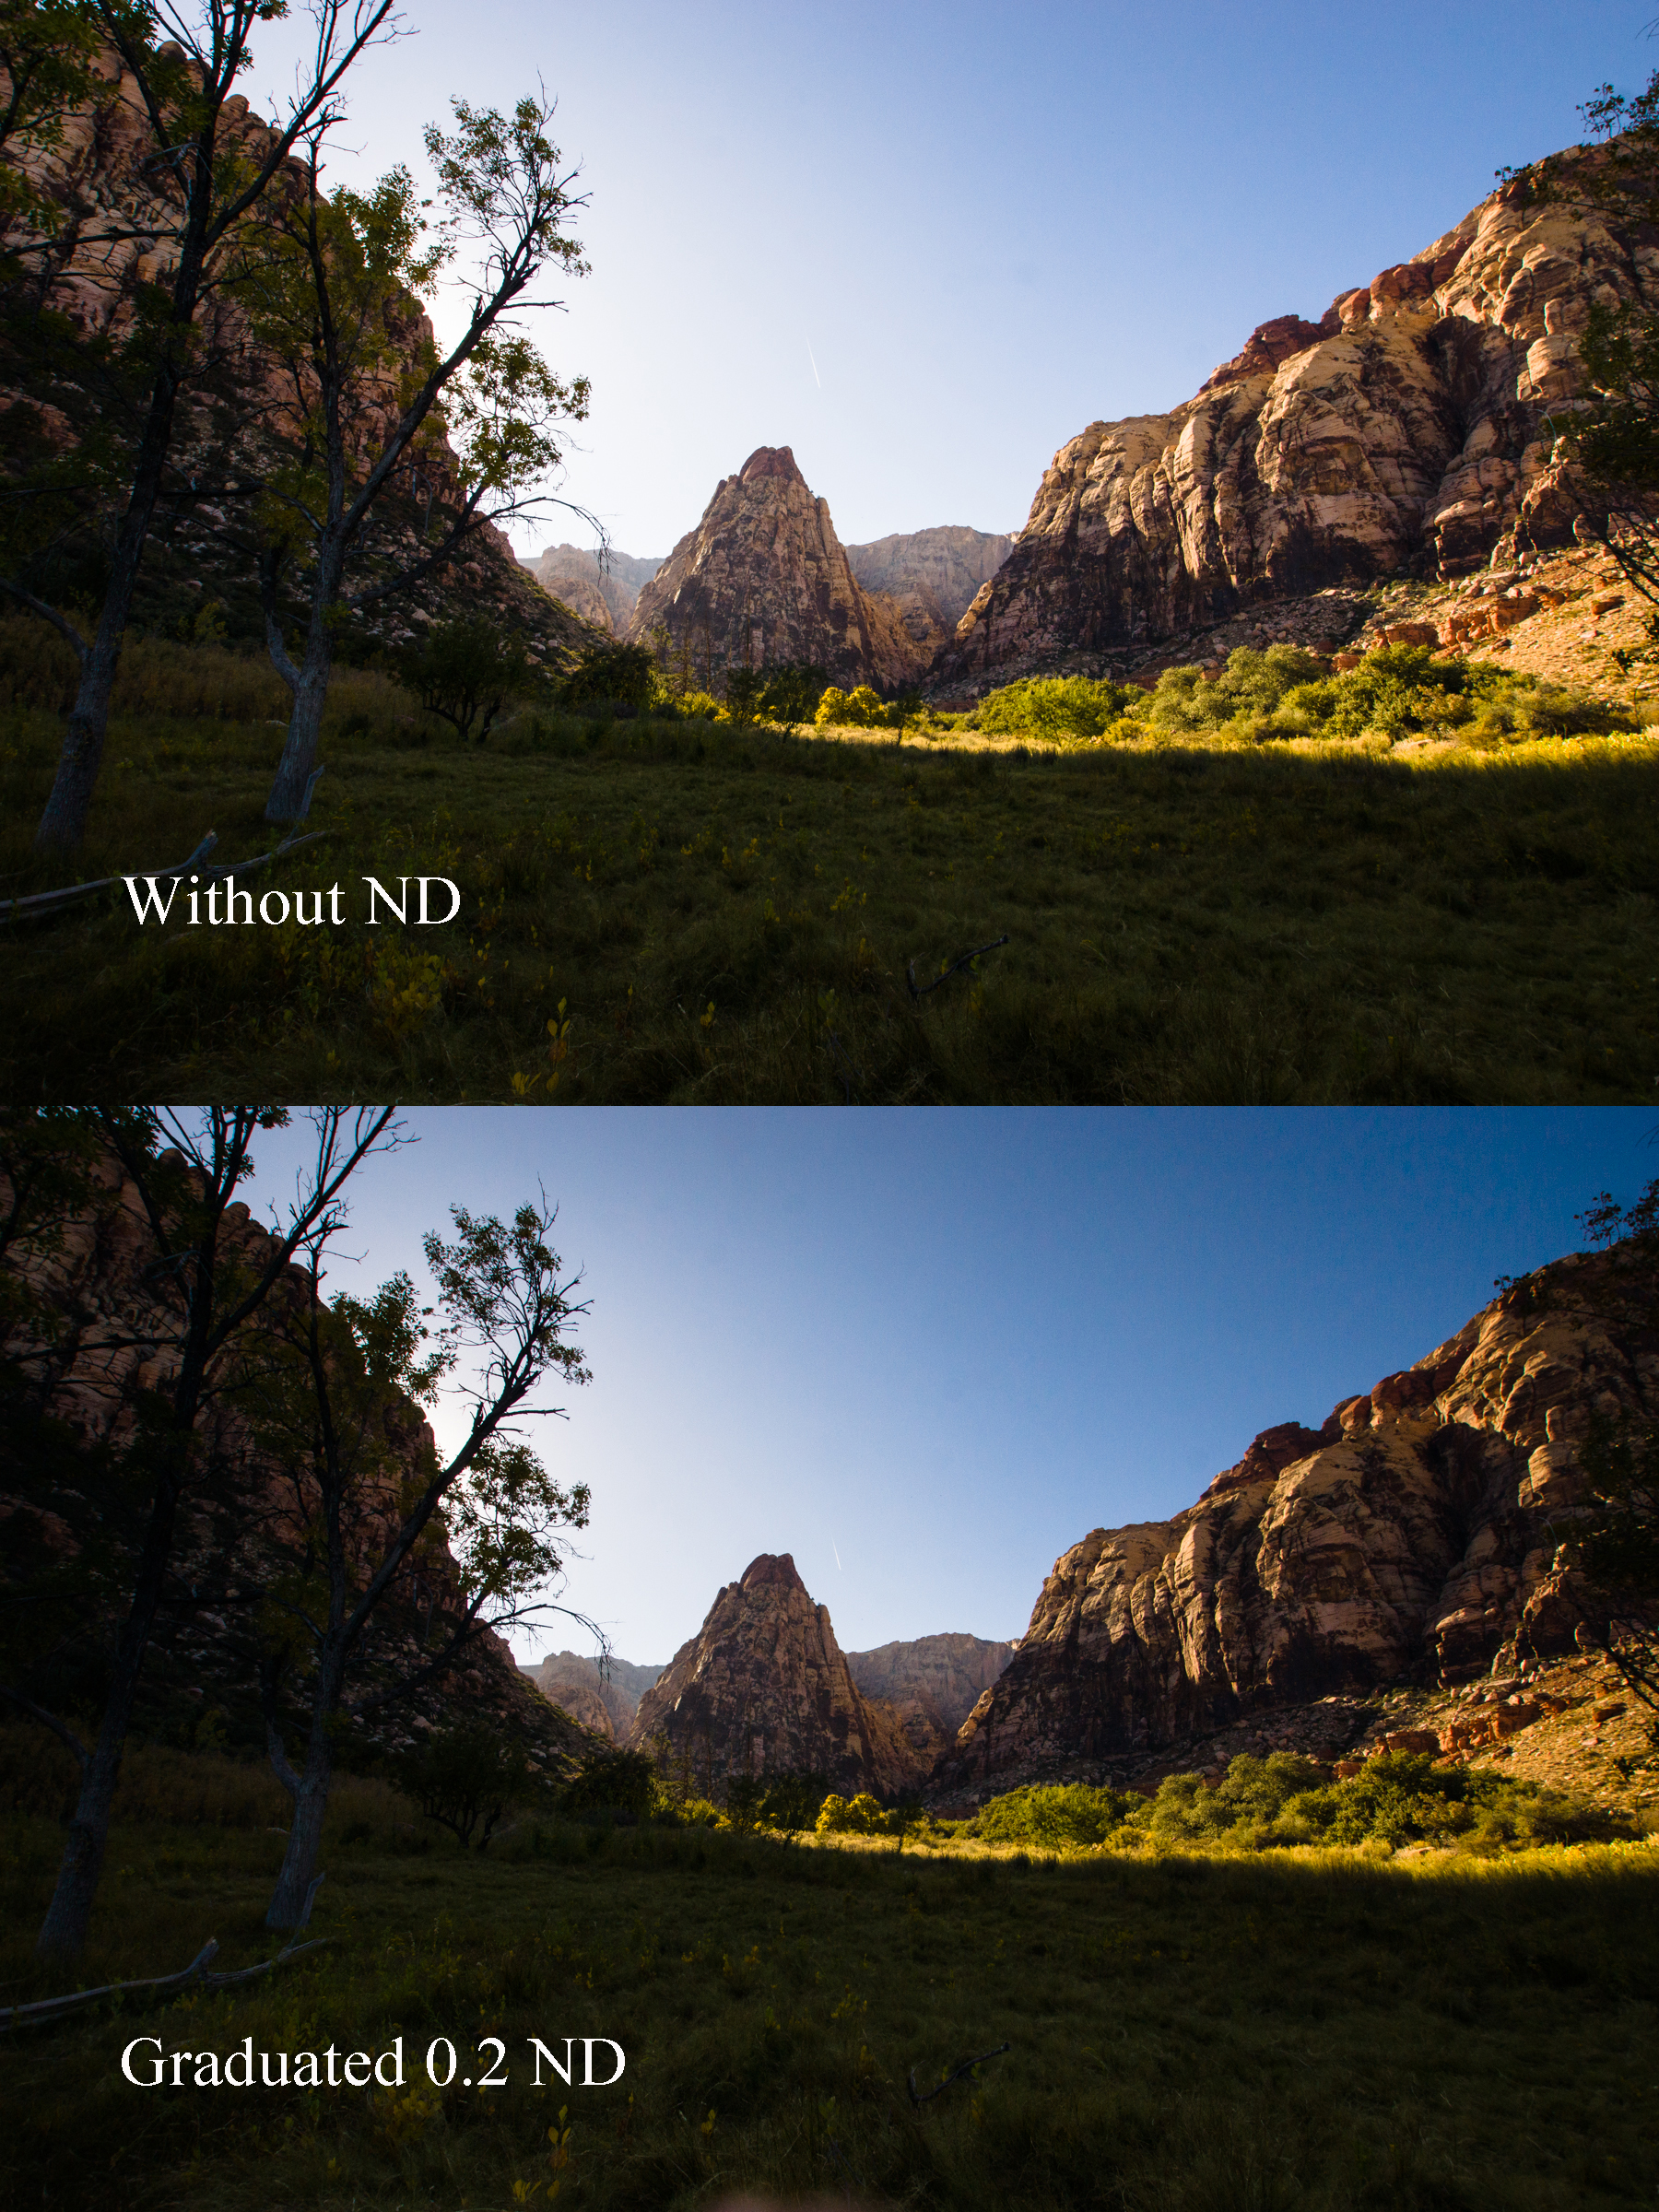
There are also graduated ND filters which are used to darken a bright sky over a landscape so both can be seen. They come in both screw on filters and in a square filter with a holder. Just like the regular ones also come in different strengths.

Here is what I shot today with the girls. Notice both are about even on the ground but with the grad ND the sky looks better and not as blown out. For a scene like this I should have had the grad tilted more toward the sun on the left. I tried it bu…

Here is what I shot today with the girls. Notice both are about even on the ground but with the grad ND the sky looks better and not as blown out. For a scene like this I should have had the grad tilted more toward the sun on the left. I tried it but wasn't paying attention and got my finger in the frame because I was talking to children.

As for removing people from scenes I have pictures of them removed but no before shots. If I go to a populated area where people are moving I will get it. Until then see where an ND might fit into your needs. Now go out and shoot.

~Scott

tags: ND, neutral, density, filter, teaching, camera, education, example, equipment, long exposure, exposure
Sunday 10.15.17
Posted by Scott W Gonzalez
 

Histogram and Perfect Exposure

Good evening,

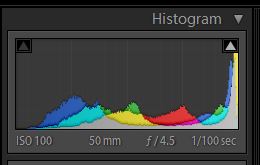
Today I am going to talk about the histogram which is I believe the defining thing for a "perfect exposure." The histogram is a graph of how much brightness vs darkness you have in an image. On the left we have black and on the right we have white, then bottom to top is how much you have in each. Some histograms like below have colors to go along with them and others just have a black and white graph.

Middle Histogram.JPG

Perfect

This is what our histogram would say is a "perfect" exposure. Not that there is anything wrong with it. Notice on the histogram that everything is right in the middle nothing goes all the way off to the sides or the top.

This is what our histogram would say is a "perfect" exposure. Not that there is anything wrong with it. Notice on the histogram that everything is right in the middle nothing goes all the way off to the sides or the top.

Hightlight histogram.JPG

Highlight

Here we have a highlight image. My daughter was sitting in a little alcove to get out of the sun. If you notice on the histogram there is a spike all the way to the right and some even goes off of it. This is called clipping, in this case highlight …

Here we have a highlight image. My daughter was sitting in a little alcove to get out of the sun. If you notice on the histogram there is a spike all the way to the right and some even goes off of it. This is called clipping, in this case highlight clipping, which means there is no image detail in that area it is just white. Generally not a desired characteristic in images. Leaving the image with the highlights shows that it was a really bright day and there was a need to seek shade from the blazing sun. Not "perfect." It works though with what I wanted to express.

Shadow Histogram.JPG

Shadow

Now it is the opposite end, shadow clipping. Parts of the pier have no detail, there is also highlights in this where the sun is. I can brighten it but then I start to get to many highlights, I would prefer to just leave the pier as a silhouette so …

Now it is the opposite end, shadow clipping. Parts of the pier have no detail, there is also highlights in this where the sun is. I can brighten it but then I start to get to many highlights, I would prefer to just leave the pier as a silhouette so that I can retain colors in the sky and the reflection. Again not "perfect." It portrays what I wanted though and the way that I saw it.

The camera wants to make the images be in middle ground. Sometimes that doesn't leave us with an image that portrays the mood or feel of what we see at the moment. So we change it and take control away from the camera. If we are in the semi manual modes then we can use exposure compensation (it looks like a little +/- icon) to make the image our own. or go to full manual and have complete control over the exposure.

In manual if we want it a little darker or brighter we can just make an adjustment to the shutter, aperture, or iso to achieve the desired effect. each one can change the way the picture looks as previously discussed. Now go out and shoot. Enjoy it, experiment.

~Scott

tags: education, exposure, exposure triangle, teaching, learning, histogram, perfect
Sunday 09.17.17
Posted by Scott W Gonzalez
Comments: 1
 

ISO

Good afternoon,

Now I will move onto ISO (International Standards Organization) or ASA (American Standards Association which might be seen in older publications) which is a measurement of how sensitive to light a sensor or film is. I sometimes shoot film still and enjoy it, I even have had my daughters use film.

The ISO can usually be changed in almost any setting on a DSLR type camera, and if I recall quite a few point and shoot cameras as well. Unless it is turned to auto. Auto from my experience doesn't use the whole range that the camera is capable of. I have cameras that are a few years old and they are both capable of 16,000 (more on this in a bit). I don't ever use them at that setting but it is there, I have gone up to 3200 with decent results though. ISO goes up/down in stops, it doubles every time for one full stop. 50, 100, 200, 400, 800, 1600, 3200, etc... from 12800 to 16000 isn't a full stop though and higher end cameras can go in between full stops (64, 120, and so on). If you are in A or S priority then the setting will double or half when decreasing or increasing the ISO in full stops accordingly. 

Some of you might be thinking "why not always use the highest ISO?" Well every increase in ISO adds noise or grain to the image. It is the price that we pay for more light gathering ability. Somethings the noise isn't an issue with (things not needing fine detail, documenting events or just needing to have a photo, night shots) and others it is (wanting fine detail, portraits, stationary items).

I kept the aperture at f5.6 while changing the shutter speed to compensate from 30 seconds at 50 ISO to 1/10 of a second at 16000 ISO. To see the detail lost look at the books and the wood grain. These are 100% crops of the pictures.*I changed it fr…

I kept the aperture at f5.6 while changing the shutter speed to compensate from 30 seconds at 50 ISO to 1/10 of a second at 16000 ISO. To see the detail lost look at the books and the wood grain. These are 100% crops of the pictures.

*I changed it from the previous pictures. I felt these demonstrated the ISO difference better.

The highest acceptable ISO depends on what we are taking pictures of and what we are using the image for. Landscapes low ISOs work well because we usually mount on a tripod for them for sharpness and high dof. Action we want a high ISO to stop the motion and get a sharp stopping of it. Indoor either high ISO or a flash, my personal experience is that an image taken at a get together is not usually going to be blown up to a large enough size to make higher ISO degrade the print.


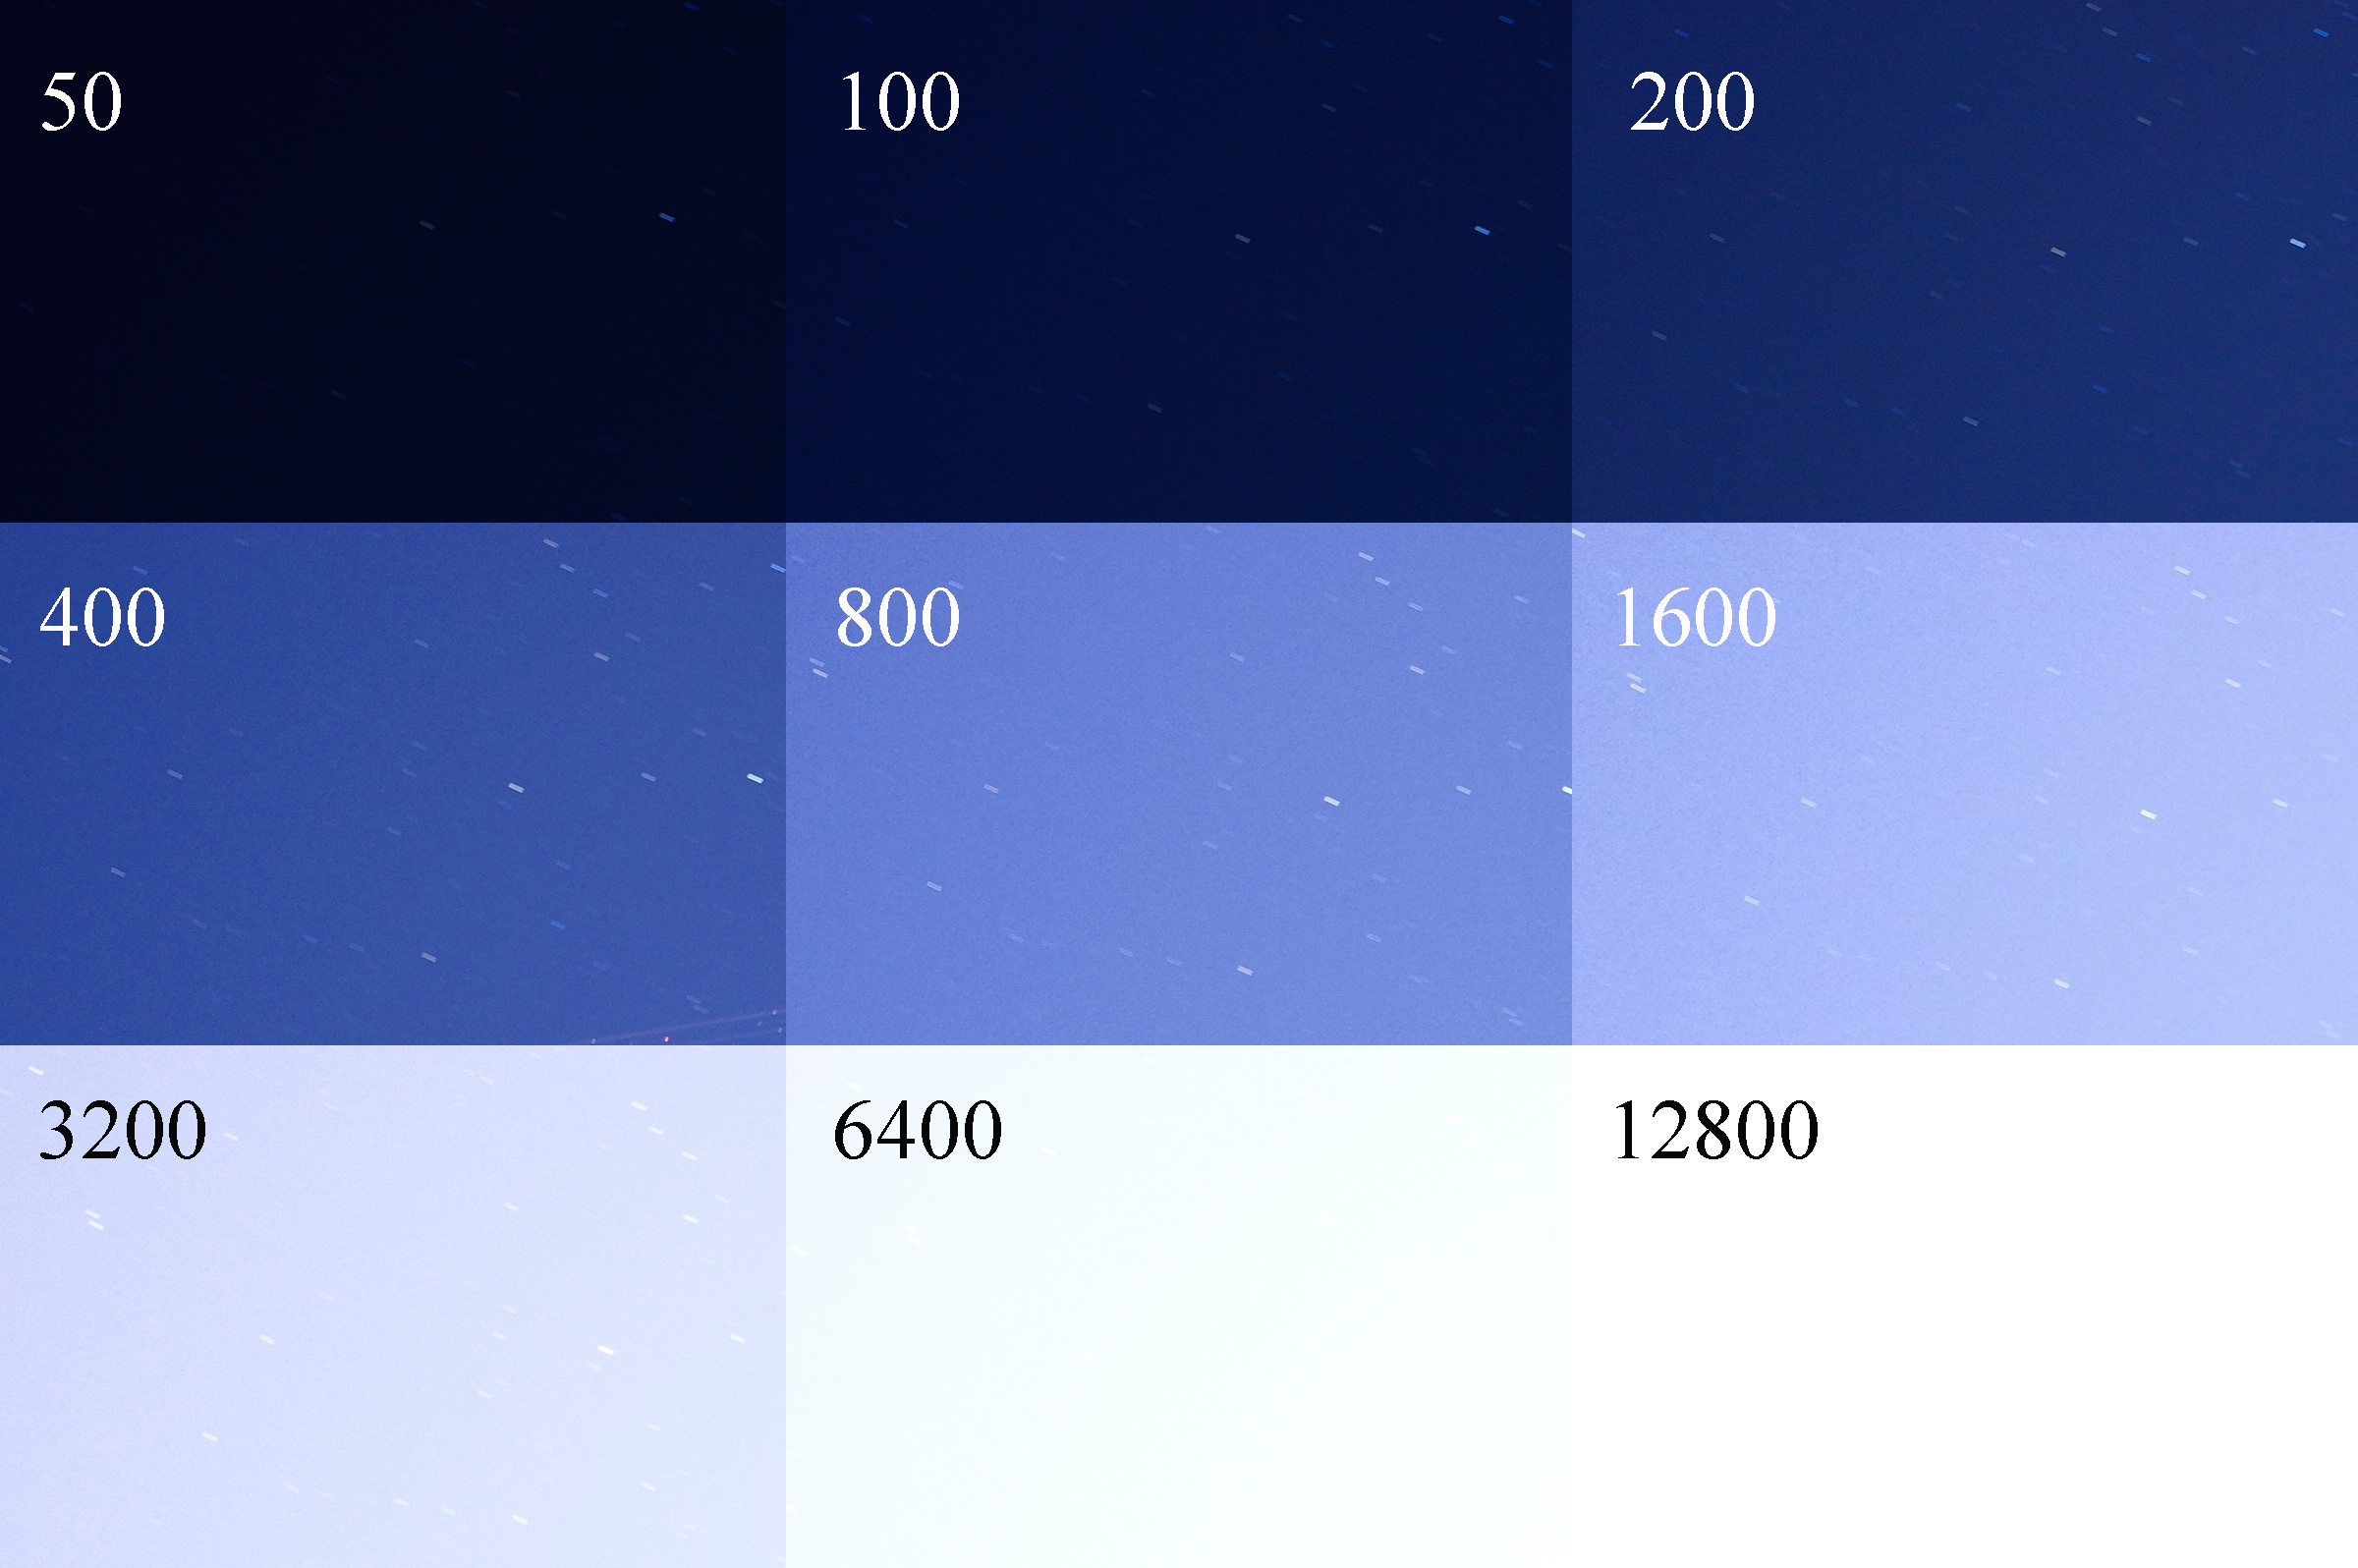
I kept the aperture at f2.8 and the shutter at 30 seconds, the ISO was changed to show the difference between the light sensitivity. More stars can be seen until it gets blocked out by ambient light. At 400 there was a plane flying through the frame…

I kept the aperture at f2.8 and the shutter at 30 seconds, the ISO was changed to show the difference between the light sensitivity. More stars can be seen until it gets blocked out by ambient light. At 400 there was a plane flying through the frame.

*I changed the image to 100% crops of the upper left corner so the stars would be more visible.

So far we have covered the points on the exposure triangle, next week I think that we should move onto the Histogram which more or less defines a "perfect exposure." Go on out and shoot, experiment with new knowledge. Change your settings and see what you can do.

~Scott

tags: film, ISO, exposure triangle, adjustment, exposure, education, learning, example, teaching, ASA
Sunday 09.10.17
Posted by Scott W Gonzalez
 

Shutter Priority

Good Evening,

Shutter priority is not one that I use often. There is nothing wrong with it I just never really used it. After taking this series of photos I will make an effort to use it. I have seen the times that it could be useful. Such as when being more worried about stopping motion in the image as opposed to having a certain amount of the photo in focus. You control the shutter speed and ISO then the camera sets the aperture (or tries to within the lens limits) to what would make a "perfect" aperture using the exposure triangle.

If you are taking pictures of cars in motion, people running or playing sports, you have an artistic idea that has some motion blur and you want to control how much is blurred, you are trying to make a busy place look empty, taking pictures of fans, etc, then this would probably be the way to go. It can be used for all of those and more.

Shutter.jpg

These images were taken at 800 iso with a tripod mounted camera. The first was and last images had a blinking aperture which means each was outside of the "perfect" exposure. 1/640 sec was a stop below what the aperture could adjust for and 1/2 second was a stop above. If you notice the first one is dark compared to the others and the last is brighter. Again we can see the triangle at work in these captures. For each stop (keep in mind these are full stops) the the shutter speed changes the aperture changes one stop too. I know that Sony and Canon have the option, not sure about Nikon I haven't used them enough, to change the stop adjustment to either 1/3 stop or 1/2 stop when changing the shutter speed or aperture. I hope this collage provides a good example of shutter speed adjustments. Now go out and shoot.

~Scott

tags: shutter, speed, adjustment, priority, exposure triangle, exposure, teaching, learning, example, collage
Sunday 09.03.17
Posted by Scott W Gonzalez
 

Aperture priority

Good Evening,

I figured that I would take a step into mode dial settings. I was discussing it with a fellow patron of the B&B the Wife and I stayed at to see the eclipse. He asked for some pointers and I gave him what I could in the short time we saw each other. The discussion went to the mode dial and how to use it.

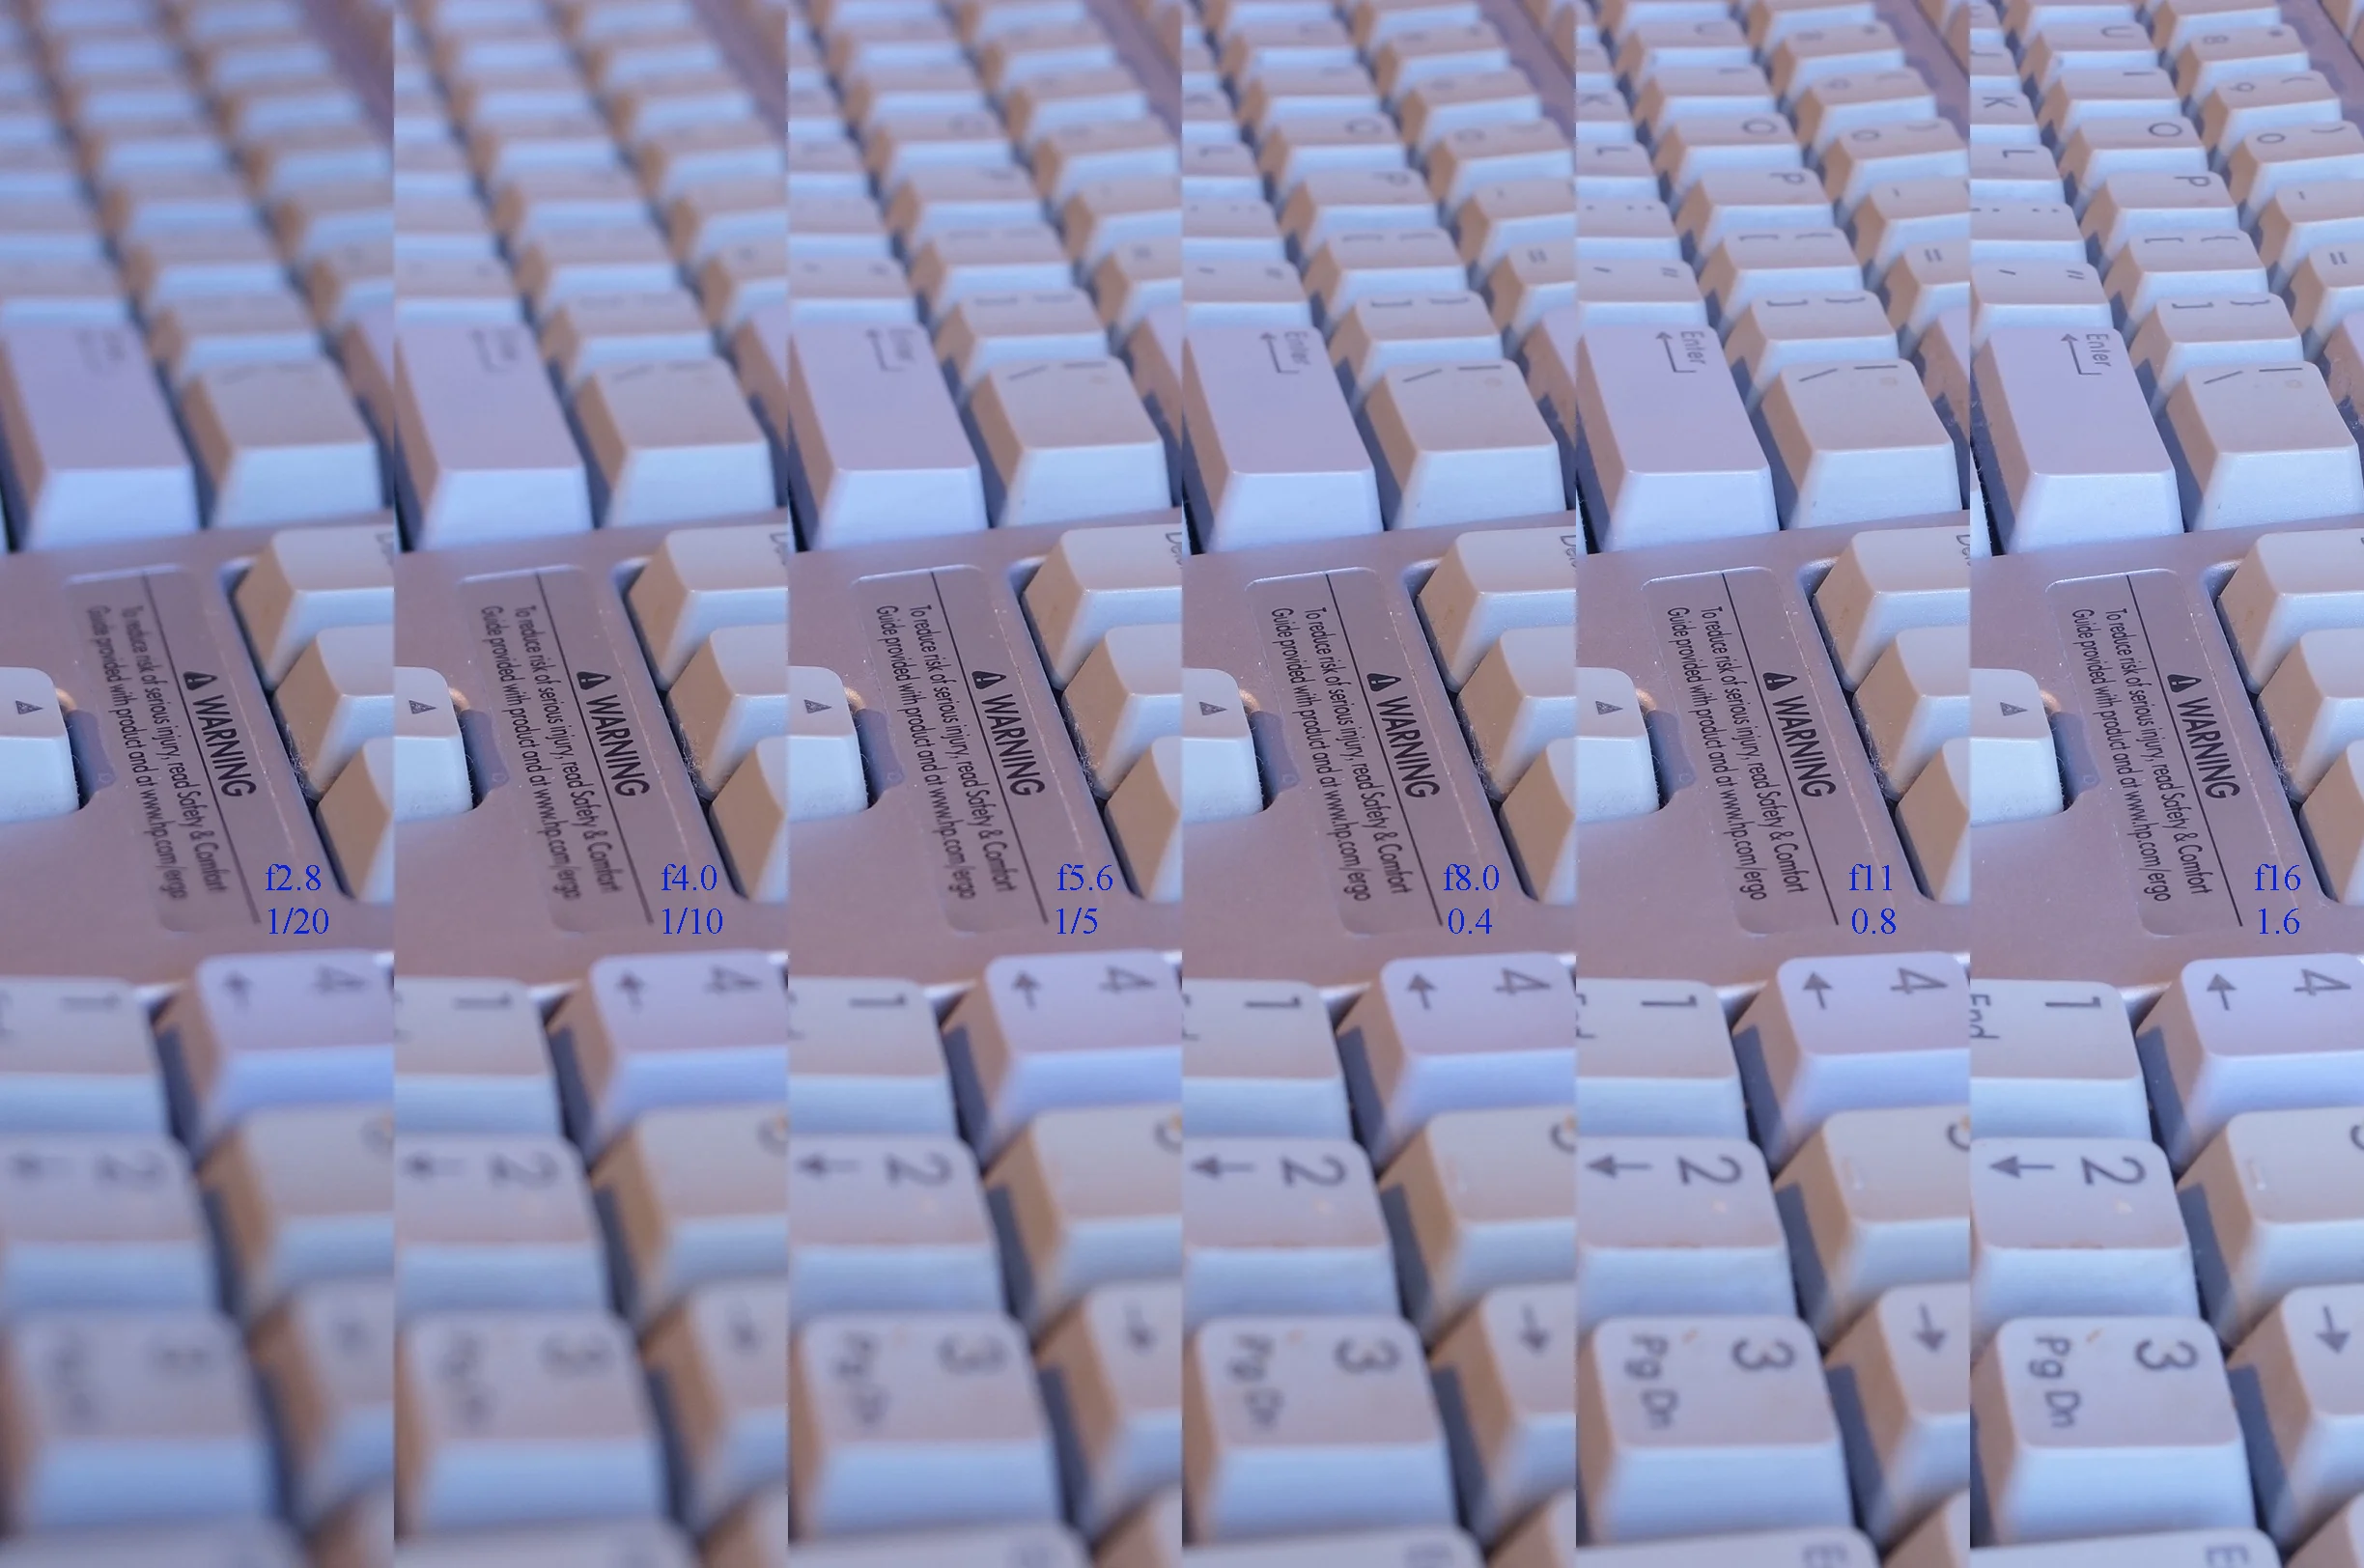
Most of the time I use Aperture priority (A or Av). I like to have control of depth of field. This is again a personal preference, and just one corner of the triangle. If it doesn't work for me then I usually jump to Manual. I put together this image to illustrate the difference.

Aperture.jpg

All were shot at 400 iso in jpeg from an a57 with a 28mm lend mounted on a small tripod. Each time I went up a full stop (smaller number smaller in focus area) in the aperture and in turn the shutter went up a full stop too, to compensate for the light change. The difference between all of them is how much of the keyboard is in focus. The aperture controls depth of field and is a great tool to isolate what we want in focus in an image. It is also good for low light situations as well. If you are in one you can open it wide which allows more light in a shorter period of time. Such as a birthday party when the candles are lighting up a face, with a wide aperture you can have other people blur away if you know what you are doing. Go out and shoot.

~Scott

tags: aperture, exposure, exposure triangle, education, example, teaching, learning, shutter
Sunday 08.27.17
Posted by Scott W Gonzalez
 

Exposure Triangle

Good Morning,

The exposure triangle. It seems like a simple concept if you understand some photography. It starts off with "perfect" exposure in the middle, ISO on one corner, shutter speed on another, and aperture on the last. Showing that it you change one it has an effect on the other ones to maintain the "perfect" exposure in the middle. If we change the shutter speed one stop we can either change the ISO 1 stop or the aperture 1 stop, or a combination ISO 1/3 and aperture 2/3 and so forth.

There have been many alliterations of this. I am going to use my own. Imagine cooking an egg. Sunny side up is a "perfect" exposure, with the fire being the aperture, time being the shutter speed, and the pan the ISO. If we have a small fire (small aperture, high f stop), then we would have to either more the pan closer to the fire (increase the ISO) or cook it for longer (keep the shutter open for longer) to cook the "perfect" egg, if we didn't change something then the egg would be under cooked (underexposed) and we risk getting salmonella. Now if we have a large fire (large aperture, small f stop), then we could move the pan, or we could cook the egg for a shorter period of time. If we didn't change something then the egg would be burnt (overexposed). I could go on all day typing each option changing and the others but I am not going to, I think that you probably get it with those two.

After understanding it you can use it to take better pictures that are outside of the "perfect" exposure. Going back to the egg story, some people want their eggs runny, others like them a bit dry. Is either way wrong? No it is a personal preference. The "perfect" exposure doesn't have leeway for those preferences. That is a story for another day though. So go out and shoot.

~Scott

tags: exposure triangle, education, exposure, teaching, learning, speed, shutter, adjustment, aperture, ISO
Thursday 08.17.17
Posted by Scott W Gonzalez
 

Powered by Squarespace.