Good morning,
So a while back I went hiking with my daughters in Zion National Park, we completed the Canyon Overlook Trail. Impressive for a 5 and 7 year old. While looking over the Canyon I noticed the road and thought to myself “that would make a great night shot with car trails.” Since then I have seen pictures of it on photo sharing sites, and my first thought was “damnit I was going to do that.” In October I went camping and got a chance to take one myself. I feel that it turned out pretty decent.

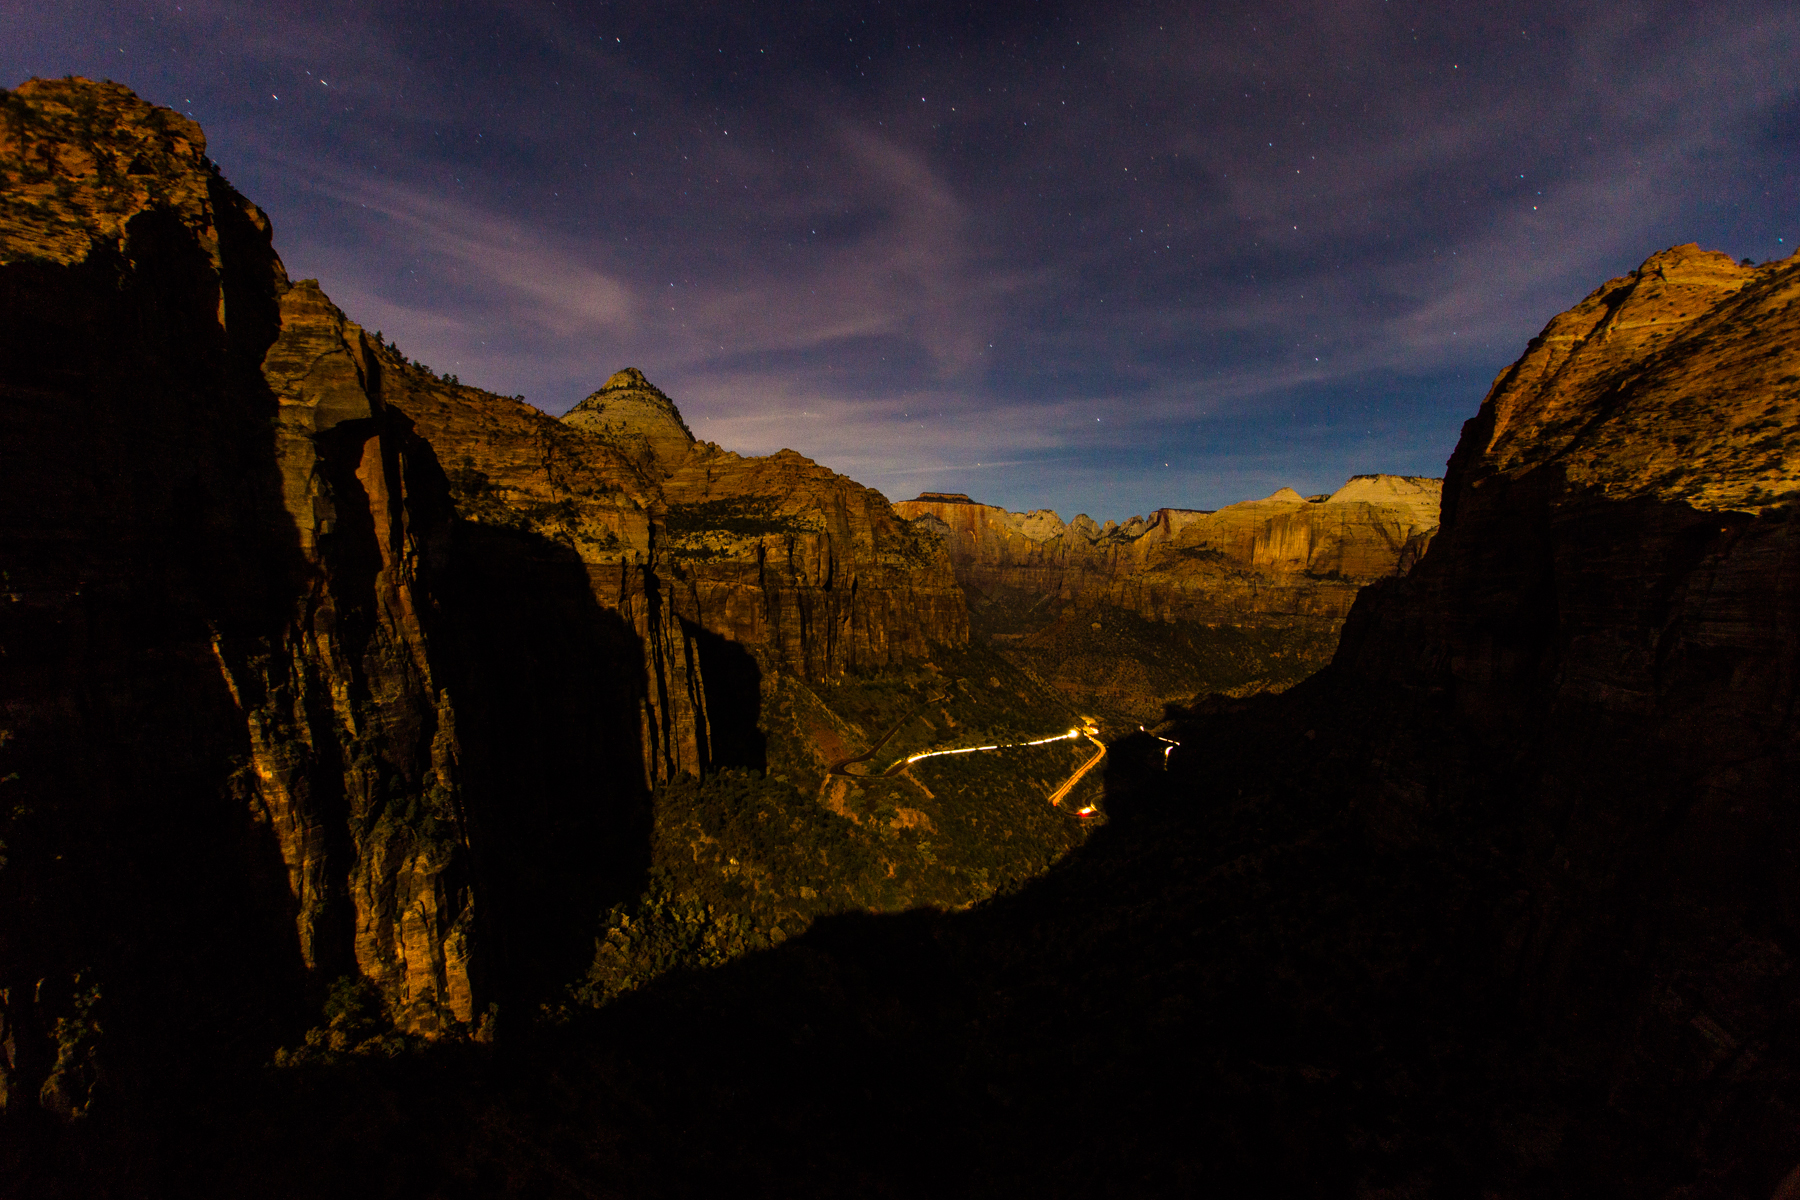
It was a near full moon so the canyon was visible except where the shadow was.
So I went up there with my friend Drew. Sadly I forgot my remote so I was left with 30 second exposures with a self timer. Not exactly what I wanted but it worked. Around 40 pictures were taken and the cars were not cooperating. With the bright moon and about an hour of shooting the shadow of the mountain had moved from covering nearly half of the drive to covering about a quarter of it. So I chose the last shot to use as the background or base layer.
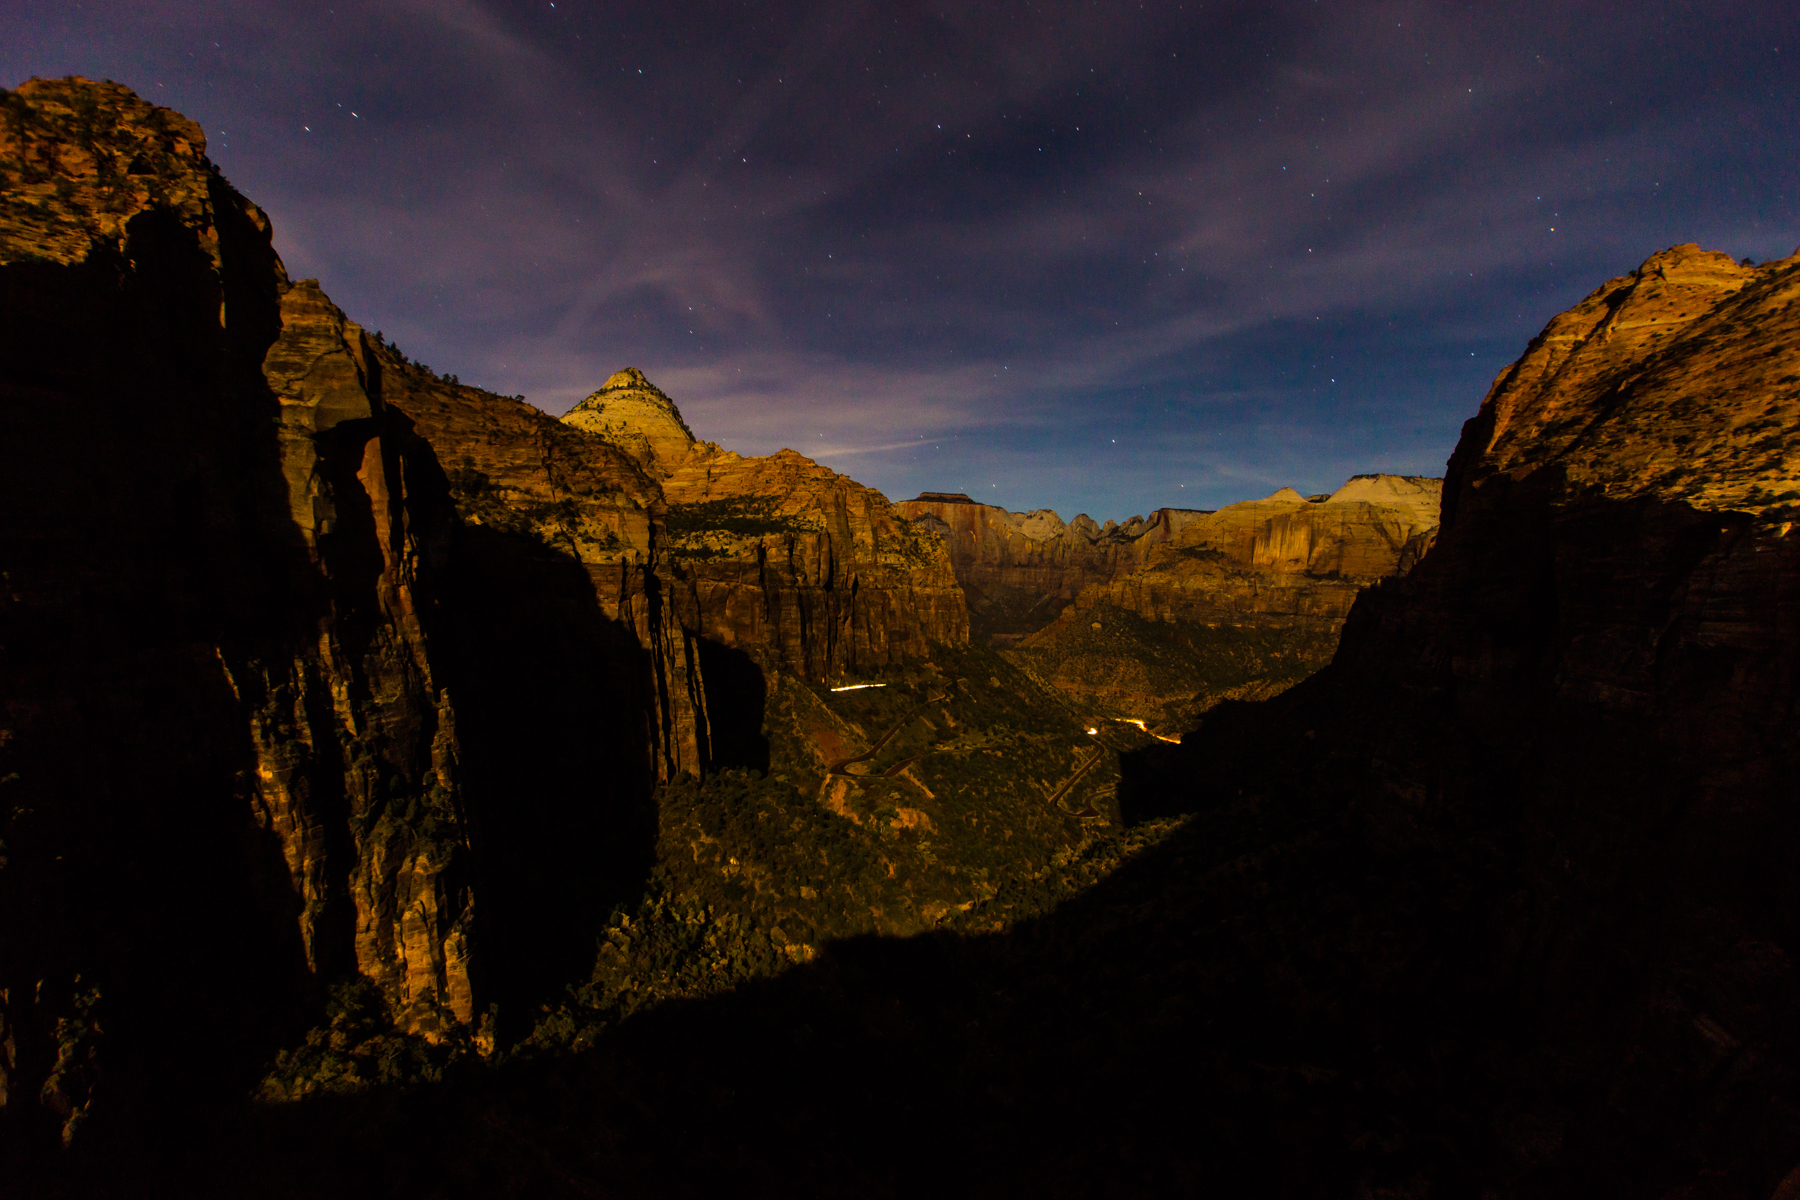
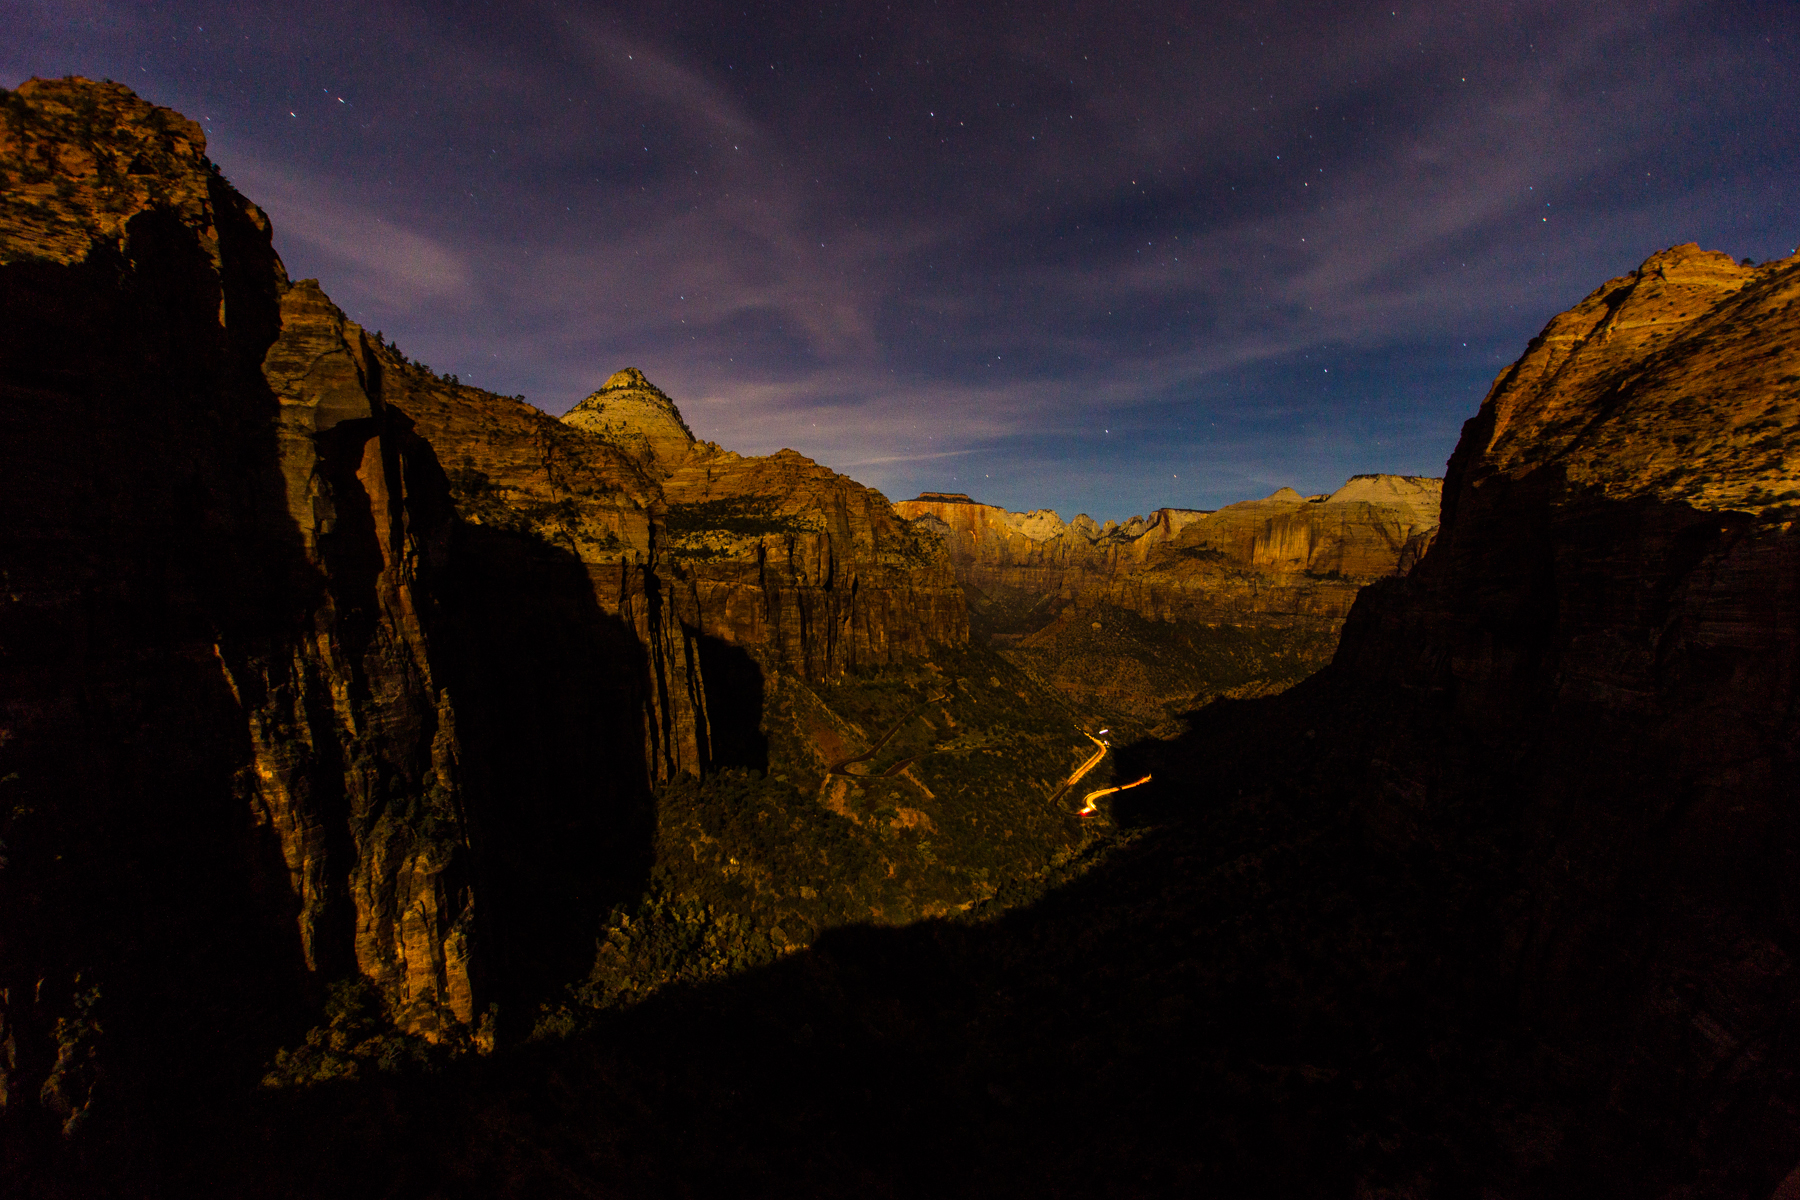
Here we have the base layer.
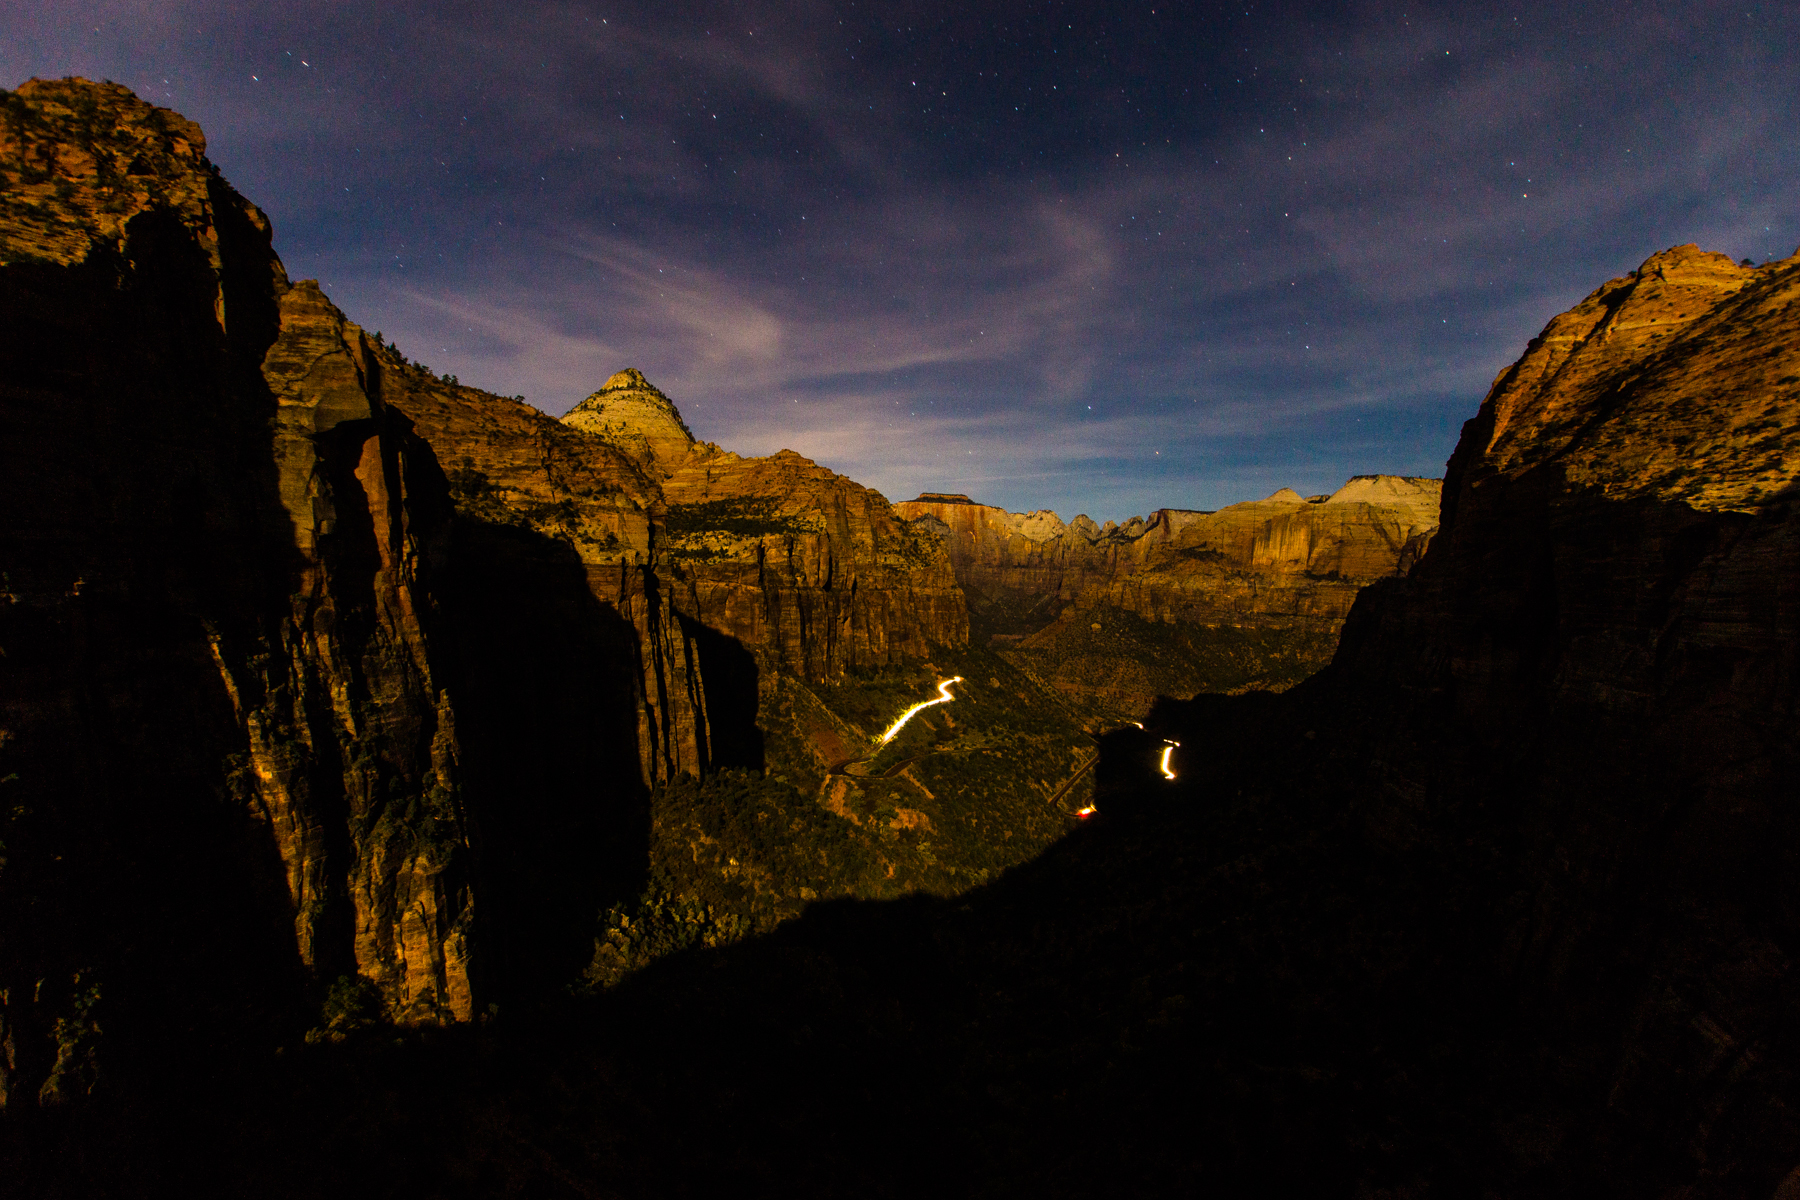
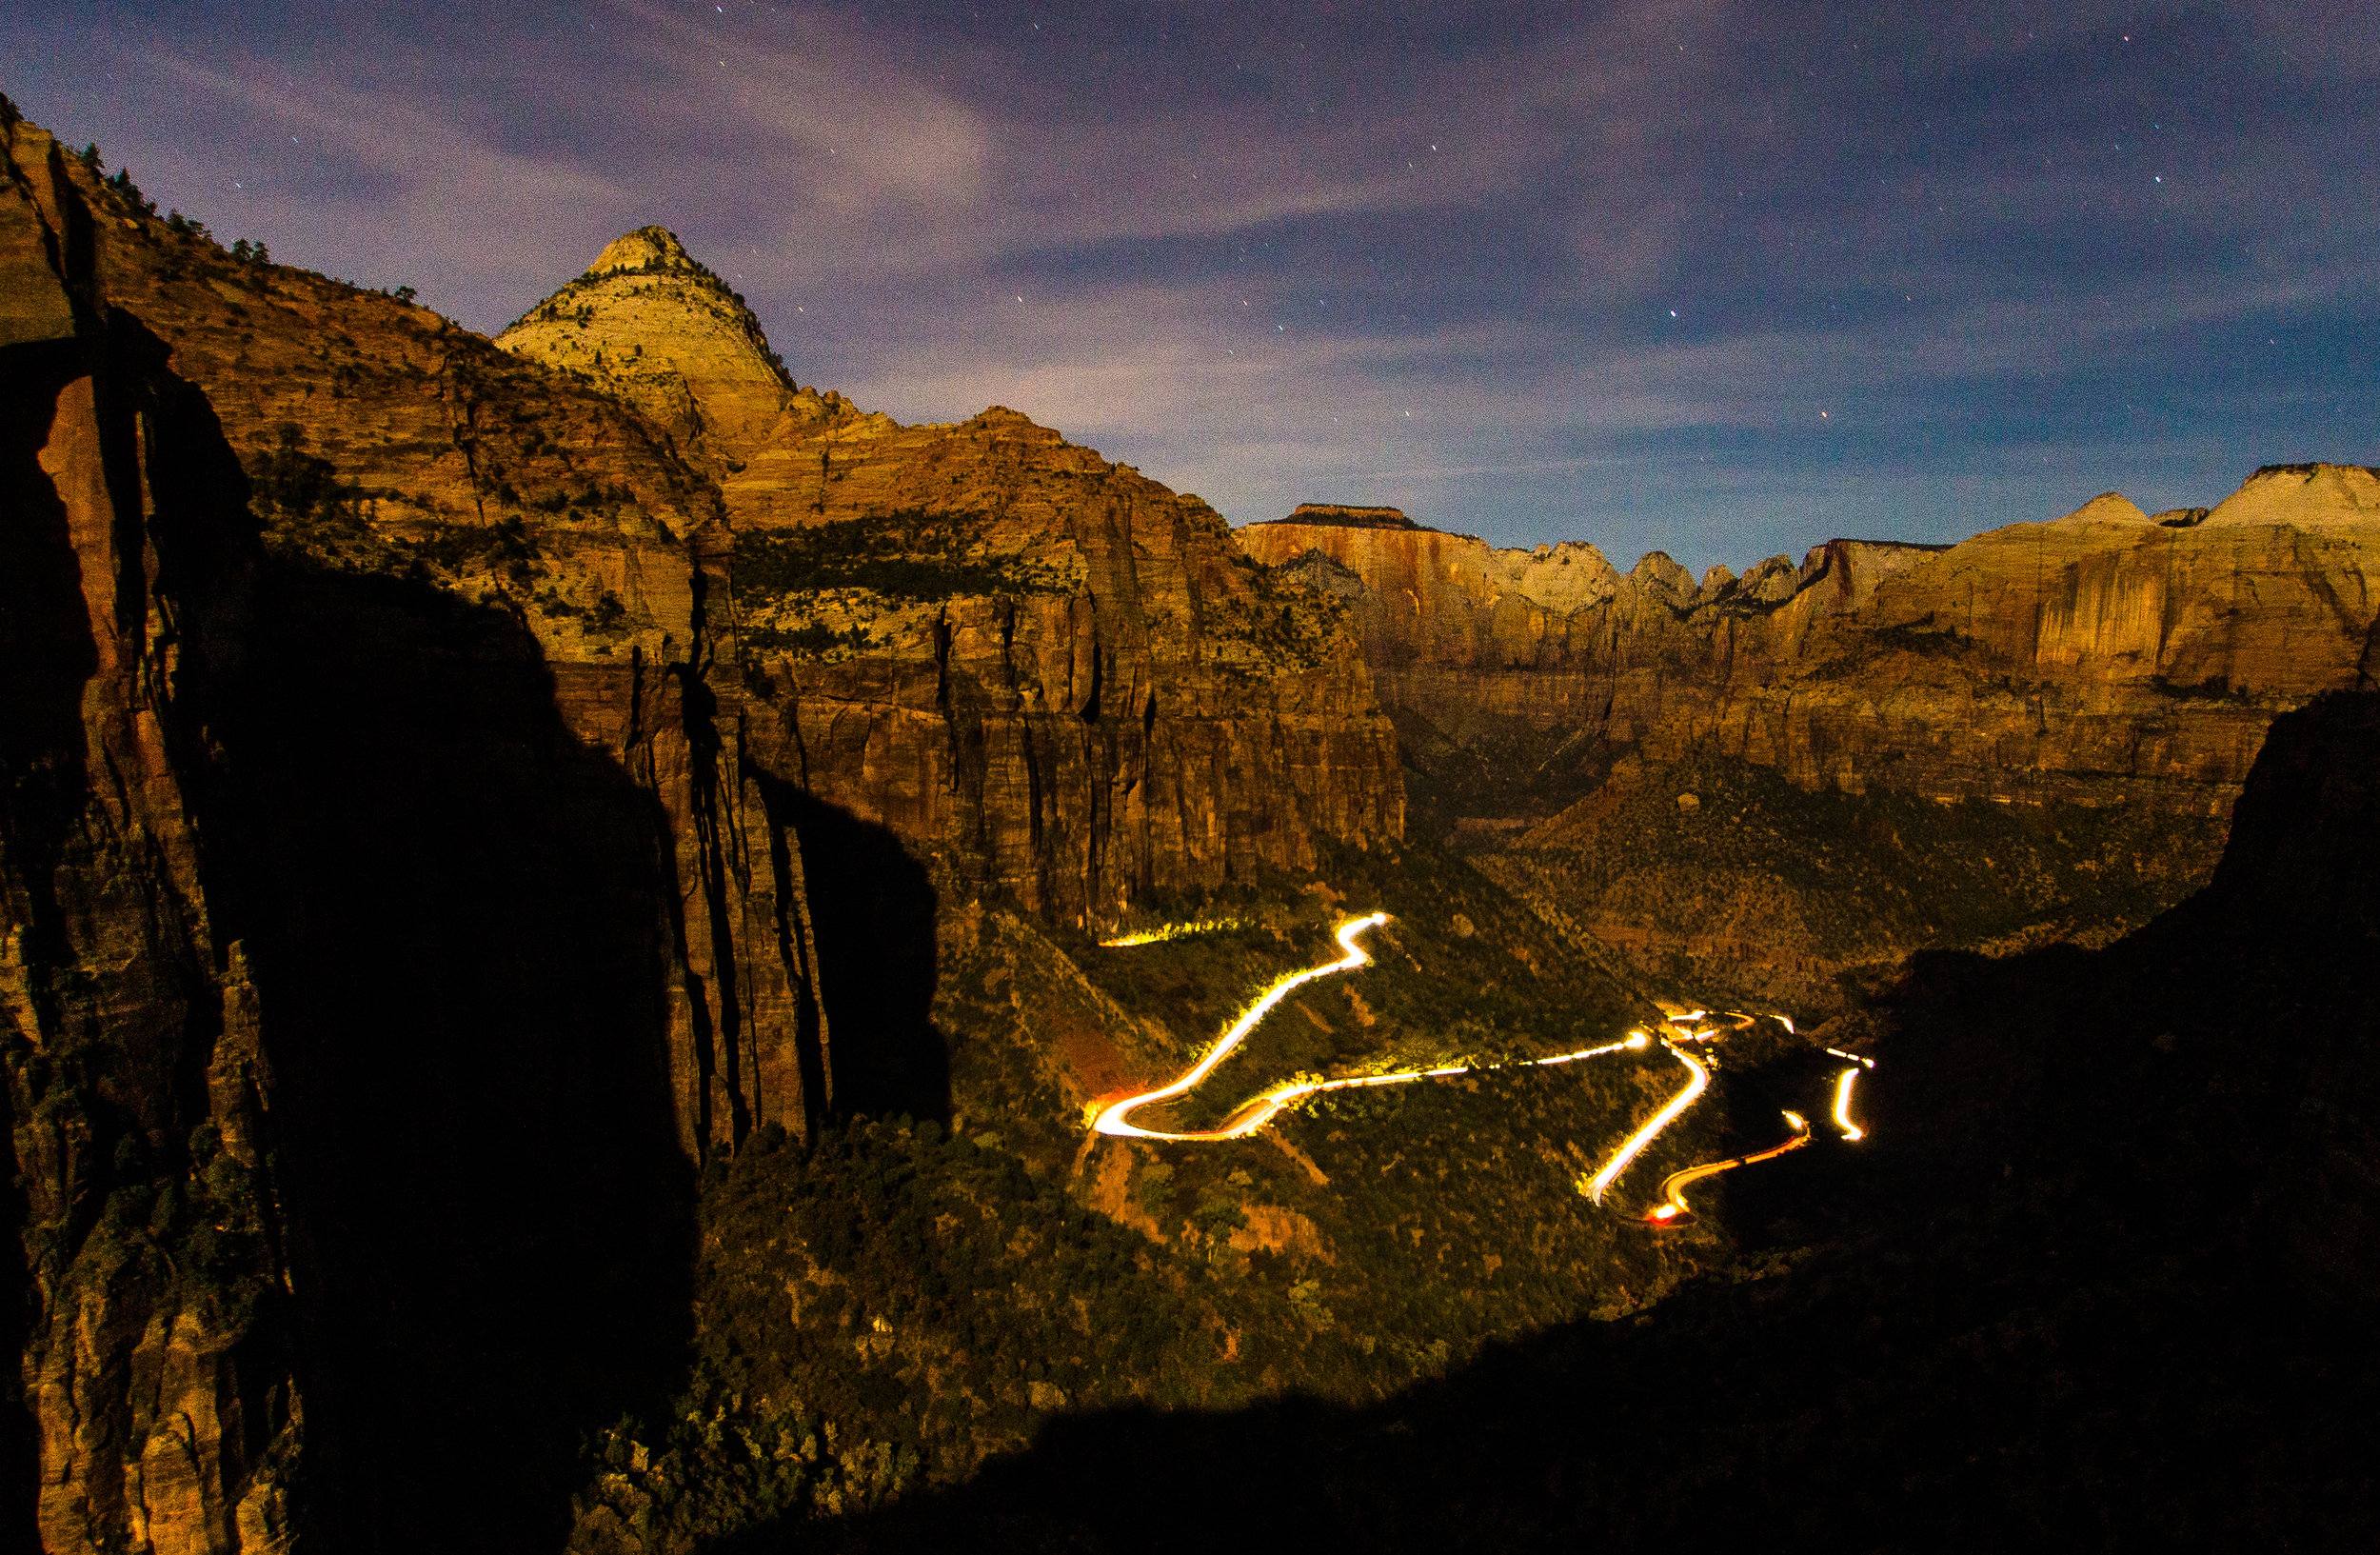
Then I added the other images onto it complete the light trail for the most part. Below are 4 of the images that I took.
So I cut and pasted each image onto the base layer and chose “lighten” in the blending option for each. I wanted the sky, canyon, and mountains to just be one image. Layer masks is the way to go to complete that task. In the “Layers” window there is a button that is a square with a circle in it called “Add Layer Mask.” Clicking it seems to do nothing except adding a white square next to the layer that you are on (It doesn’t work on the background layer). If we hit the “B” button then we can paint the layer and it will either hide of show what is beneath the layer we are working on. To toggle back and forth between hiding and revealing hit “X.” Alternatively if you want to see through most of the layer below hold “Alt” while clicking the Add layer mask button. You will have a box that is black next to the layer.
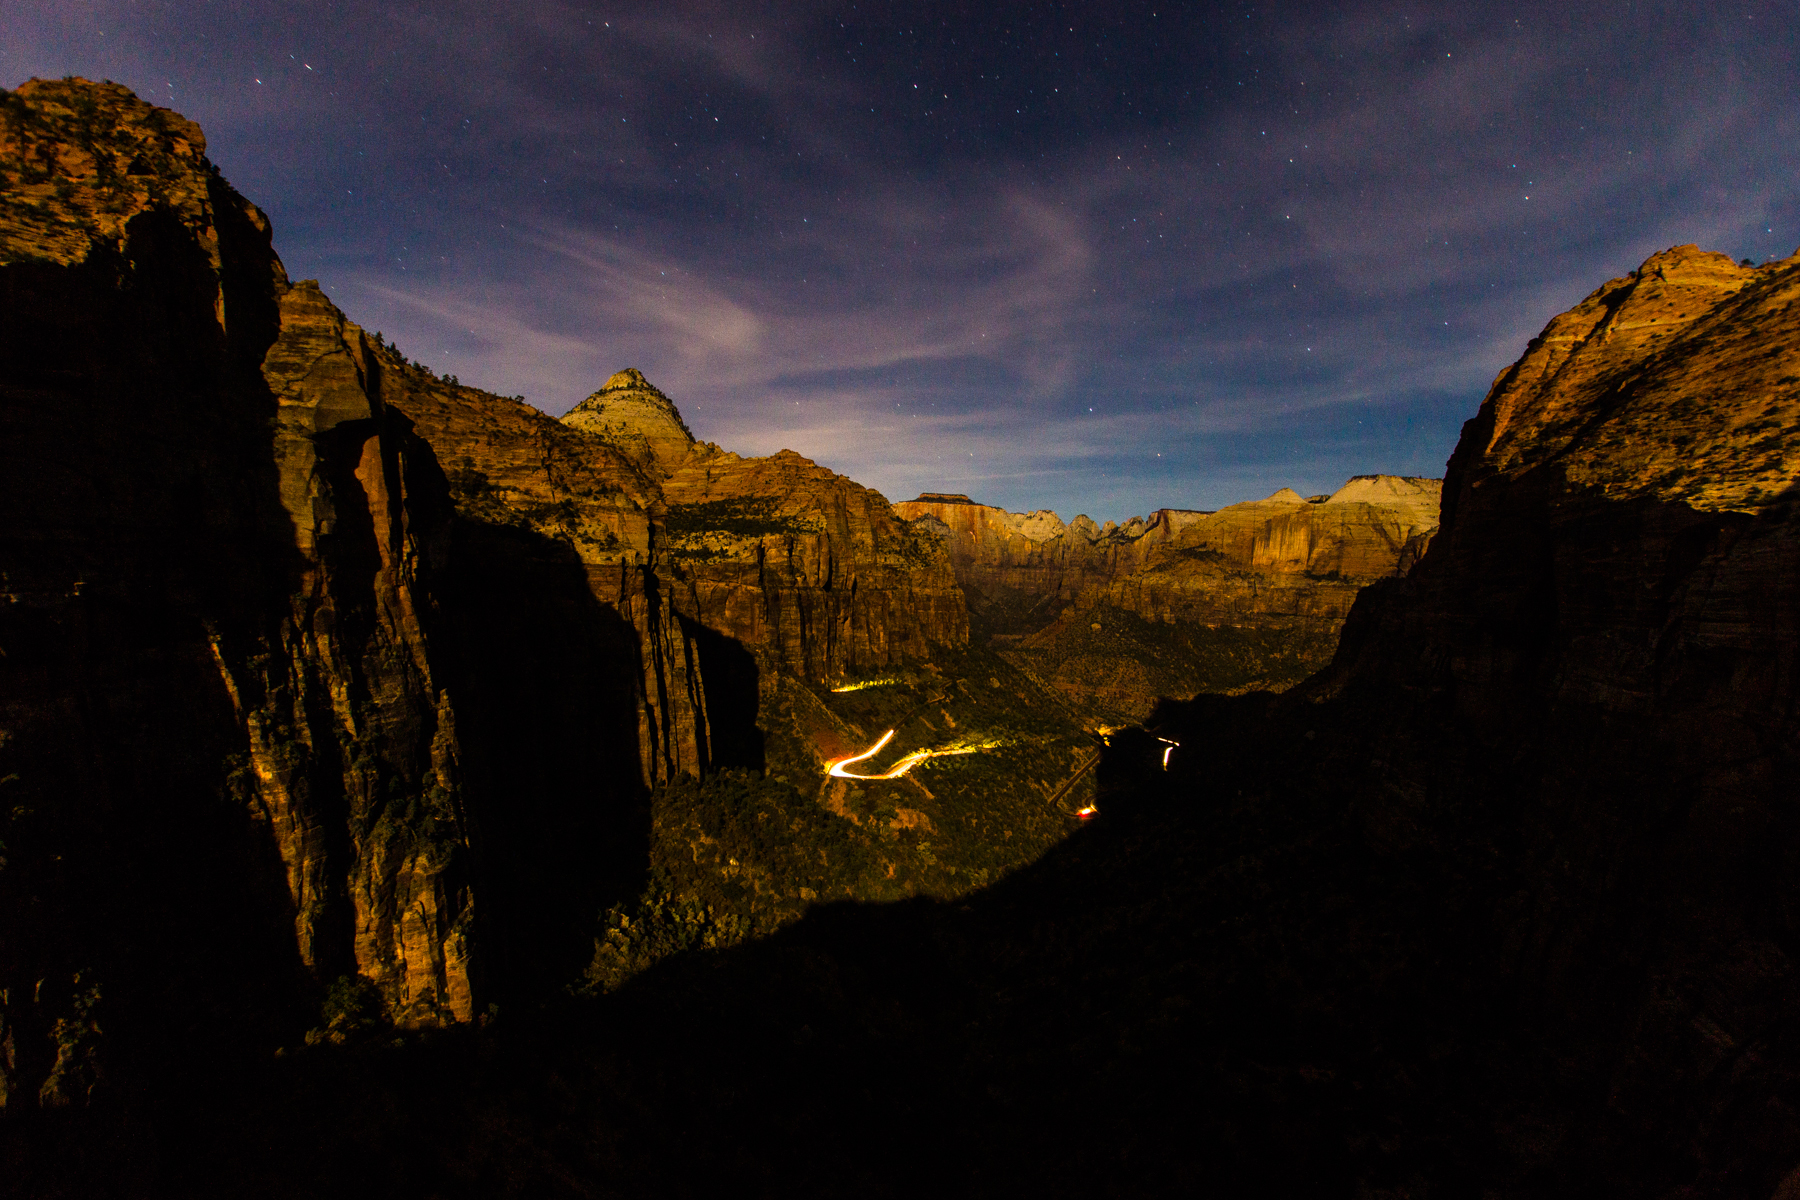
To sum up. I cut and pasted the pictures onto the background image, changed them to lighten, added layer masks, then painted the masks to keep the car trails that I wanted. Leading to this image below.
Photoshop is daunting with all of it’s options of what to do. I still only know maybe a quarter of what it can do. Layers and masks are a big part of what I use it for and from talking to other photographers it is a major thing to know and understand. I hope this helps you on your path to understanding photoshop.
~Scott