• Photography
  • About
  • Contact
  • Light Writing

Scott W Gonzalez

  • Photography
  • About
  • Contact
  • Light Writing

Cropping a Full Frame

Good morning,

I just found out that my A7iii which is a full frame camera can be used as a crop sensor camera with a camera setting. It doesn’t maintain the 6000x4000 pixels it becomes a 10mp image at 3936x2624 pixels. The images appear to be the same whether I crop them to 10mp or if I just take them at 10mp. So a 300mm lens will become a 450mm. I already wrote about crop vs full frame here Crop Sensor vs Full Frame — Scott W Gonzalez

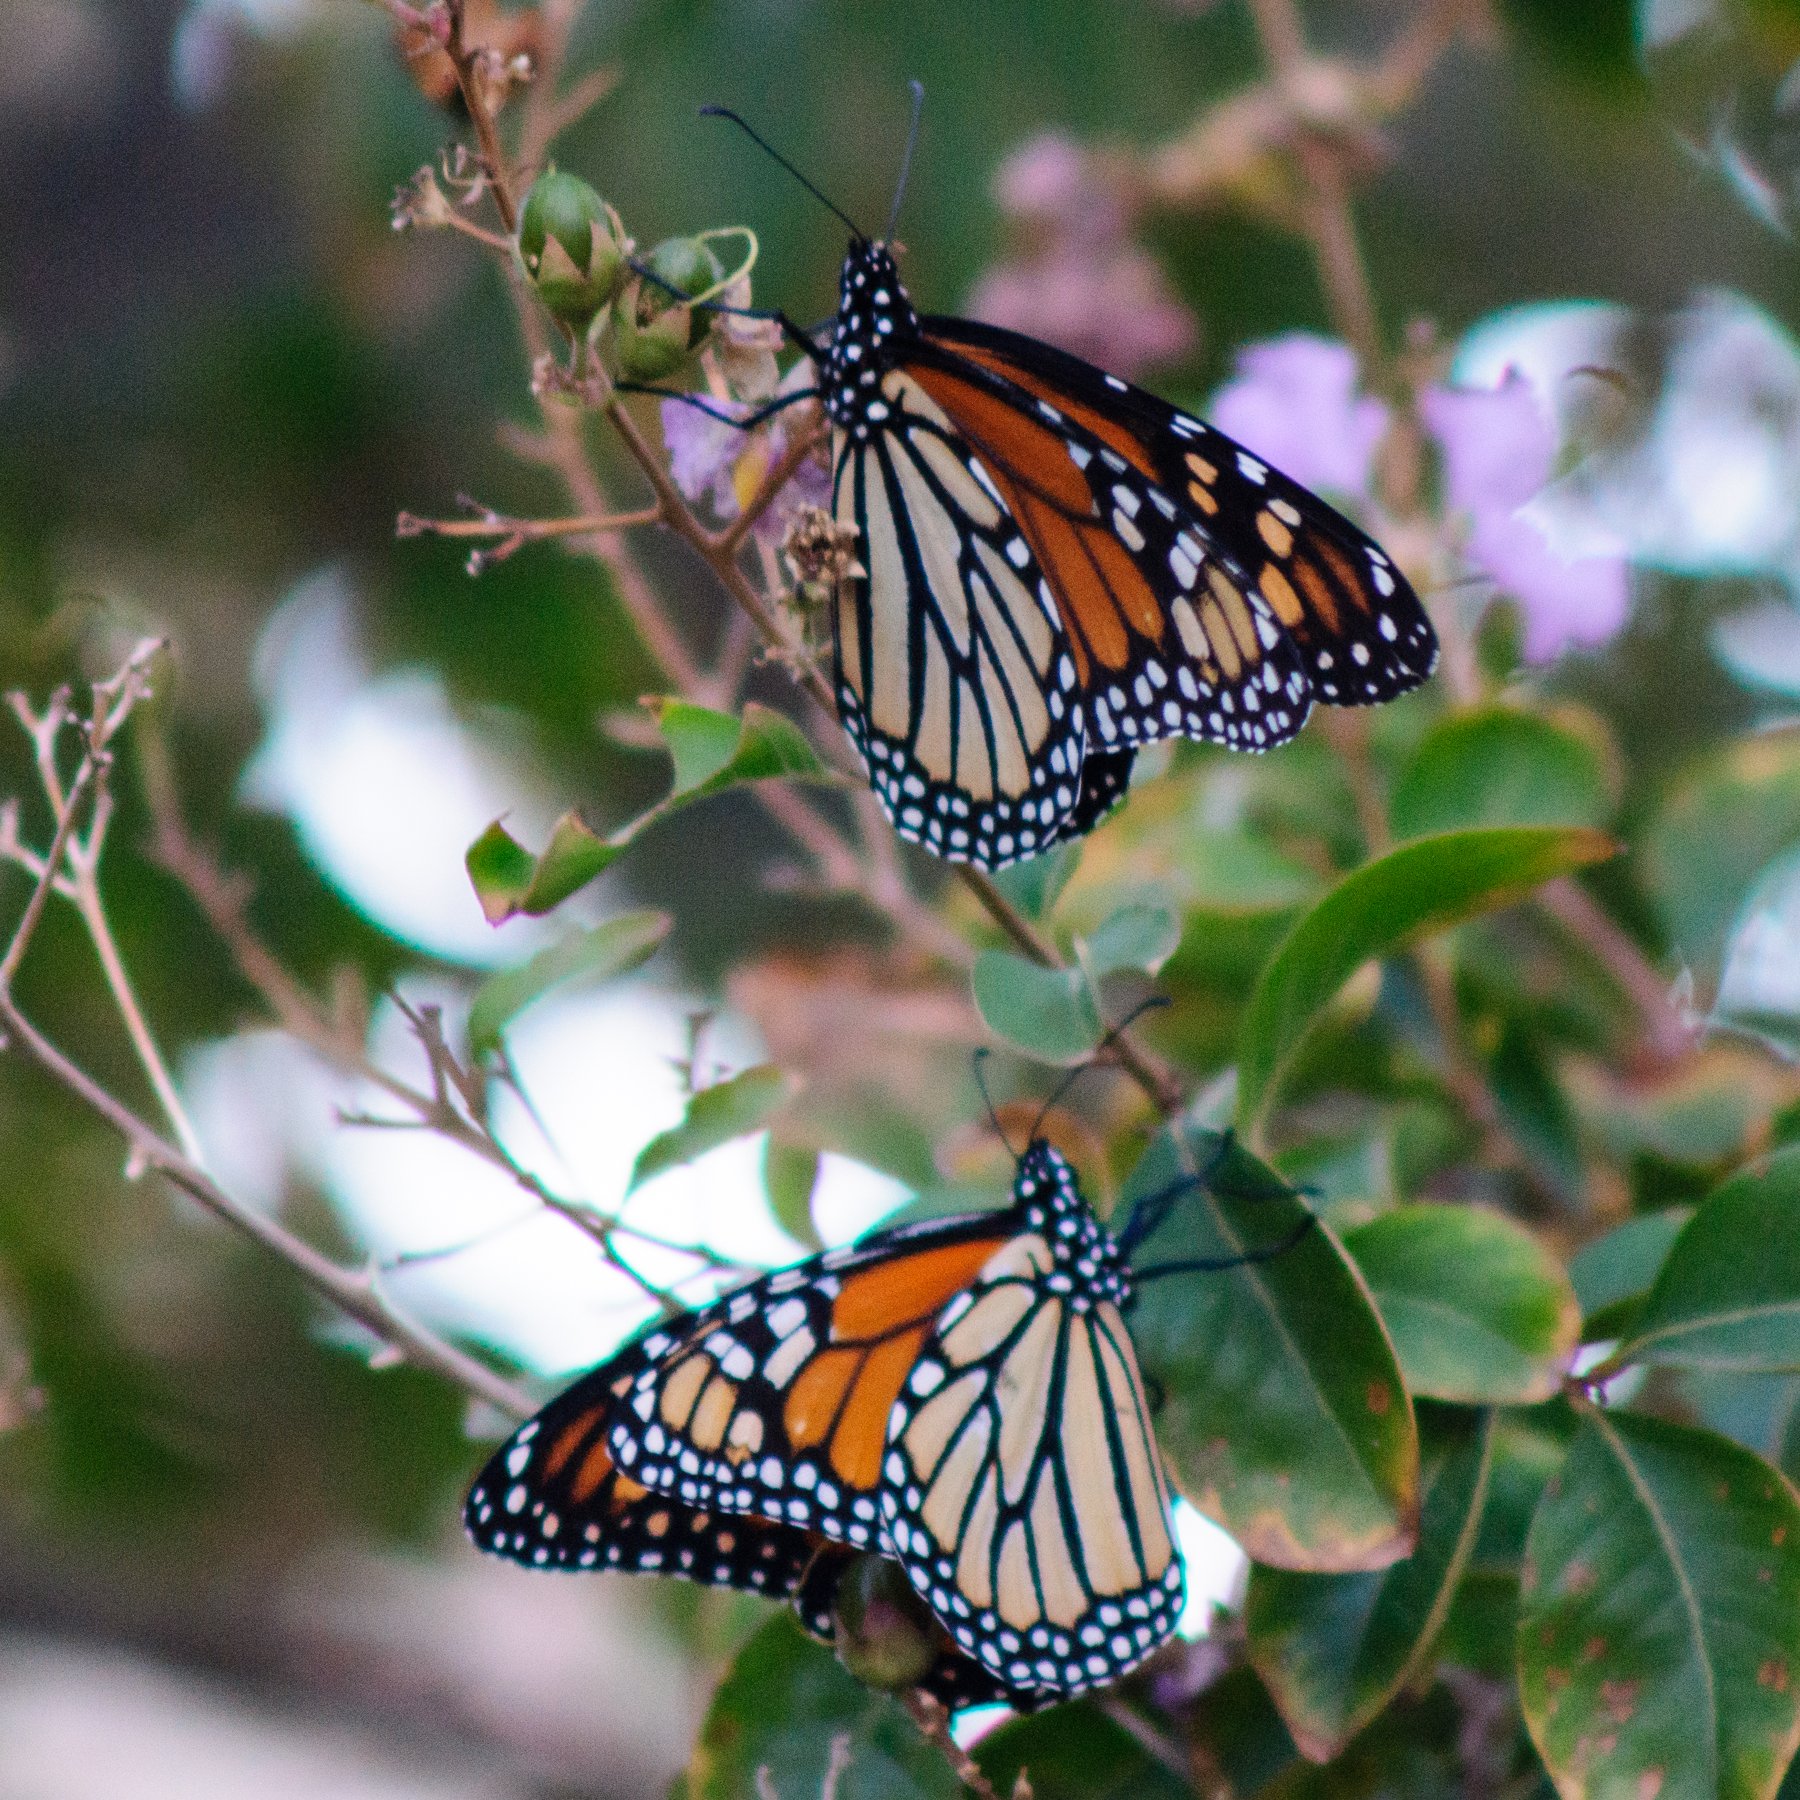
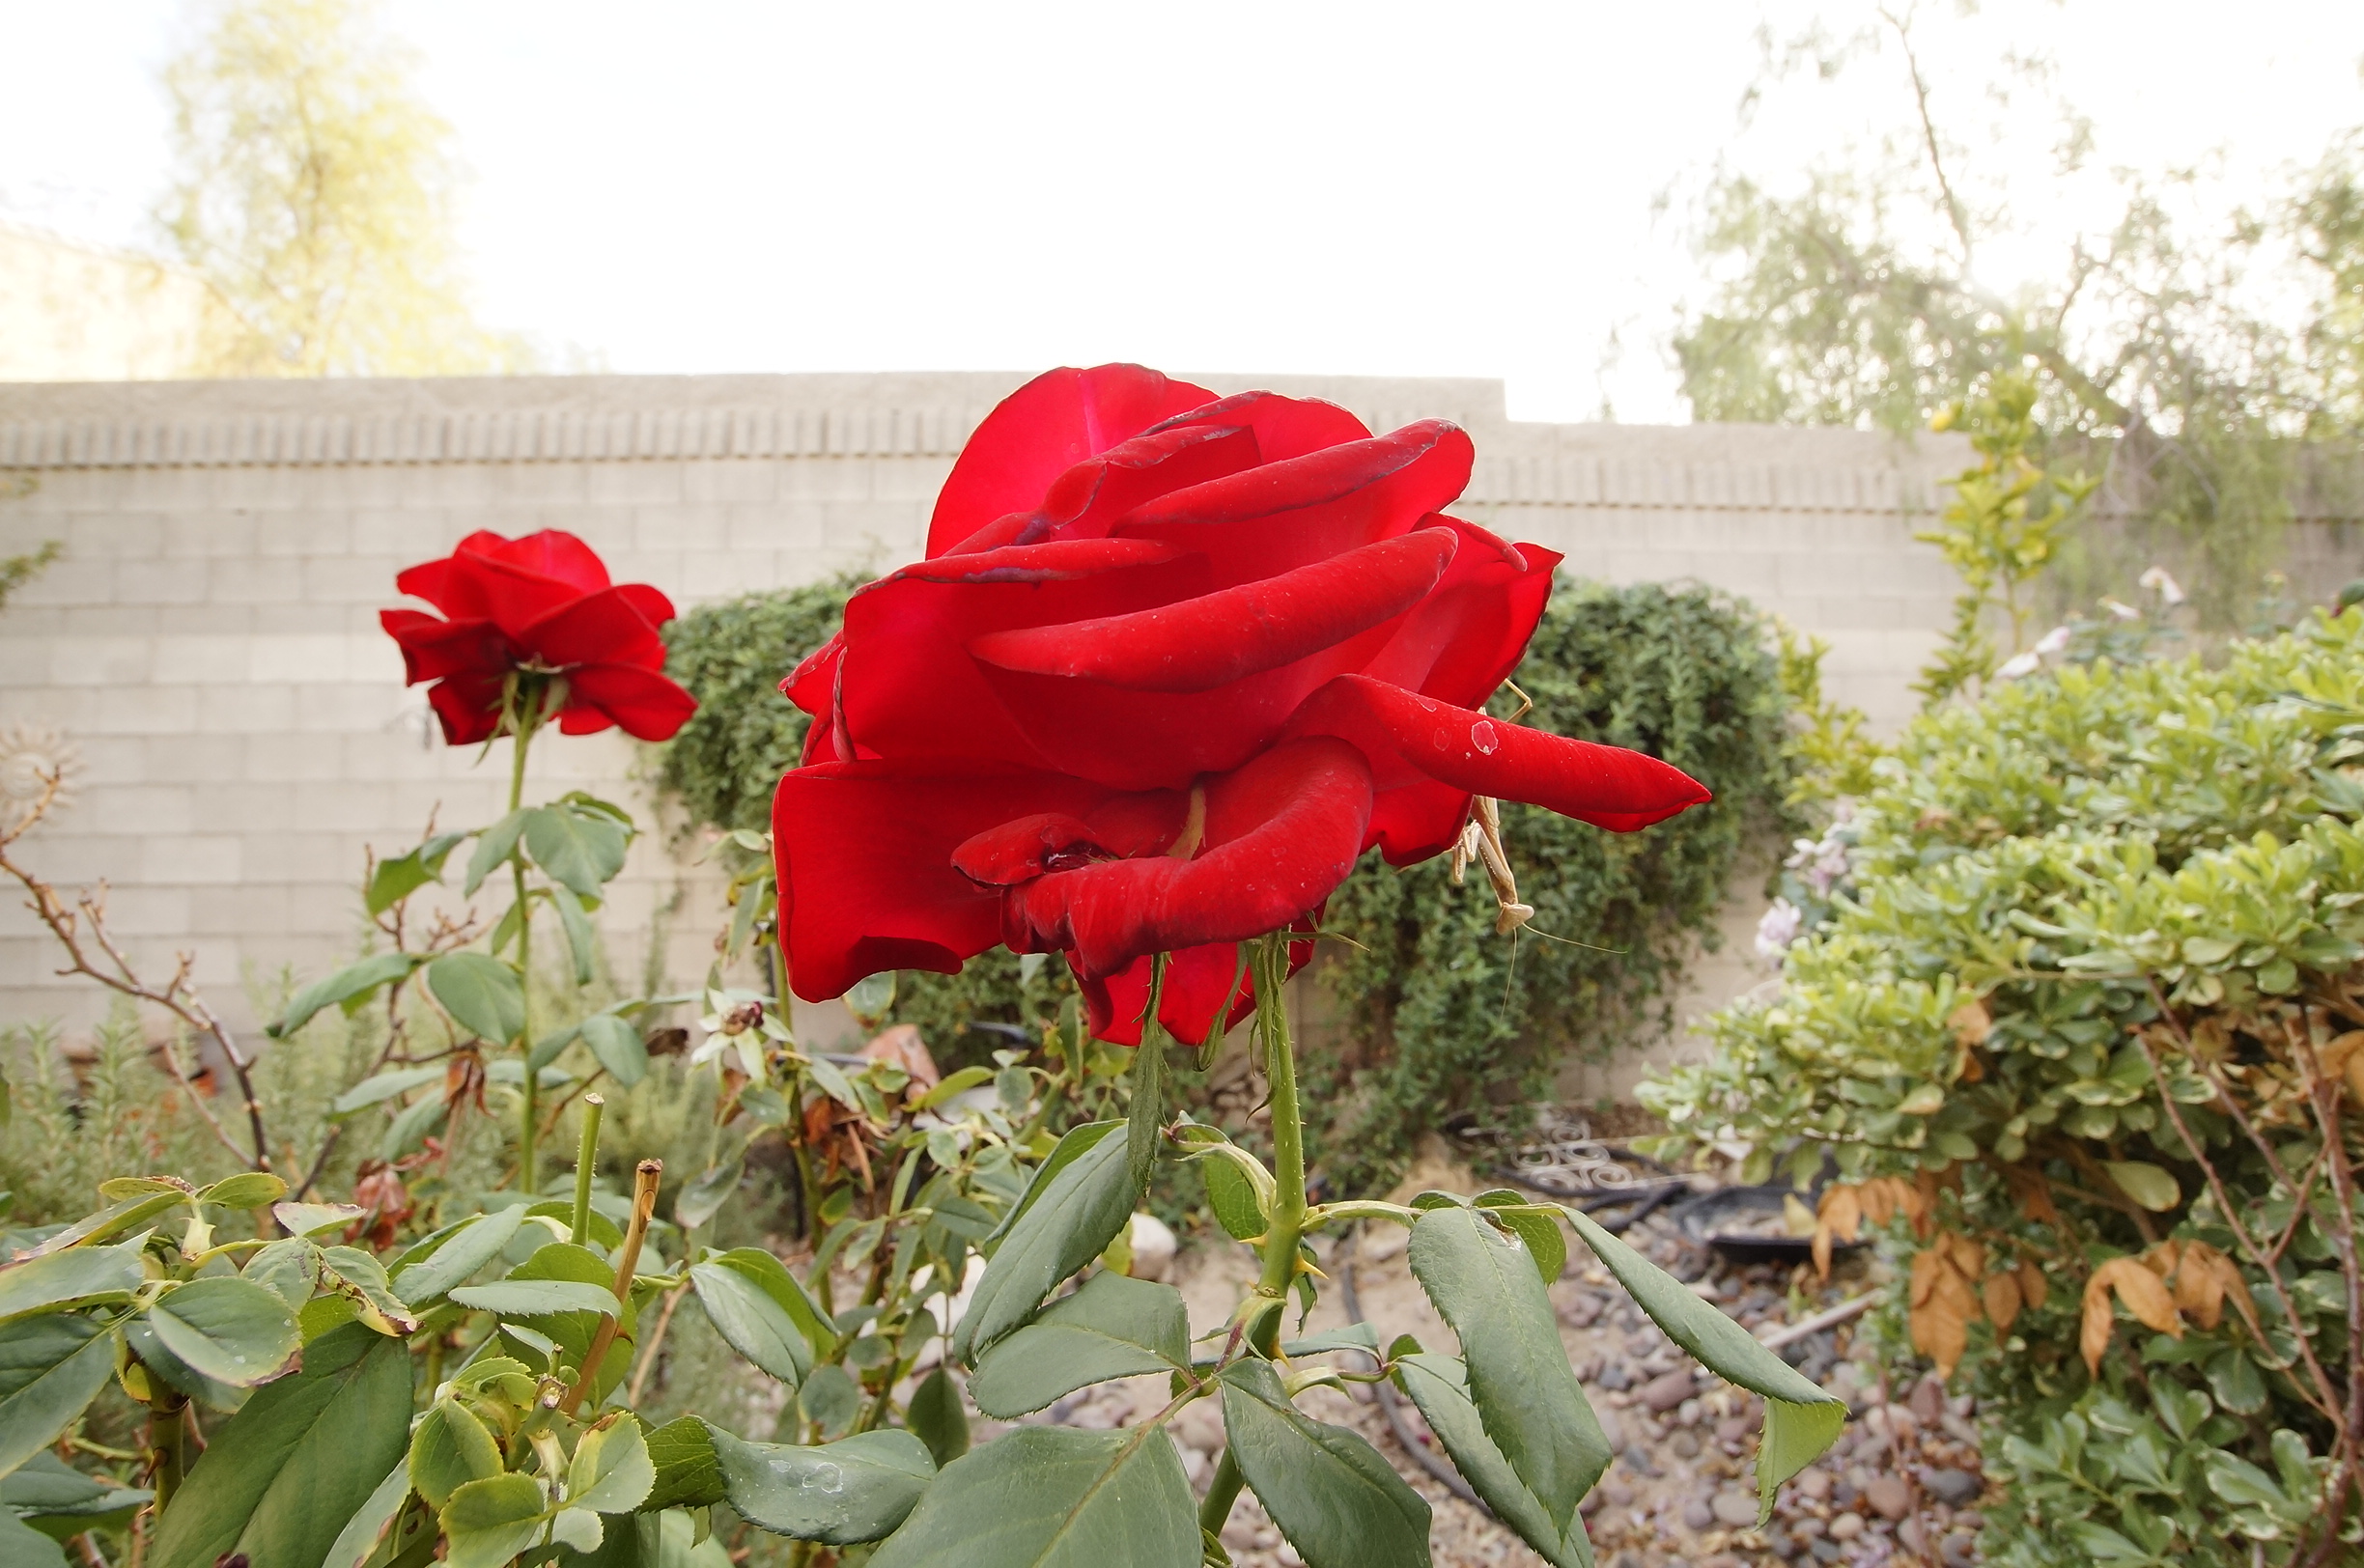
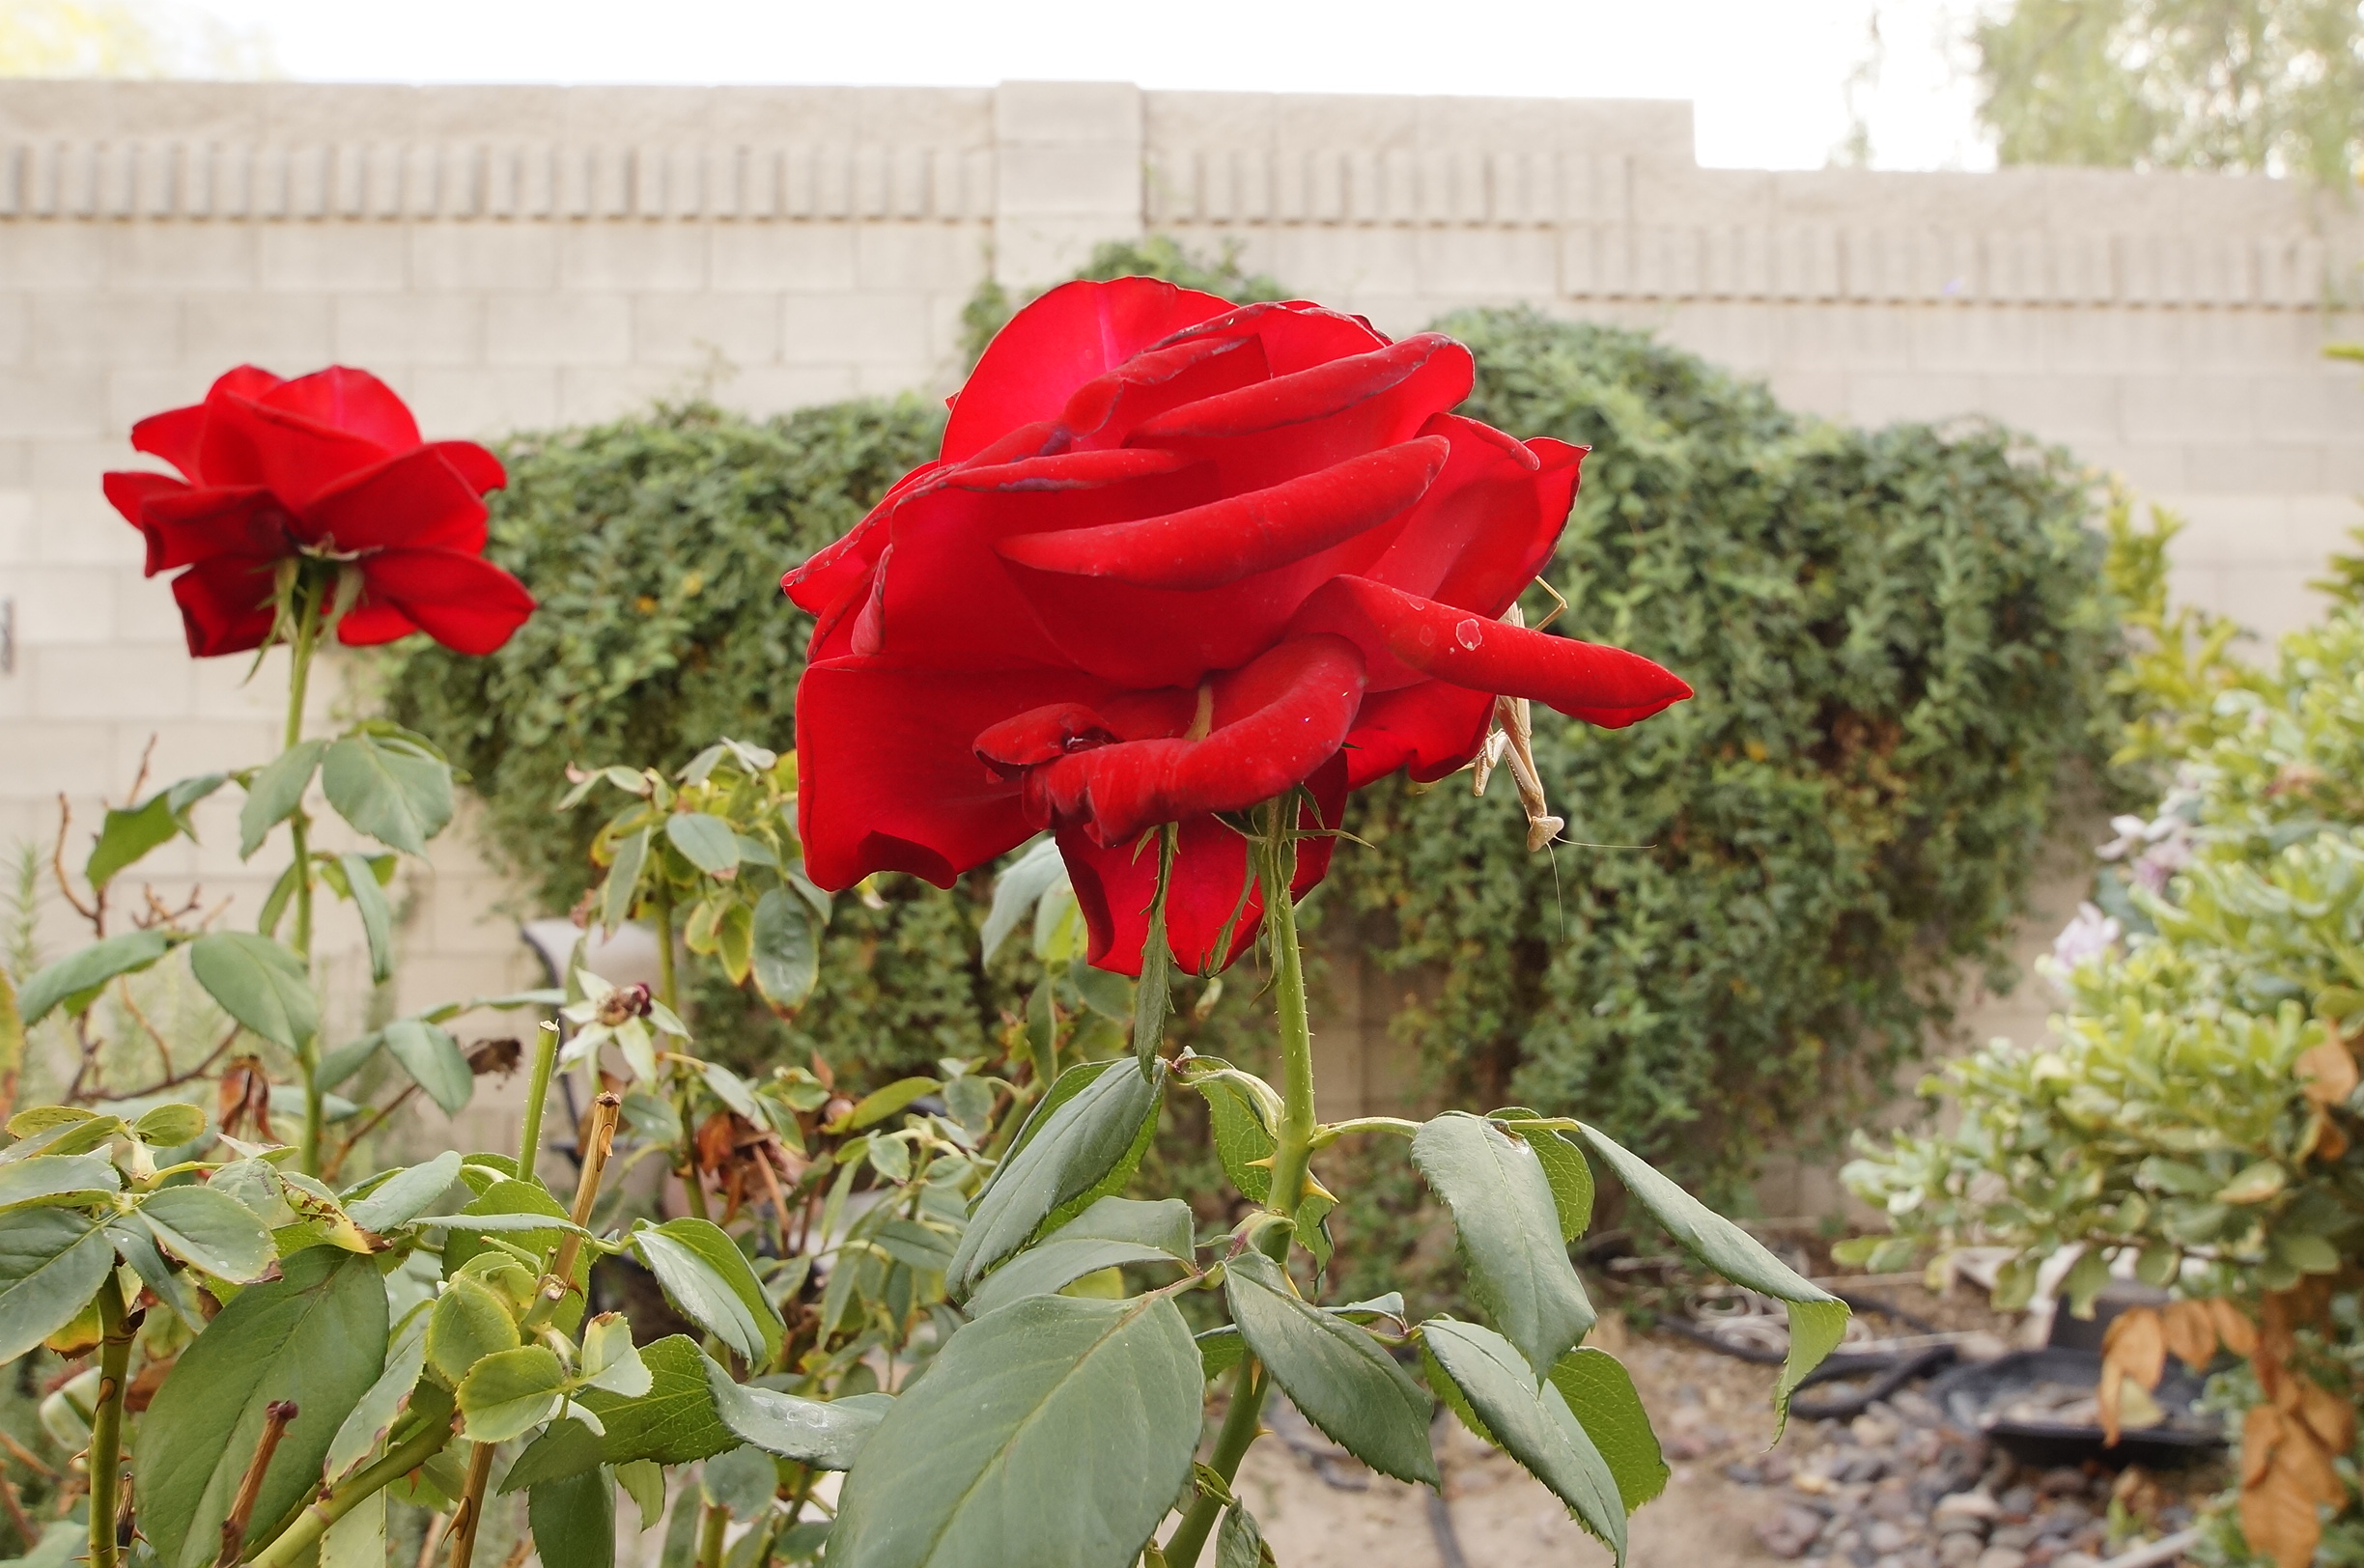
I recently got a new lens that is used for all these images. A Tamron 150-600mm so the images are going from a 600mm to an effective 900mm. I will talk about the lens at another time. All I can say about it is damn.

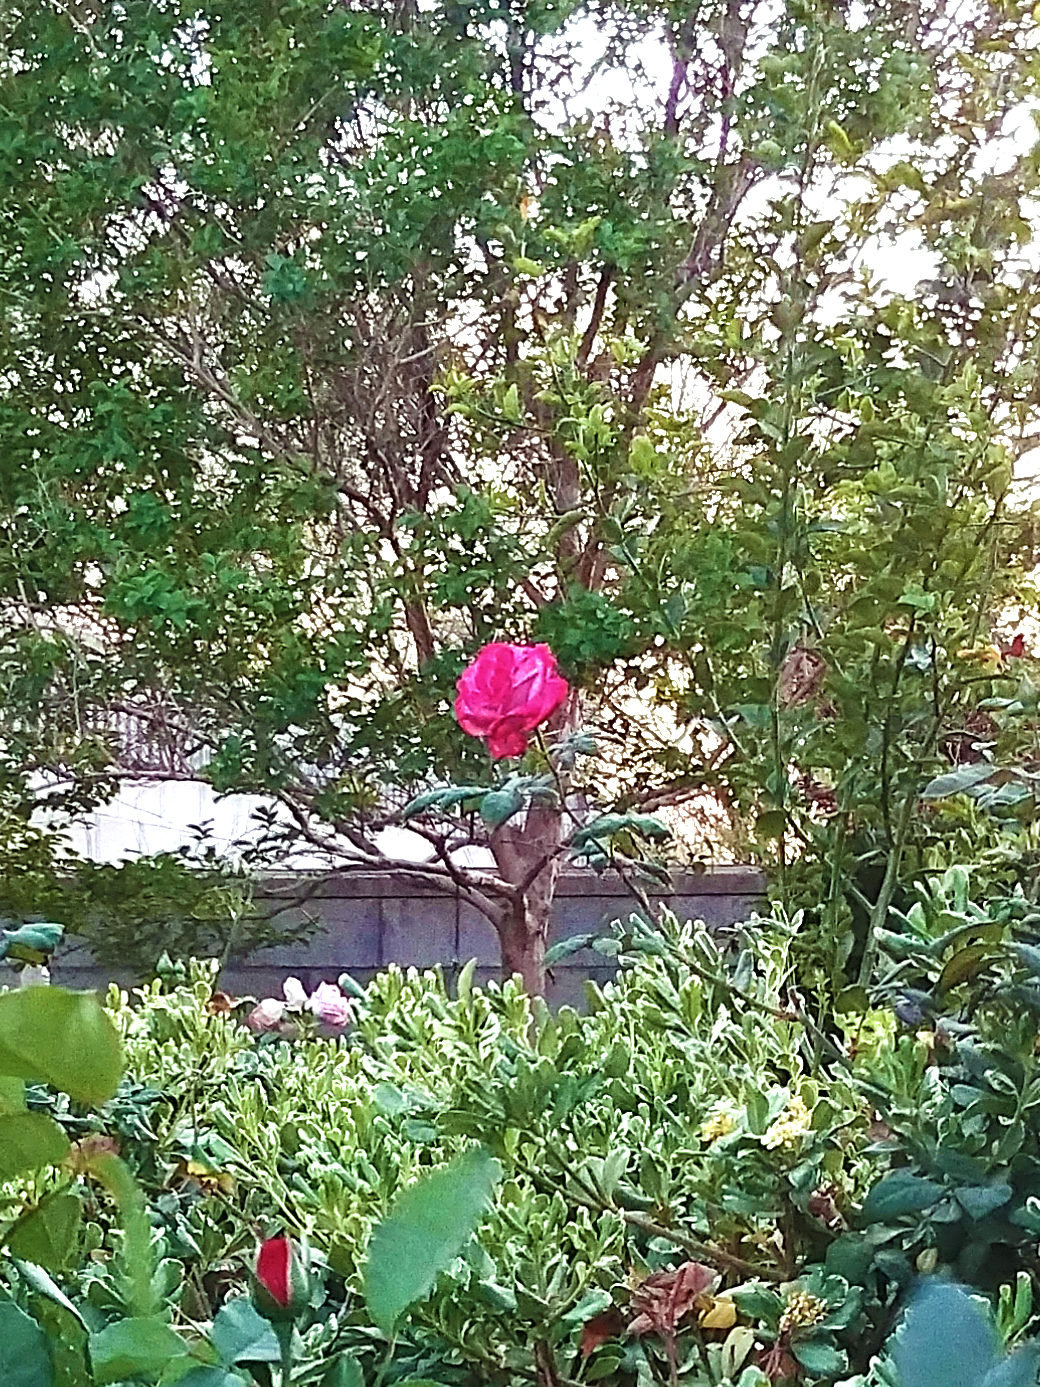
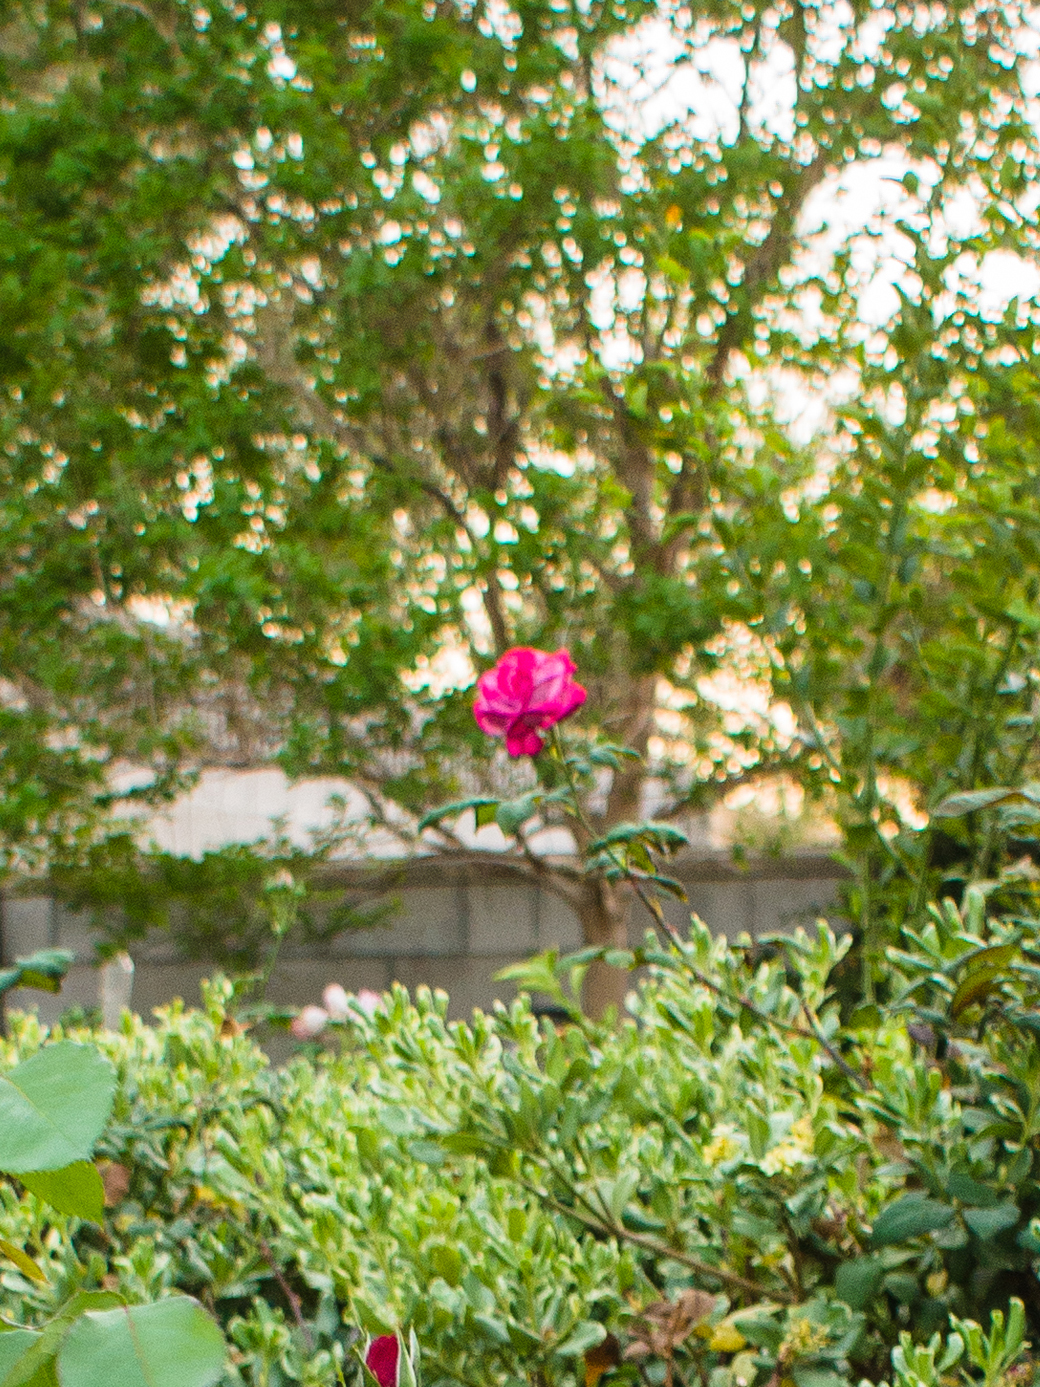
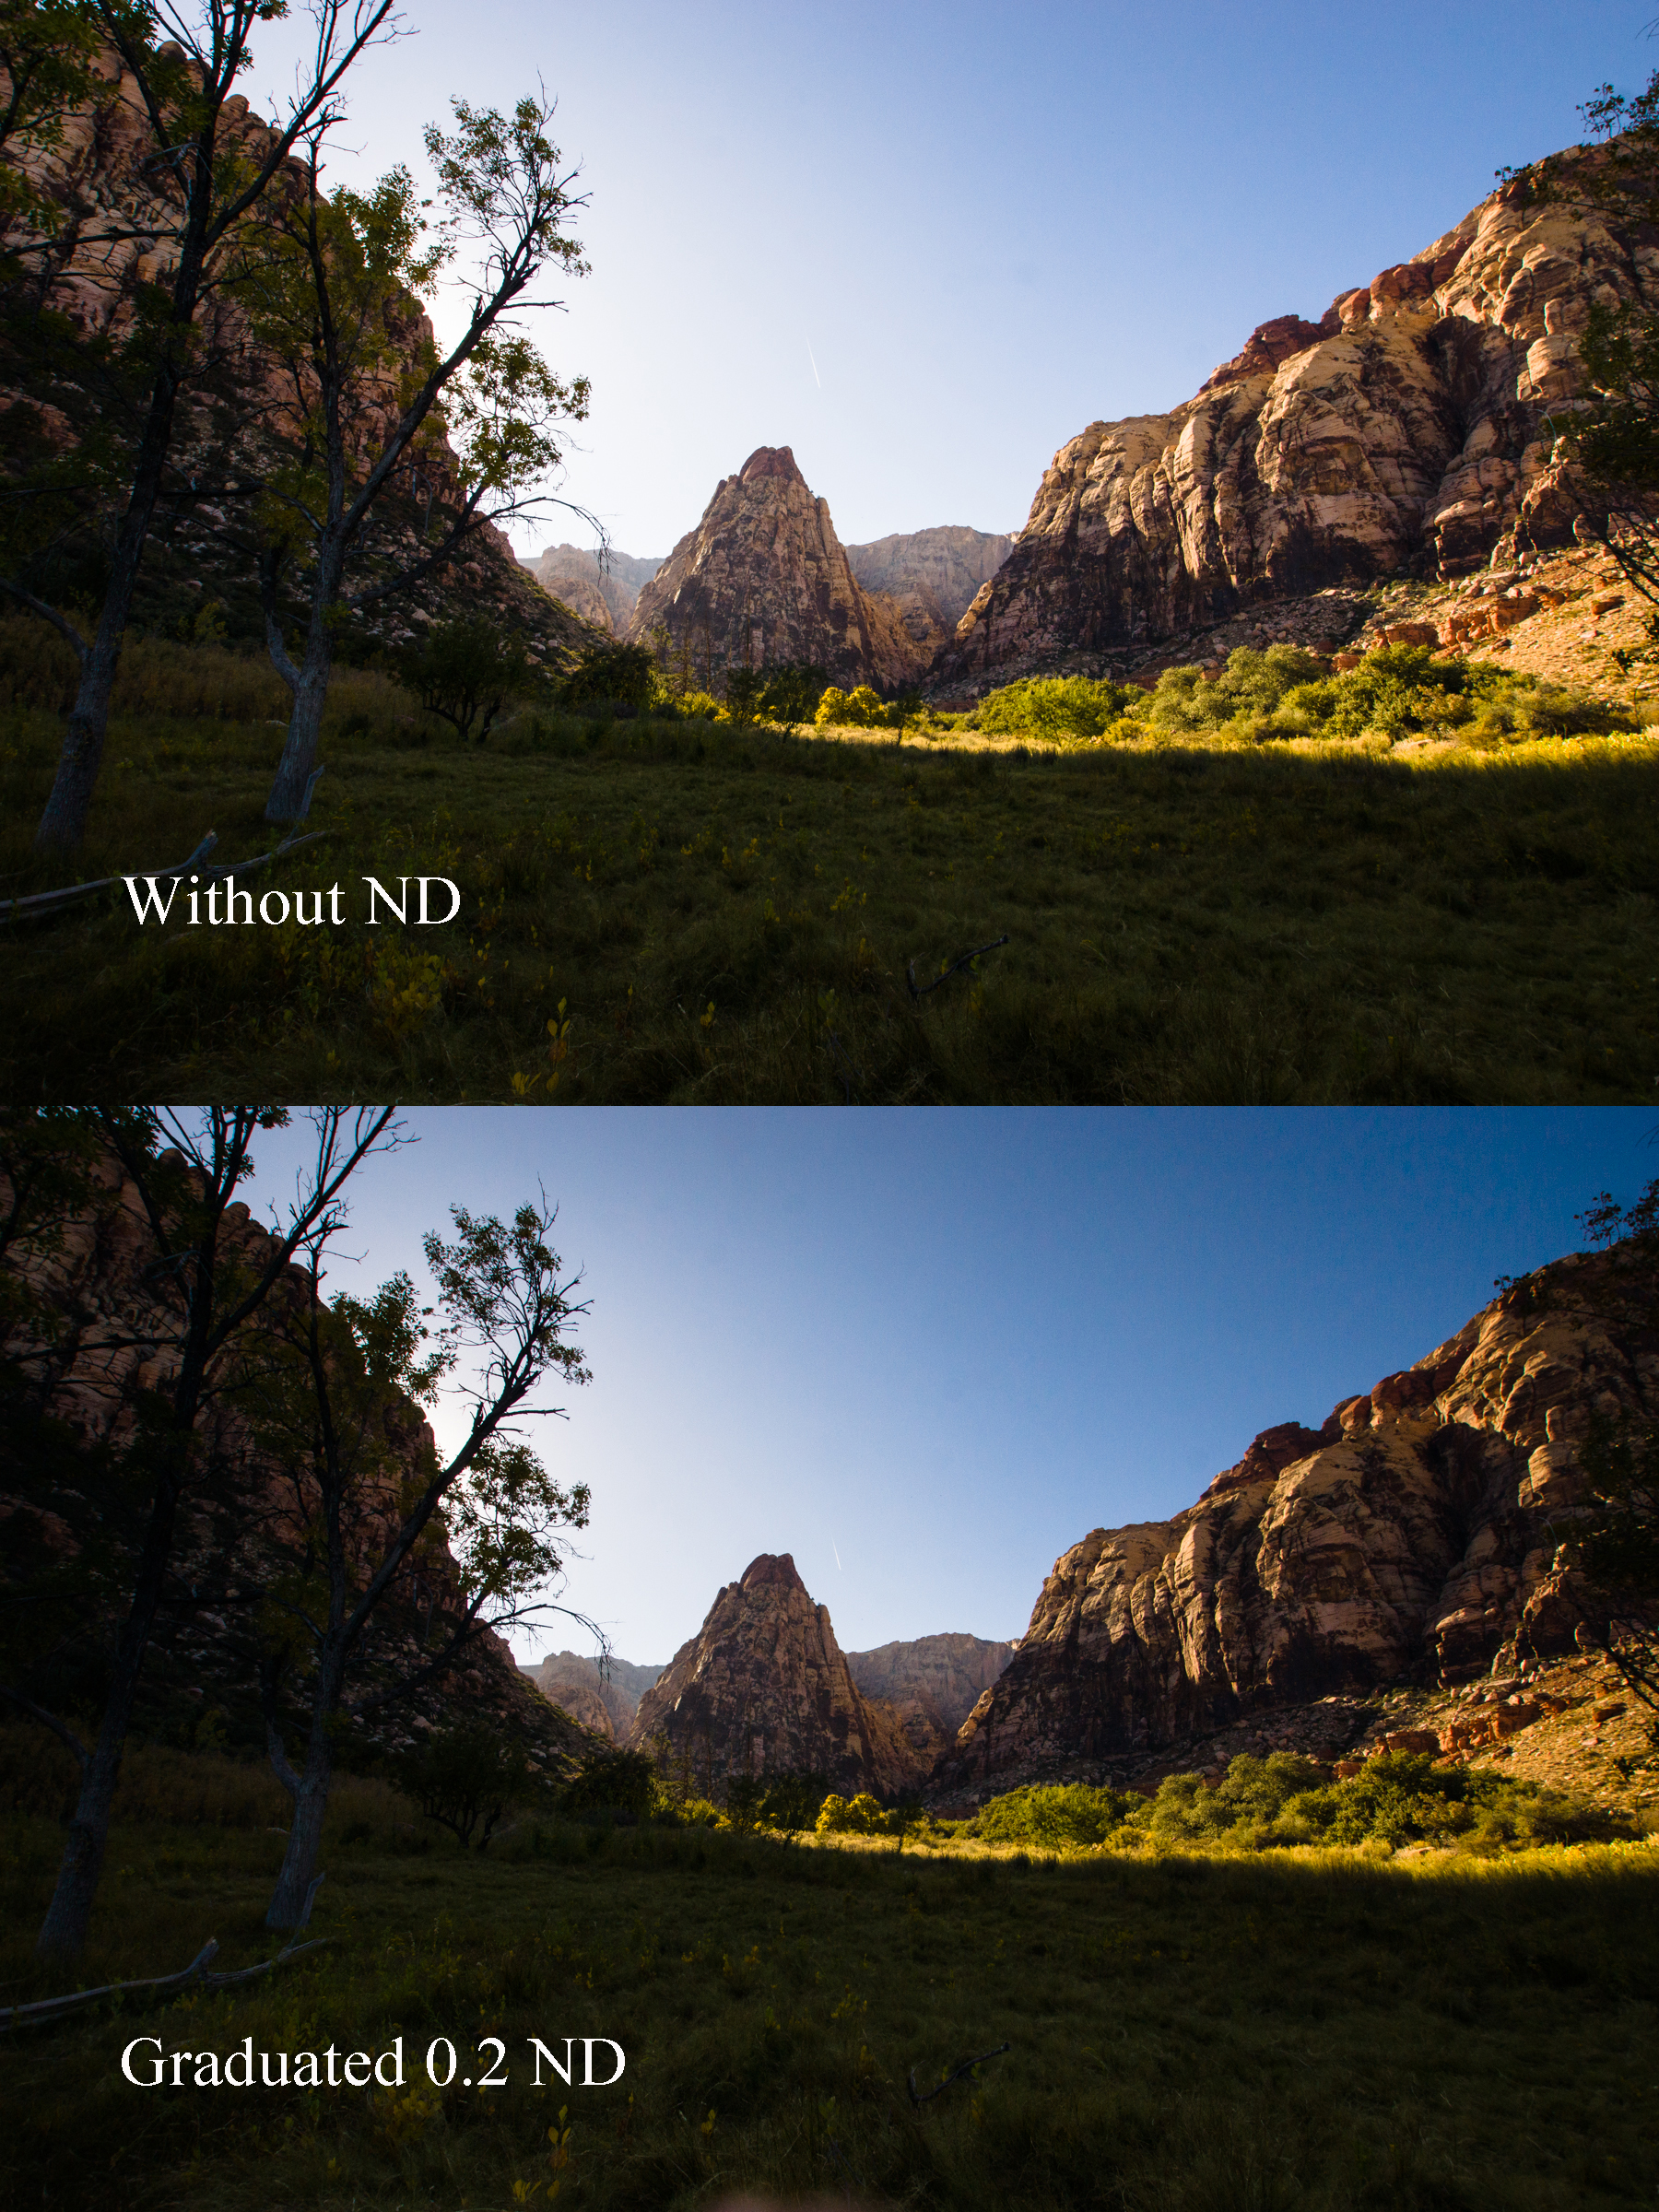
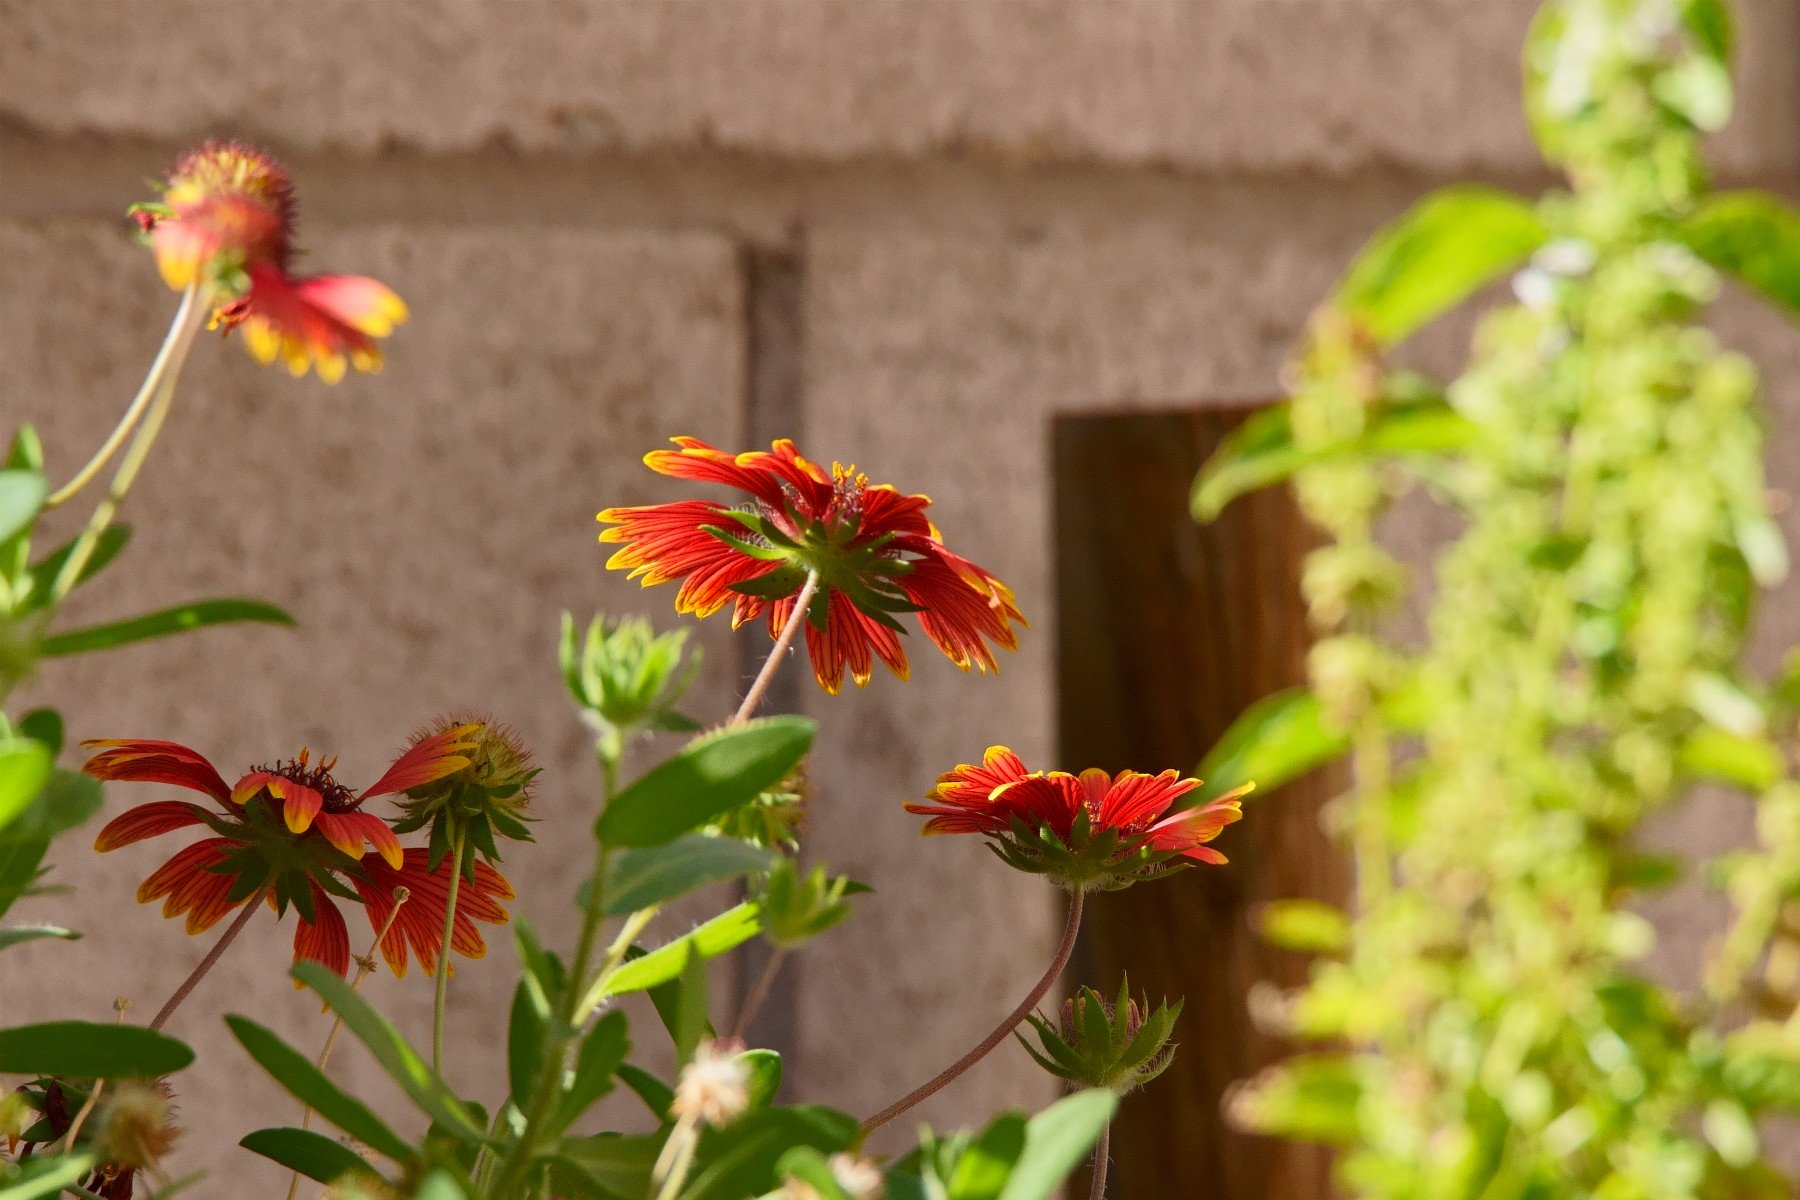
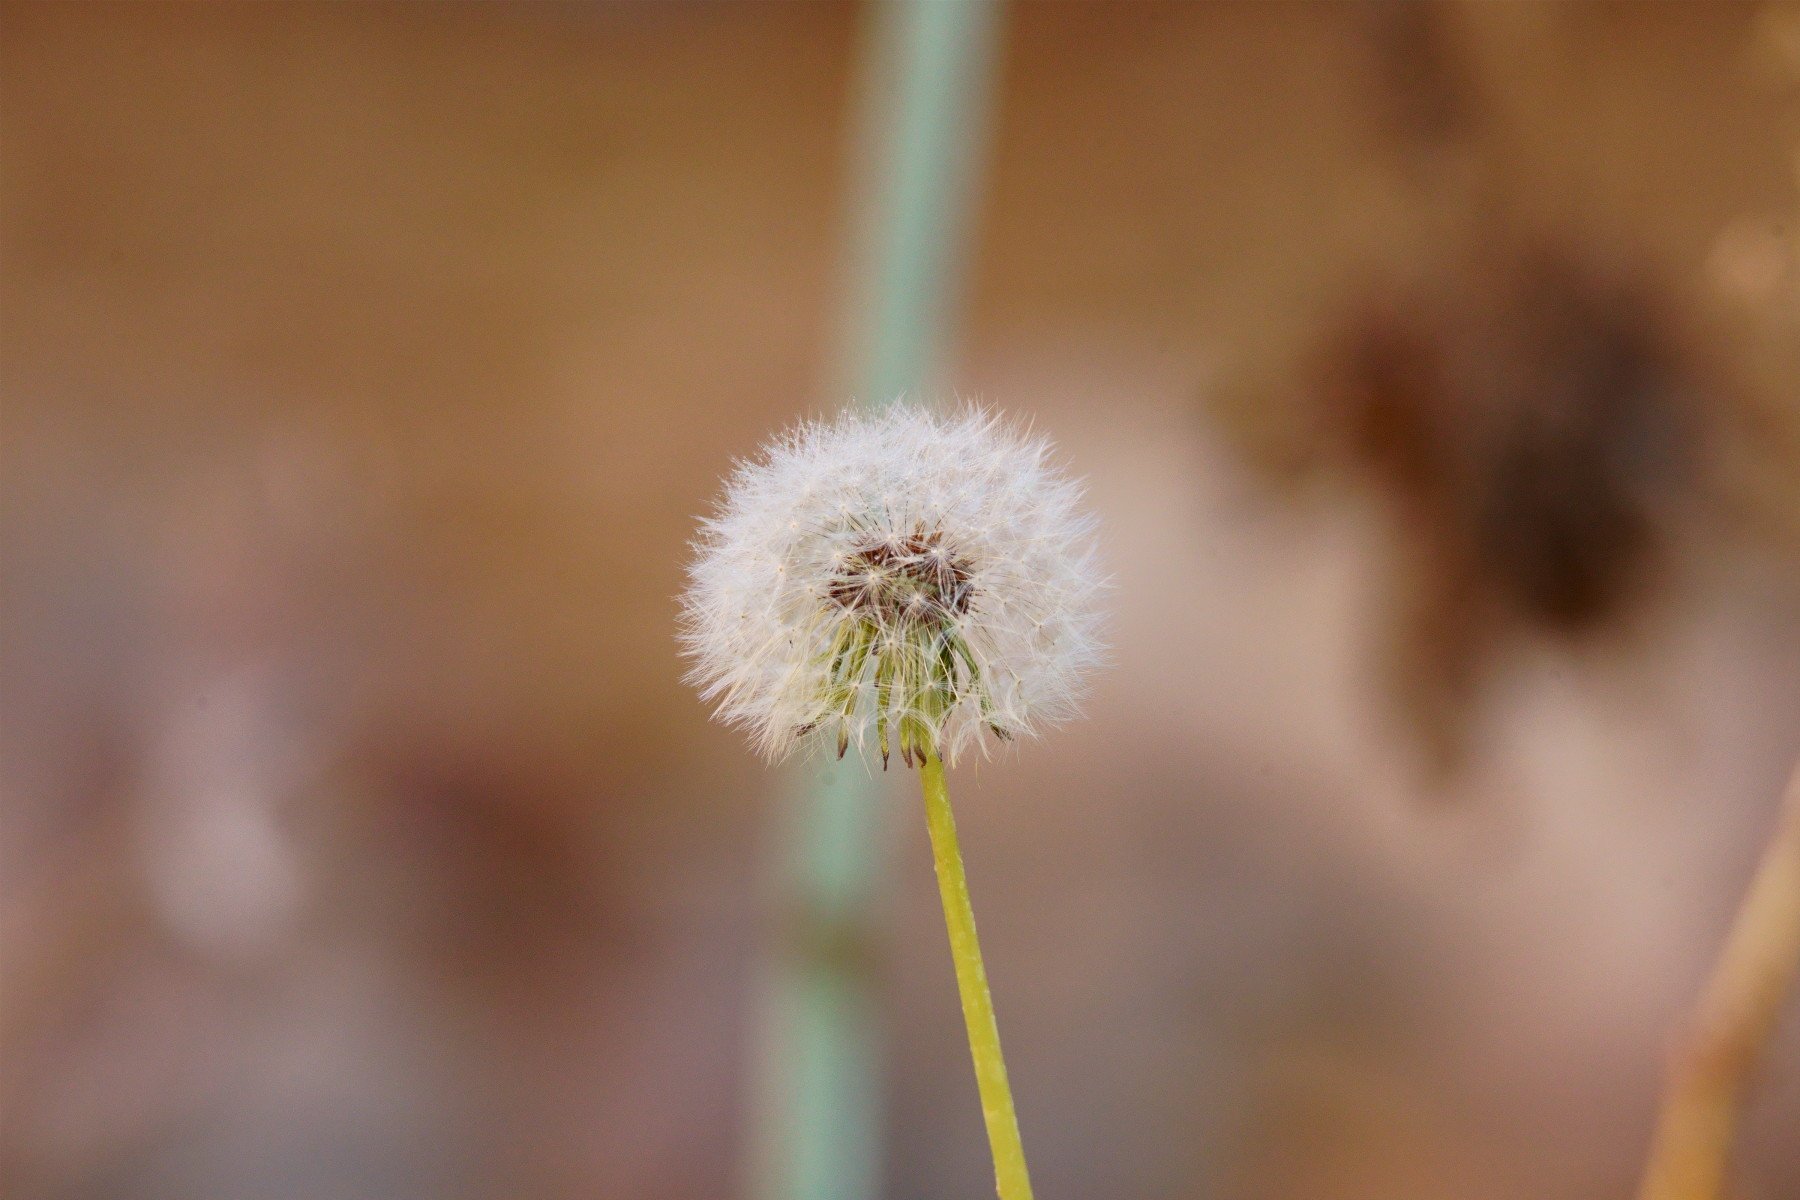
I know that the A7iii and the a7Riii do it and I can only guess that Sony’s other FF cameras do too. I did a little checking there are Canon and Nikon FF cameras that have the option too. Below are some uncropped pictures from from my yard. The first is at an actual 600mm and then an effective 900mm.

DSC06271.JPG
DSC06278.JPG
DSC06284.JPG
DSC06286.JPG
DSC06289.JPG
DSC06287.JPG
DSC06271.JPG DSC06278.JPG DSC06284.JPG DSC06286.JPG DSC06289.JPG DSC06287.JPG

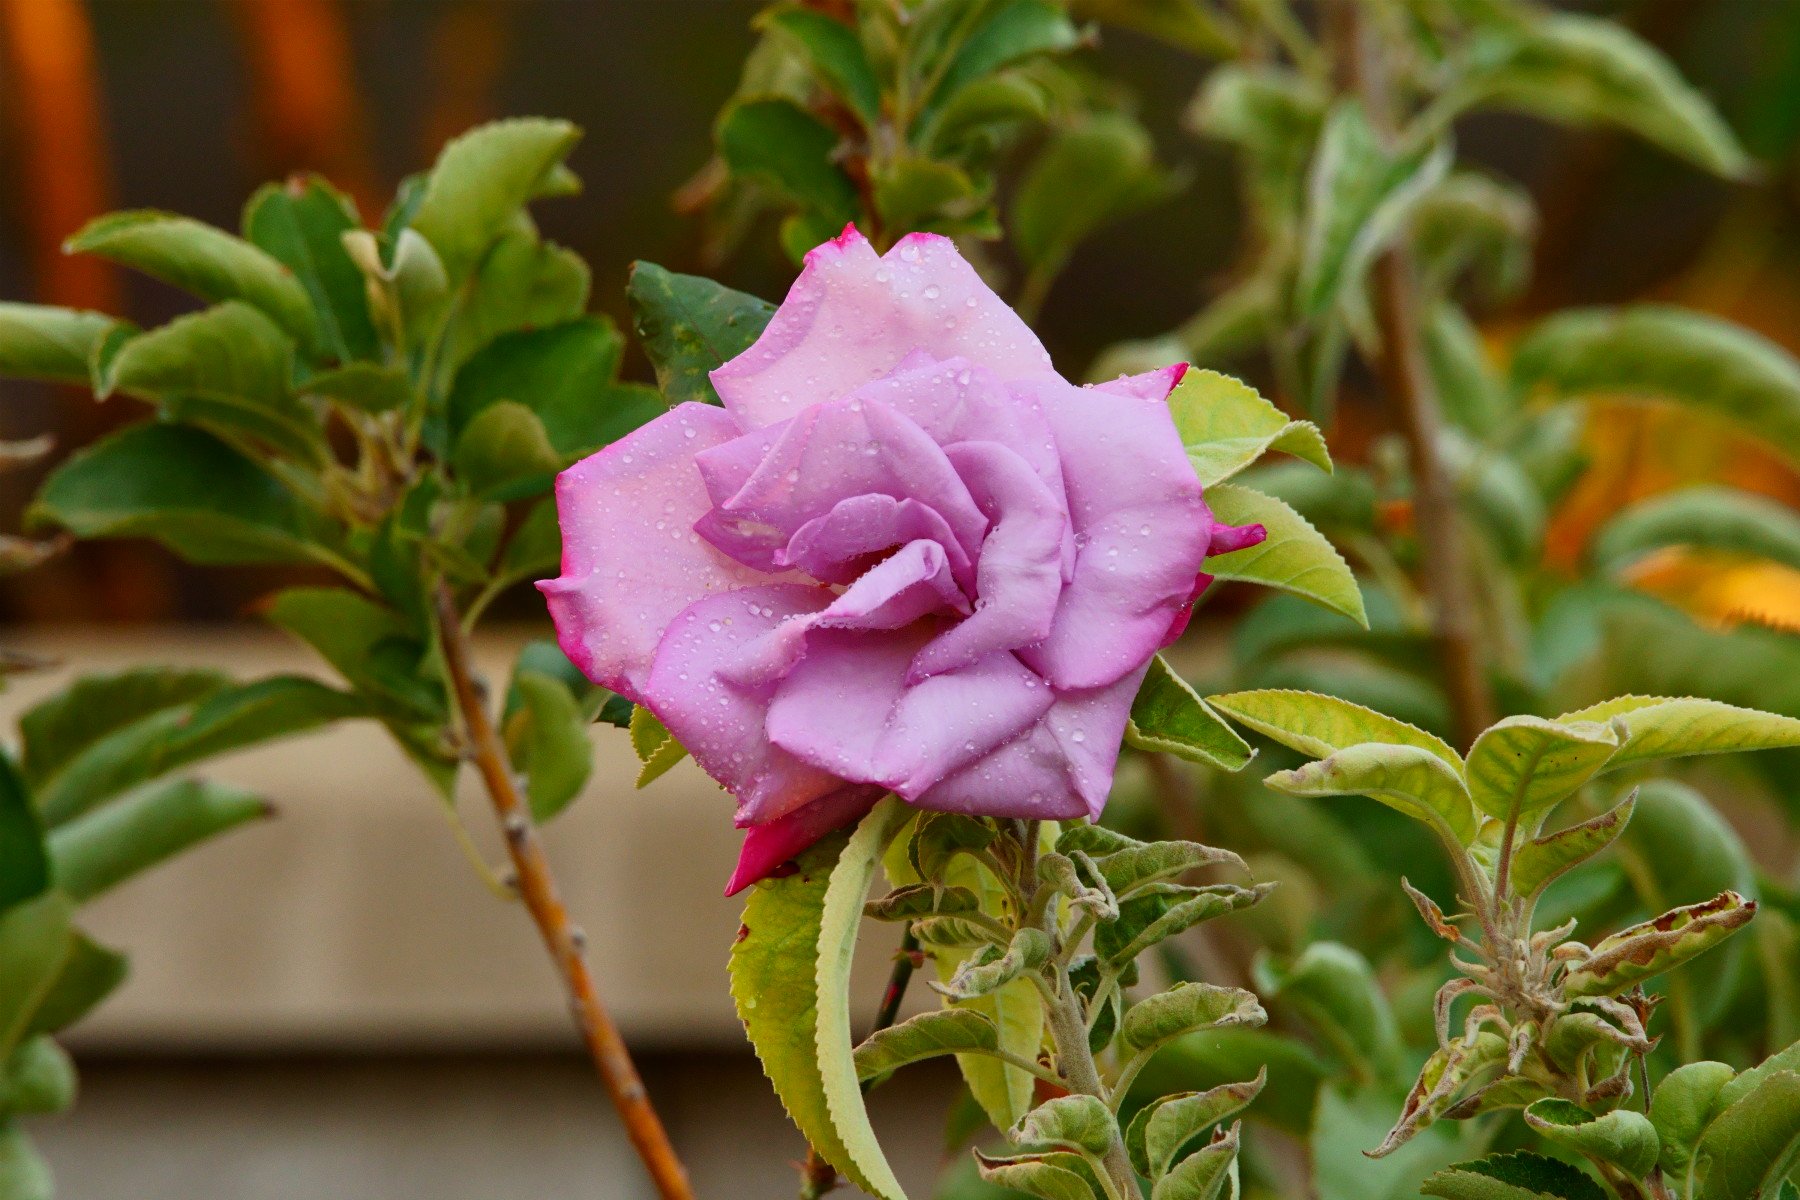
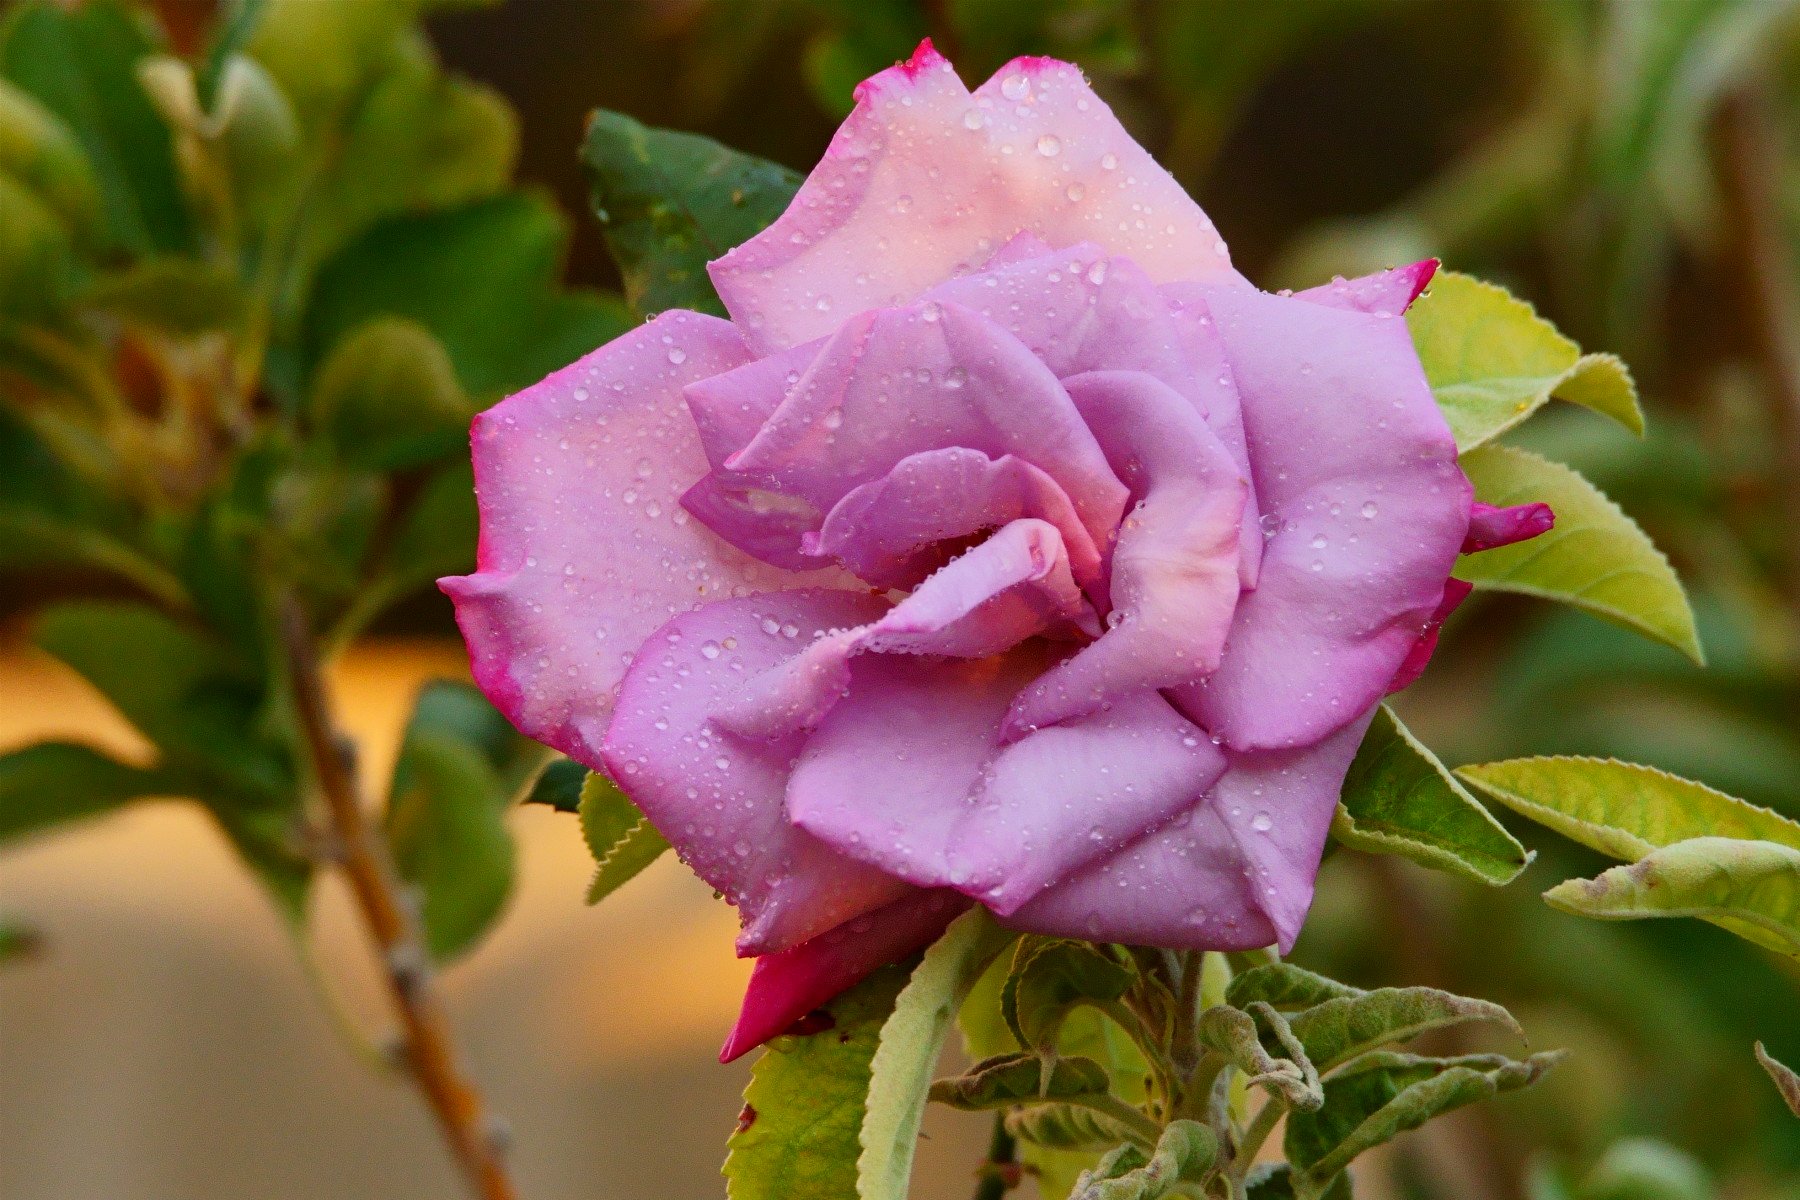
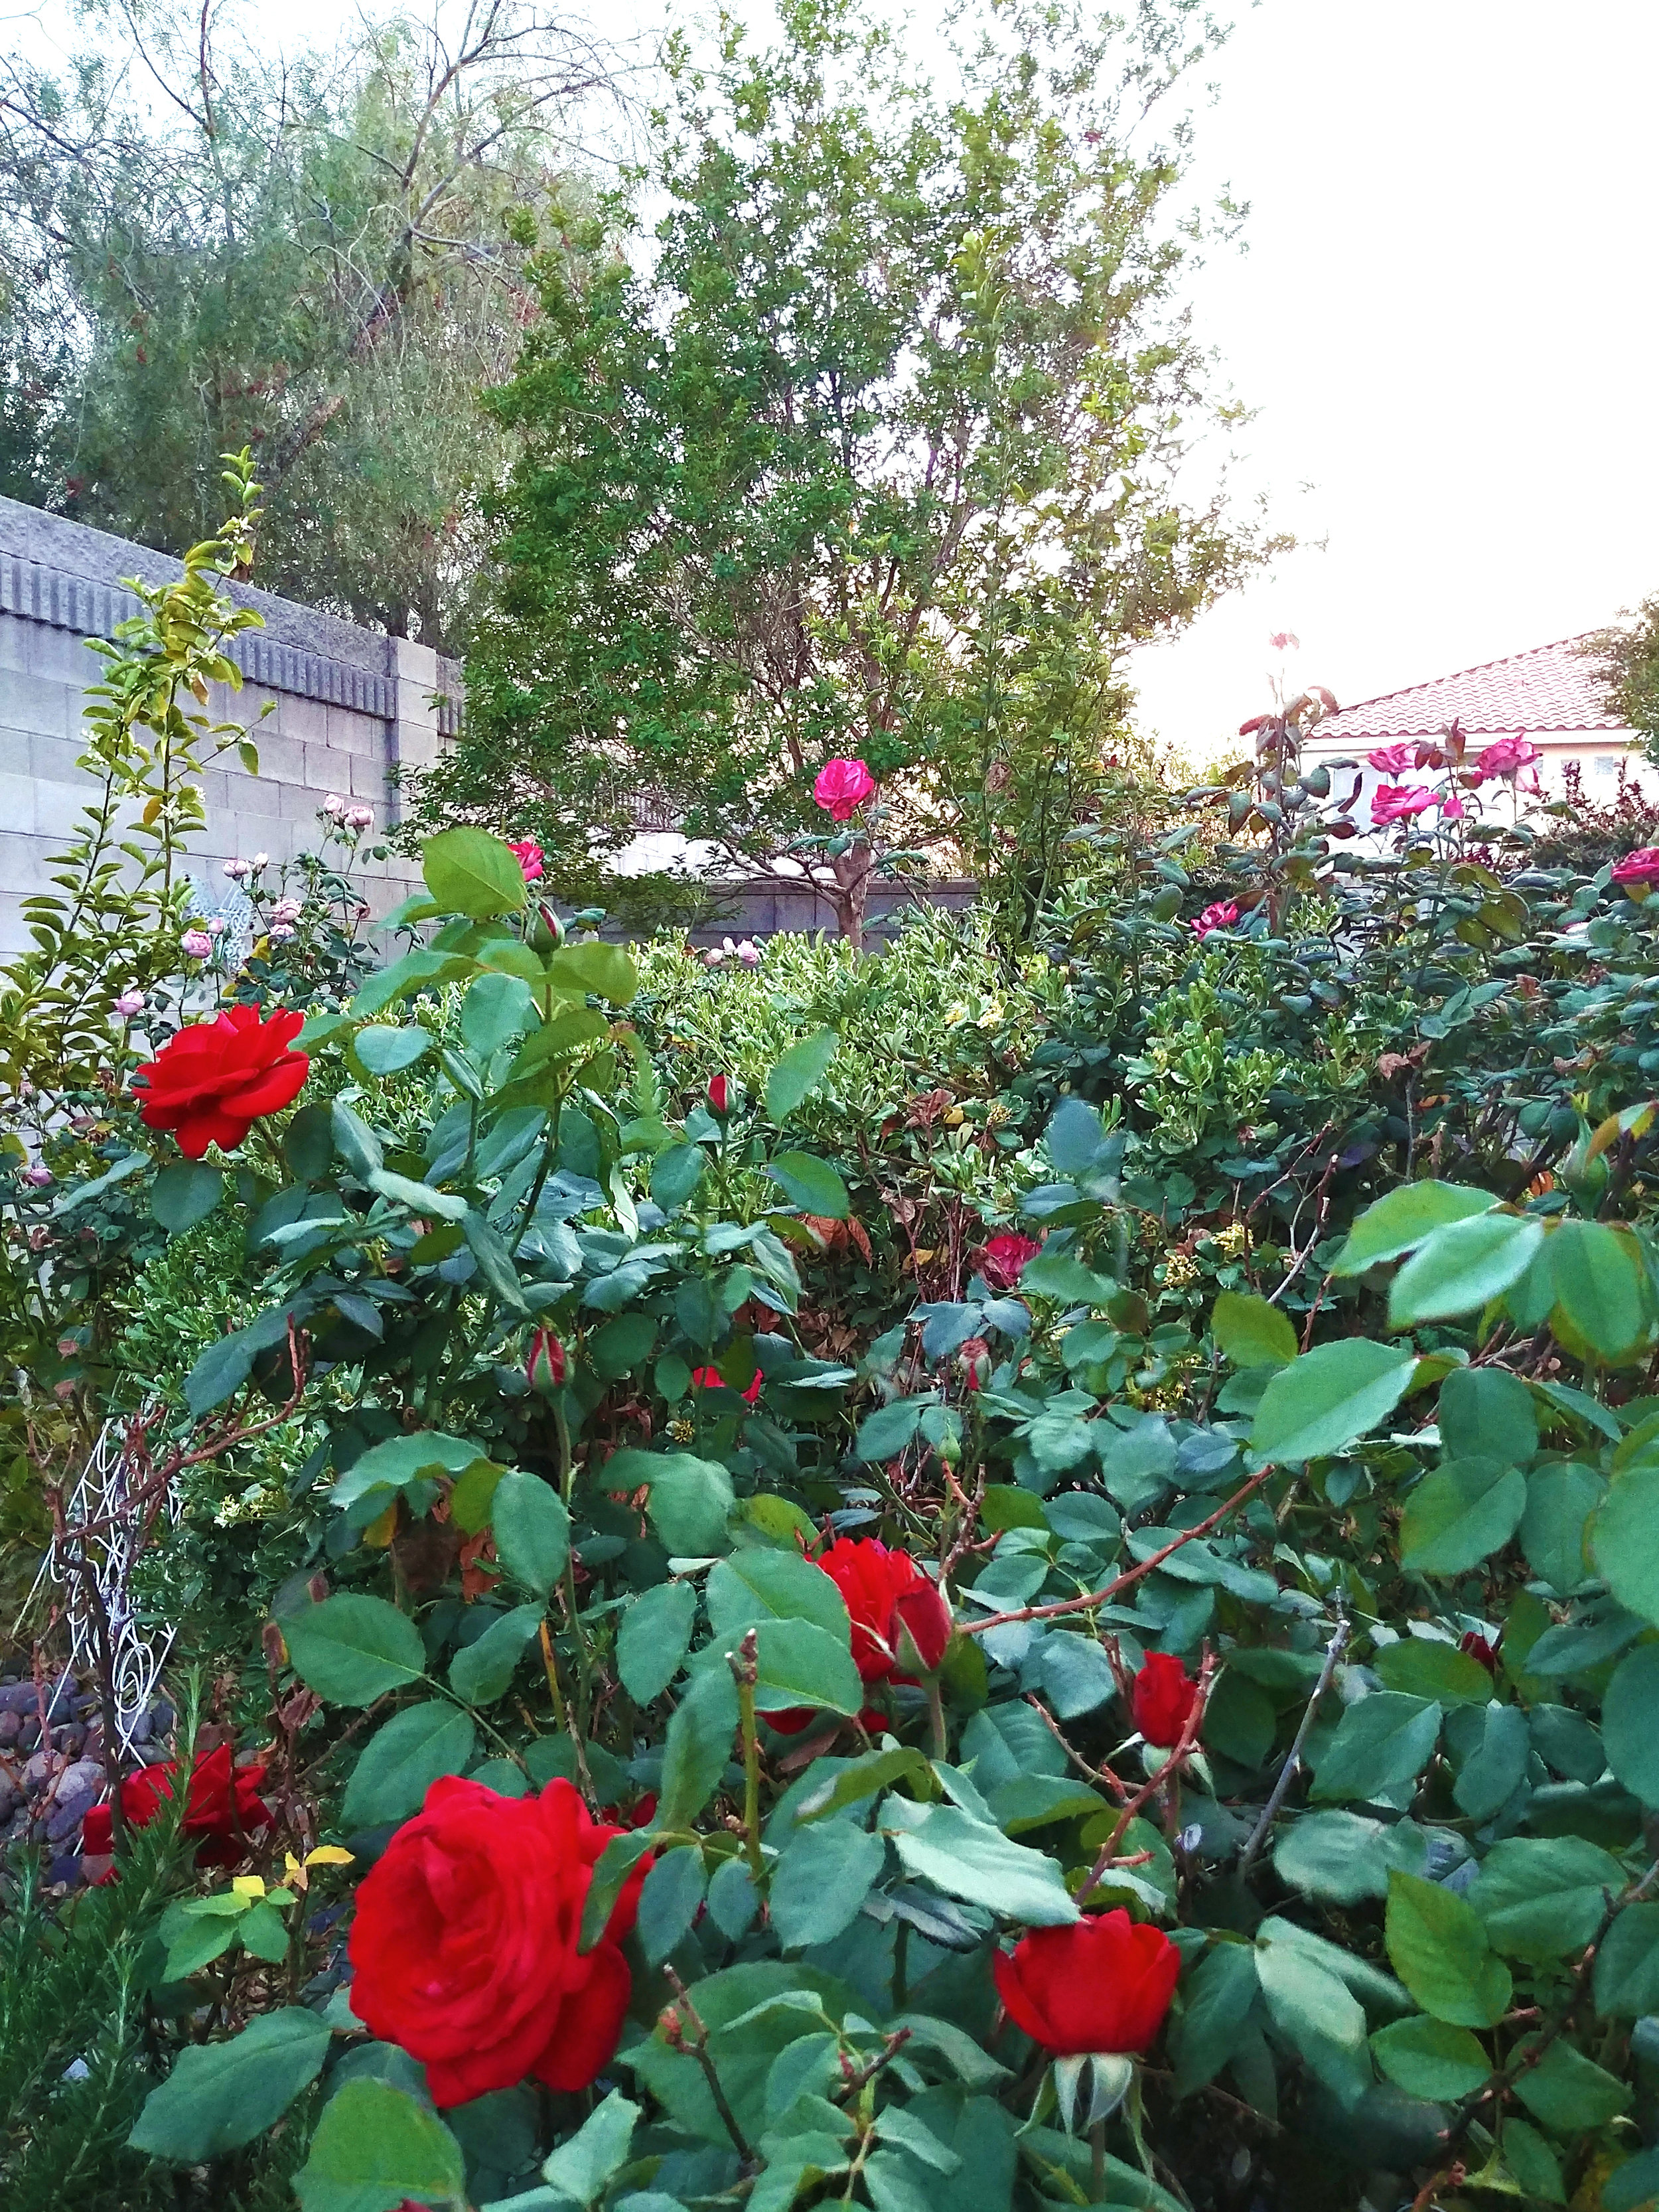
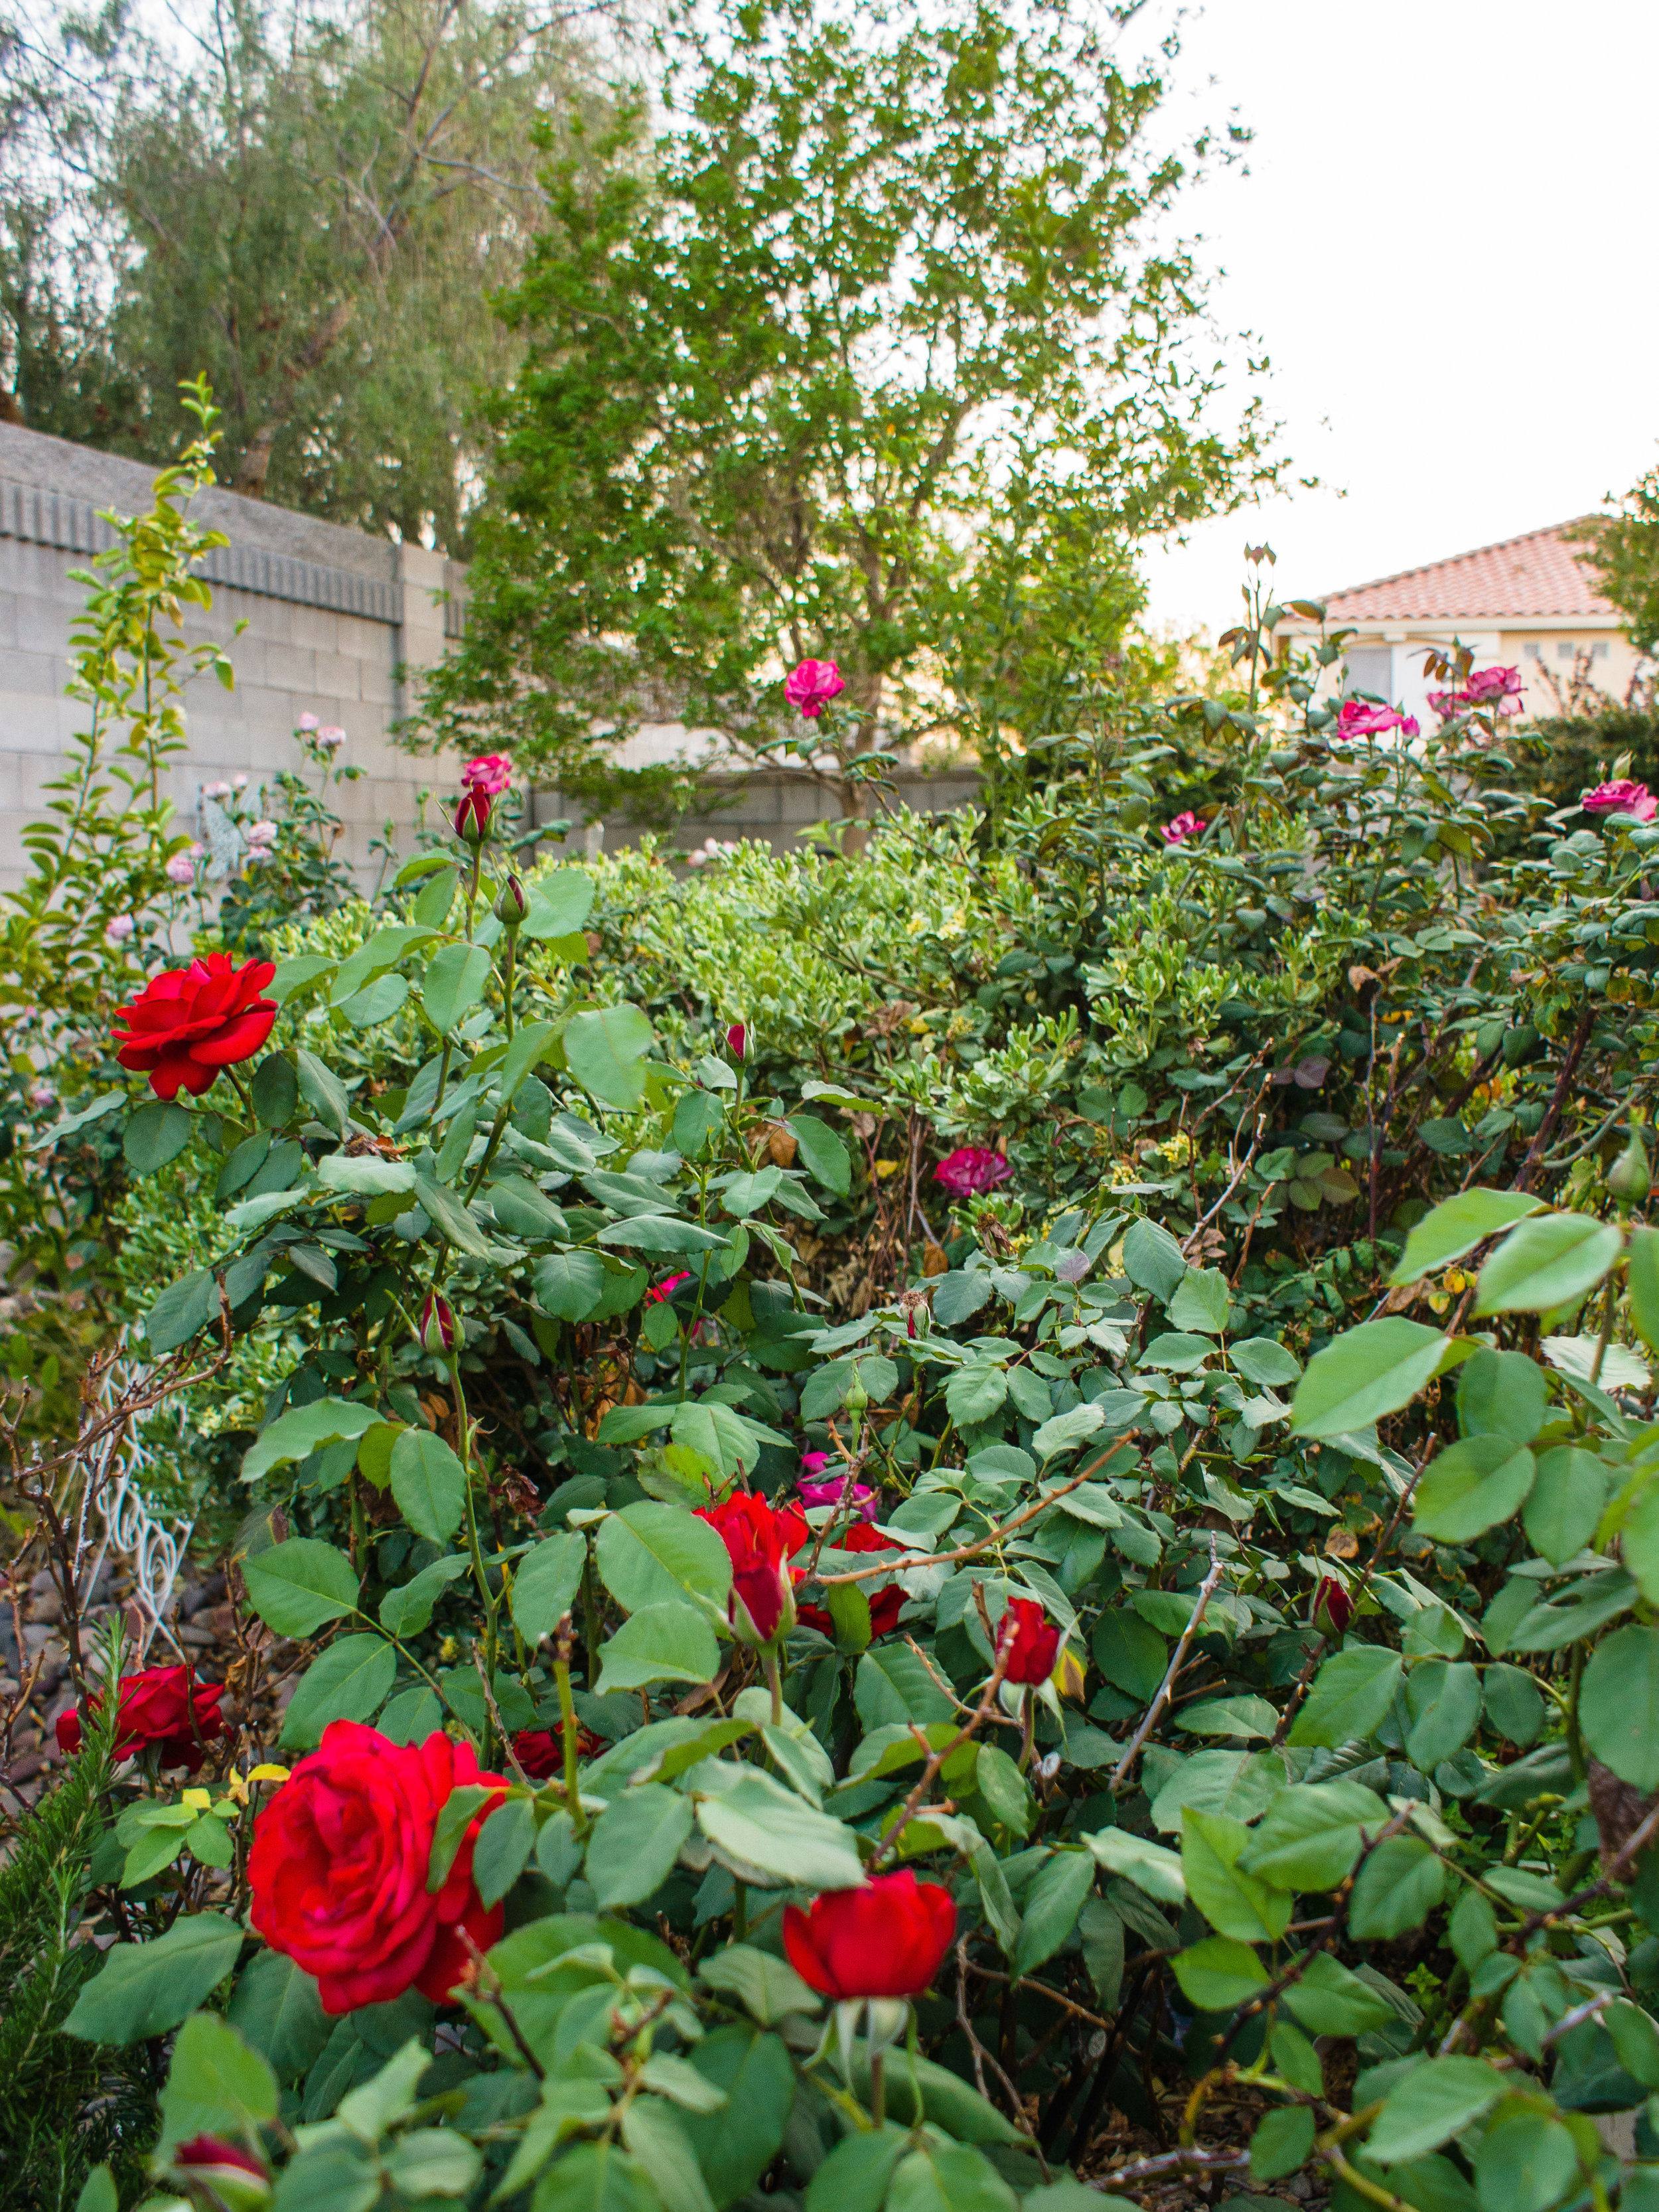
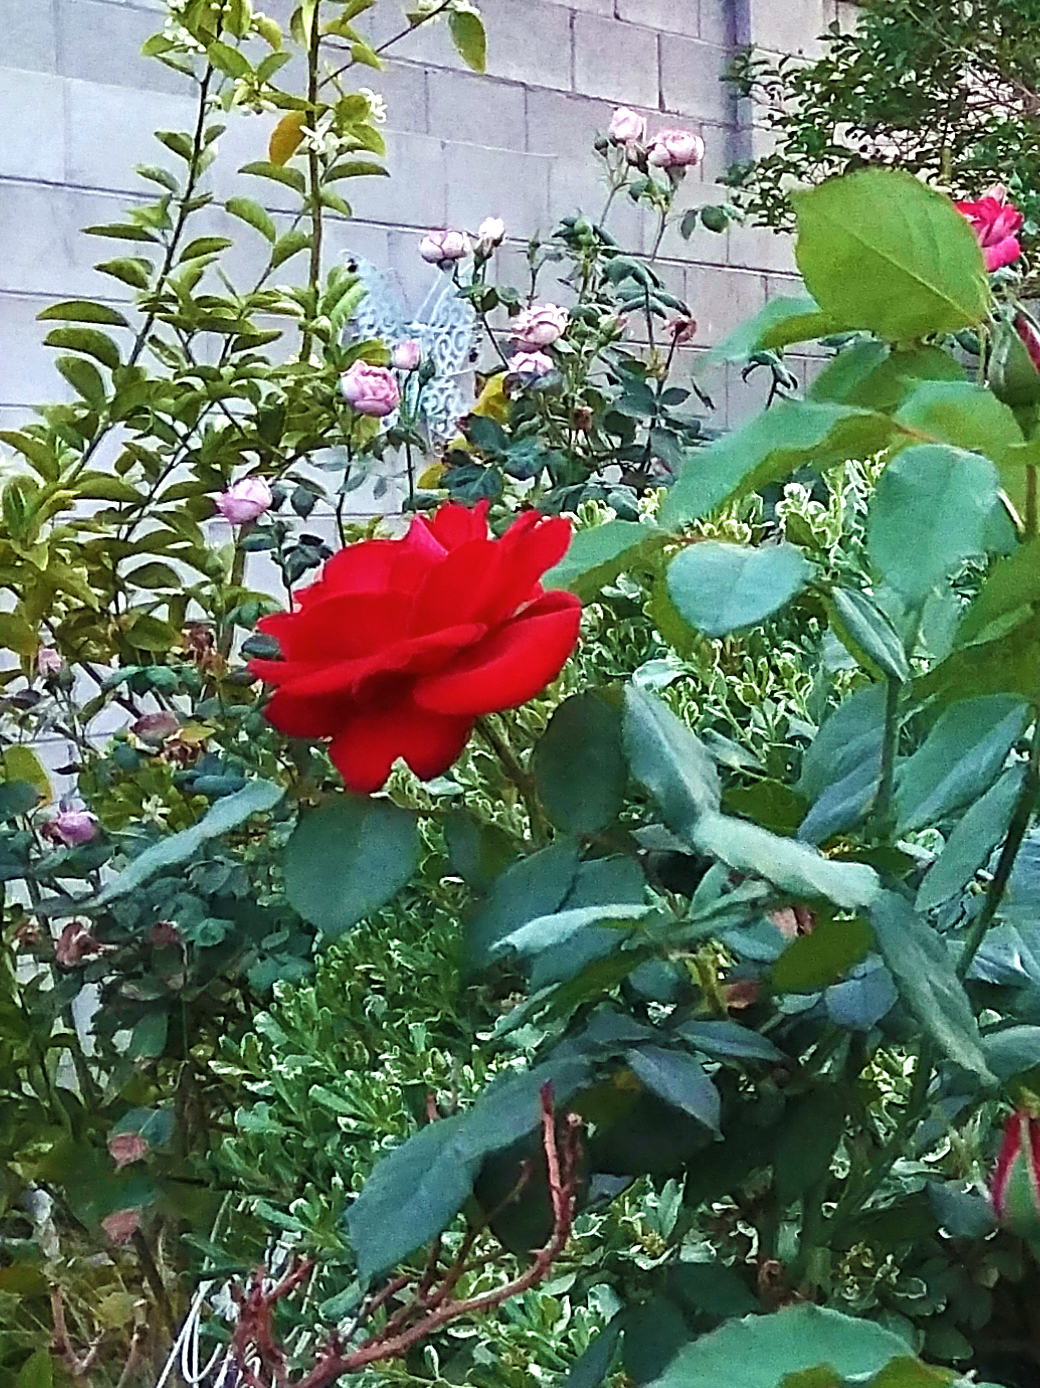
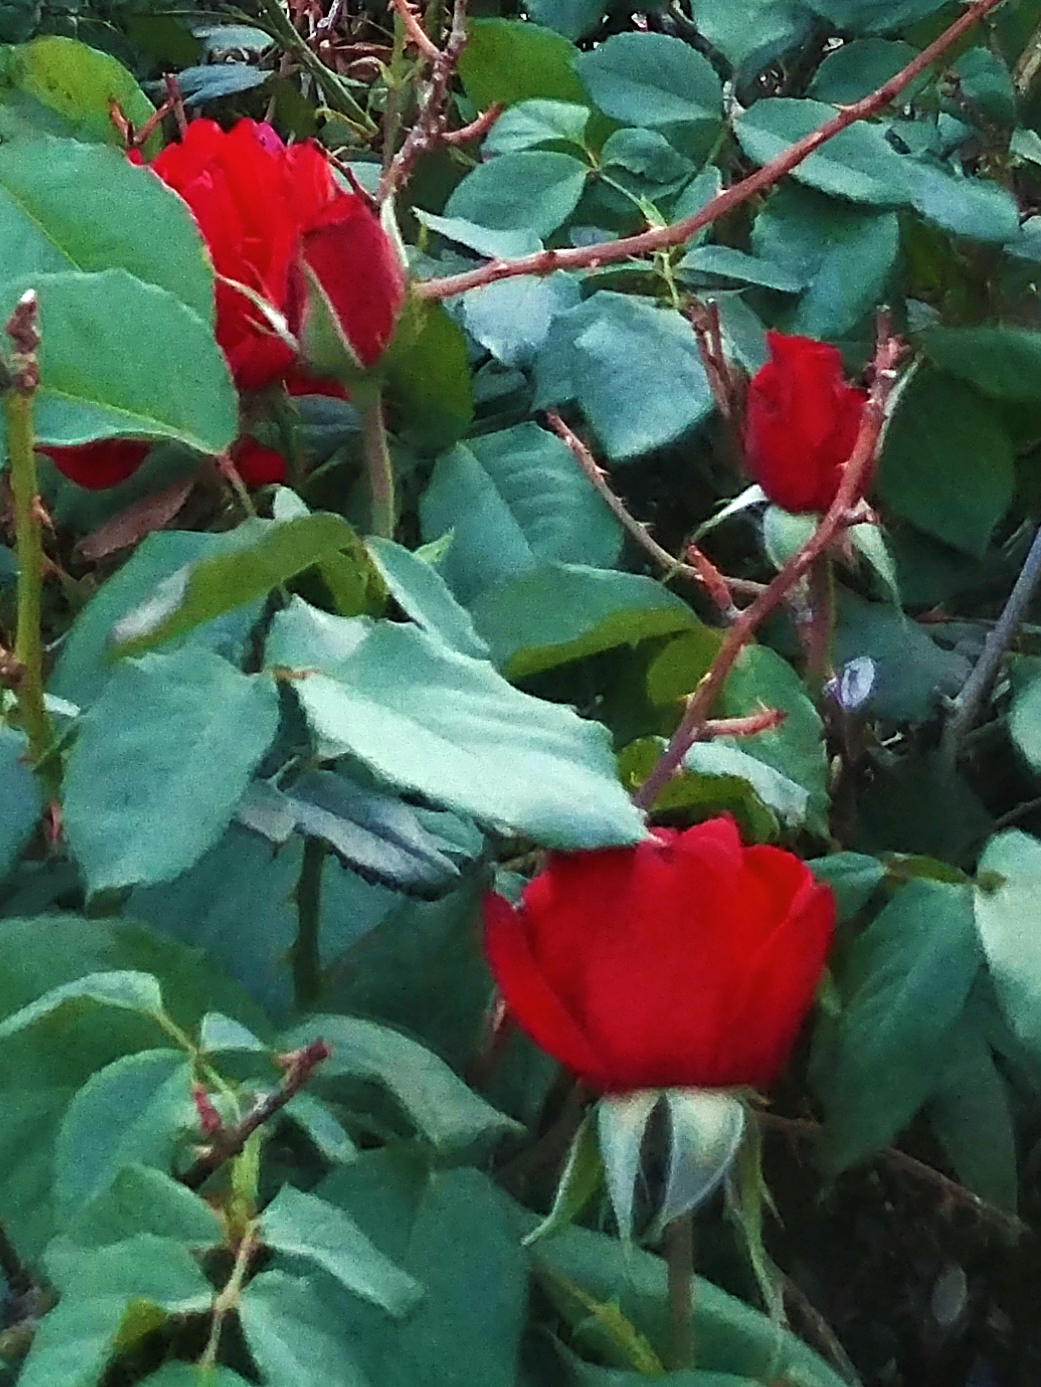
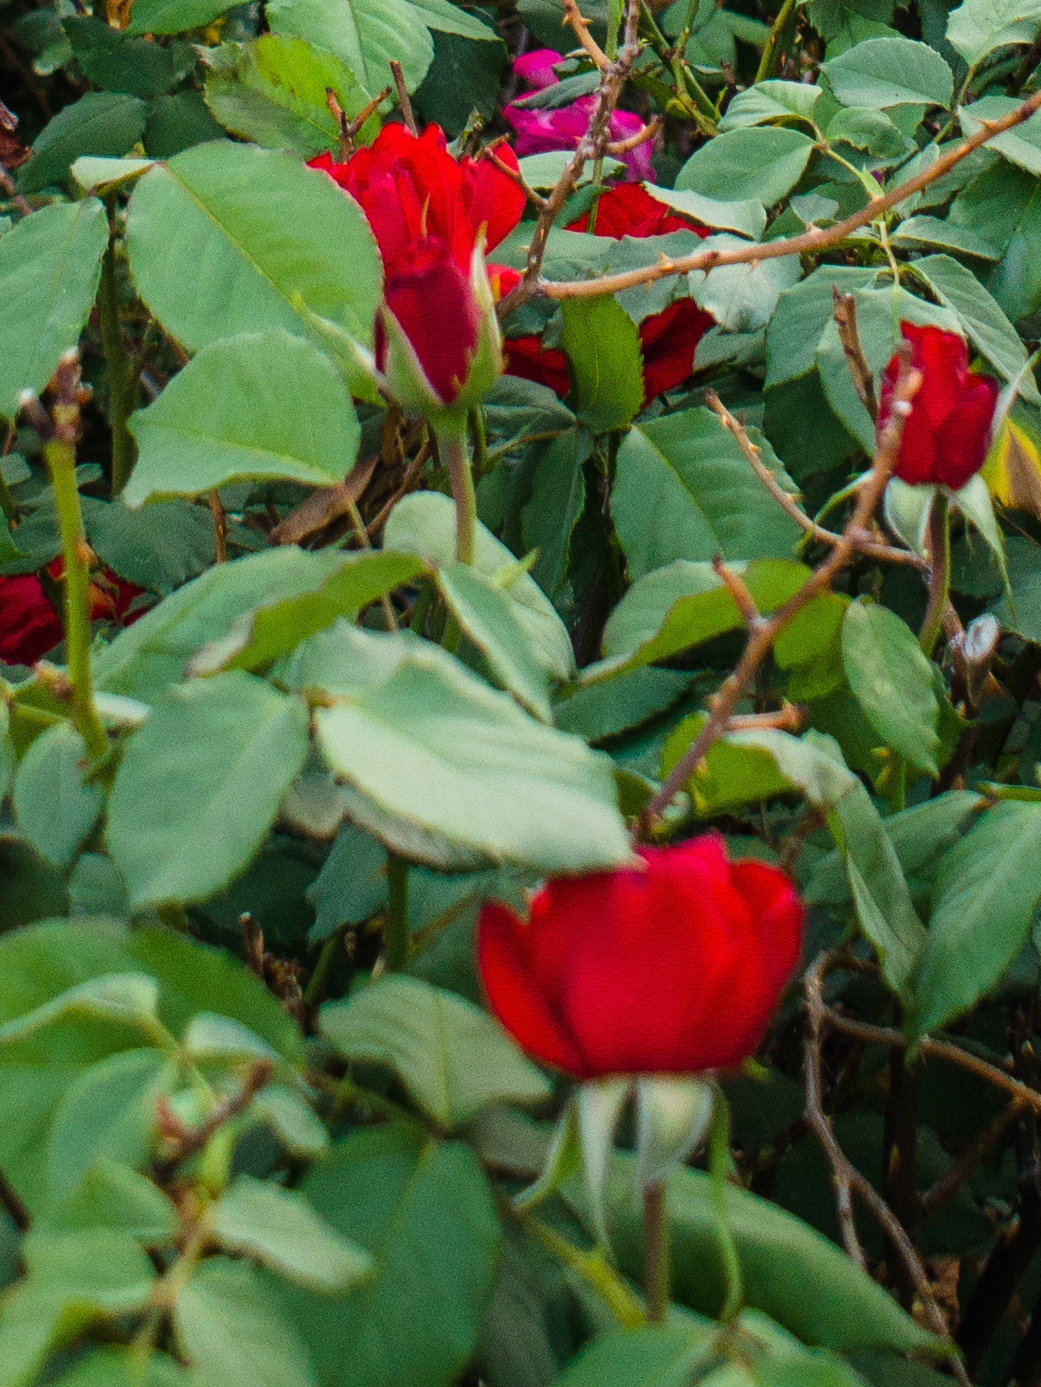
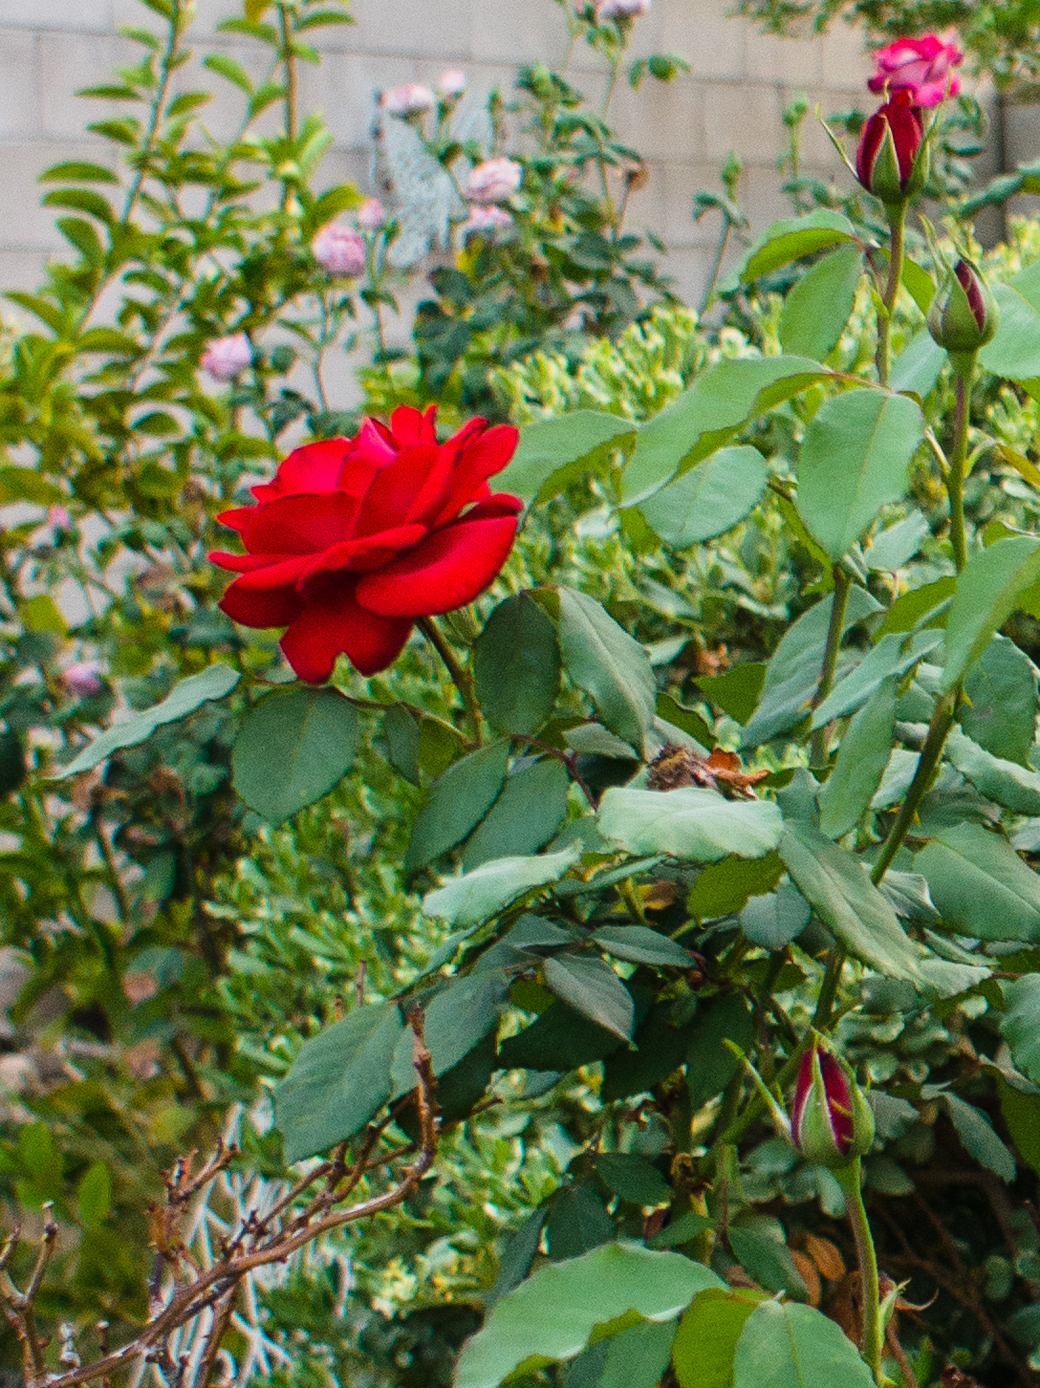
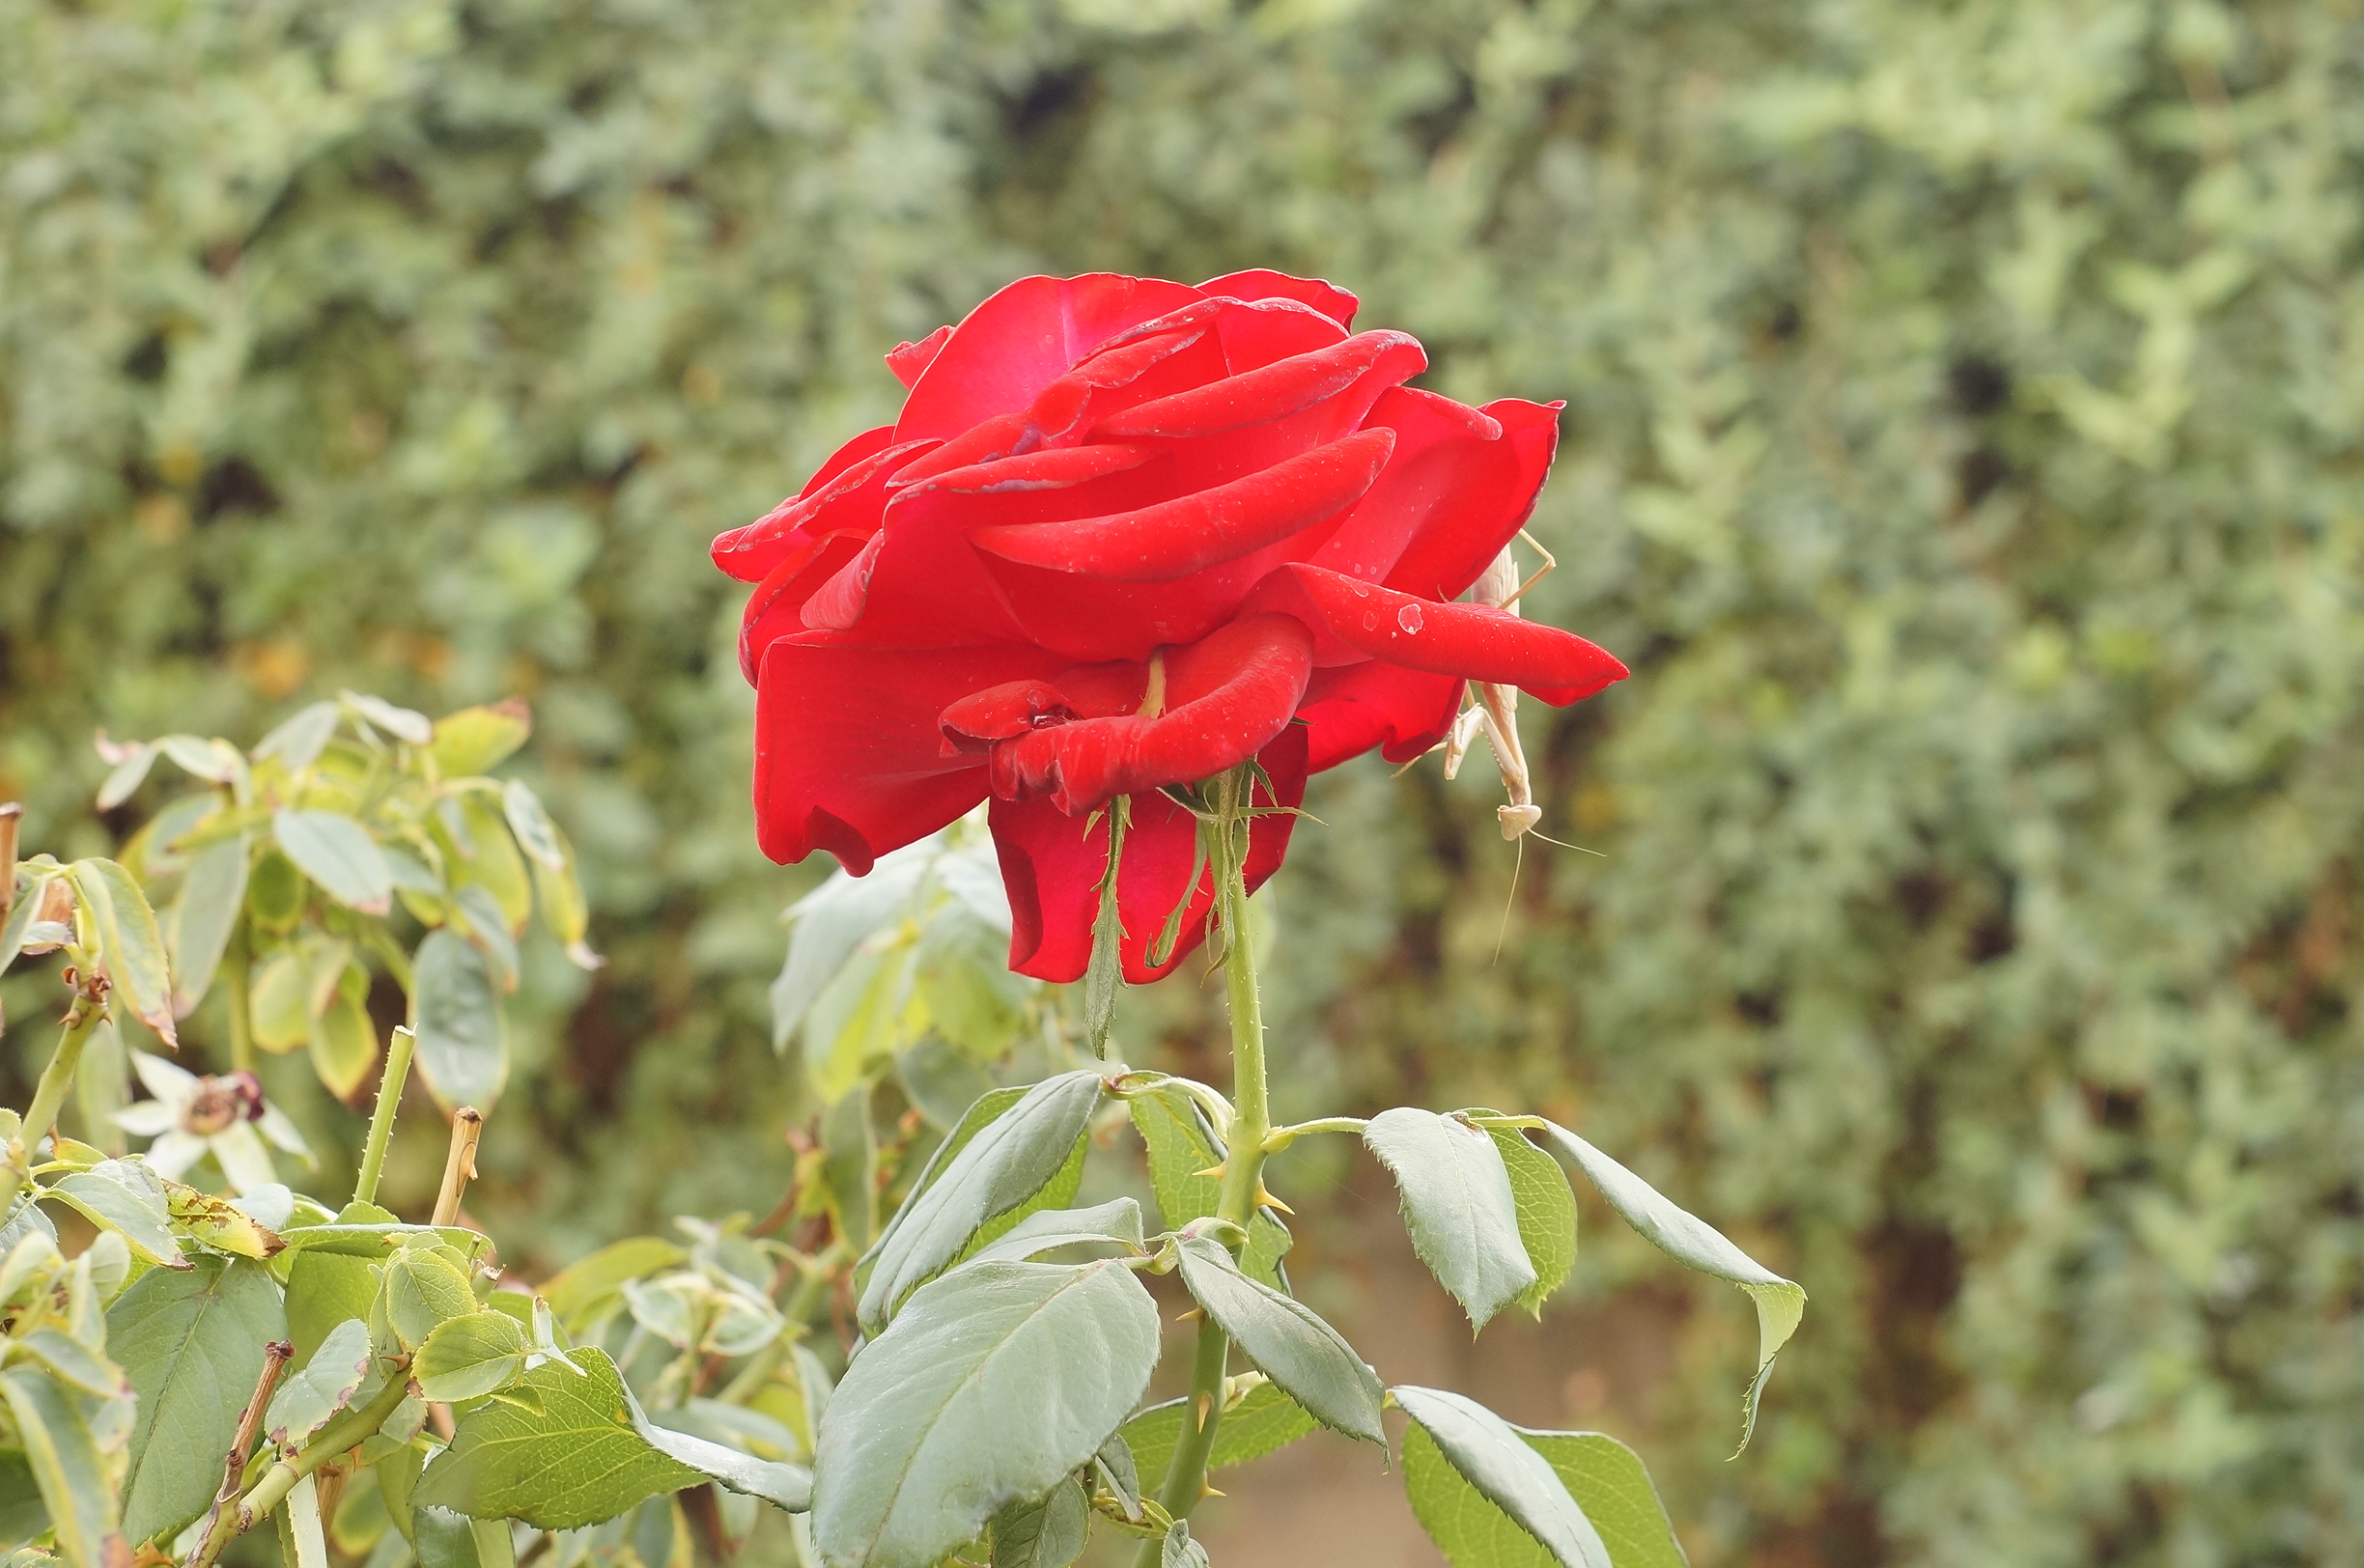
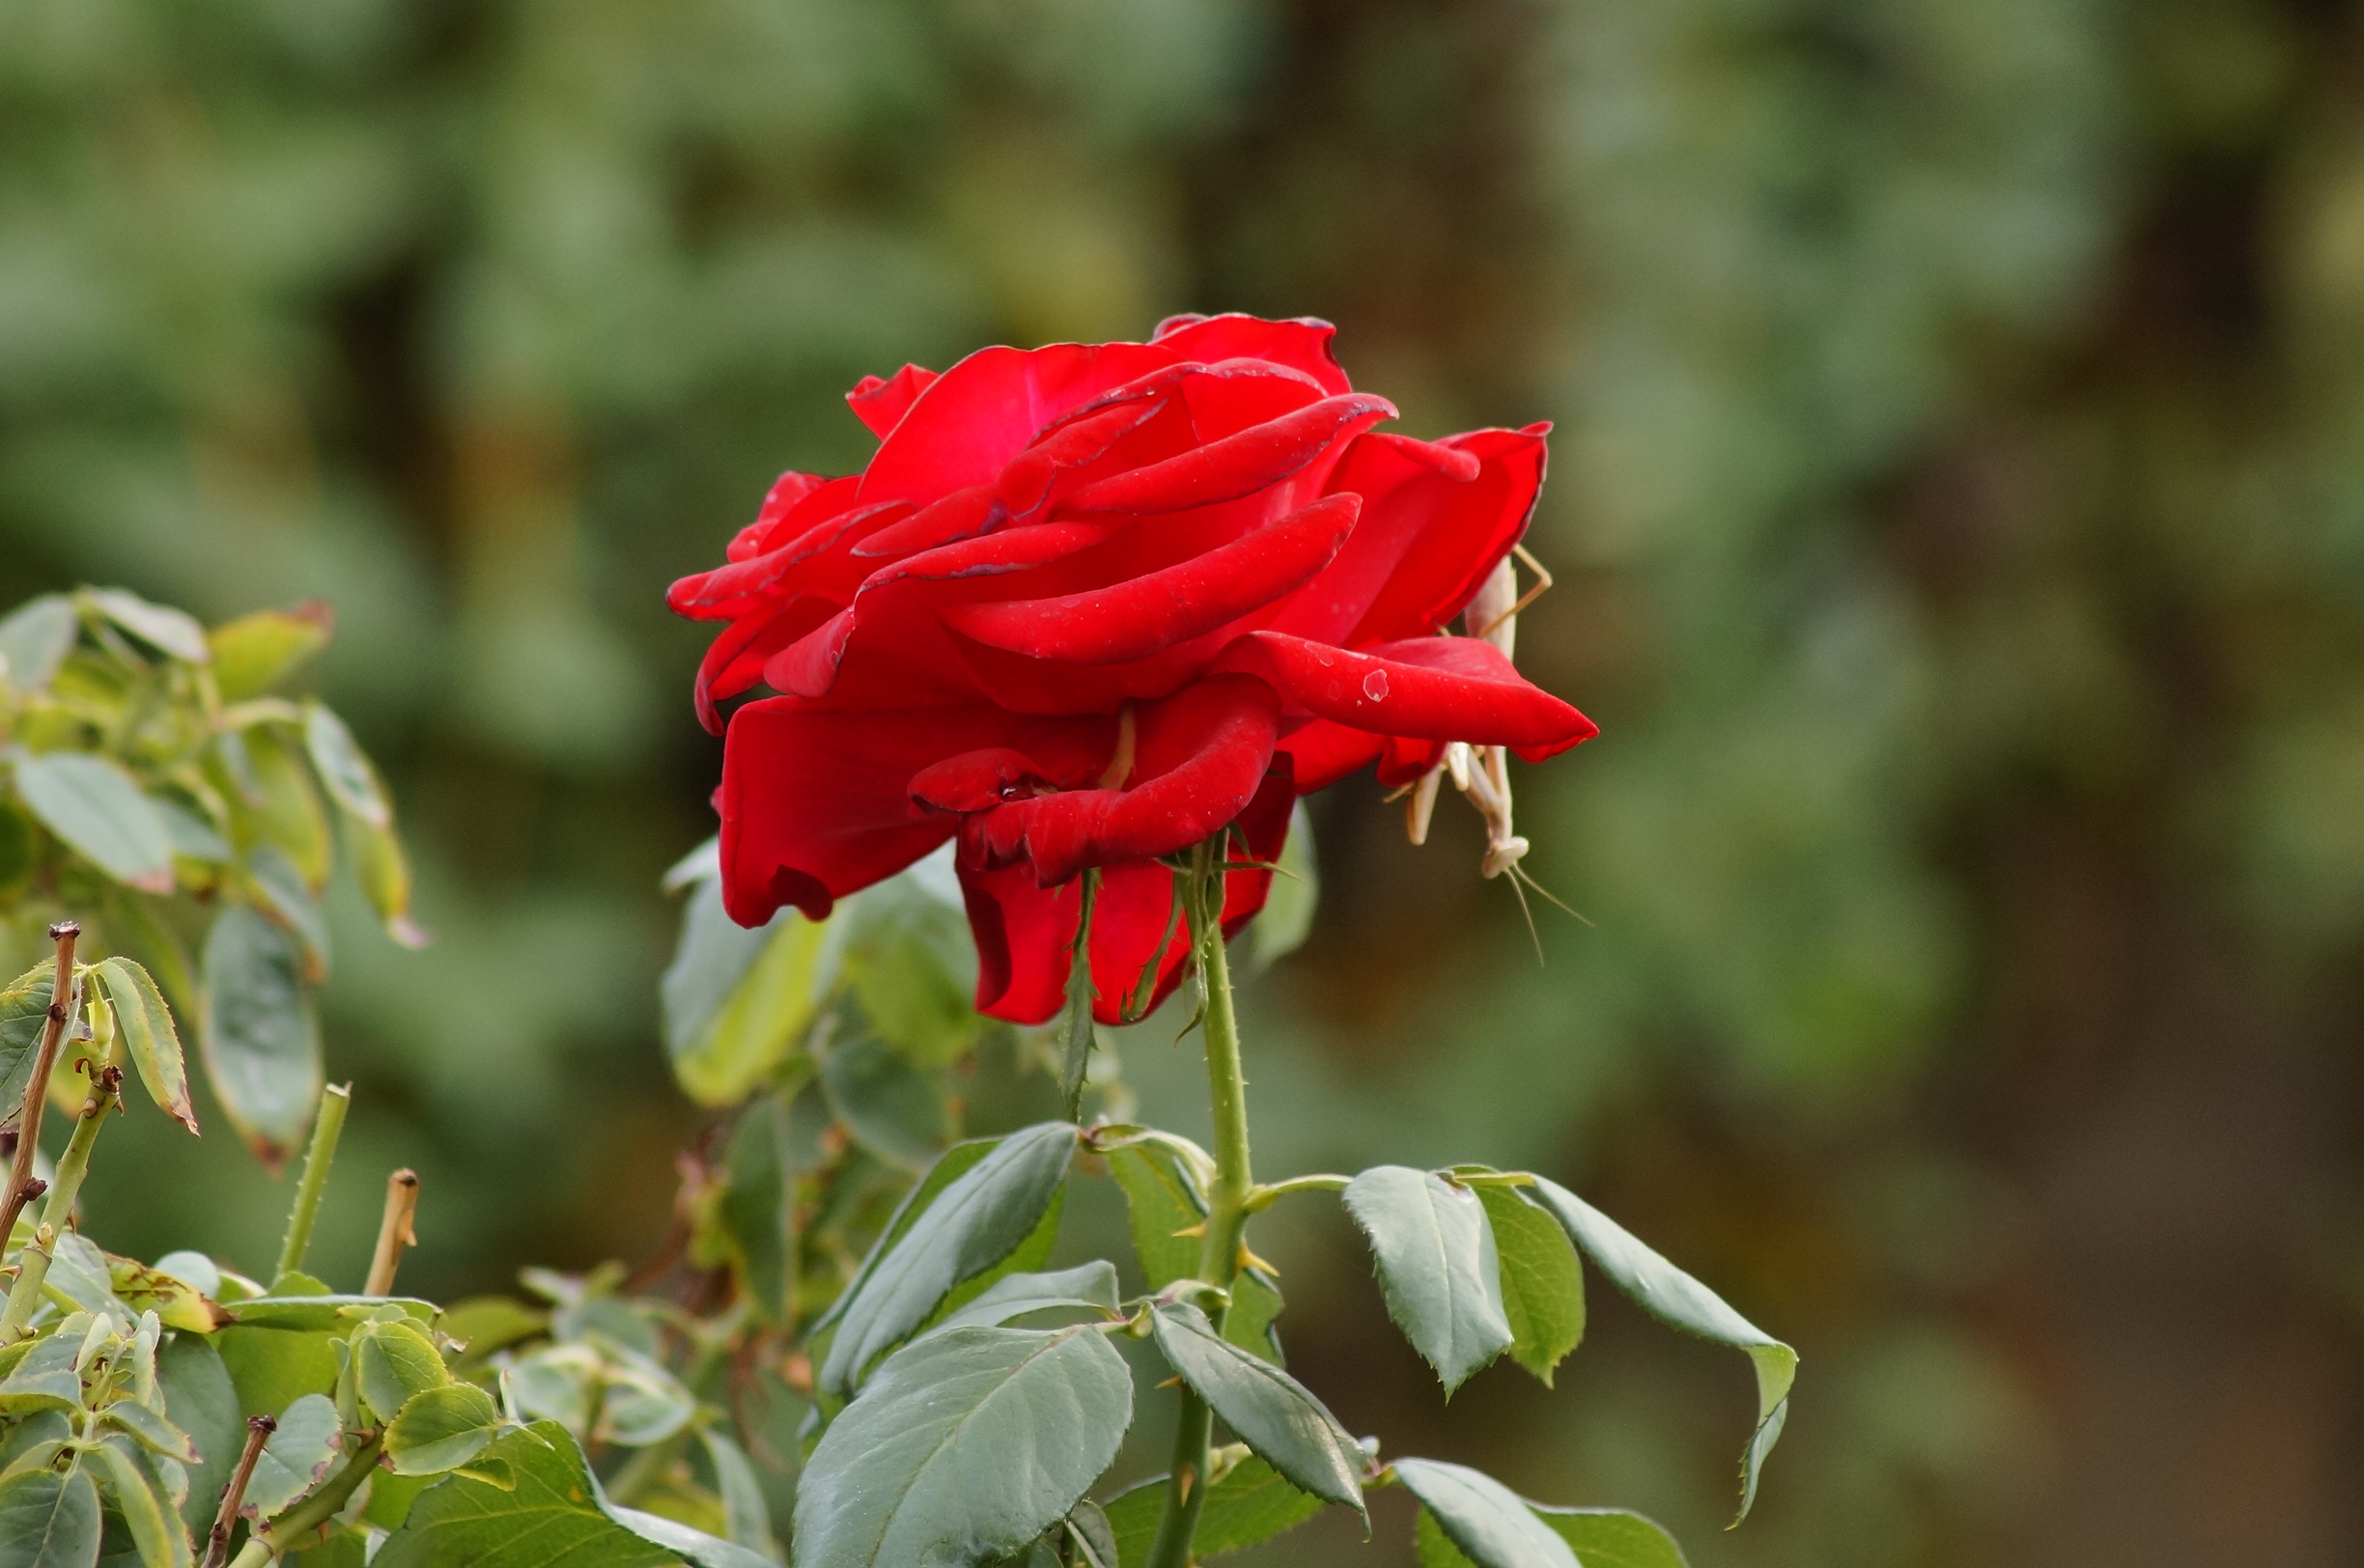
It comes in real handy when you want to get a little closer to your subject. In all reality it is not changing the optics, it is like cropping the image to a 10mp image in the camera instead of doing it in post processing. To show this I took the rose pictures and cropped them to 1800x1200 without resizing them. They are below.

DSC06287 crop.JPG
DSC06289 crop.JPG
DSC06287 crop.JPG DSC06289 crop.JPG

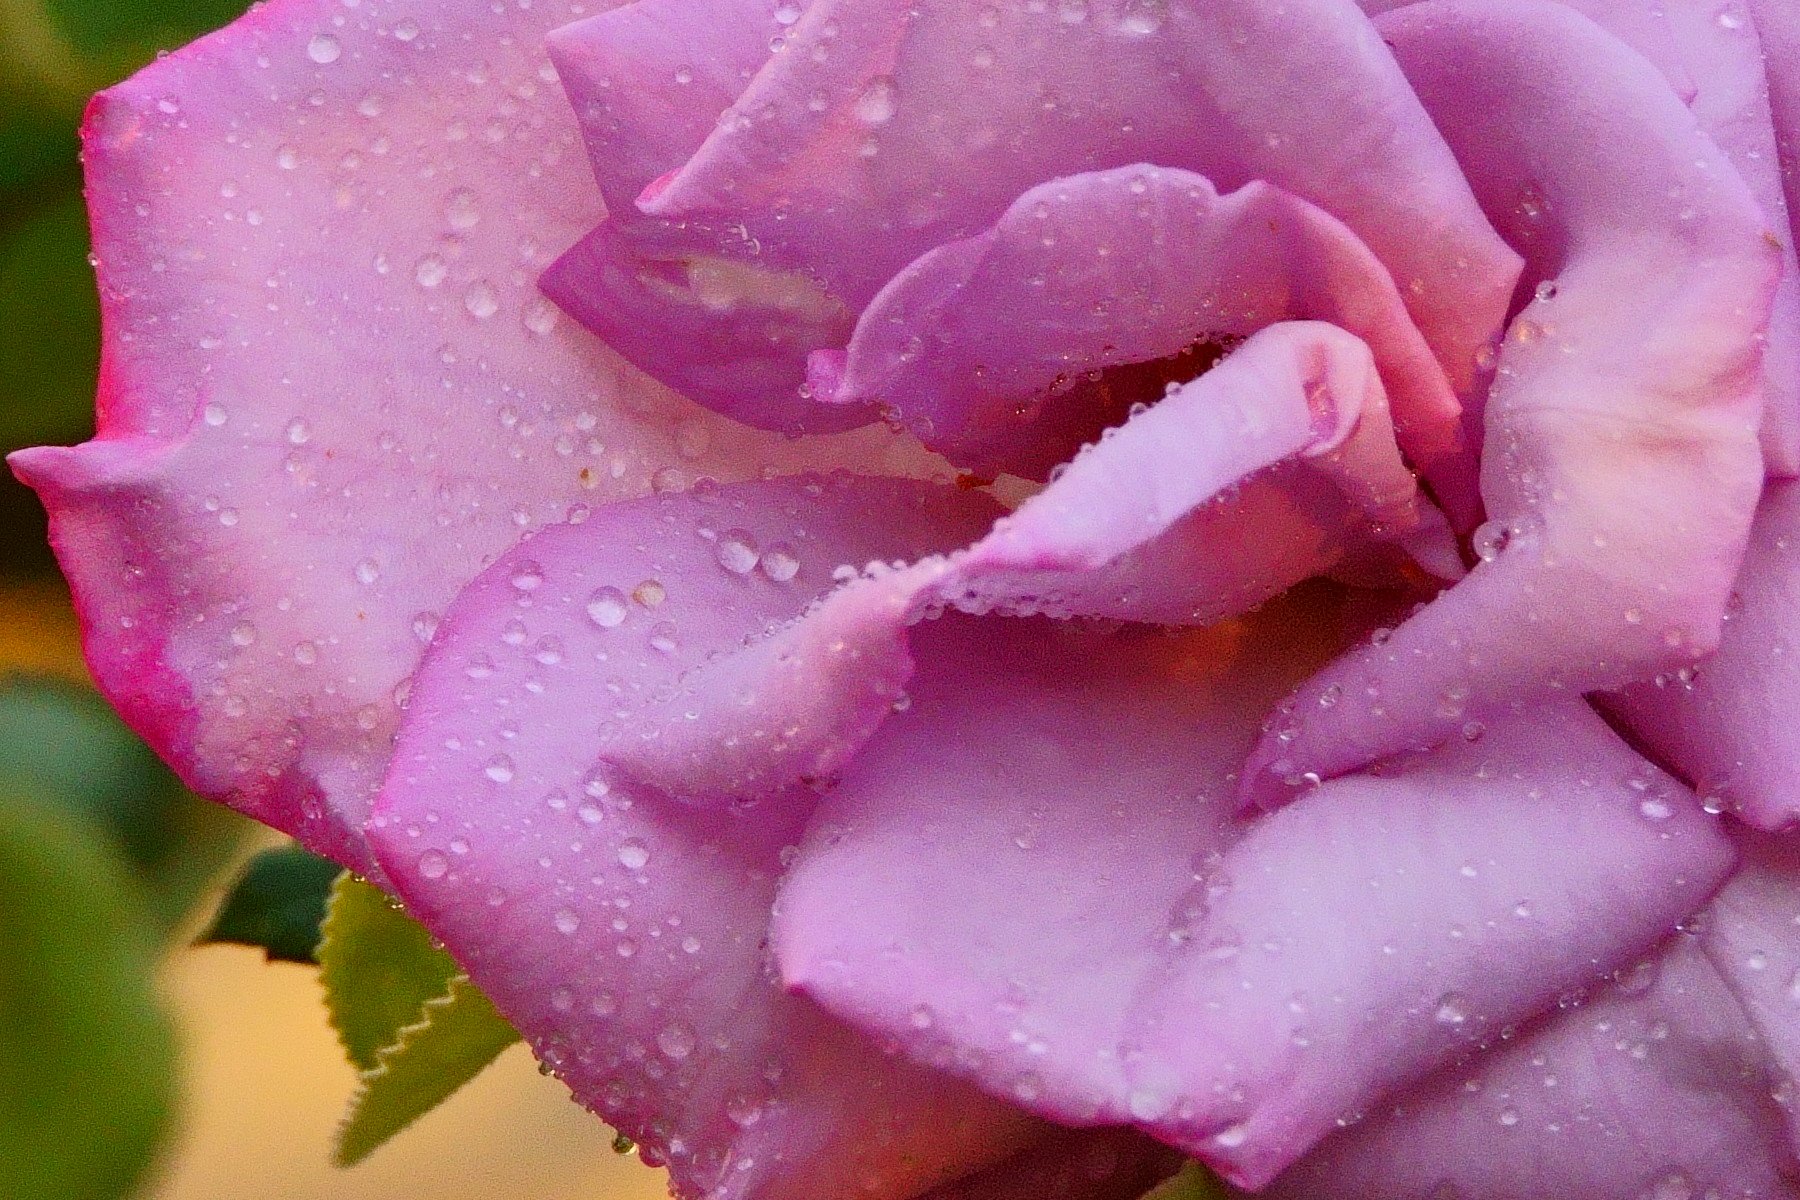
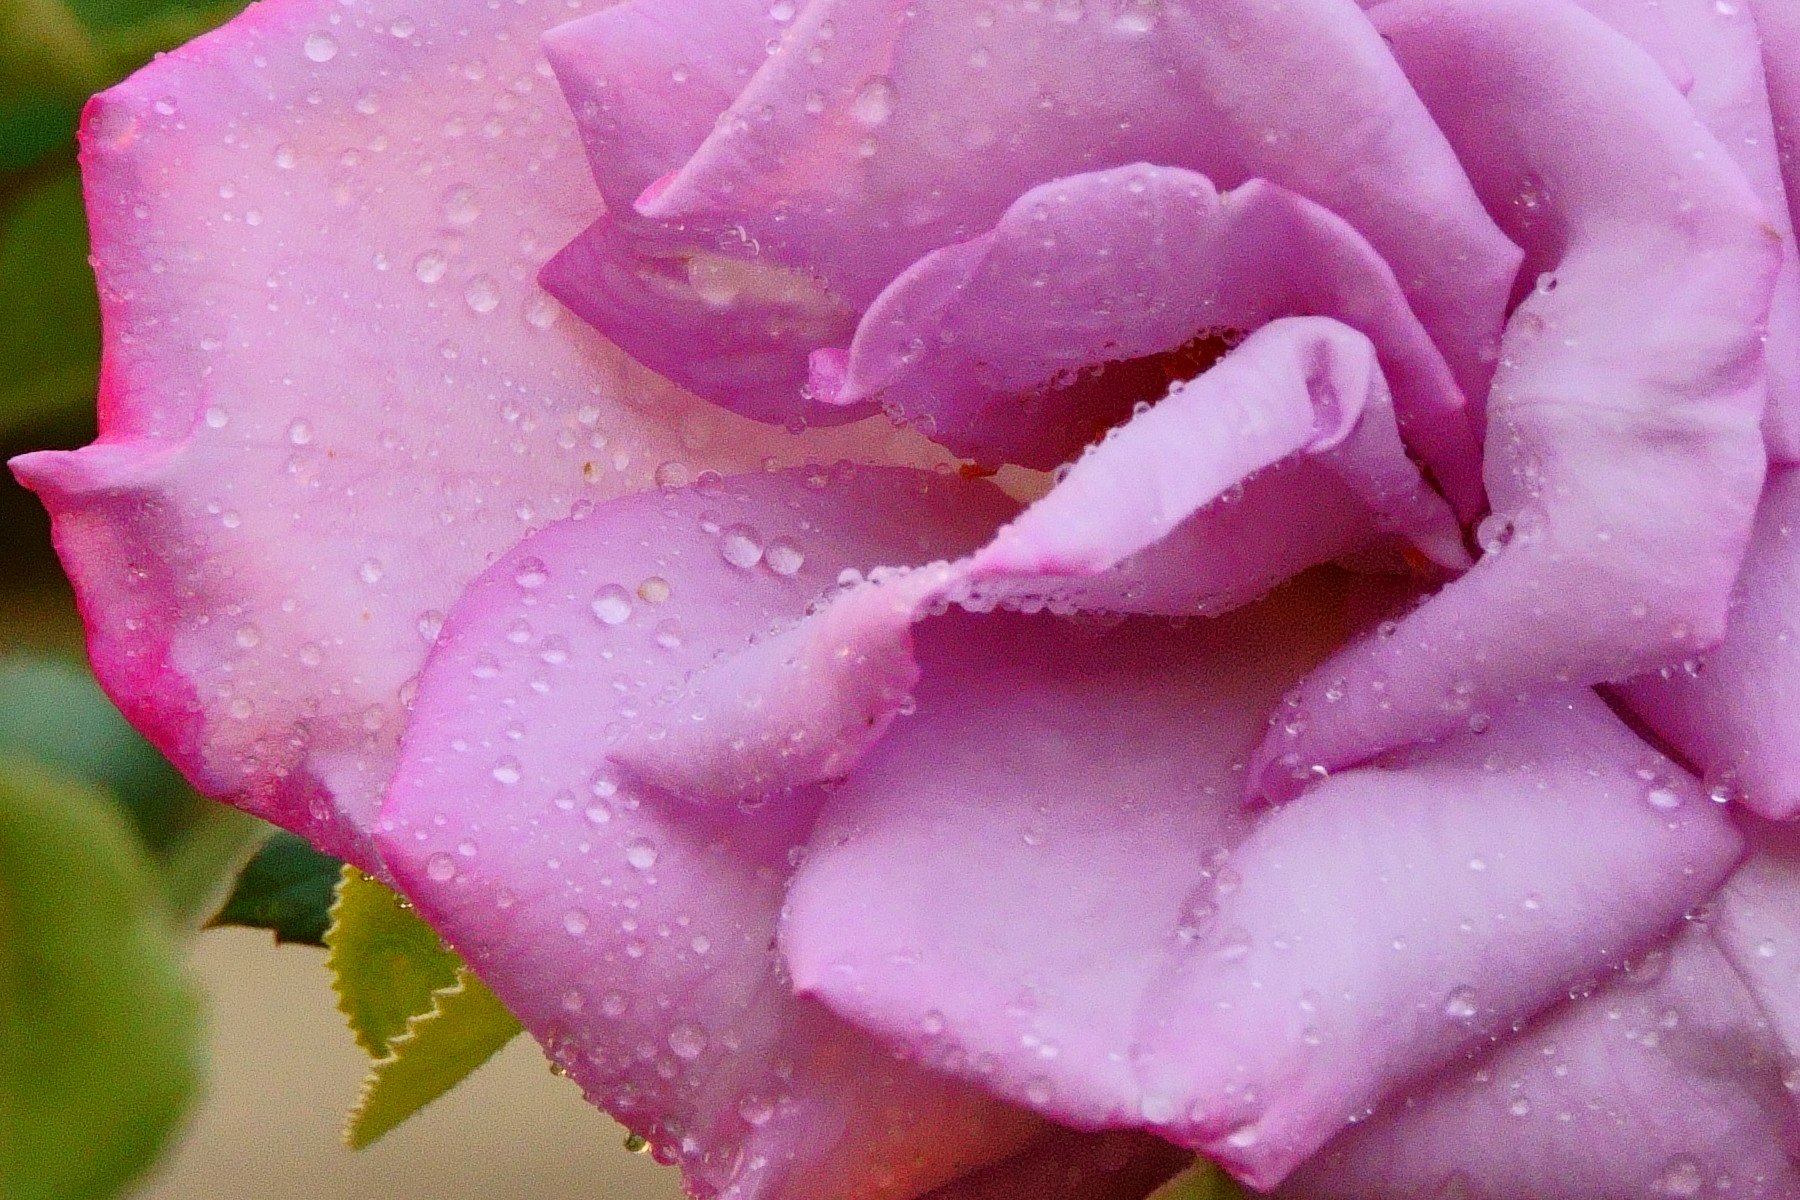
The only reason that I know which is which is from the sun on the wall and even with that I had to look at them uncropped to make sure. It is super useful if you don’t want to do the cropping in post. One less step.

~Scott

tags: crop sensor, teaching, full frame, camera, post process, crop
Thursday 11.04.21
Posted by Scott W Gonzalez
 

Gear Envy

Good morning,

Again it has been a while and I appreciate your patience.

I am sure that all of us has experienced it we see someone else with something that is better or newer or different than what we are using and there is that moment of “I wish I had that” or “If I had that lens/camera/flash/program I could capture/make that image.” I currently have it in regards to my friend Drew. His camera is tech from 2017 and my newest is from 2012. Now this doesn’t mean that his camera takes better pictures than mine is just means it is newer. Mind you I still would like a newer camera and it will happen eventually. There are advantages on both sides. Newer has better ISO capabilities, lighter, better battery, newer tech. The downside is I would have to buy new editing programs and new lenses or an adapter if I want to use my current lenses, I would need to learn a new camera as well.

Taken with my A77 (2011) on the way to meet up with Drew and his A7RIII (2017)

Taken with my A77 (2011) on the way to meet up with Drew and his A7RIII (2017)

The main point here is that sure there is always going to be newer or better gear than what we have unless you can buy the newest greatest thing every few months. Sometimes new things are needed other times the gains are minimal and not worth the cost. I say wait until you have outgrown what you currently have then get the new thing that is out. There are photographers out there that are making exceptional photographs with 35mm film. That from the 1900s. The first patent for a 35mm camera was in 1908. So currently I will stick with what I have any quietly envy other peoples’ newer equipment while at the same time honing my own skills by finding work arounds with what I have.

~Scott

tags: new, gear, equipment, photography, camera
Monday 03.18.19
Posted by Scott W Gonzalez
 

Car Trails

Good evening,

So I realized after publishing the last blog that I am late on it and owe you all one. So car trails were brought up. Once you know how to do them they are easy and it becomes more placement of the subject and background than anything else.

The main needs are a steady camera, a long exposure, cars, and a darkish location.

Here is an 8 s exposure at f18. The camera was sitting on the median and I used a self timer because I did not have a remote.

Here is an 8 s exposure at f18. The camera was sitting on the median and I used a self timer because I did not have a remote.

Ideally a remote shutter and a tripod will be added. It gives some more control over the image. Instead of being limited to guessing on when a car will come into the frame, like I did in the above image, the shutter can be triggered when you want without disturbing the camera. Having a tripod will let you place the camera where you want for the image you are trying to create.

Below I had a tripod and remote shutter. So I was more focused on other aspects of the image than just when the car was coming into the frame. I knew the Milky Way and Luxor light were in the frame. I also placed the bush, that is illuminated by my tail lights to give the image more depth. On a side note that is not the sunrise, it is the lights from Las Vegas.

A tripod mounted 30 second exposure. The car was traveling relatively slow so I did a longer exposure.

A tripod mounted 30 second exposure. The car was traveling relatively slow so I did a longer exposure.

I have not gotten a really good capture of it but keep in mind that flashing lights from emergency vehicles can add a bunch of interest to a car trail image.

While getting ready to pull out I saw the flashing lights coming my way so I quickly grabbed my camera and set it on my dash, no timer and I had to stop it from sliding around on the dashboard. Not a sharp image it does show the lights well though..

While getting ready to pull out I saw the flashing lights coming my way so I quickly grabbed my camera and set it on my dash, no timer and I had to stop it from sliding around on the dashboard. Not a sharp image it does show the lights well though..

So have fun with it. Grab your gear after nightfall and find some cars hopefully with their headlights on.

PS if you have any questions about photography that you want me to tackle let me know in the comments or through the contact page.

tags: cars, lights, camera, photography, learning, teaching, long exposure, night
Monday 12.24.18
Posted by Scott W Gonzalez
 

Deleting photos

Good Morning,

Sorry it has been a while. School is out and 2 kids are time consuming. Today is just a tip for a pain in the but process I have been dealing with. I have had many times where I took way more pictures than needed to get the shot that I wanted to capture. Like blowing out candles during a birthday party, hitting the ball  during a game, a first kiss during a wedding, etc... Taking a plethora of pictures in this day and age is easy. It is also easy to let a few days build up then a few weeks then a month or two and if you are not careful it can turn into a year or more. In years 2014 and 2015 I took over 13000 pictures each year. Realistically at most about half of those were good quality, in focus, and not a near duplicate image. That brings it down to 7500 each year. While spending hours going through and deleting these I realized that it would have been easier to go through them after uploading. With our megapixels increasing hard drive space becomes limited, a 2 gb card will hold around 115 raw files from a 16mp camera or 57.5/GB. One terabyte would only hold around 58,000-59,000 of those same files. 16mp isn't even a large image size either anymore, a quick search showed a 50mp camera from Canon. My advice here is to delete the photos that aren't your best after uploading them. It takes a few minutes and give you time to enjoy your photos. If it becomes a habit then you don't have to look through thousands of photos all at one time because you are running out of storage space.

_DSC9118.jpg
_DSC9122.jpg

These two images were taken 1 second apart and there were 3 captures between these images and about 20 captures total. I kept five or around a quarter. Delete, free up some space, grab your camera then go out and shoot.

~Scott

tags: camera, teaching, storage, space, learning
Wednesday 06.27.18
Posted by Scott W Gonzalez
 

Best Camera

Good Evening,

A question often asked to photographers is what is the best camera. A common response is "The one you have with you." This is a little misleading because it doesn't actually give any new information. If we only have a camera phone with us to catch a moment then it is the best camera. That doesn't mean that we should just take a phone with us to capture a special event like a wedding, birthday, party etc... especially if it is a planned event. It doesn't make sense. Yes great images can be made with cell phones. How many times do we see a great or even good photographer going out to a location with just a cell phone. What we are planning on doing with the image is also critical. Posting online or making small prints, it doesn't matter as much. Making large prints, the cell phone might not cut it.

This is more about knowing the limitations on equipment rather than bashing the idea of a highly portable and relatively inconspicuous camera. A cell phone has a smaller sensor (some as small as 4.54 x 3.42mm) compared to most other cameras but often the same amount of megapixels. Which means it has less space to fit all those pixels (think of each pixel as a bucket to capture light), meaning more noise in the image, less low light capabilities, and most likely less dynamic range (the HDR option can help). Full frame DSLRs have a 36 x 24mm sensor and regular DSLRs have 23.60 x 15.60mm. If there was the same amount of pixels on all three the the regular DSLR would have over 23 times the sensor surface and the full frame would have over 55 times.

Below we have relatively the same image taken with an LG G6 and a Sony a77. Trying to match the color was a pain.

g6 roses.jpg
SLT roses.jpg

Some might see it as good thing others might see it as bad. With a DSLR one can select the area that they want in focus, with a cell phone not so much, most everything is in focus. The difference can be seen in the images above.

Below are some crops of the images above. The differences in detail, transition from in and out of focus areas, and how they are rendered by the programs. The order goes LG then Sony through the slideshow.

g6 rose colored.jpg
SLT rose colored.jpg
g6 roses left.jpg
g6 rose bottom.jpg
SLT roses left.jpg
SLT roses bottom.jpg

Now some good things about cell phones. Pictures can be shared to social media, emailed, or texted right away. To get the most out of a DSLR processing of the image needs to be done. Selfies are so much easier with them too. Just like with everything there are good and bad things. So pick up the camera that you have then go out and shoot.

~Scott

tags: cell phone, camera, compare, best camera, dslr, teaching, learning
Friday 04.20.18
Posted by Scott W Gonzalez
Comments: 1
 

Lenses: Focal Lengths

Good Morning,

Today we are going to talk about focal lengths and their effects on images. We have discussed different focal lengths and what they are generally used for. We have not talked about how they affect the image or rather the relationship between subject and background. Below is a series of a red rose with a praying mantis on it in my backyard. I tried to stay focused on the same spot of the rose but moving and changing lenses does not help, thankfully the wind didn't give me any issues. First image is at 11mm, some distortion can be seen on the wall and the area of focus is wide and it looks like the wall is pretty far away. The second is at 18mm and the wall looks closer, pretty much everything looks closer or tighter, the distortion at the wall is negligible, and praying mantis is still judging us. Third we have 50mm and we can barely see any of the wall, the image is a bit brighter, I didn't have it on manual and it changed shutter speed was changed in Av. The honeysuckle doesn't look as far as it did before and out area of focus seems to have shrunk.  Fourth is 100mm and it was switched to manual mode. The praying mantis is so judgemental and has been for a while. It appears that the honeysuckle is just behind the rose bushes leaves and is rather out of focus. Fifth and final image is at 300mm, sorry the angle changed a little to keep in the same size I had to go up a step. The mantis stared directly at the camera, finally. The leaves are hard to make out on the honeysuckle now and look pretty close.

_DSC6558.JPG
_DSC6559.JPG
_DSC6560.JPG
_DSC6561.JPG
_DSC6563.JPG

As can be seen through the images. If a subject is kept the same size the relationship with the background can be greatly affected by the focal length of the lens. What we are trying to convey with our images can be changed by zooming. Now go out and shoot.


~Scott

tags: focal length, camera, teaching, education, example, equipment, lens, telephoto, wide angle, normal
Tuesday 11.14.17
Posted by Scott W Gonzalez
 

Filter: Neutral Density Filters aka ND

Good Evening,

Today the little ones and I went to Red Rock Canyon. I brought along some ND filters to show what they can do.

ND filters are basically like putting sunglasses on a camera. They darken the whole thing. There are a few reasons to want to do this. Wanting to use a large aperture to have a shallow depth of field, wanting a long or longer exposure time, making flowing water silky, removing people from a busy location. They come in different strengths. Just like CPL filters they can be costly and we can buy one set for our largest thread lens and then step rings for the rest of the lens. Ultimately we want a filter that darkens the frame evenly without adding a color cast.

I did not use an ND filter for either of these images. I was testing a new lens and seeing what I could get out of it. I was planning on taking some water images today but alas didn't get the chance as there hasn't been any recent rain. This does gi…

I did not use an ND filter for either of these images. I was testing a new lens and seeing what I could get out of it. I was planning on taking some water images today but alas didn't get the chance as there hasn't been any recent rain. This does give an idea of what an ND filter can do to a scene though.

There are also graduated ND filters which are used to darken a bright sky over a landscape so both can be seen. They come in both screw on filters and in a square filter with a holder. Just like the regular ones also come in different strengths.

Here is what I shot today with the girls. Notice both are about even on the ground but with the grad ND the sky looks better and not as blown out. For a scene like this I should have had the grad tilted more toward the sun on the left. I tried it bu…

Here is what I shot today with the girls. Notice both are about even on the ground but with the grad ND the sky looks better and not as blown out. For a scene like this I should have had the grad tilted more toward the sun on the left. I tried it but wasn't paying attention and got my finger in the frame because I was talking to children.

As for removing people from scenes I have pictures of them removed but no before shots. If I go to a populated area where people are moving I will get it. Until then see where an ND might fit into your needs. Now go out and shoot.

~Scott

tags: ND, neutral, density, filter, teaching, camera, education, example, equipment, long exposure, exposure
Sunday 10.15.17
Posted by Scott W Gonzalez
 

Settings

Good early morning,

I am going a little off the plan. I didn't plan for anything horrific to happen when I said I would be talking about filters part 2 ND filters. It did though and I have spent time out helping with recovery and memorial efforts. So today I am going to discuss something that happened to me today.

Generally I shoot in RAW, sometimes I use the small jpeg for things that shouldn't need editing. I took some in jpeg format and forgot to change it back. I took my daughters out hiking today for a picnic dinner, to get away from the TV, social media, radio, and to take some pictures. After picking up my A77 and checking the charge I noticed that it was on jpeg. I changed it to RAW before I took out the battery, so I wouldn't forget. After getting to RRNC and taking a few dozen pictures I realized that they were jpegs again. So the moral of the story is to change your settings back to your normal after the shoot and check it before the shoot too. It sucks to think you have all this latitude with a RAW file only to find you have a jpeg that is reduced from a 24 meg to a 6 meg file. Luckily it wasn't anything that I was being paid for it was all just fun with my daughters.

This is the 5 year old. If you didn't know she was laughing that might almost look like a surprised I fell expression.

This is the 5 year old. If you didn't know she was laughing that might almost look like a surprised I fell expression.

This is the 6 almost 7 year old, we have to work on her acting.

This is the 6 almost 7 year old, we have to work on her acting.

Even with all the things going on around us we can still find times for fun and pictures. There was some stargazing which will probably be worked into a future discussion. I am not sure about other camera systems and if they are the same as Sony in this regard, I believe that removing the power source changes the settings back to what they were for the last capture. So double check before you shoot. I should be back on track next week and I will get some photos on the CPL post too. Now go out and shoot.

~Scott

tags: setting, mistake, camera, reset, preshoot
Sunday 10.08.17
Posted by Scott W Gonzalez
Comments: 1
 

Powered by Squarespace.