• Photography
  • About
  • Contact
  • Light Writing

Scott W Gonzalez

  • Photography
  • About
  • Contact
  • Light Writing

Flash 5 (color change)

Hello,

Today I am going to write about changing the color of flashes.

There are a few ways to do it.

The WB can be changed with a global image change. Daylight will keep it about the same, Cloudy and Shade will make it a more yellow/orange. Fluorescent will make it Purplish and Tungsten will make it Blue.

Another option is to change the color of the light coming from the flash by bouncing it off of something or by putting a filter over the flash. This is what I want to write about.

The short is paper or gels can change the color of the flash in select areas.

White lilies on a blue background, colors have been changed by 2 flashes with blue and red paper over them.

White lilies on a blue background, colors have been changed by 2 flashes with blue and red paper over them.

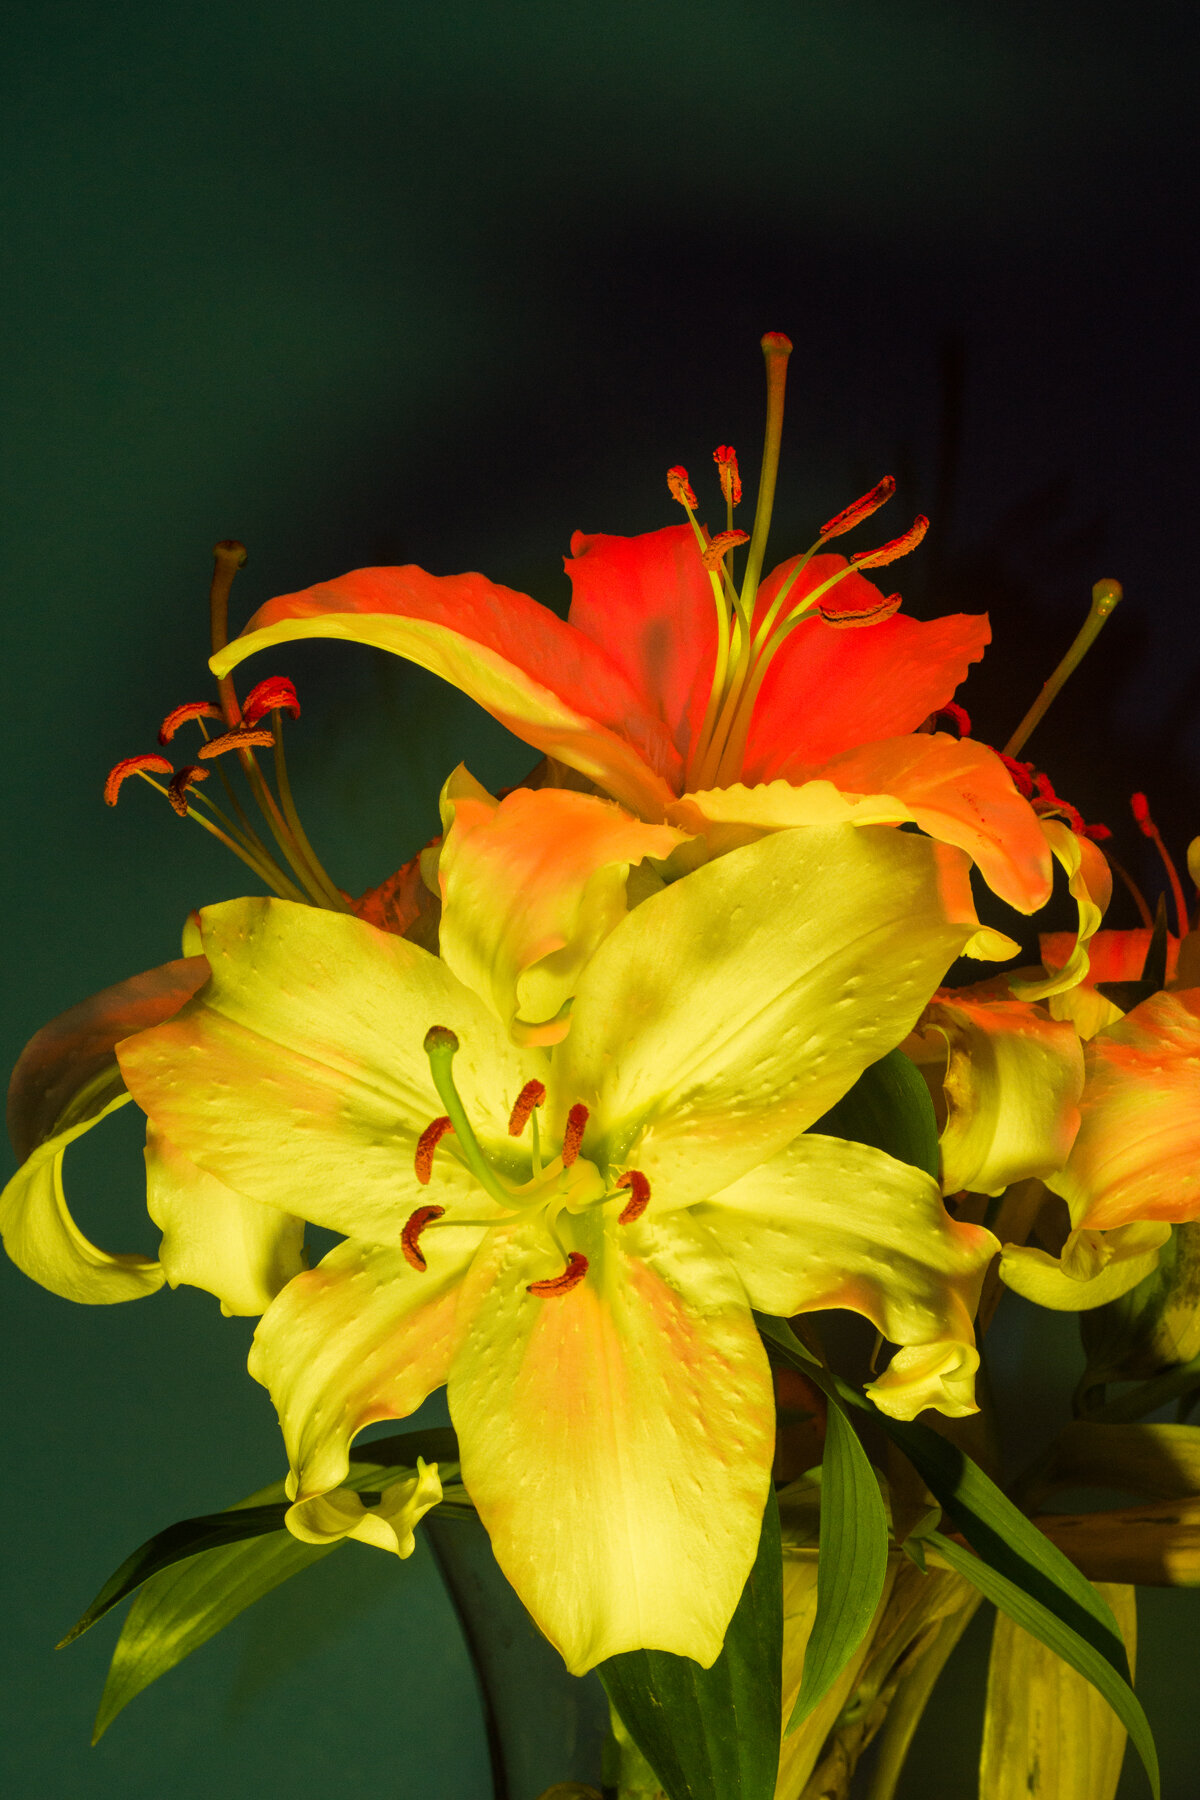
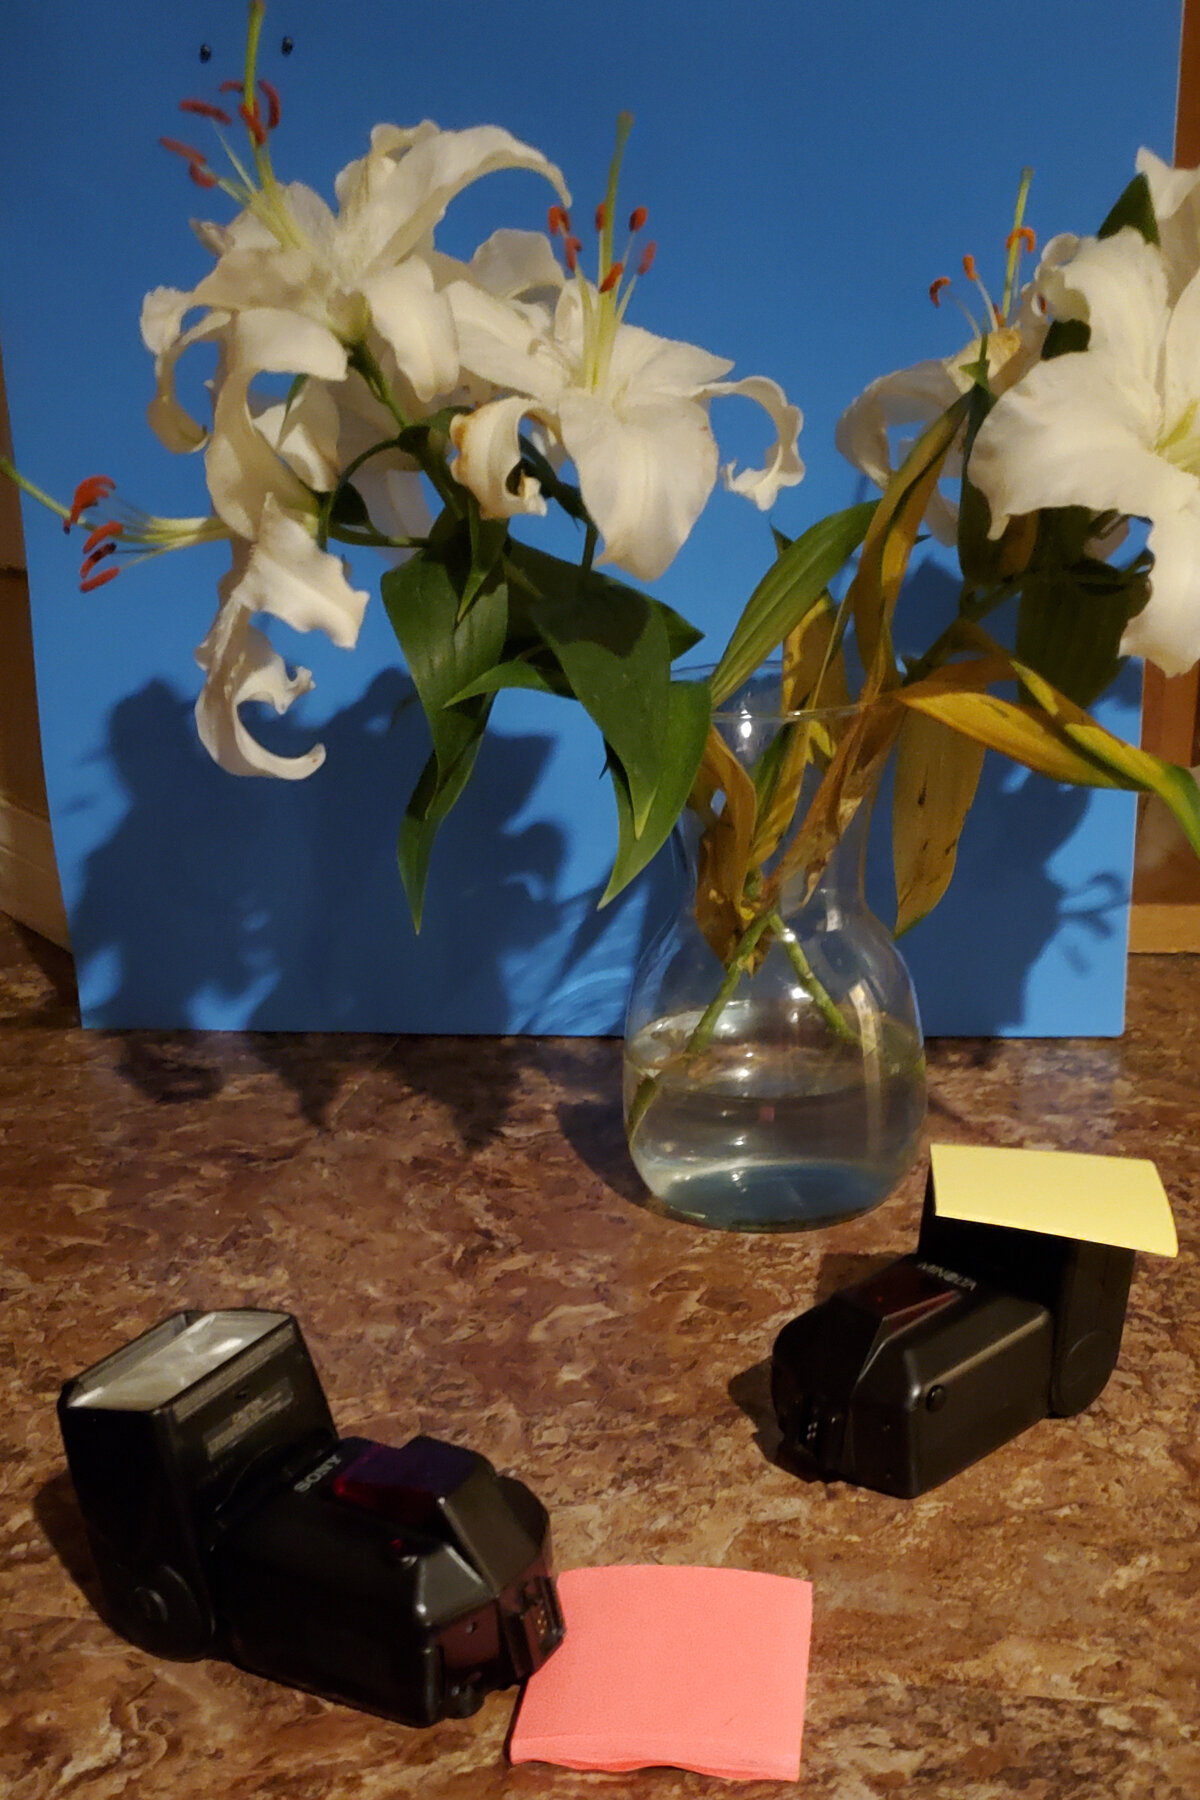
The above image is an example of changing the colors how (more or less) I wanted. The flash with the blue is on the ground pointing up towards the center of the forward facing flower. The red covered flash is being held and is facing down towards the center of the top flower. Below is a similar set up with yellow instead of blue and a picture with the supplies used.
_DSC6075.jpg
20210820_001249.jpg
_DSC6075.jpg 20210820_001249.jpg

The light from the flash with a yellow Post It was a wide flash and impacted all of the rest of the image. The blue of the background mixed with the yellow of the light and appears green. I used multiple pink Post It notes to get a red color which appears more orange because red and yellow make orange.

Clear gels can be found at stores, I have found construction paper and Post It notes do the job.

I originally figured this out years ago on a bored night off. I put a pink and a blue Post It over 2 flashes and again with lilies that I bought for my Wife.

Post It Lilies.jpg

Notice that there is some overlap that leads to a purple on the petals.

Go out and experiment.

~Scott

tags: learning, blend, flash, color, teaching
Wednesday 08.25.21
Posted by Scott W Gonzalez
 

Flash: Snoots

So with the pandemic going on, I have been staying home more than normal. The pictures of the mushroom that I took not to long ago needed some different lighting that just a flash. A flash was involved but there was a home made snoot on it.

*If you are familiar with snoots you can probably skip ahead to after the picture. If not read on.

So a snoot is a light modifier that contains the spread of the light. Think flashlight versus a lamp. Basically it is to make it so the flash is on one specific subject or even part of the subject. In doing so it can make the subject stand out from the rest of the picture. One can also be used to isolate the subject turning nearly everything else in the frame either in shadow or blacked out.

Now a snoot is basically an opaque cylinder that fits over the front of a flash. I have seen some a while back that had reflective surfaces inside of them. I have seen others that are collapsible and ones where the size of the opening can be changed.

A tiny mushroom I found growing on the side of a seed starter pot. It was less smaller than a 1/4 inch. Marco lens, lit from above on a wooden cutting board, 1/60 second, f13, iso 100, camera was tripod mounted with a timer some I could hand hold th…

A tiny mushroom I found growing on the side of a seed starter pot. It was less smaller than a 1/4 inch. Marco lens, lit from above on a wooden cutting board, 1/60 second, f13, iso 100, camera was tripod mounted with a timer some I could hand hold the flash.

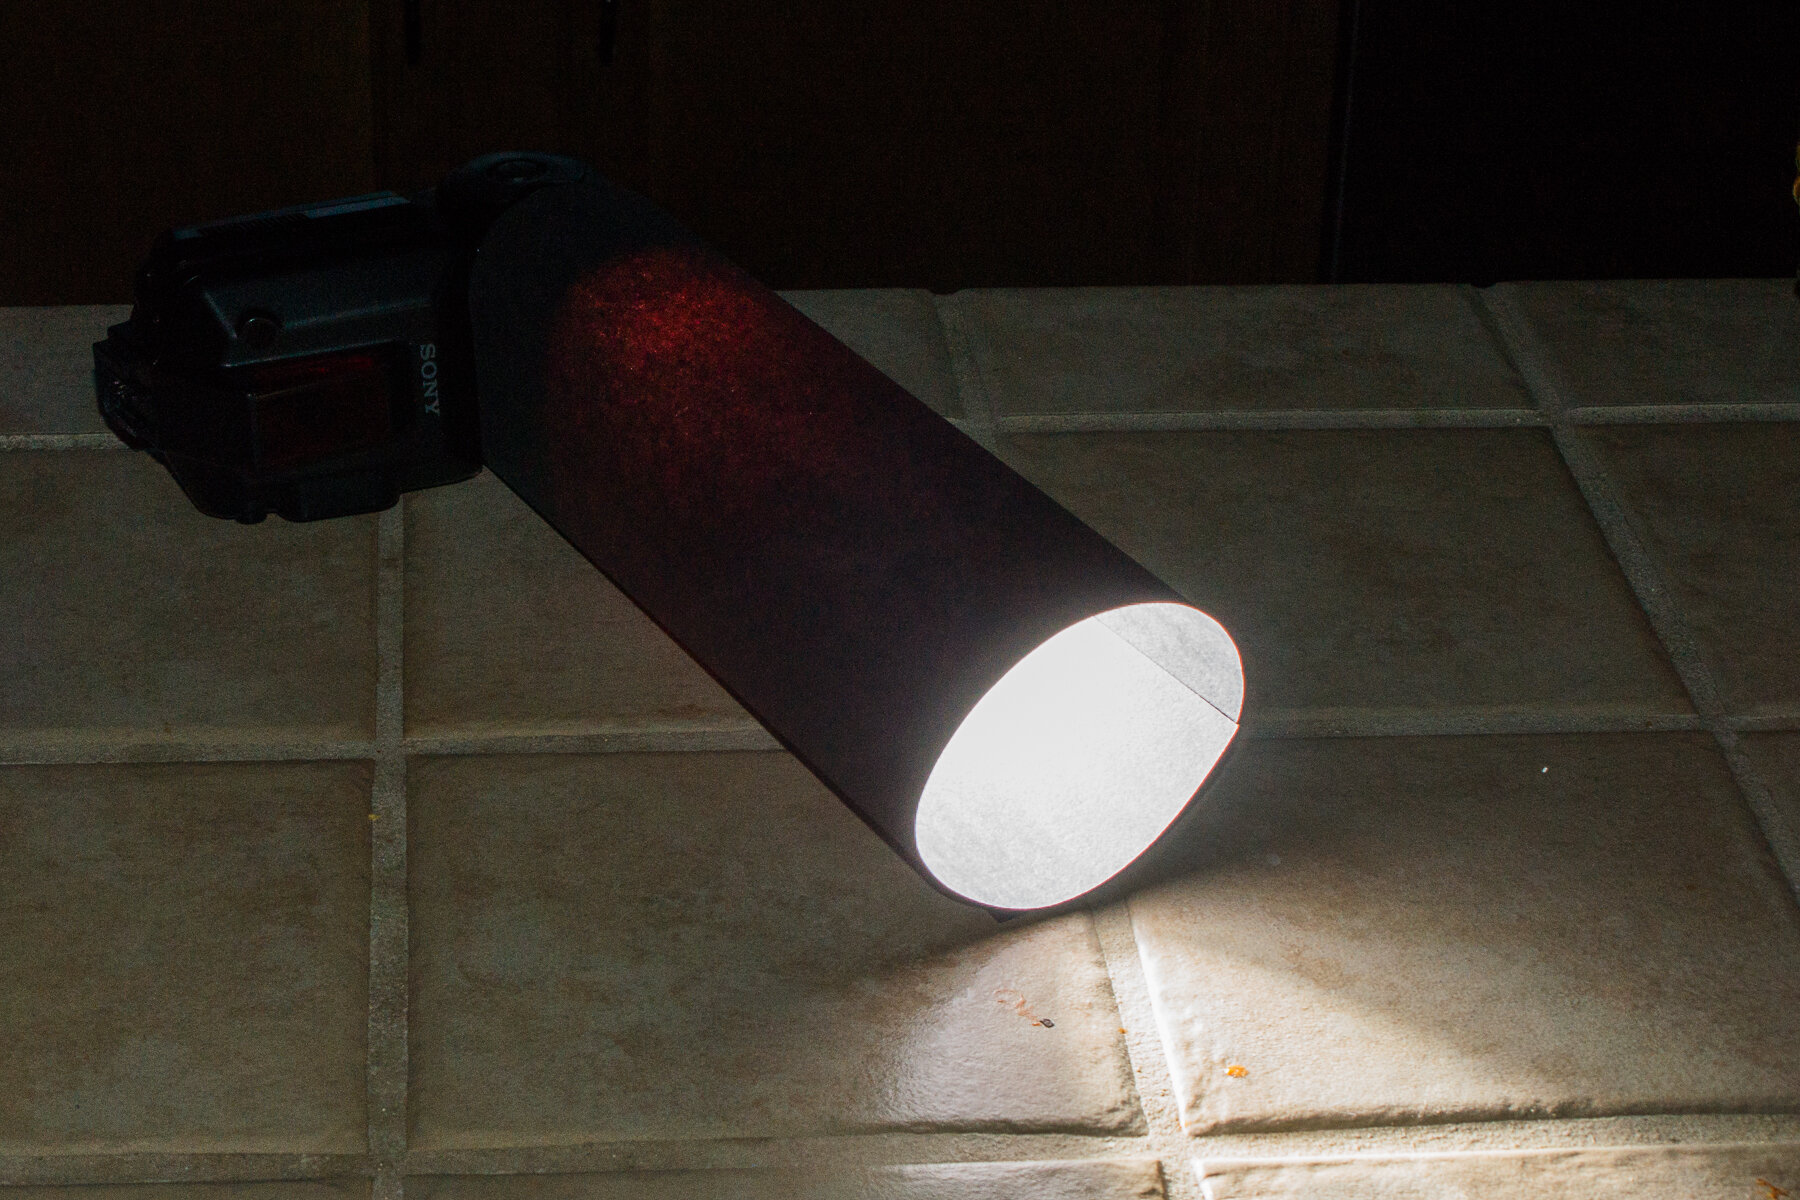
Today I will show you how I made a simple one with an adjustable opening. First you get a piece of construction paper that is black, next you roll it into tube, then you adjust the roll until it fits around your off camera flash on one side and has the opening size that you want on the other side. Finally if you want to keep it that specific size then tape the paper together. Below is a picture of todays subject.

The conjoined crimson clover that was in the backyard. To give an idea of how close everything is in the coming set of pictures.

The conjoined crimson clover that was in the backyard. To give an idea of how close everything is in the coming set of pictures.

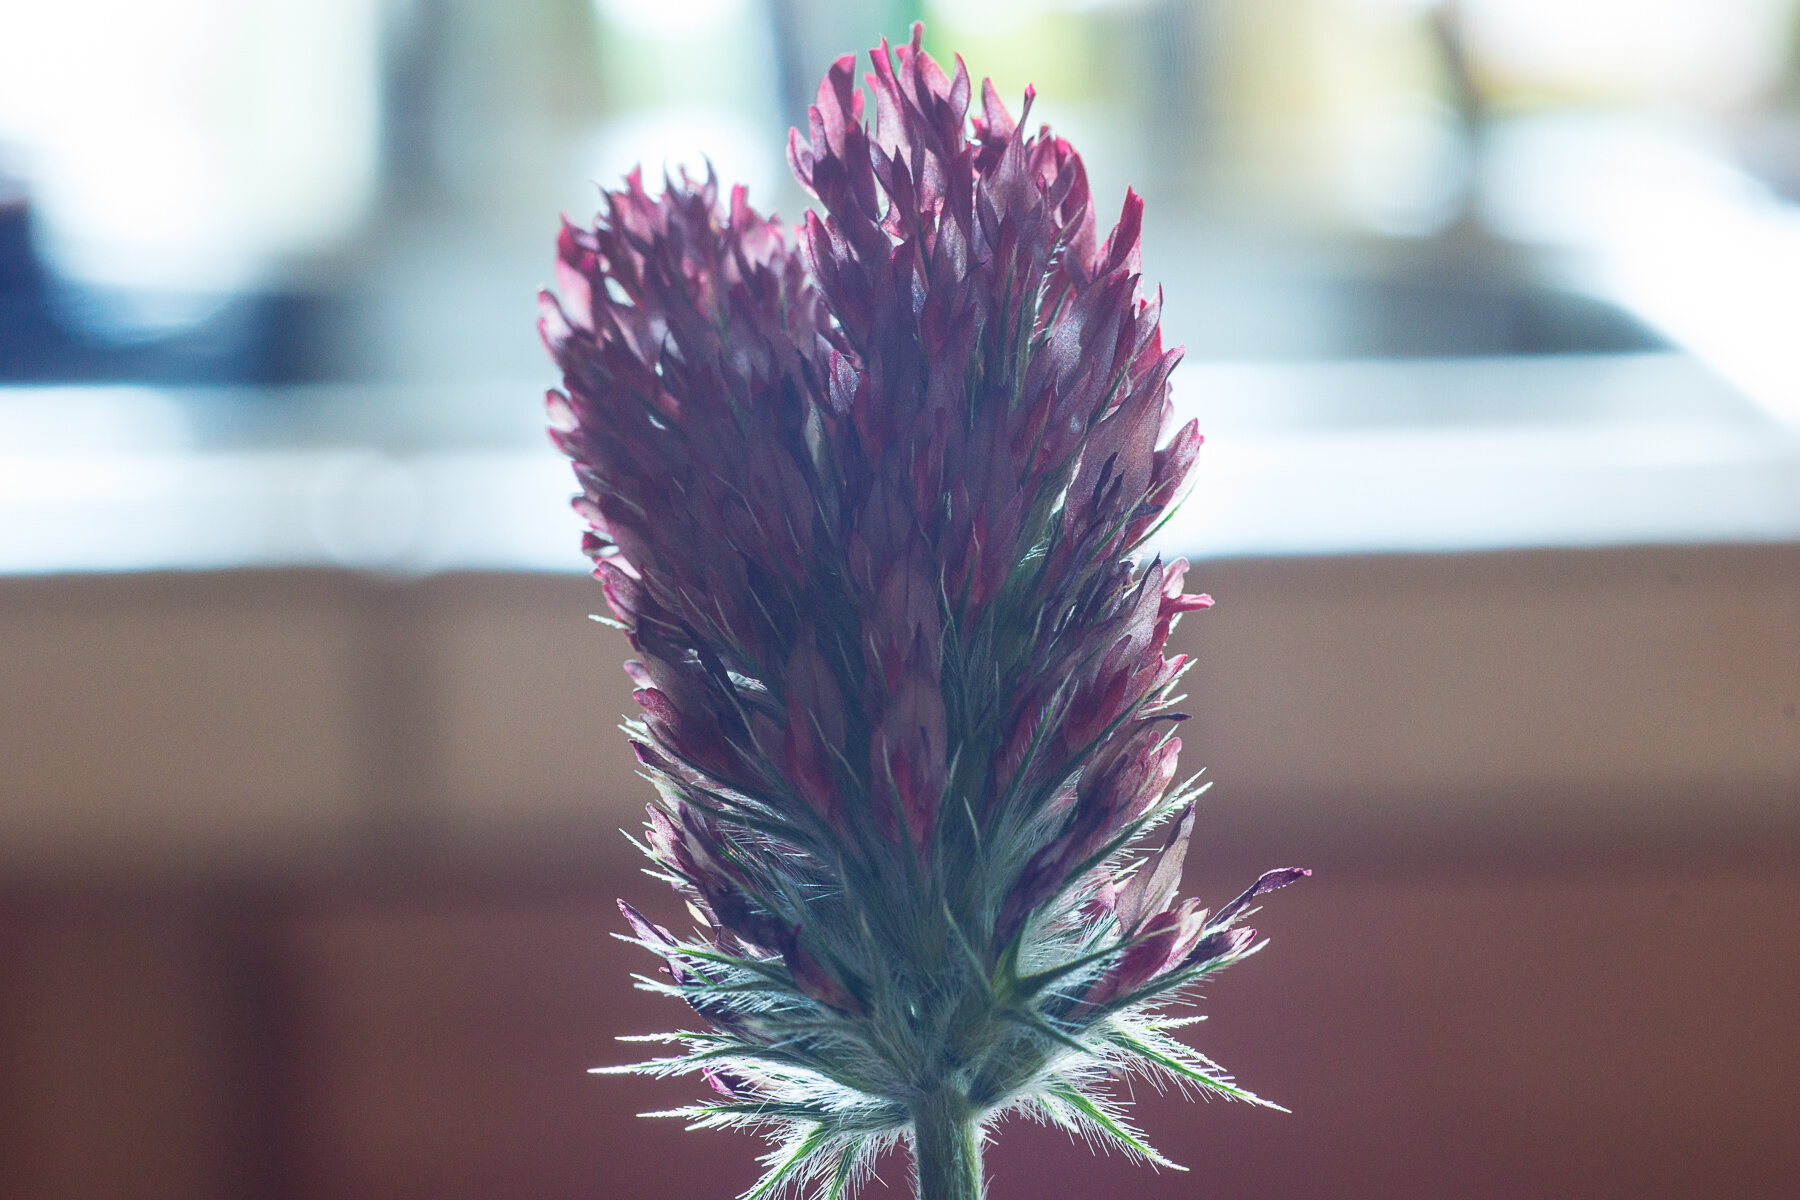
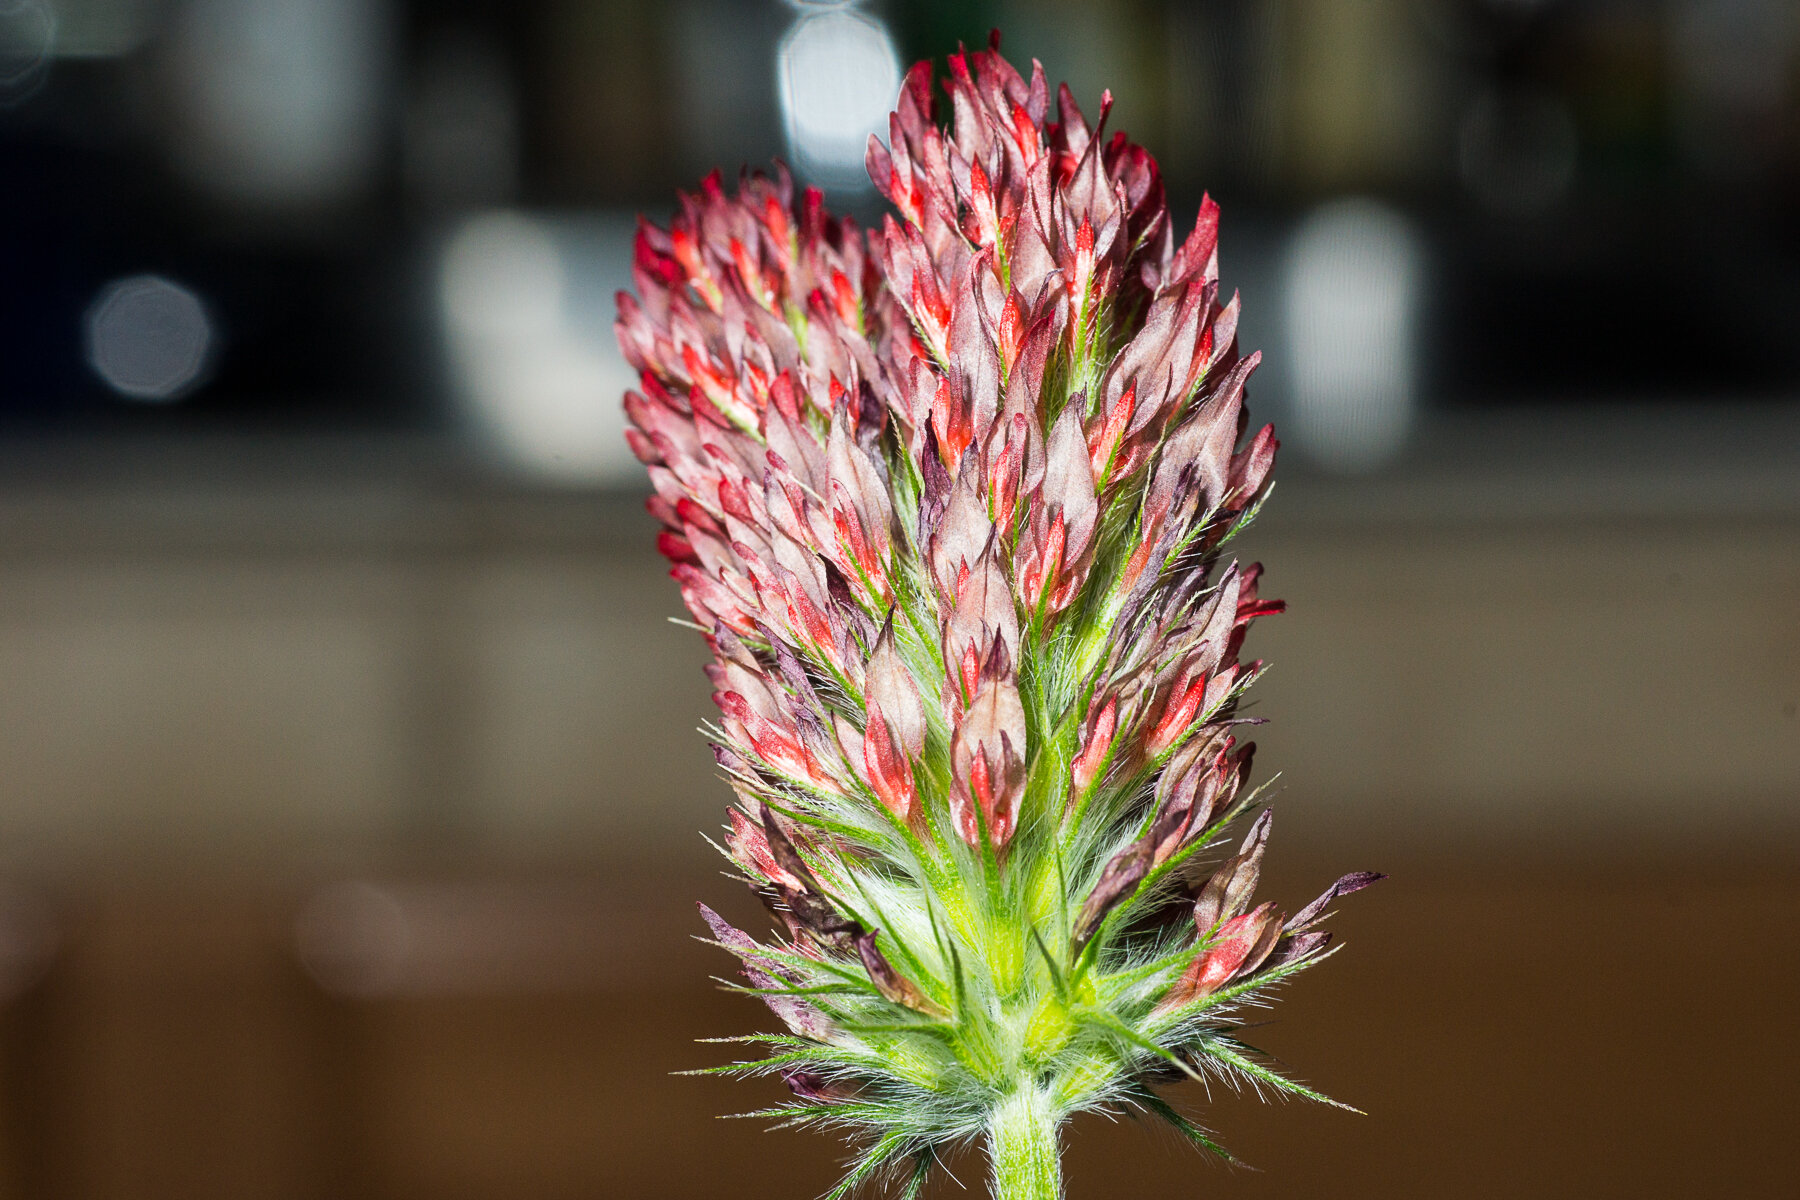
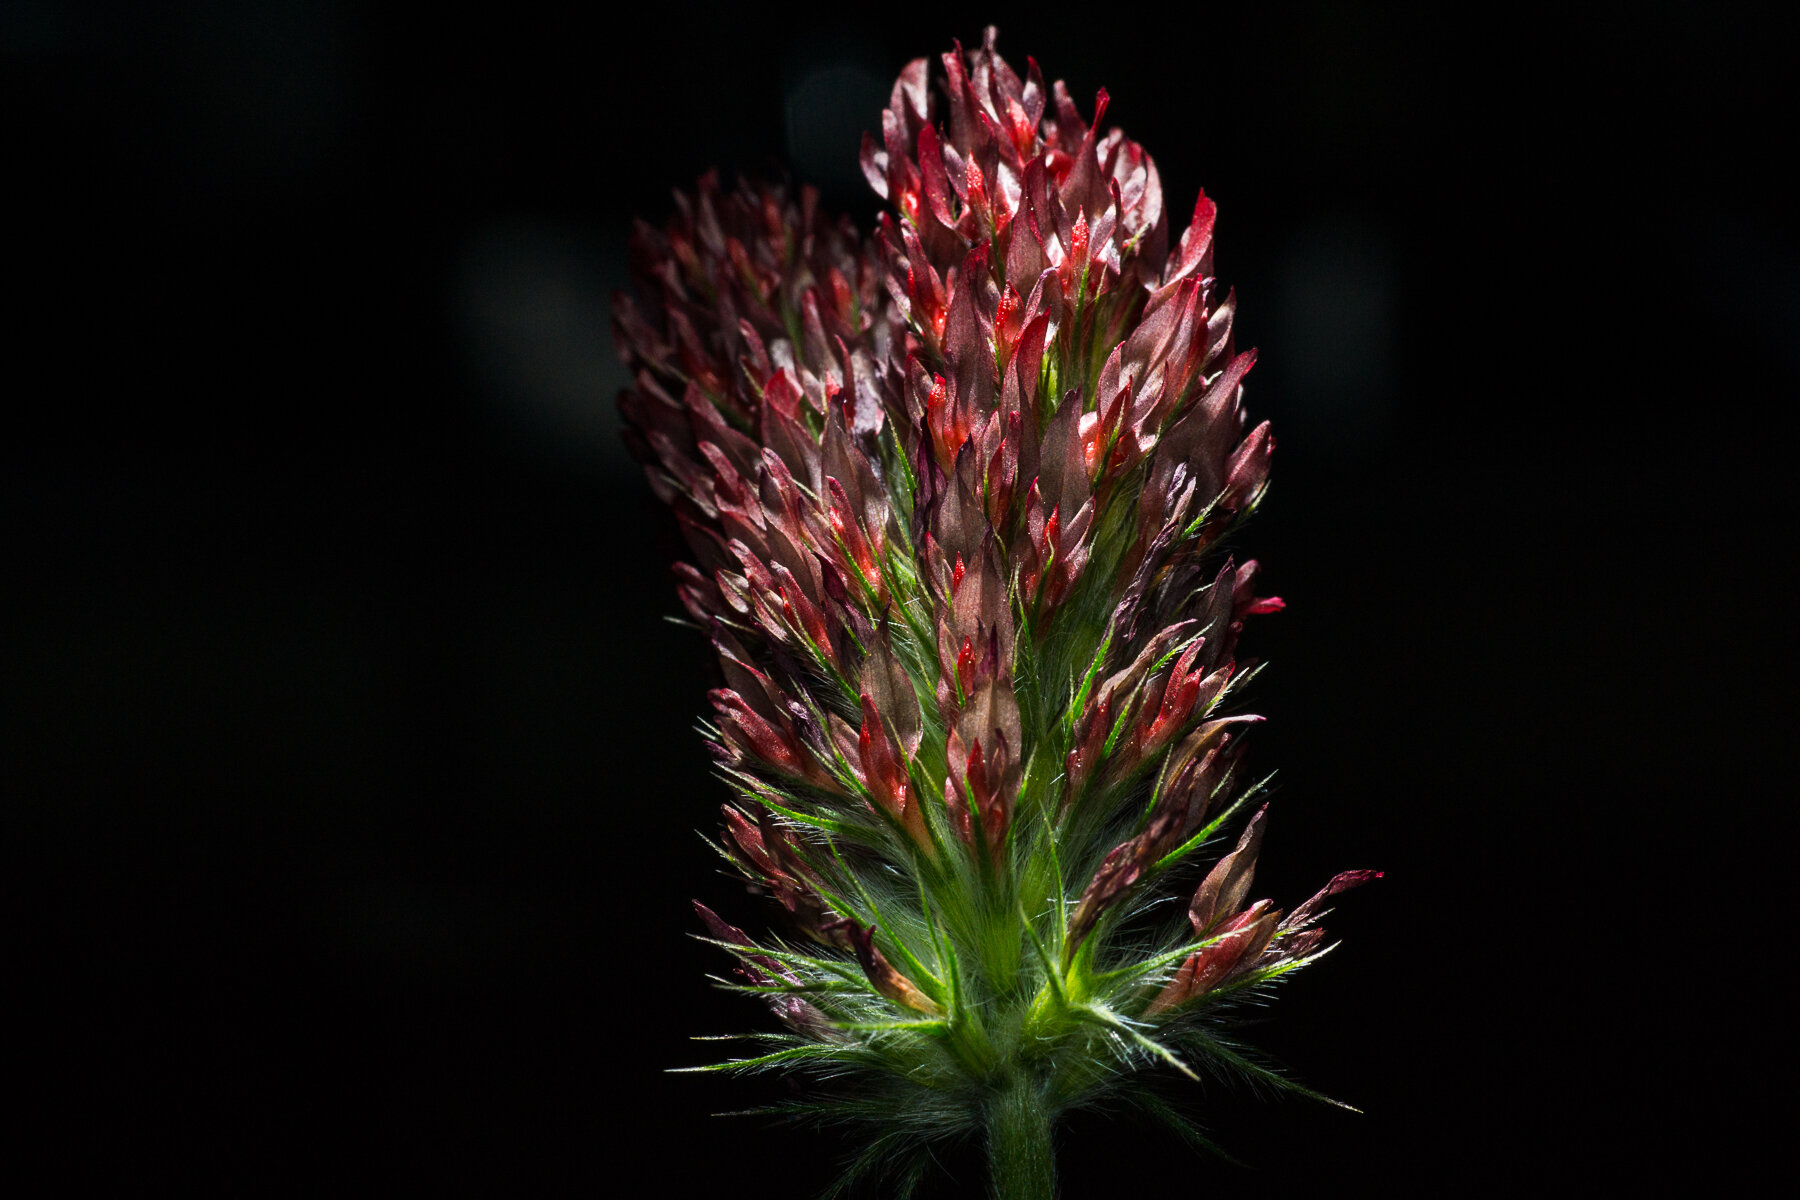
First the construction paper wrapper around the flash. The second was actually taken last and is the conjoined clovers with no flash (all the pictures were taken within 12 minutes) to show the lighting that was there. The third image is of a flash with no snoot from nearly were it would mount on the camera. The fourth is with the snoot but wide so it light both flower heads. Finally the fifth picture is with the snoot with a small opening only big enough to completely light one flower head.

_DSC9924.jpg
_DSC9939.jpg
_DSC9931.jpg
_DSC9933.jpg
_DSC9936.jpg

It isn’t hard and it can be very useful in the right situations. Given the current situation with the pandemic it is something that can be tried without leaving home. Stay safe and as always I would love to see what you can do with this new information. Pictures and comments are welcome

tags: photography, pictures, flash, snoot, paper, construction, off camera
Thursday 04.02.20
Posted by Scott W Gonzalez
 

Flash 4 (Ceiling bounce flash)

Good evening,

Tonight I am going to go over one of the easy things that can be done with most flashes. Bouncing them. Stop don’t throw your flash on the ground. I am talking about the light off of something else then onto the subject. I slightly discussed this in my first Flash post some months ago. That was dealing with the on camera flash though. For this I used a hot shoe flash, a Sony HVL-F56AM to be precise.

It can tilt and swivel either separately or in conjunction with each other.

It can tilt and swivel either separately or in conjunction with each other.

So to bounce the flash off of the ceiling you just tilt the head to face the ceiling. It can either be done connected to the hotshoe or not and triggered remotely.

_DSC3923.JPG

Above we have Grumpy Bear with the flash pointed directly at him. The light looks harsh nearly over bright, detail has been lost in his fur, the high points (cheeks and snout in his case) lost color, and the shadow behind him is prominent.

_DSC3922.JPG

Again I have taken a picture of Grumpy Bear. This time with the flash pointing nearing straight up at the ceiling. The scene is more evenly lit albeit a bit darker. His fur detail is easily visible, the shadows are more naturally where one would see them during the day (under his chin mainly), the high points aren’t overly bright, and he appears closer to the color that he is.

Neither of these pictures to me is perfect, I was going straight out of the camera and did not adjust them at all. I am sure that if I did I could clear up some of the faults of each. I am a firm believer in getting it right in camera. It would be easier and look better to just brighten up the second image than to darken the highlights. Tilt or ceiling bounce is not hard and with practice it is easy.

tags: flash, teaching, photography, bounce, hotshoe, off camera, ceiling, tilt
Tuesday 04.30.19
Posted by Scott W Gonzalez
 

Flash 3 (flashfoolery)

Good morning,

I recently went back through old pictures and came across some flash photography from when I first started out using off camera flash. I have since put them in the Still Life gallery.

Below we have a jack o lantern. This particular one I was using a slave flash. The flash was inside the pumpkin facing the back. I had a hole in the top toward the back for a chimney as I was still using candles in my jacks back then. The trigger flash was covered with paper so it didn’t flash forward only up, which was enough to trigger the slave flash in the pumpkin. I set it on a timer so I could be by the front and out of the frame spraying a mist with a water bottle. It took more than a few times to get it right. The light on the left was intentional and from a second flash that was out of frame to give dimension to the pumpkin.

places with high humidity might not need a mister

places with high humidity might not need a mister

I also played with changing the color of the light as well. I saw the gels that were available and didn’t want to wait for something like that. So I tried putting colored paper over the flashes. It worked the way that I wanted and I never got gels. I put the flashes facing the flowers about 90 degrees from each other.

Blue on the right flash and pink on the left

Blue on the right flash and pink on the left

Photography has been a journey of discovery and experimentation for me. With digital it has become easier to learn, instant results and metadata have made it so much less time consuming and less expensive. Grab your flash, be prepared to experiment, then go out and shoot.

~Scott

tags: flash, experiment, photography, photo, fun
Saturday 10.20.18
Posted by Scott W Gonzalez
 

Flash 2 (Fill Flash)

Good evening,

So this is just a quick one. Fill Flash or using a flash in bright lit scenes to brighter the dark parts. Most often used in my experience is during a backlit portrait. Nice bright landscape that you want to include in the portrait or selfie except that the subject is too dark so you change the exposure to make the subject brighter then the background is lost in highlights. Fill flash to the rescue.

_DSC5553.jpg
_DSC5555.jpg

First one is no flash and the second one is with the built in camera flash. I had to change ISO from 800 to 200 because the shutter changed from 1/400th to 1/100th of a second. The settings in post are identical. If I wanted I could probably have made the non flash one better, I feel that it is better to get it right in camera than to try and fix it later in post.

Until next time. So grab your camera, pop the flash up, don’t fear those backlit portraits, then go out and shoot.

~Scott

tags: flash, photography, learning, teaching, fill flash, backlit, background
Thursday 10.04.18
Posted by Scott W Gonzalez
 

Flash 1 (probably)

Good evening,

Tonight I am going to talk about flash photography. It is a huge subject hence the "1" in the title. There is so much that it is intimidating, at least it was for me. I recall trying to do everything with natural lighting because it was more "real." I was doing it because flashes can be expensive, the flash that comes with the camera isn't good, and it was another thing to learn. Well after learning a little it was fun, I could make the light do what I wanted instead of placing my subject to suit the natural light.

The reason that it is intimidating is because there are new equipment and new terms to learn. For example; bounce lighting, fill lighting, background lighting, wireless, umbrella, soft box, remote lighting, reflected light, catch lights, ring lights, etc. 

It is best to start with the simple and go from there. Mind you I am not going to cover all that I listed in this post.

So the flash that we have built in to our DSLR usually sucks and gives a mugshot type image. See below.

Notice the shadow on the background that is 4 ft away, the flat lighting where depth in my face is lost except at the wrinkles in my skin.

Notice the shadow on the background that is 4 ft away, the flat lighting where depth in my face is lost except at the wrinkles in my skin.

Now this might sound and seem discouraging to the built in flash and that is not my intent. I am just trying to make the flaw known so it can be worked around. There are multiple modifiers out there from mirrors that bounce the light off of the ceiling (doesn’t work outdoors), to softeners that basically turn the flash into a small softbox (more on that later), to filters that change the color of the light, and other items to “fix” the flash.

The camera flash can be used as a fill flash in backlit situations, in documenting subjects, street photography, and my favorite as a trigger for wireless flash photography.

Again this is the same built in flash with a modifier. There is more depth to my face and the wrinkles appear less prominent. The coloring is better in my opinion too but that can be changed in post. The shadow is still there, it not as obvious thou…

Again this is the same built in flash with a modifier. There is more depth to my face and the wrinkles appear less prominent. The coloring is better in my opinion too but that can be changed in post. The shadow is still there, it not as obvious though.

So in the second image I used an inexpensive modifier, a piece of wax paper set at about a 45 degree angle in front of the built in flash. Some of the light bounced off the ceiling and most of it went through the wax paper. Both of the images were shot in jpeg with the WB set to flash. I will go more into discussing flashes at a later time. So grab your camera then go out and shoot.

~Scott

tags: flash, photography, built in, teaching, learning, photo
Tuesday 09.18.18
Posted by Scott W Gonzalez
 

Powered by Squarespace.