• Photography
  • About
  • Contact
  • Light Writing

Scott W Gonzalez

  • Photography
  • About
  • Contact
  • Light Writing

Slumps (10 ft challenge)

Good morning,

So we can all get into creative slumps or blocks or what ever you would like to call it. It is just a time when doing what you enjoy seems boring or pointless because you have “done it all before.” There are various ways to get around this. A common one is to buy some new gear which is always fun and exciting for at least a little while. Now we including myself aren’t well off enough to be able to do that often. So another option is to use what you have but in a different way.

So comes the 10 foot challenge. It is rather simple and doesn’t need to be exact. Step 1 grab your camera, Step 2 look around you in a rough distance of 10 feet to see subjects, Step 3 take a picture of something within that 10 foot radius. For most people this will be indoors, if you generally shoot outdoors then this will force you to change what you do. Then maybe go outside to start this. The main point is to get you out of your comfort zone and take a picture of something that you normally wouldn’t or take a photo of something that you already have but change the way that you capture it. Spend a few minutes to look around and turn a mundane subject into something interesting.

076.jpg
077.jpg
124.jpg
151.jpg
167.jpg
289.jpg
302.jpg
324.jpg

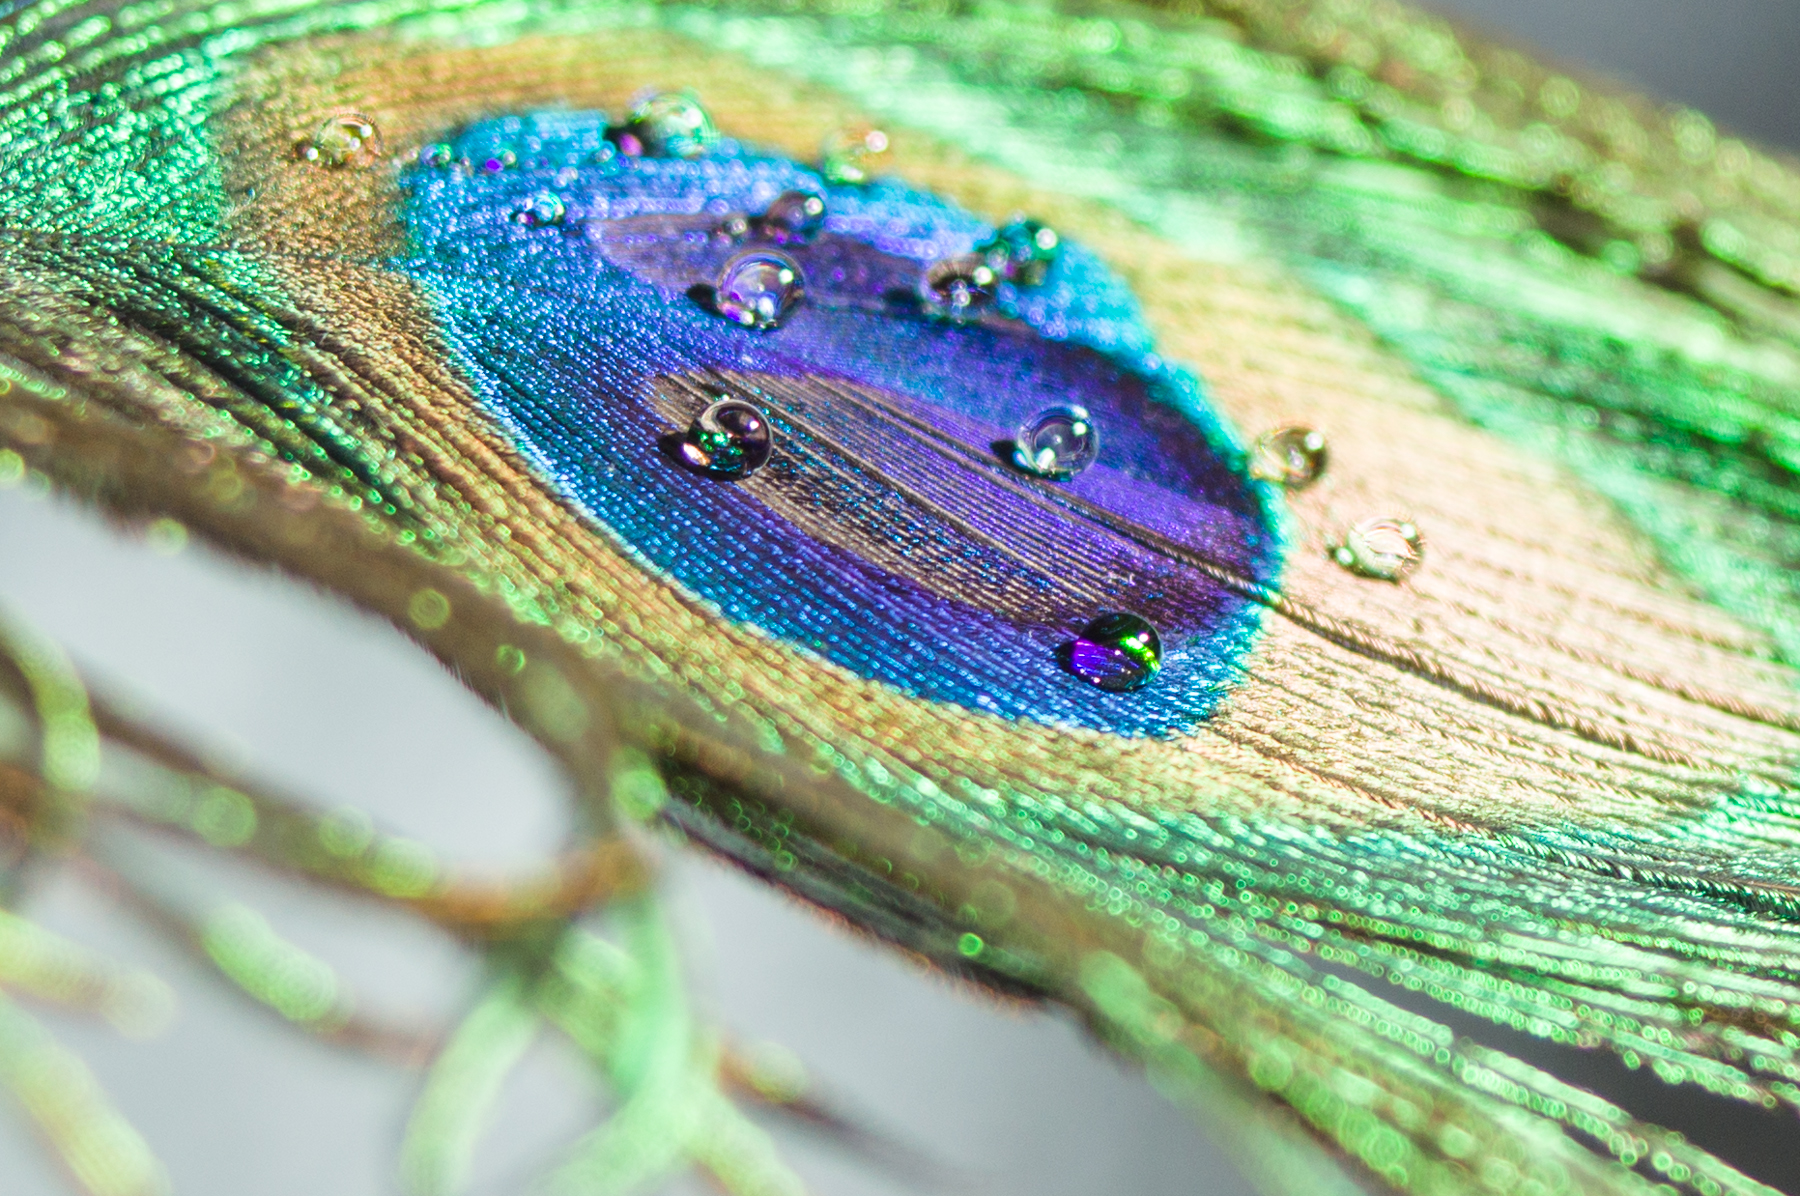
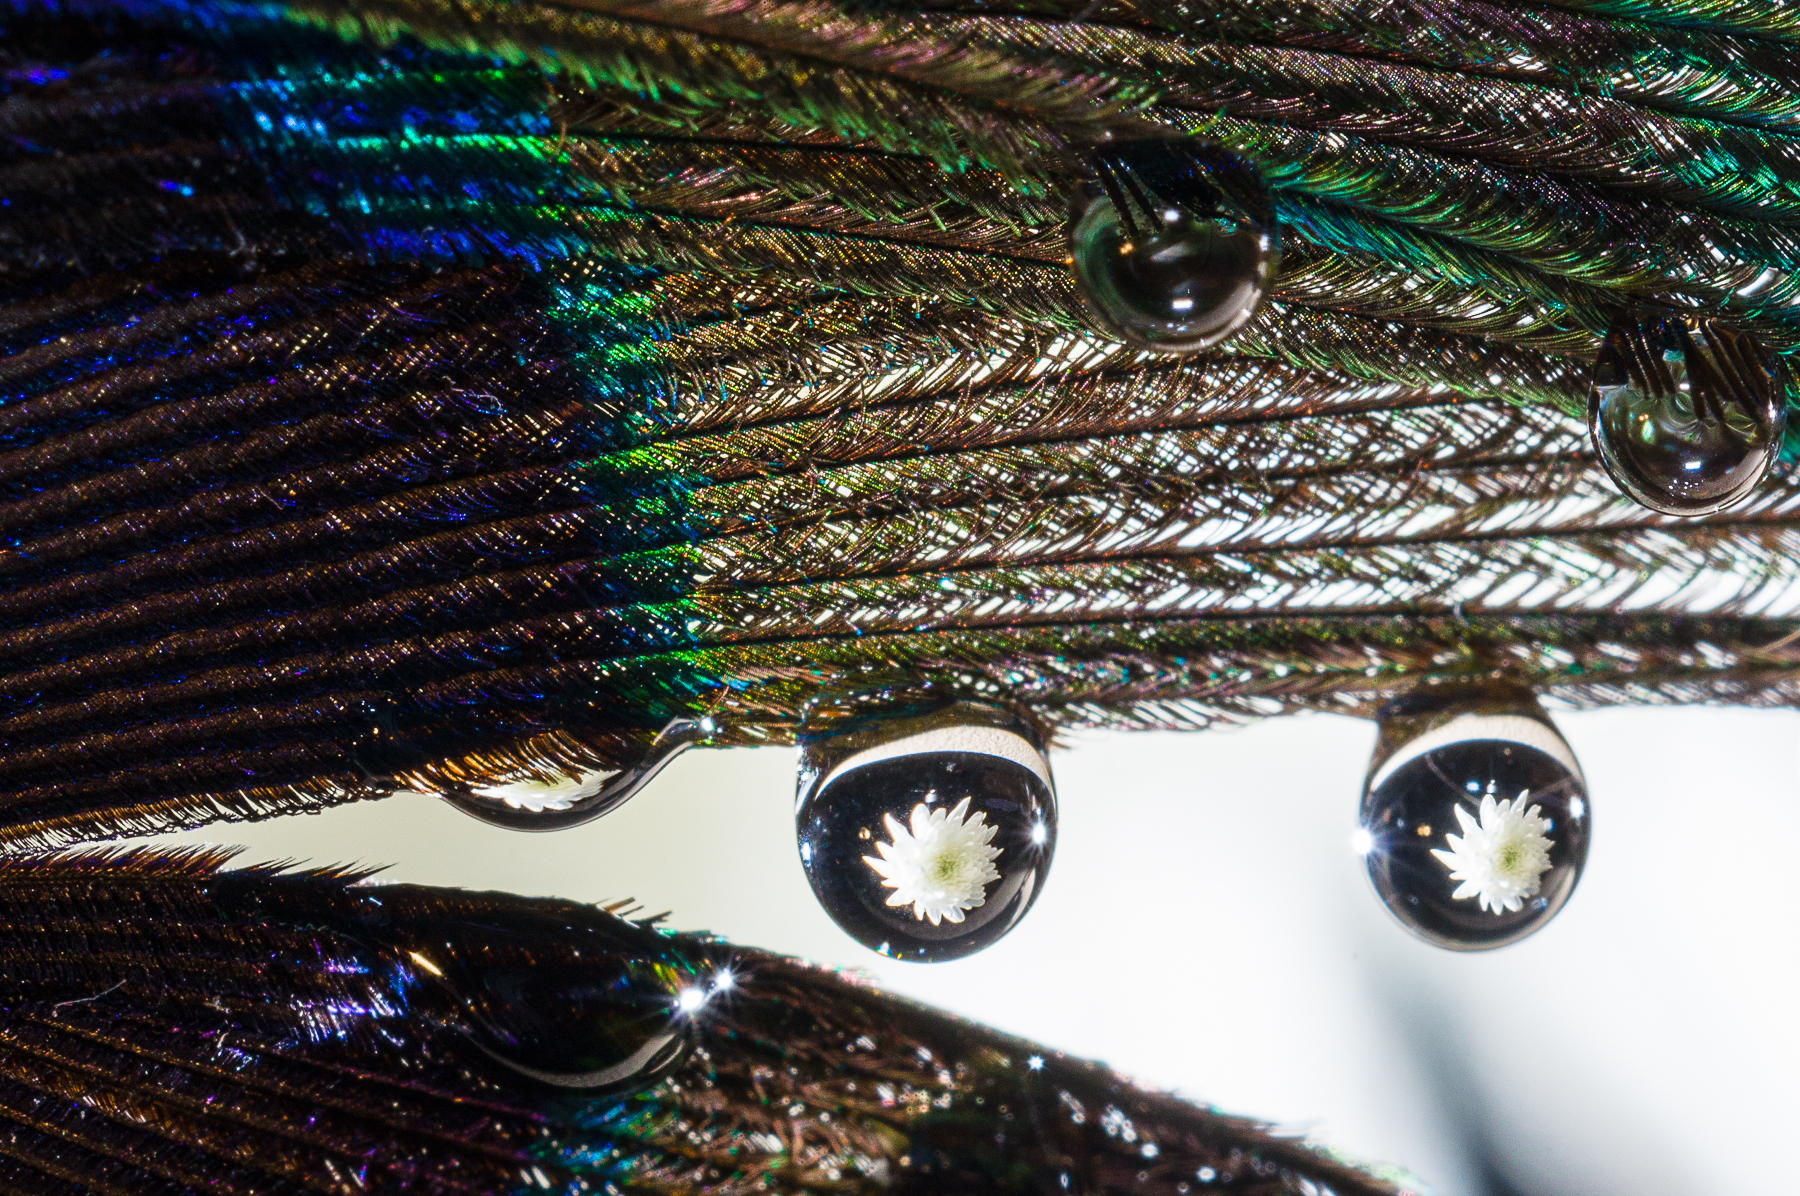
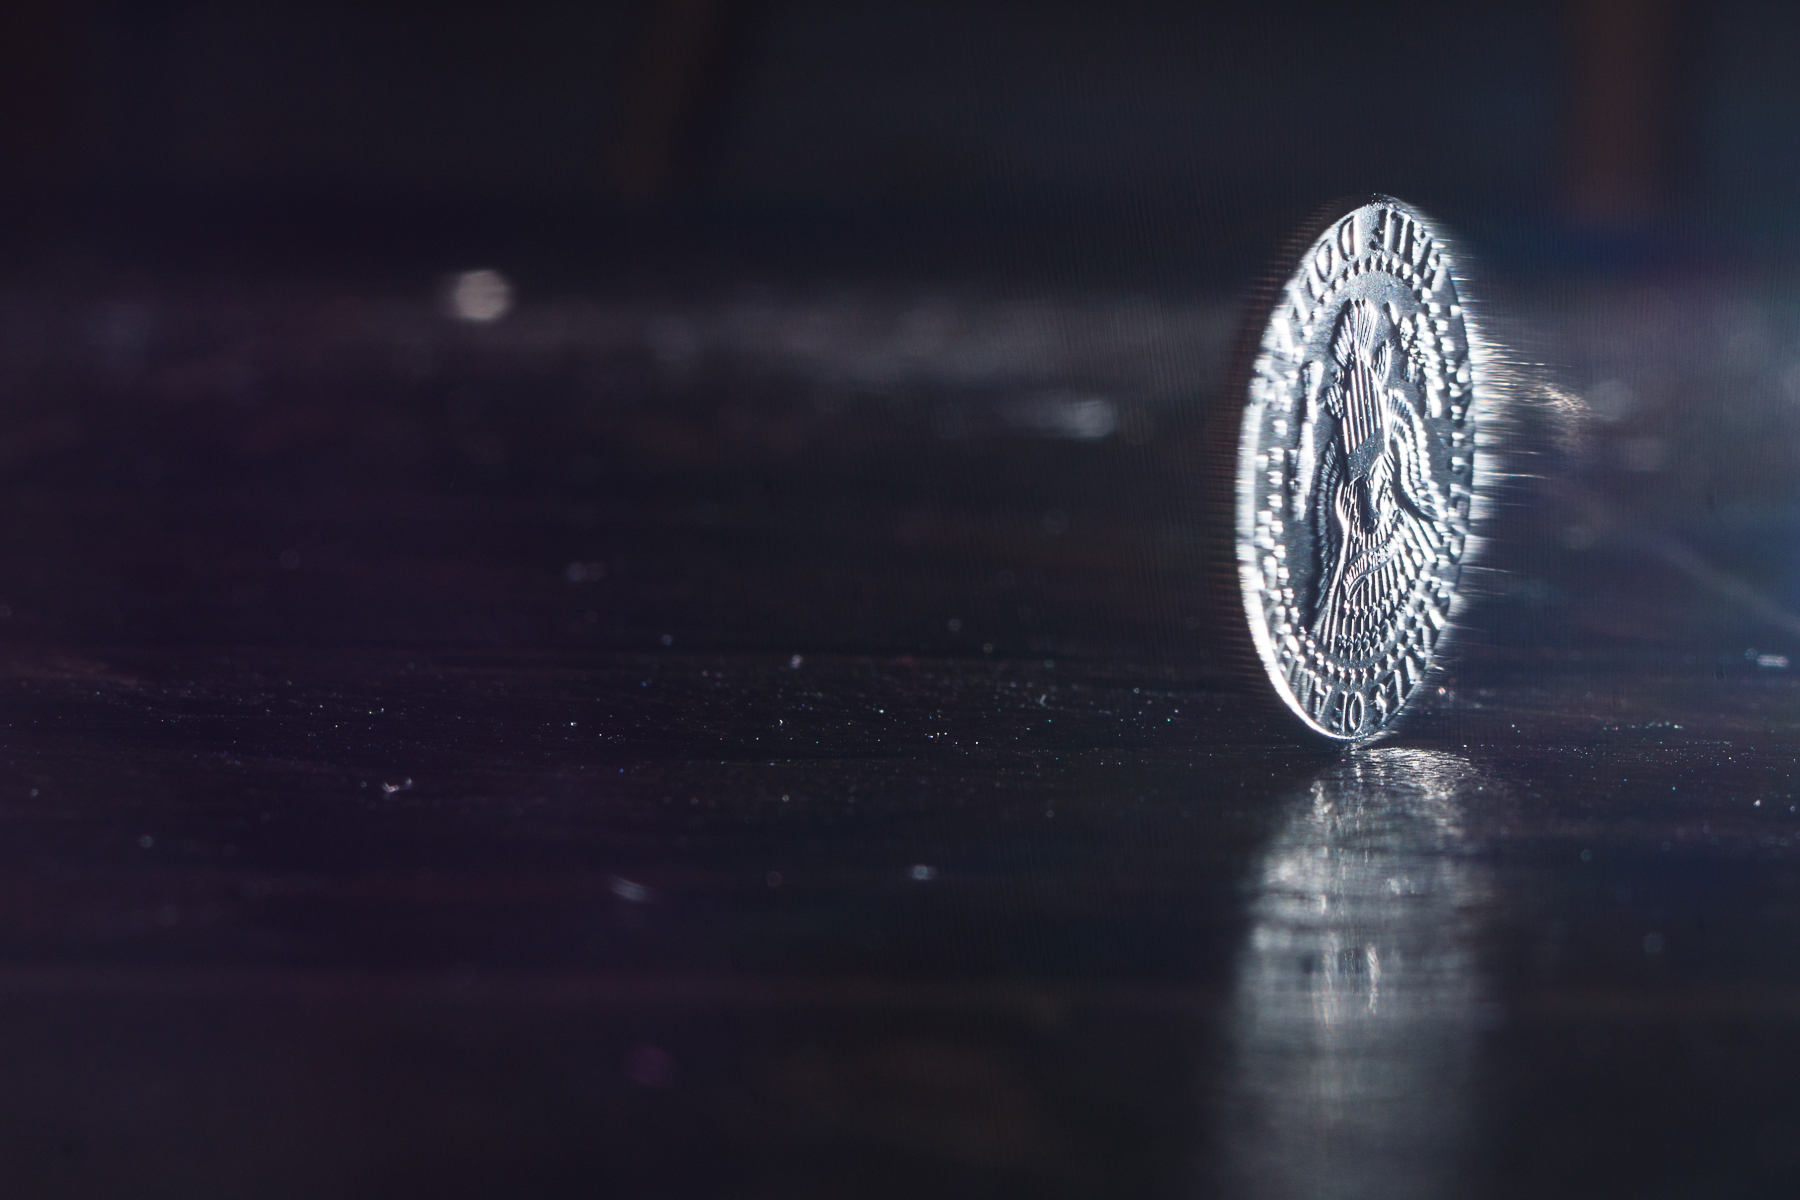
Above are a few examples of things that I did while I was doing a 365 a in 2015 with objects that were around the house. Most were types of photography that I had seen before but either never did it or didn’t have much experience with. Slumps suck and this is a way to get through one. Comments are open and I would enjoy seeing what you come up with.

Scott

tags: challenge, 10 foot, photography, photo, slump, bored
Wednesday 06.12.19
Posted by Scott W Gonzalez
 

Flash 3 (flashfoolery)

Good morning,

I recently went back through old pictures and came across some flash photography from when I first started out using off camera flash. I have since put them in the Still Life gallery.

Below we have a jack o lantern. This particular one I was using a slave flash. The flash was inside the pumpkin facing the back. I had a hole in the top toward the back for a chimney as I was still using candles in my jacks back then. The trigger flash was covered with paper so it didn’t flash forward only up, which was enough to trigger the slave flash in the pumpkin. I set it on a timer so I could be by the front and out of the frame spraying a mist with a water bottle. It took more than a few times to get it right. The light on the left was intentional and from a second flash that was out of frame to give dimension to the pumpkin.

places with high humidity might not need a mister

places with high humidity might not need a mister

I also played with changing the color of the light as well. I saw the gels that were available and didn’t want to wait for something like that. So I tried putting colored paper over the flashes. It worked the way that I wanted and I never got gels. I put the flashes facing the flowers about 90 degrees from each other.

Blue on the right flash and pink on the left

Blue on the right flash and pink on the left

Photography has been a journey of discovery and experimentation for me. With digital it has become easier to learn, instant results and metadata have made it so much less time consuming and less expensive. Grab your flash, be prepared to experiment, then go out and shoot.

~Scott

tags: flash, experiment, photography, photo, fun
Saturday 10.20.18
Posted by Scott W Gonzalez
 

Flash 1 (probably)

Good evening,

Tonight I am going to talk about flash photography. It is a huge subject hence the "1" in the title. There is so much that it is intimidating, at least it was for me. I recall trying to do everything with natural lighting because it was more "real." I was doing it because flashes can be expensive, the flash that comes with the camera isn't good, and it was another thing to learn. Well after learning a little it was fun, I could make the light do what I wanted instead of placing my subject to suit the natural light.

The reason that it is intimidating is because there are new equipment and new terms to learn. For example; bounce lighting, fill lighting, background lighting, wireless, umbrella, soft box, remote lighting, reflected light, catch lights, ring lights, etc. 

It is best to start with the simple and go from there. Mind you I am not going to cover all that I listed in this post.

So the flash that we have built in to our DSLR usually sucks and gives a mugshot type image. See below.

Notice the shadow on the background that is 4 ft away, the flat lighting where depth in my face is lost except at the wrinkles in my skin.

Notice the shadow on the background that is 4 ft away, the flat lighting where depth in my face is lost except at the wrinkles in my skin.

Now this might sound and seem discouraging to the built in flash and that is not my intent. I am just trying to make the flaw known so it can be worked around. There are multiple modifiers out there from mirrors that bounce the light off of the ceiling (doesn’t work outdoors), to softeners that basically turn the flash into a small softbox (more on that later), to filters that change the color of the light, and other items to “fix” the flash.

The camera flash can be used as a fill flash in backlit situations, in documenting subjects, street photography, and my favorite as a trigger for wireless flash photography.

Again this is the same built in flash with a modifier. There is more depth to my face and the wrinkles appear less prominent. The coloring is better in my opinion too but that can be changed in post. The shadow is still there, it not as obvious thou…

Again this is the same built in flash with a modifier. There is more depth to my face and the wrinkles appear less prominent. The coloring is better in my opinion too but that can be changed in post. The shadow is still there, it not as obvious though.

So in the second image I used an inexpensive modifier, a piece of wax paper set at about a 45 degree angle in front of the built in flash. Some of the light bounced off the ceiling and most of it went through the wax paper. Both of the images were shot in jpeg with the WB set to flash. I will go more into discussing flashes at a later time. So grab your camera then go out and shoot.

~Scott

tags: flash, photography, built in, teaching, learning, photo
Tuesday 09.18.18
Posted by Scott W Gonzalez
 

Post Processing: Presets

Good Afternoon,

Today we are going to discuss presets in post processing as the title said. There are many options for processing RAW files. Cameras generally come with their own software and it can be all that we need. Other times we need to go outside of what the manufacturer provided. Lightroom, Photoshop, Capture One, Affinity Photo, DxO Photolab, and many others. I generally use Lightroom to process images and Photoshop if I need to do some more serious editing.

In Lightroom there are presets already present. B&W: Filter, Toned, and just B&W, then Color presets, General presets, and Effect presets which are all fine and dandy for general use. We can make our own though which can be applied during import. It can be brought down to very specific settings. What we do is open our RAW file then adjust it to our liking then save it through the Develop pull down menu. There is a New Preset option or we can hit ctrl/cmd+shift+N. Now this is more for something that will be used often, (such as noise reduction for different ISOs, portrait with a flash, outside portraits, landscapes, sunsets, etc) if we are looking for something just for one group of photos then we can copy (ctrl/cmd+C) and paste (ctrl/cmd+V) the setting to each image or a group in the grid view. This is just a starting point for when importing images to lightroom, not every landscape we do will be optimal for these settings it beats starting from scratch on each shoot.

Here is where we can apply the presets during import and below the circled setting is Metadata that can be applied as well. If the preset is saved we can skip a step in post.

Here is where we can apply the presets during import and below the circled setting is Metadata that can be applied as well. If the preset is saved we can skip a step in post.

Here are where any presets we create end up. Sony Standard is my normal and mimics what I see through the viewfinder on Standard setting and is a good starting point.

Here are where any presets we create end up. Sony Standard is my normal and mimics what I see through the viewfinder on Standard setting and is a good starting point.

This is the settings for my own Standard which is usually where I end up with outdoor scenes. Mind you this is for a Sony SLT so it might not work that well for a Canon, Nikon, Fuji, Pentax etc.

This is the settings for my own Standard which is usually where I end up with outdoor scenes. Mind you this is for a Sony SLT so it might not work that well for a Canon, Nikon, Fuji, Pentax etc.

If lightroom is not what is used there are ways to make our own presets there as well. Now go out and shoot then make a preset or two to edit the images.

~Scott

P.S. there is a comment section under each post I would enjoy hearing from you all and seeing pictures.

tags: photography, photo, education, editing, processing, preset, post, teaching, training, setting
Tuesday 01.16.18
Posted by Scott W Gonzalez
 

Magazines

Good evening,

Magazines are a common item to acquire and they often have a useful article or two in each edition. Now keeping a magazine for one article is a little much. Unless we are collecting them to keep in pristine condition as a collectable or because one has been featured in it. Most of the time that is not the case though. I am going to pass on what I do so I don't have stacks and stacks of magazines all over the house.

I took a 3 ring binder and some letter size sleet protectors. I then cut out the articles that I want to keep, staple them together, then recycle the rest of the magazine. Most of it is just advertisements. For the same size as 5 mags we could have about 10 pages worth of articles (and that is being generous most of the time it is 5 pages) from 25 editions or over 2 years worth a monthly subscription.

A 3 ring binder and some sheet protectors

A 3 ring binder and some sheet protectors

Granted most articles are online now so they could be saved on the computer or cloud and that is fine. Magazines are still being printed so people are still buying them and storing them too. This post wasn't really about photography directly. I just got a copy of a magazine and thought that I would share my storage process with you all. So take the previous information and go out and shoot.

~Scott

tags: storage, magazine, education, photo, photography
Thursday 11.30.17
Posted by Scott W Gonzalez
 

Powered by Squarespace.