Hello again,
So a question came up while talking about photographing the Milky Way. It was basically can the Milky Way be photographed when it can’t be seen because of city lights. My response was no because of the light pollution. I never really tried though so while going out of town to get some Milky Way images I decided to see what the images would look like to have my own proof to my statement. So I live in Las Vegas which is a pretty bright place with the strongest beam of light in the world coming from the Luxor on top of all the other lights coming from the Strip, Downtown, and the surrounding city. It is the biggest light polluter in the state of Nevada, with the help of a few smaller cities it ruins the night sky for most of Clark County going past the borders of neighboring states. So I was going to Big Dune which is about 2 hours away from where I live just South of Las Vegas. I made some stops and took some pictures with settings that I have used to capture the Milky Way.
All of these images were taken with the same settings 10 seconds, f2.8, iso 1600, 28mm and facing roughly South.
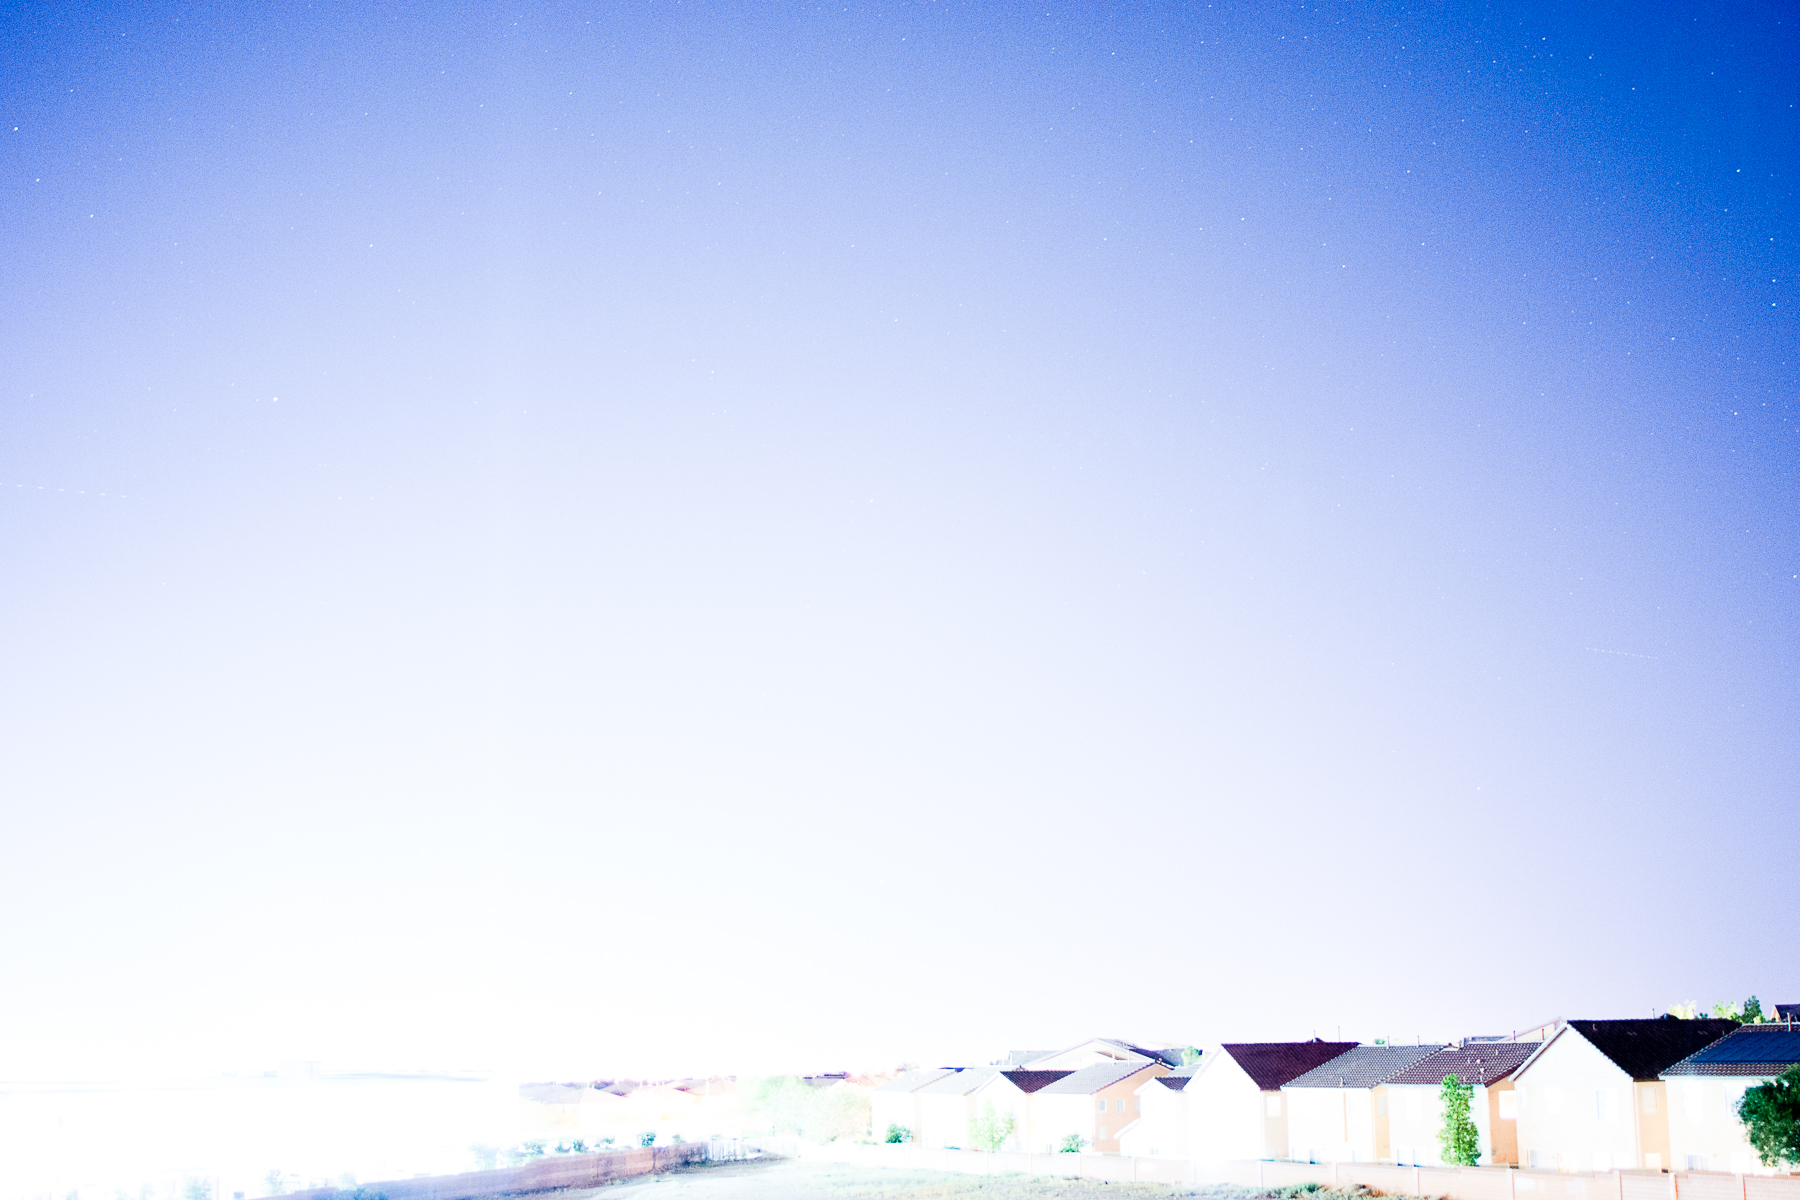

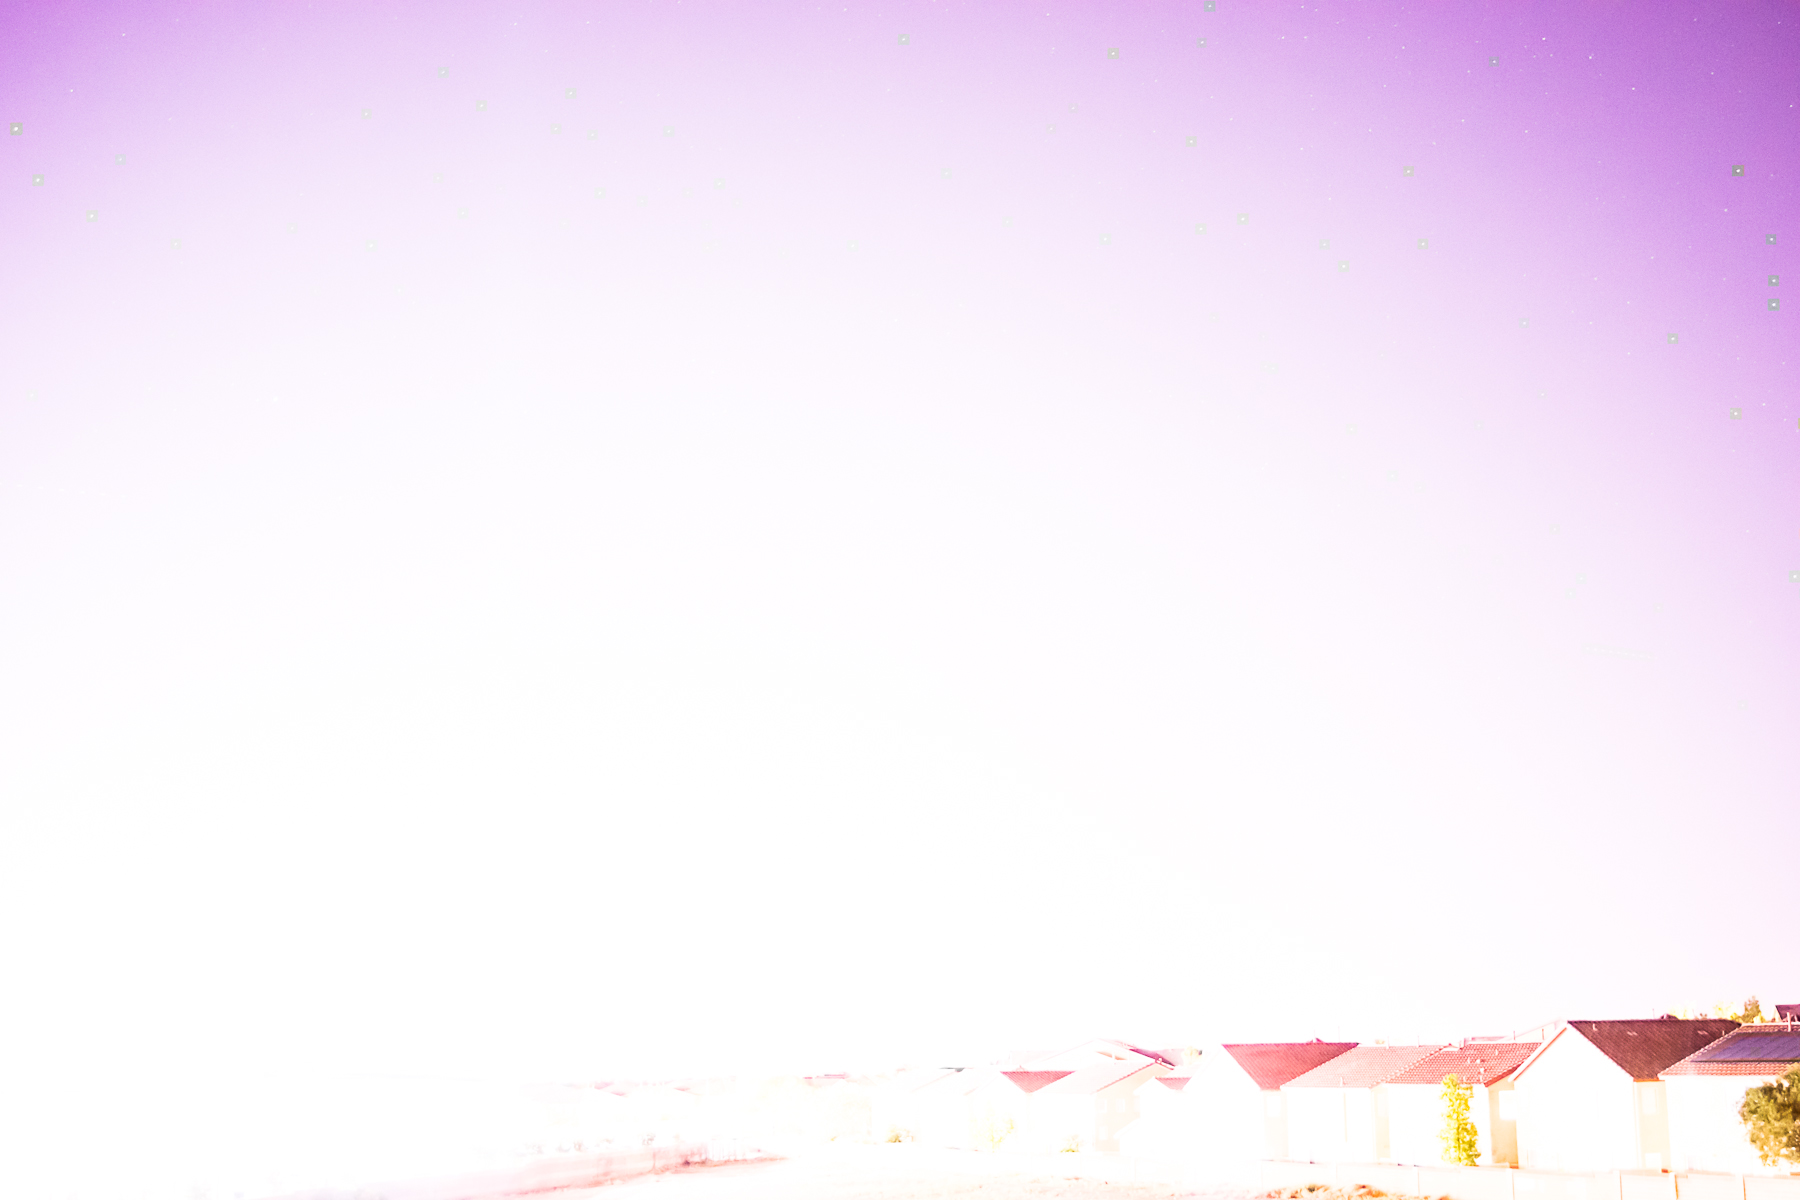
The first image was taken from an overpass roughly 15 miles from the center of the city some stars can be seen but the lights over power most of it. It picked up more stars than I could make out with my eyes though.
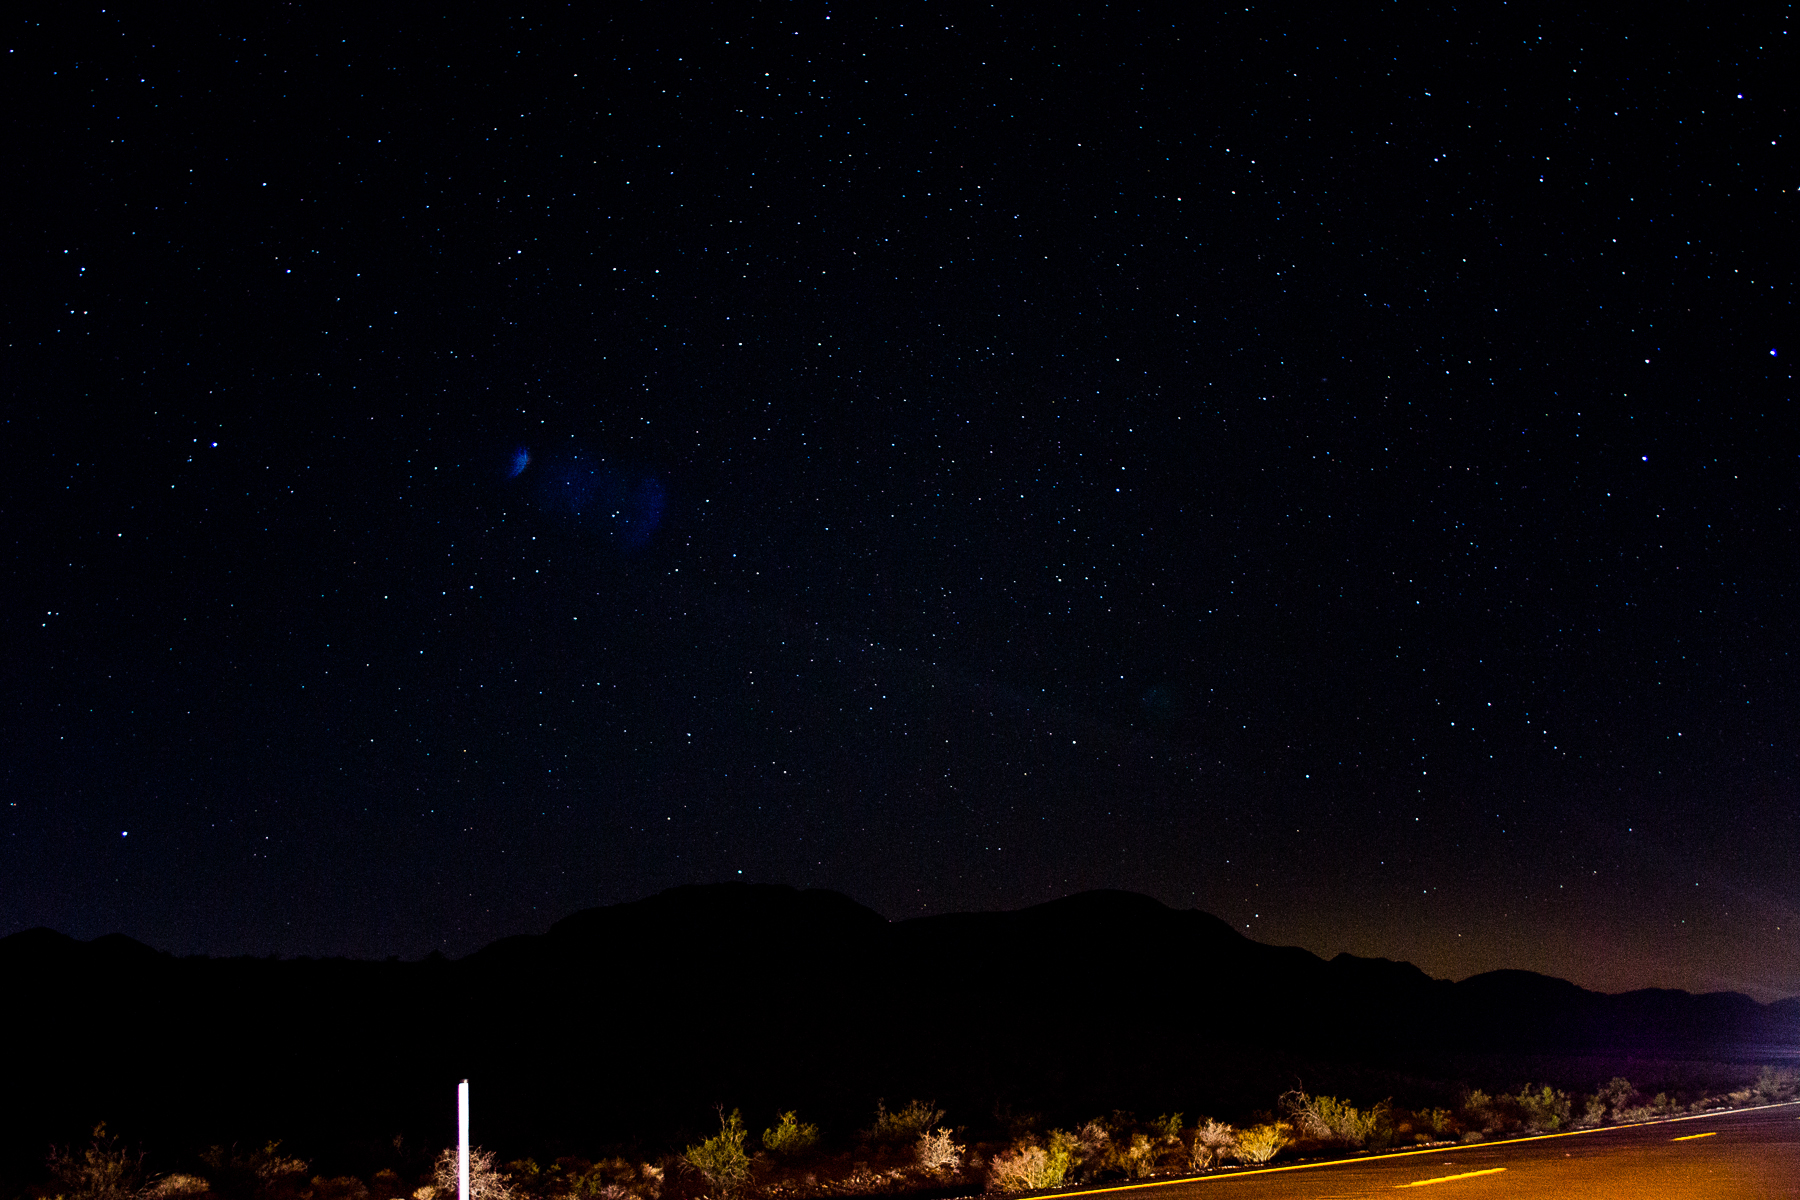
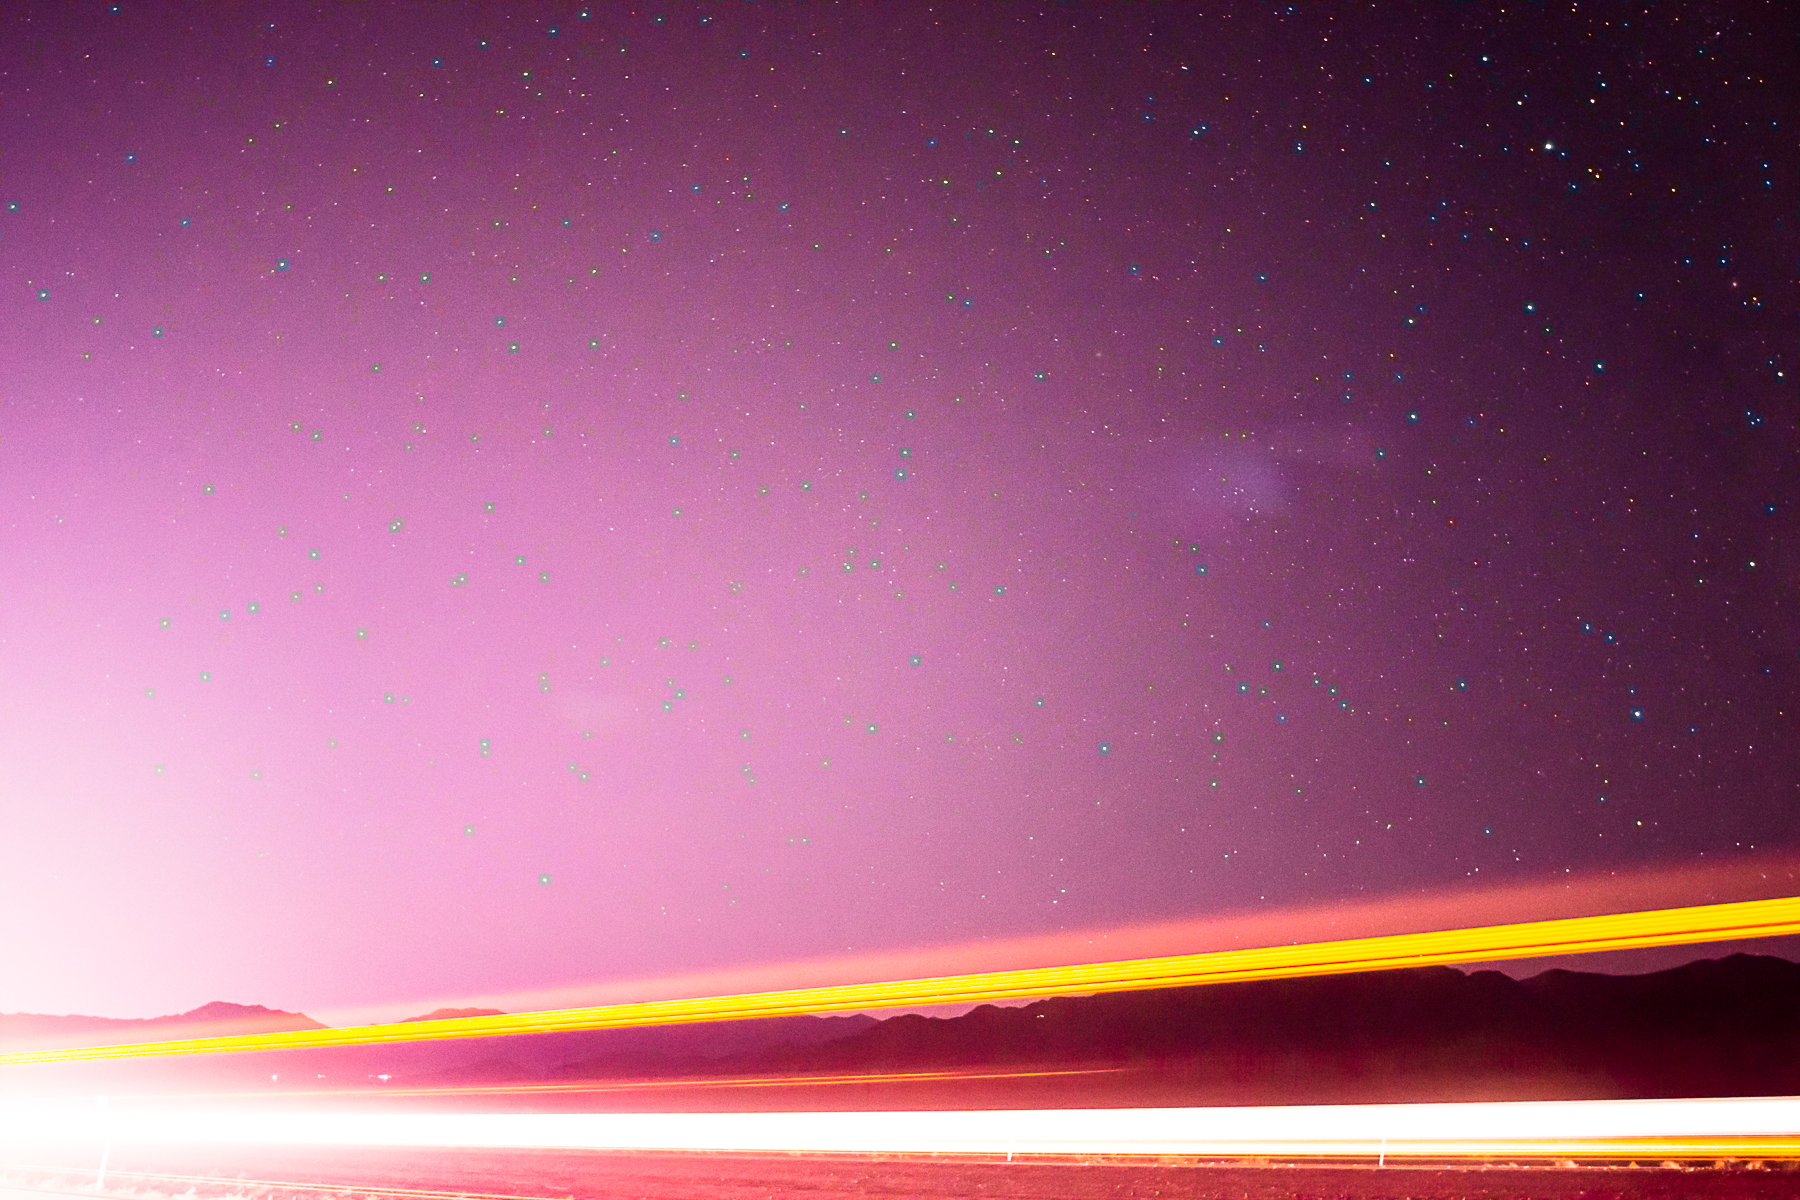
The second image was 10 miles later or 25 miles from the center of the city. It was actually facing closer to south. I had time to figure it out as I wasn’t illegally parked. That 10 miles decreased the city lights quite a bit, they can still be seen though and the truck driving by didn’t change it much. I had one with no lights going through the frame and it was nearly the same but I bumped the tripod so there was camera shake.
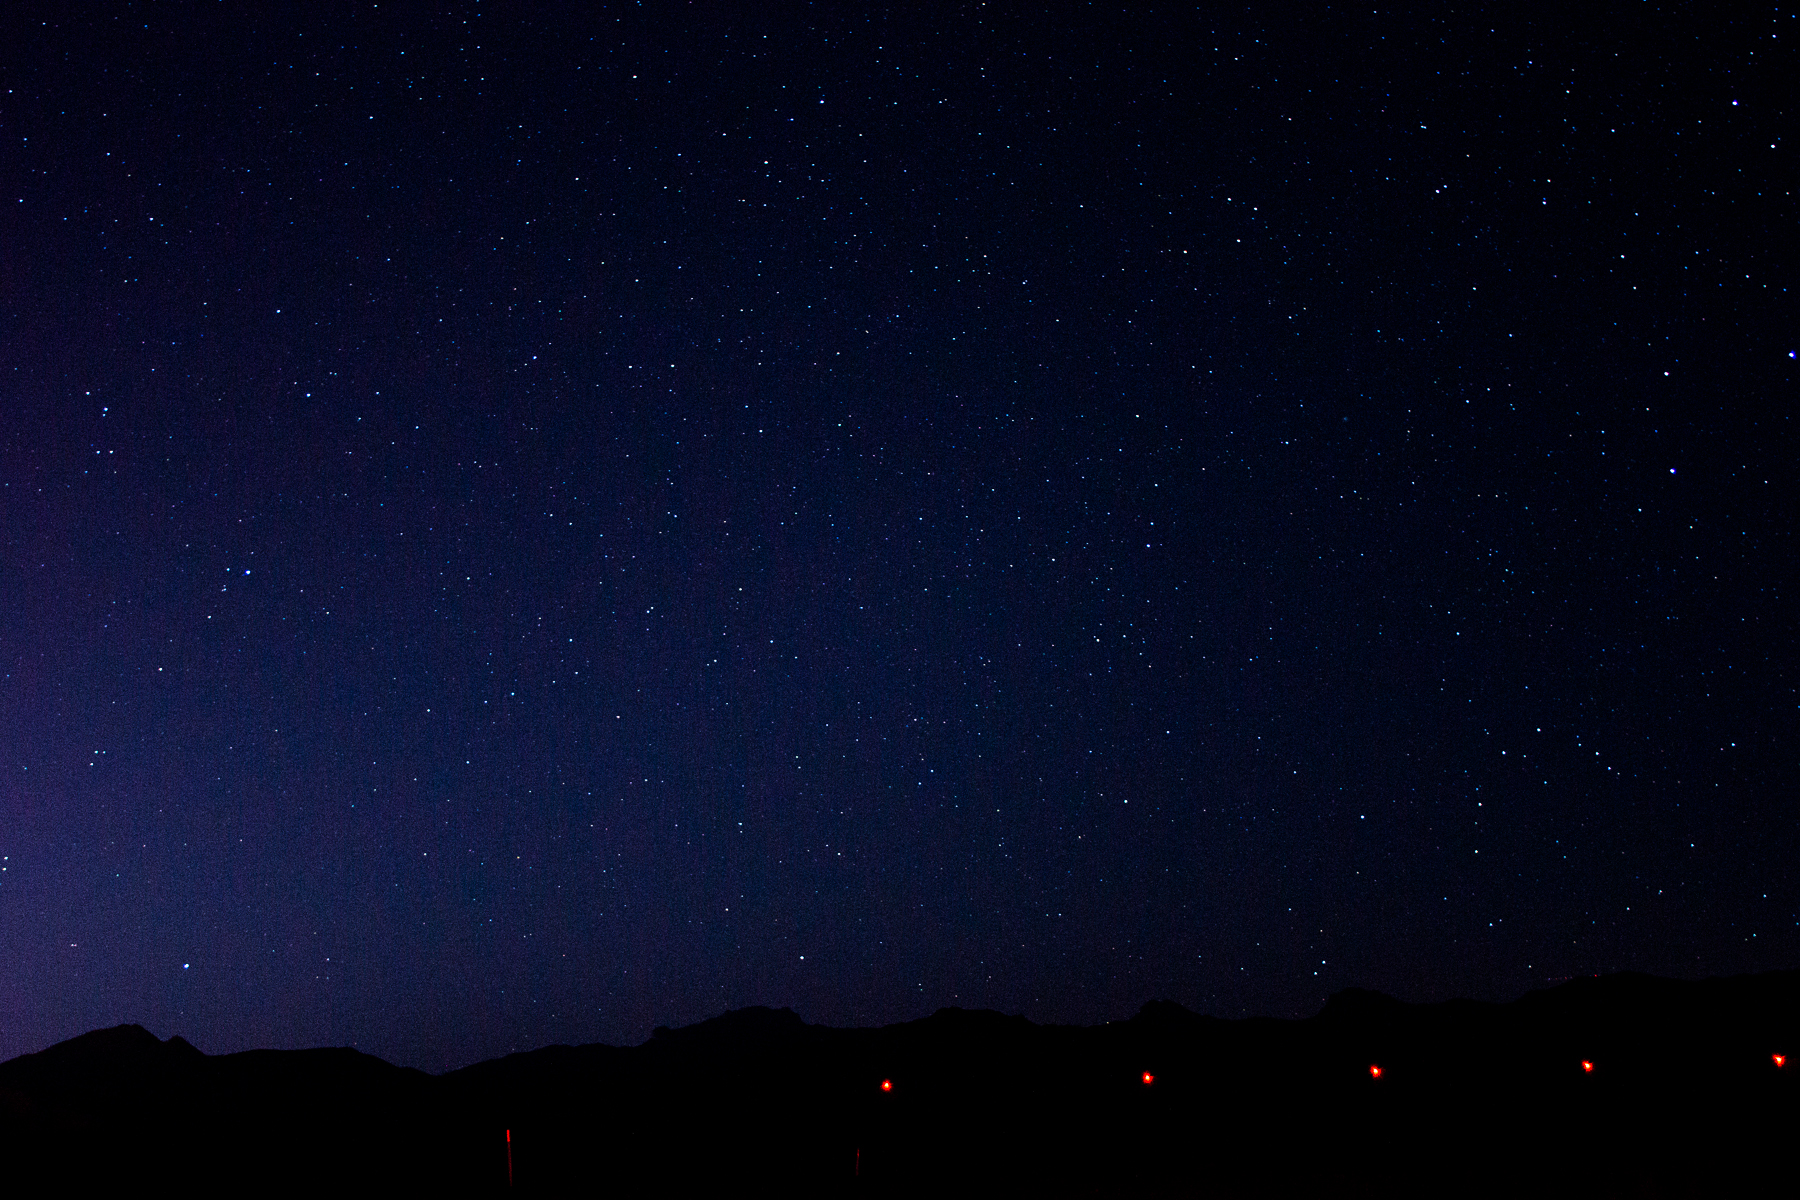
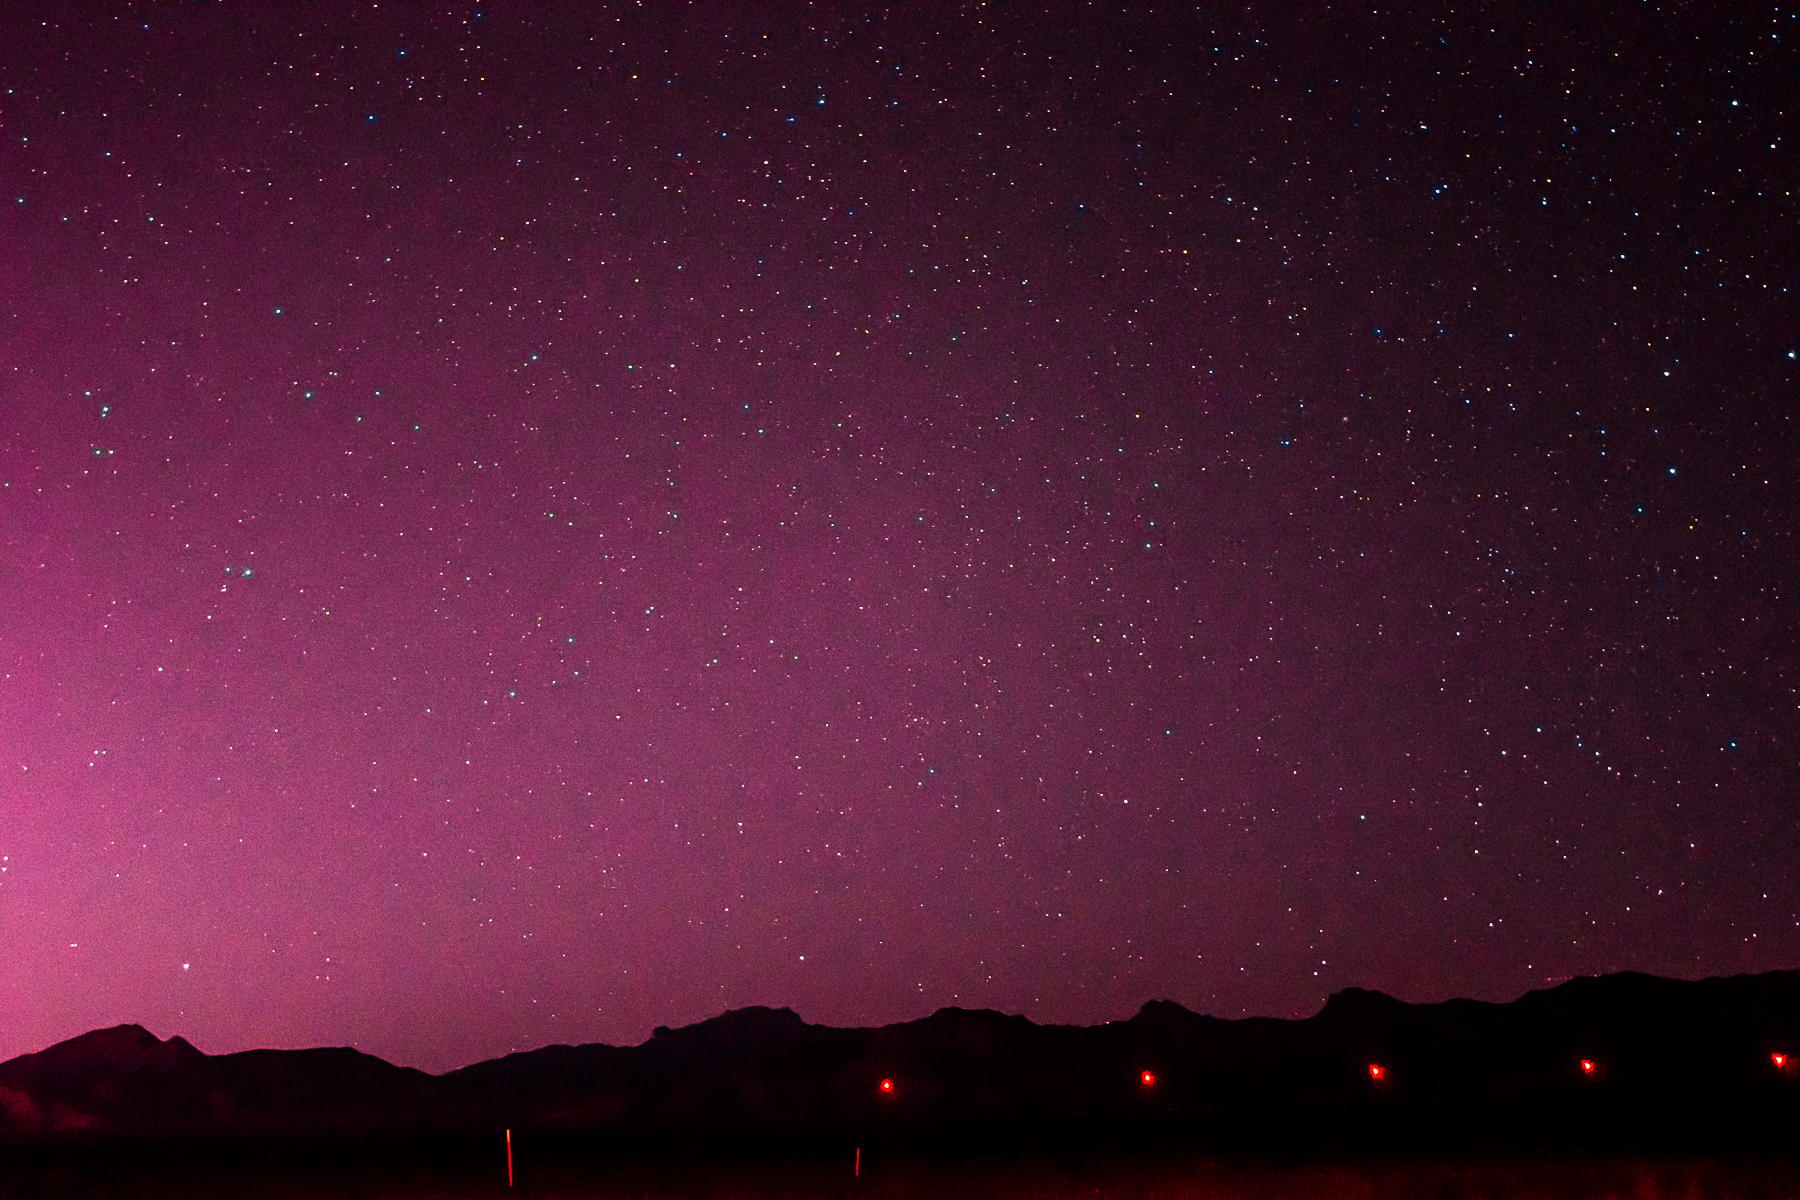
The third image was another 15 miles later or 40 miles from the center of town. The amount of stars increased drastically by adding that distance. At this point I am still seeing the light from the city on the left of the image.
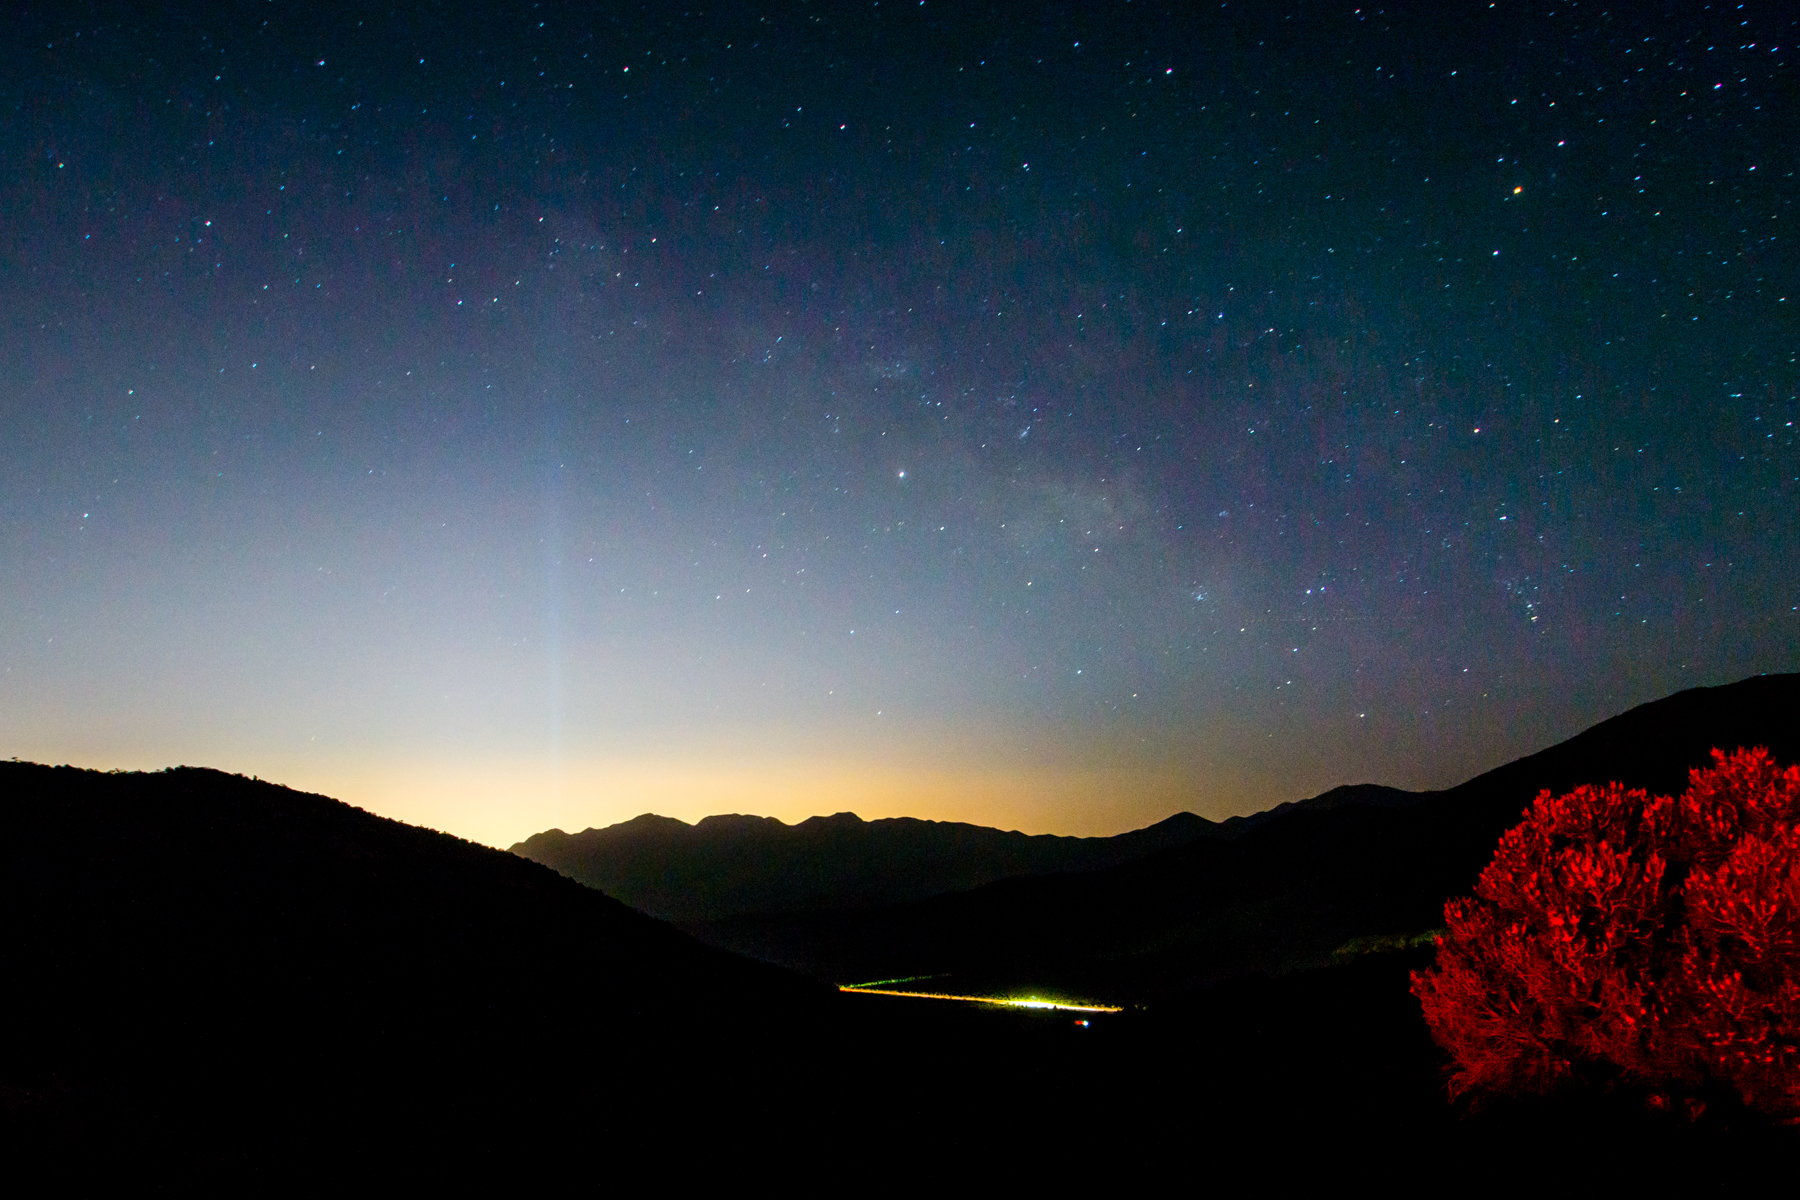
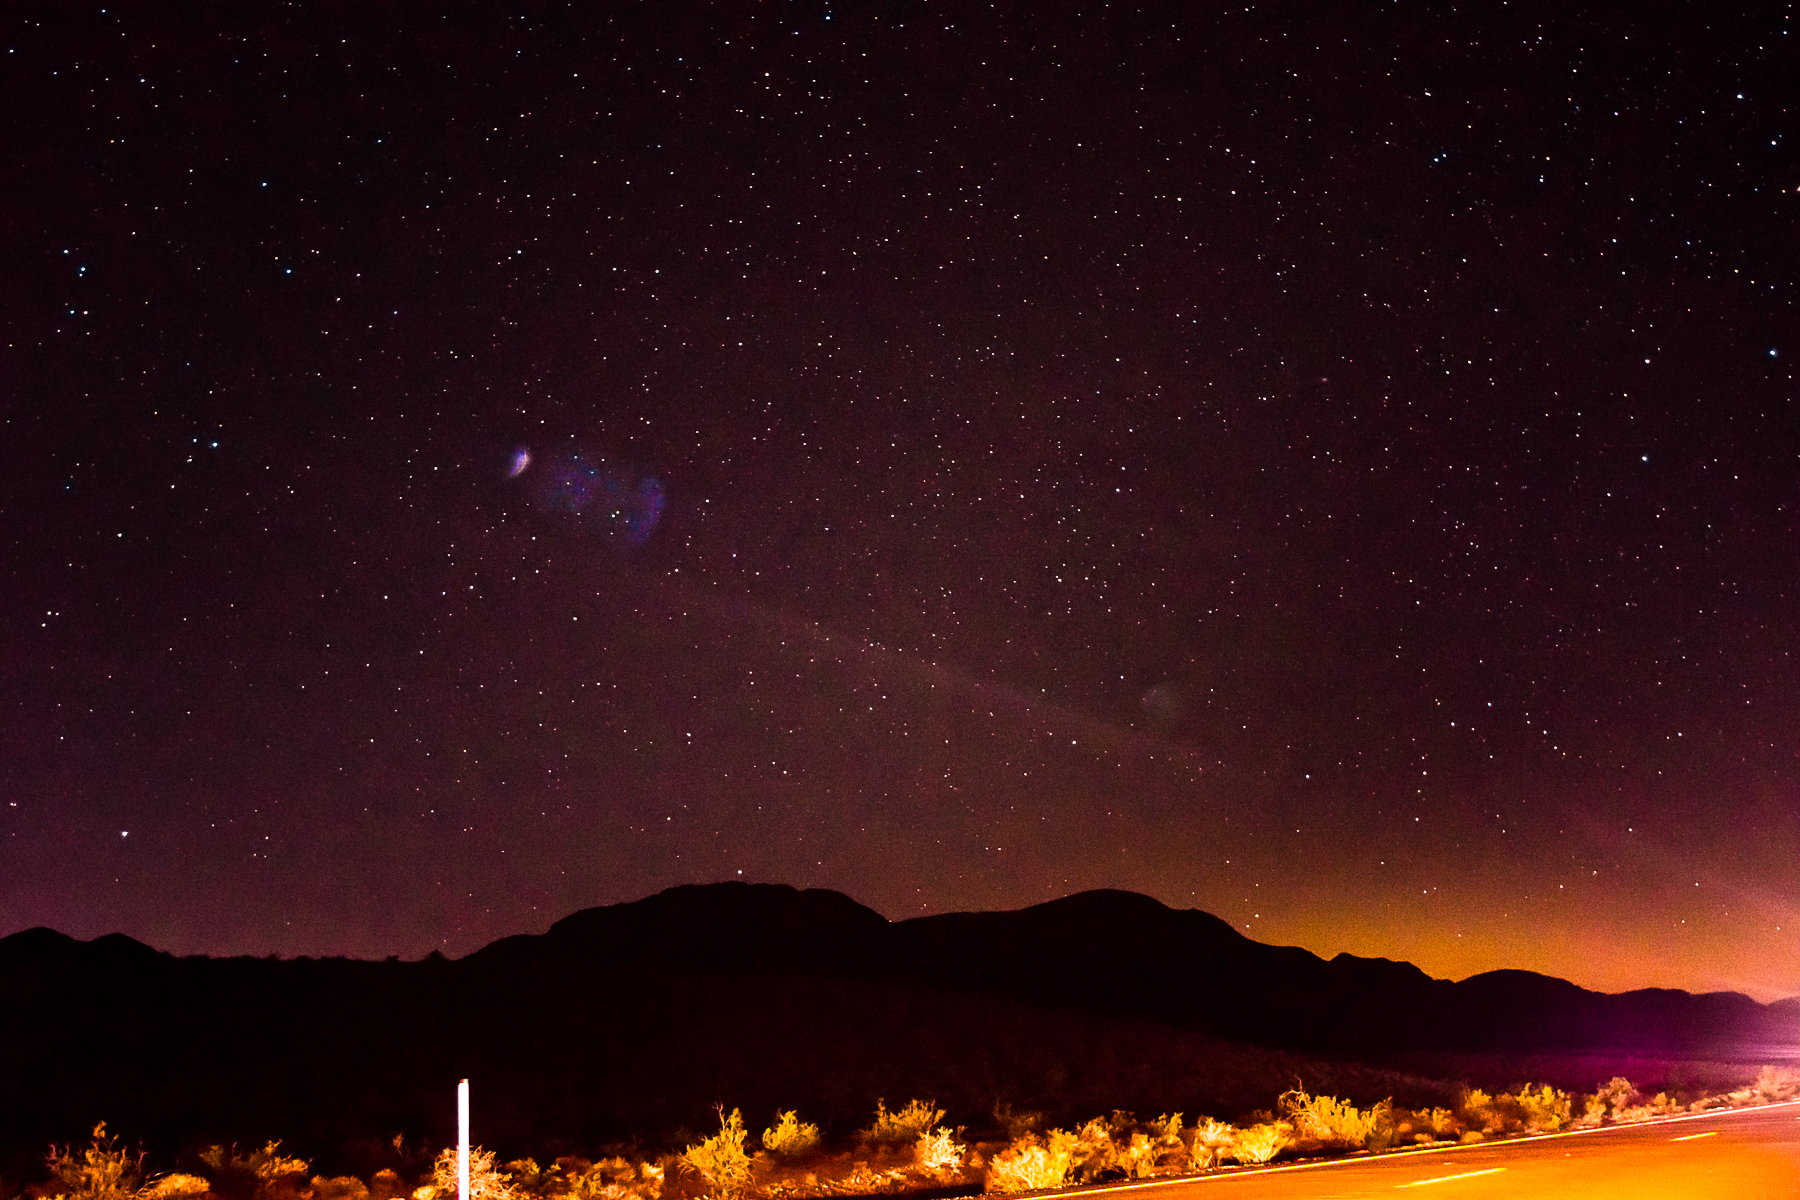
The fourth image adds another 25 miles making it 65 miles North West of the middle of Las Vegas. The main difference now is that the sky is more black. It doesn’t seem like there are many more stars noticeable to me they appear more prominent in the blacker sky though.

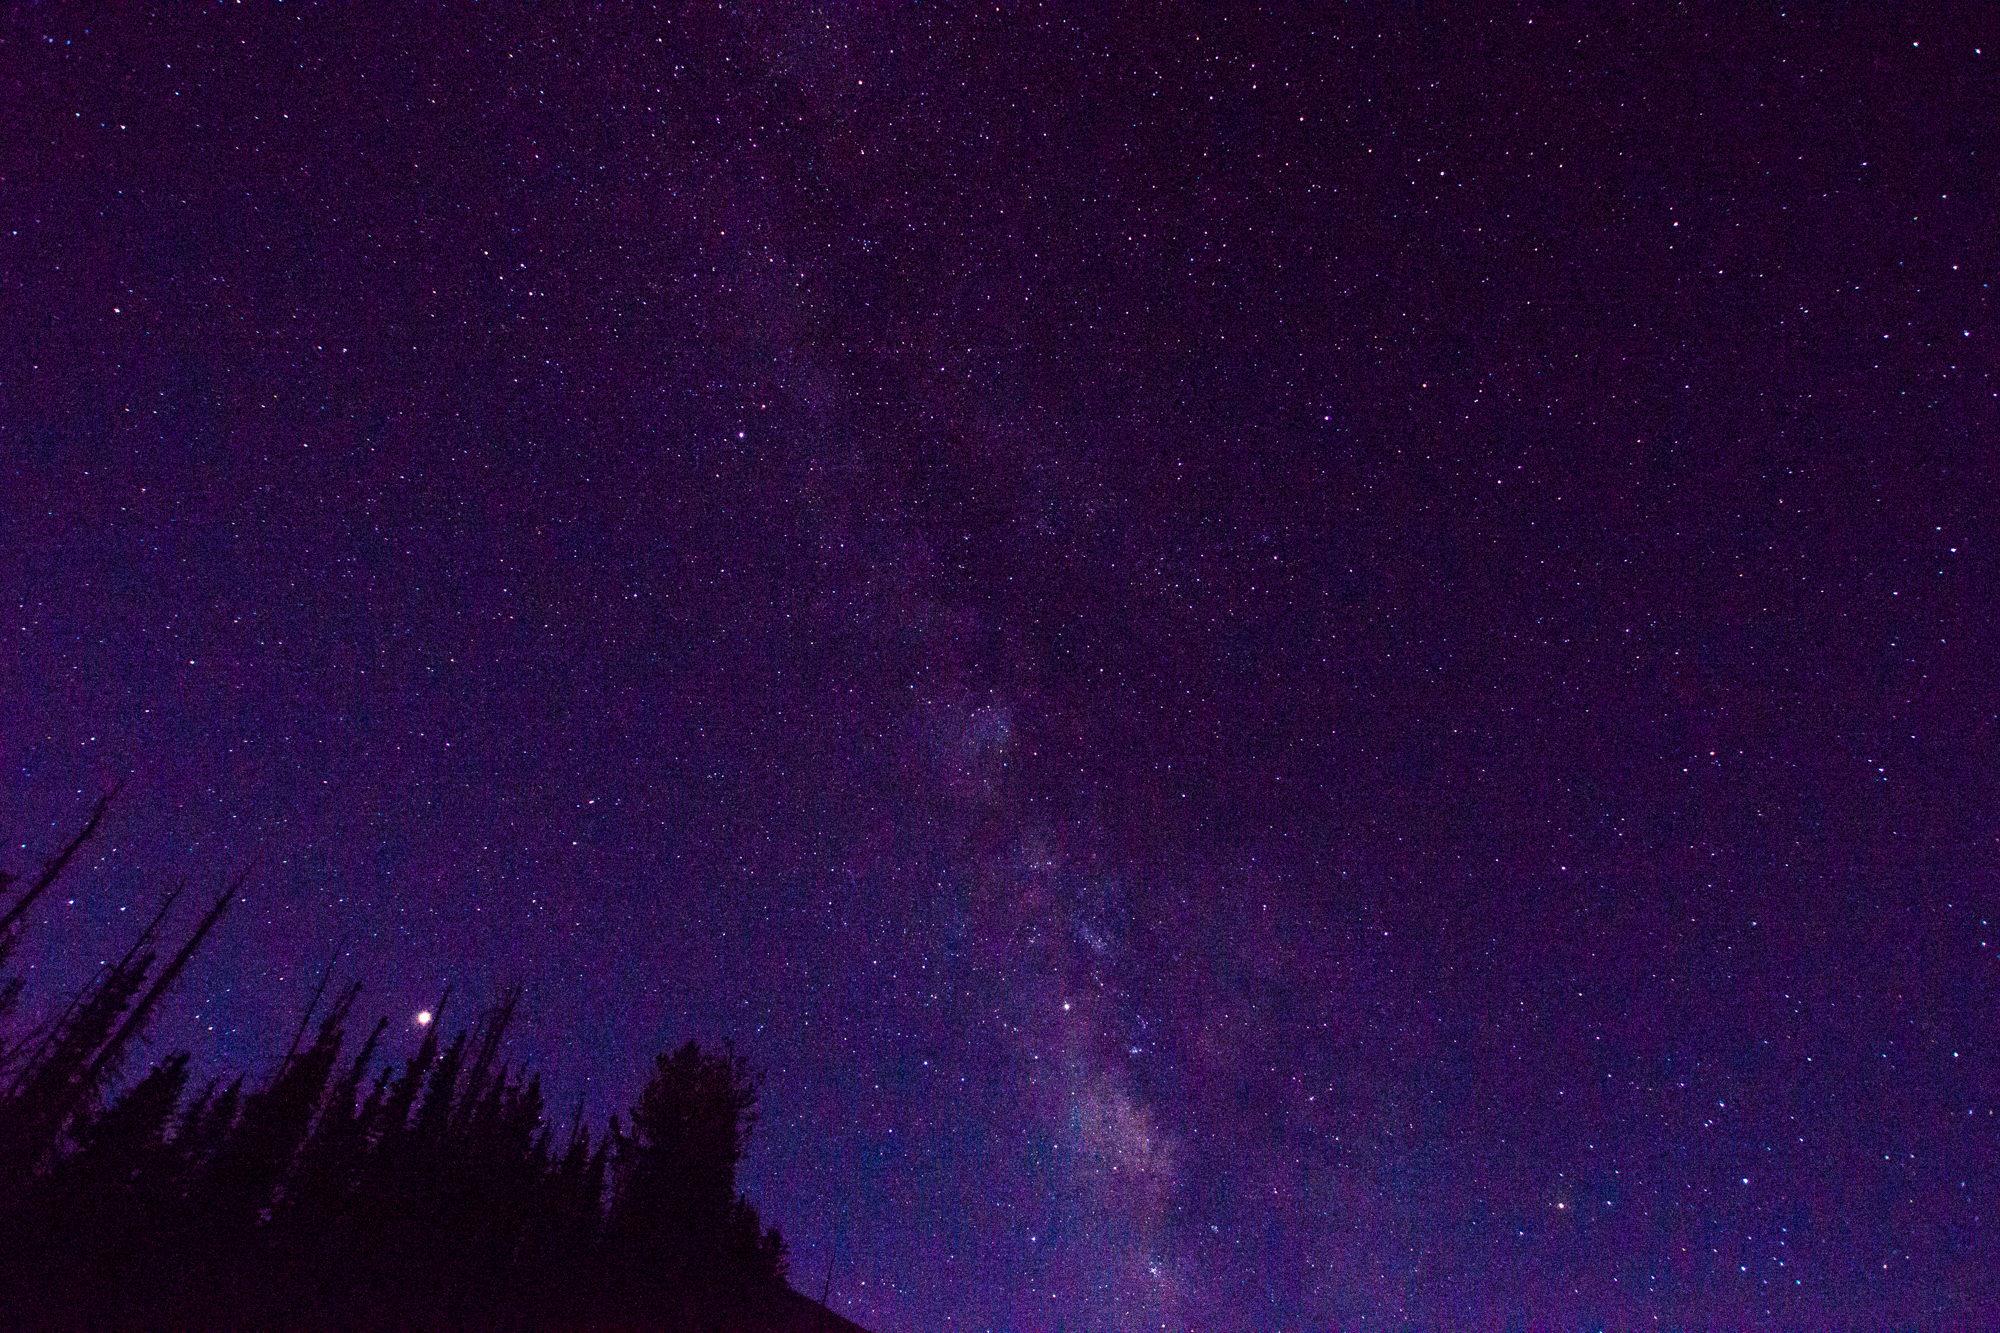
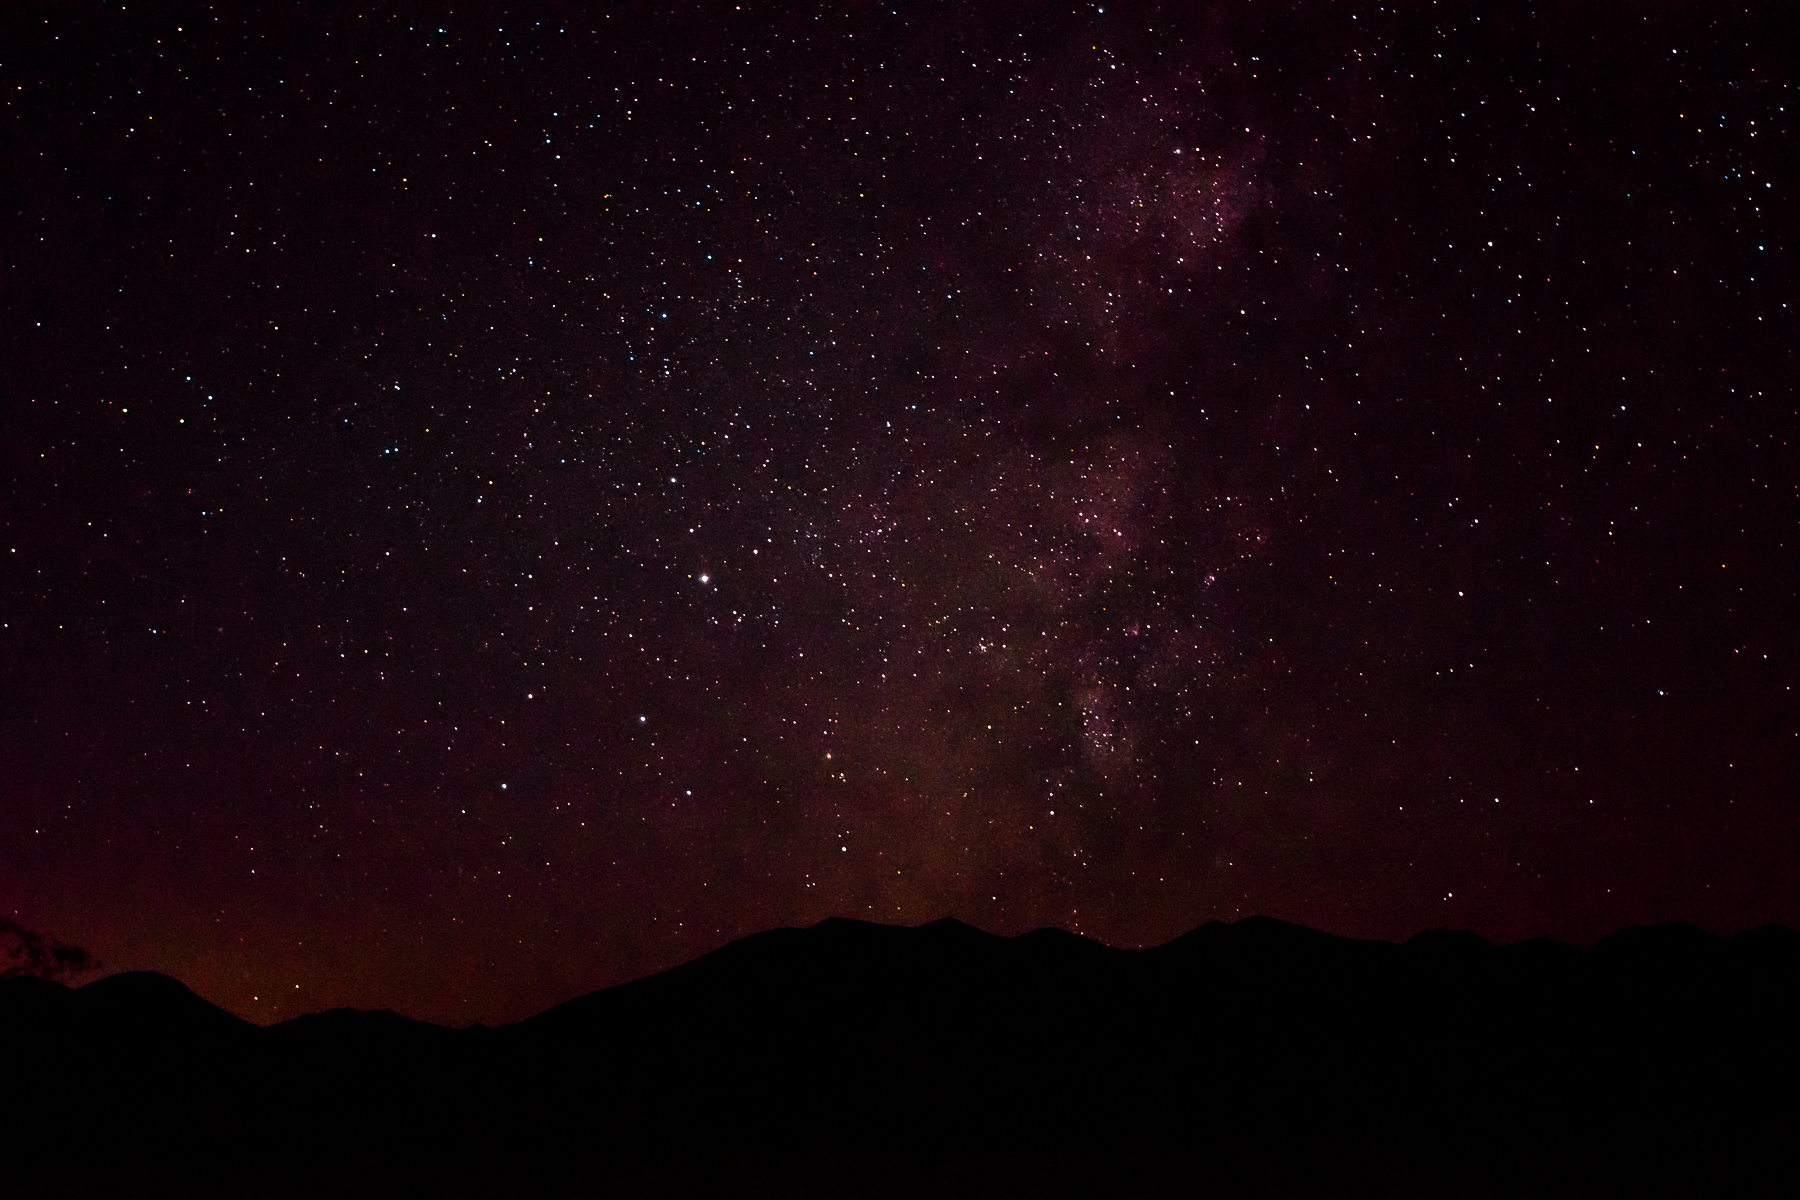
Here is an image taken with the same settings and processed the same. This was from about 100 miles North West of the center of Vegas in Big Dune. It was aimed more South West than South though.
The difference between 65 miles and the 100 miles might not be that great, to me it was less interference, no cars, the quiet, being able to take my time, and again the quiet. I wasn’t going out there to take pictures of just the stars I was doing it to get the Milky Way which is processed differently. The reason the above image is South West is because of the Milky Way.
Above is all of the images edited the same as I would for the image of the Milky Way. To me the only one that looks right like this is the one of the Milky Way. The rest the stars look altered and the rest of the lights look either way too warm or purple. I was just doing it for comparison. I hope that I gave out some worth while advice. Again I would enjoy seeing images that were helped by this in the comments.
~Scott