• Photography
  • About
  • Contact
  • Light Writing

Scott W Gonzalez

  • Photography
  • About
  • Contact
  • Light Writing

Making a Watermark for your Photos

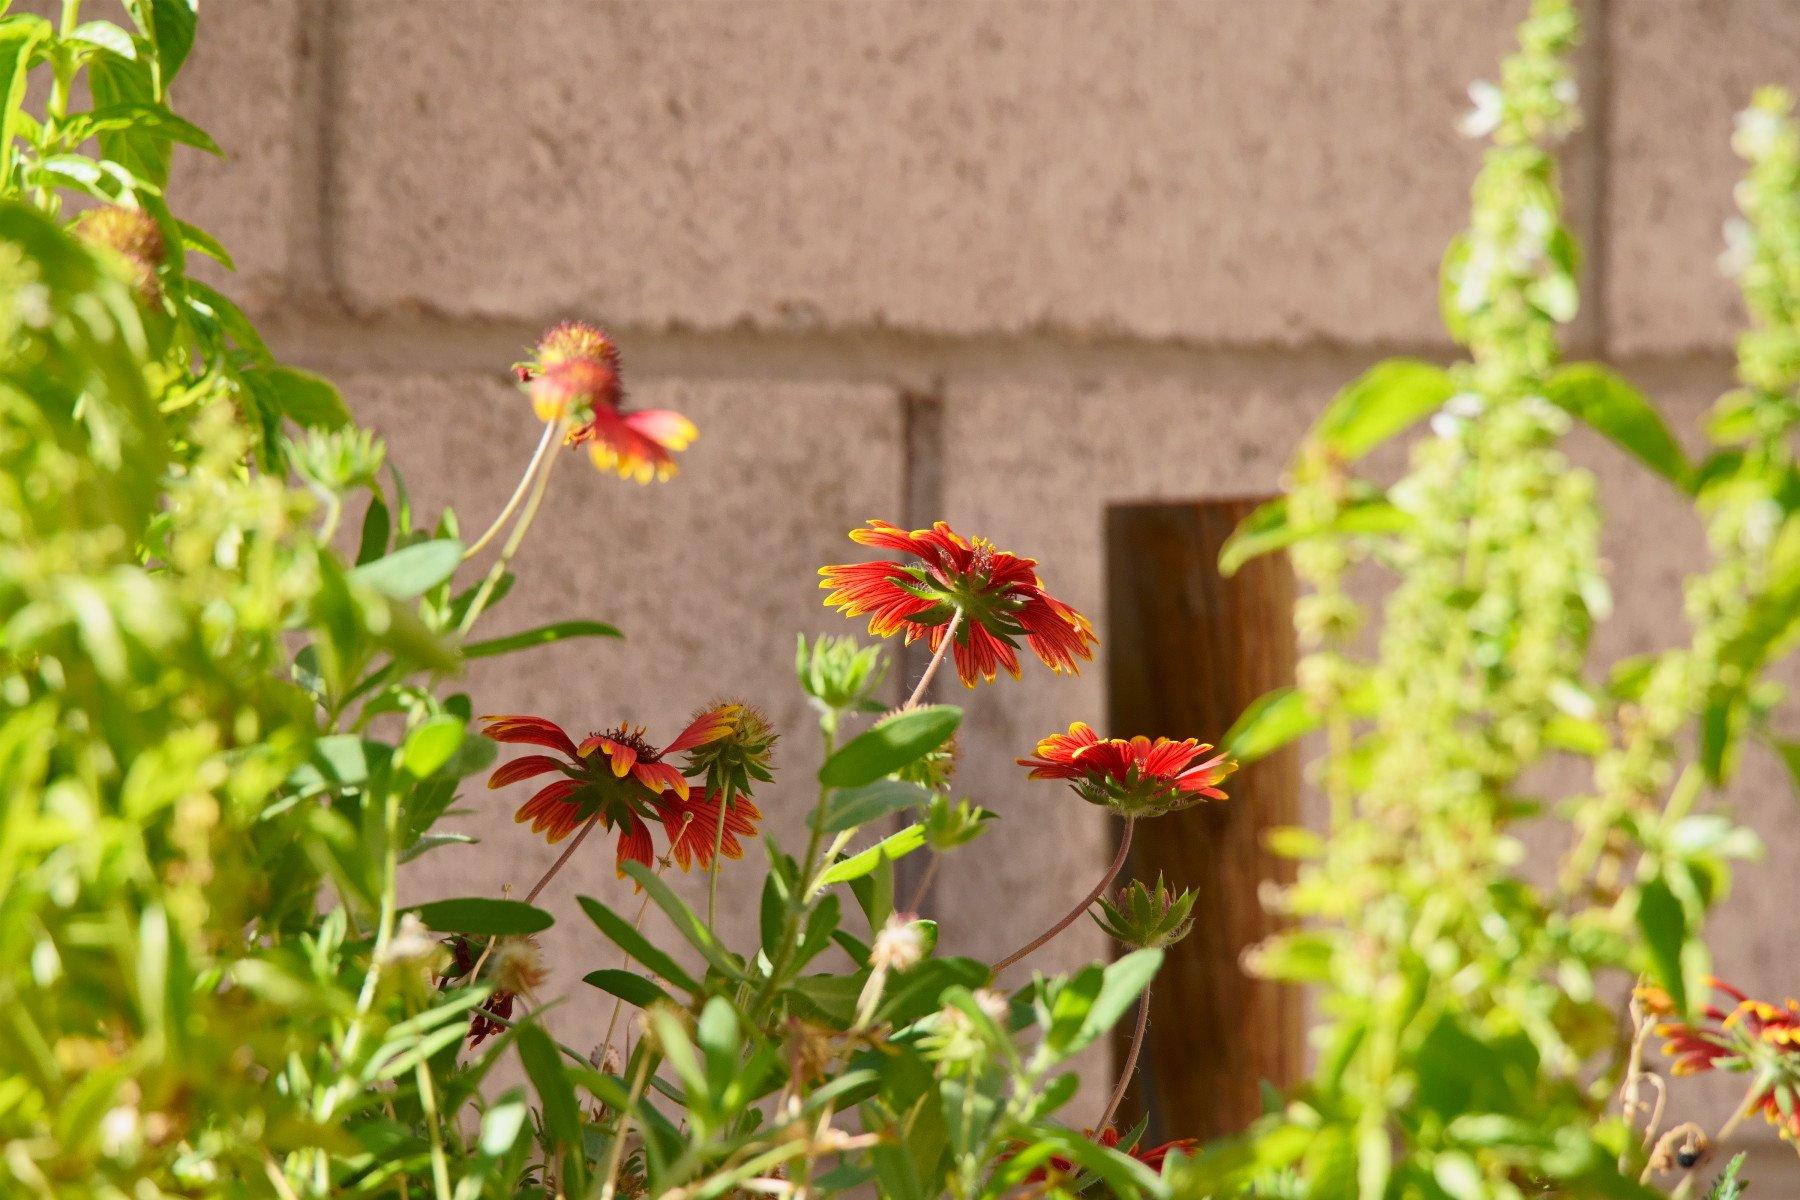
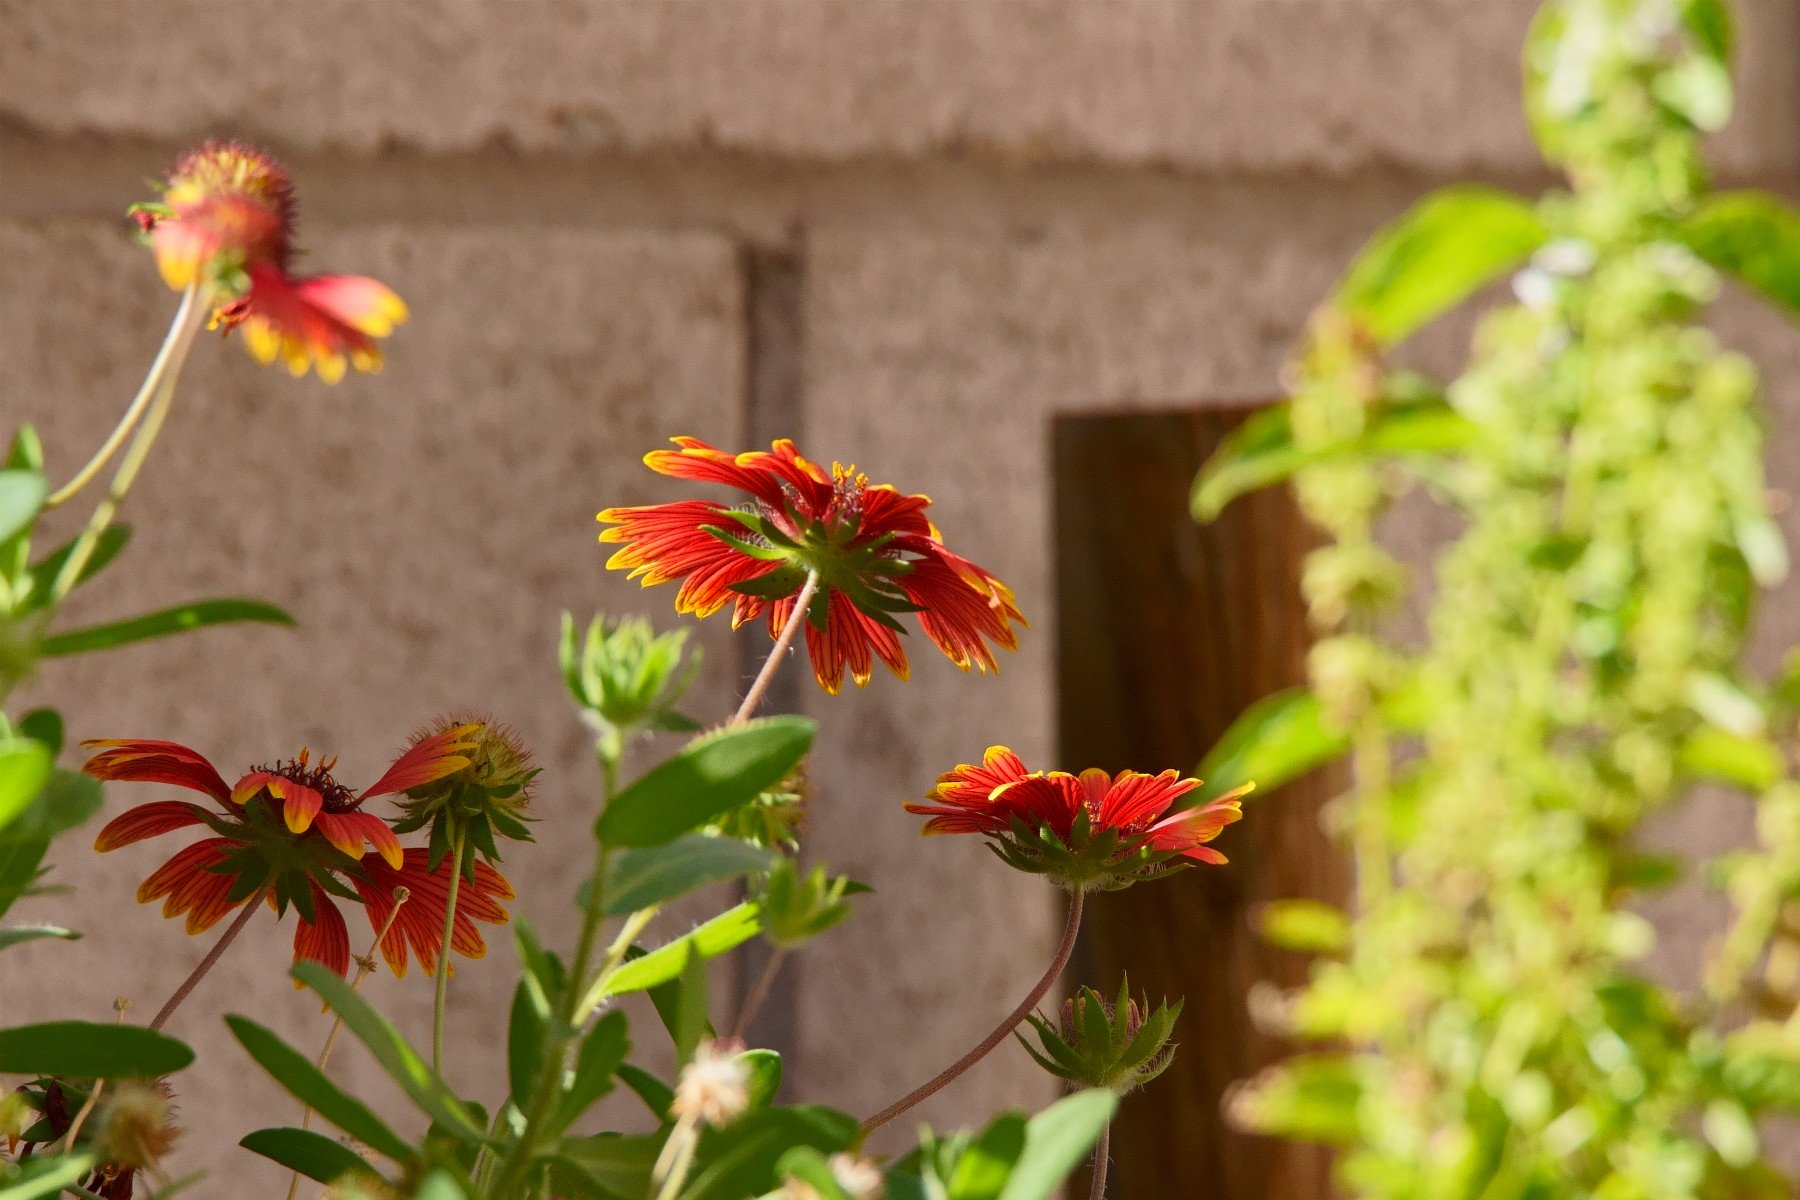
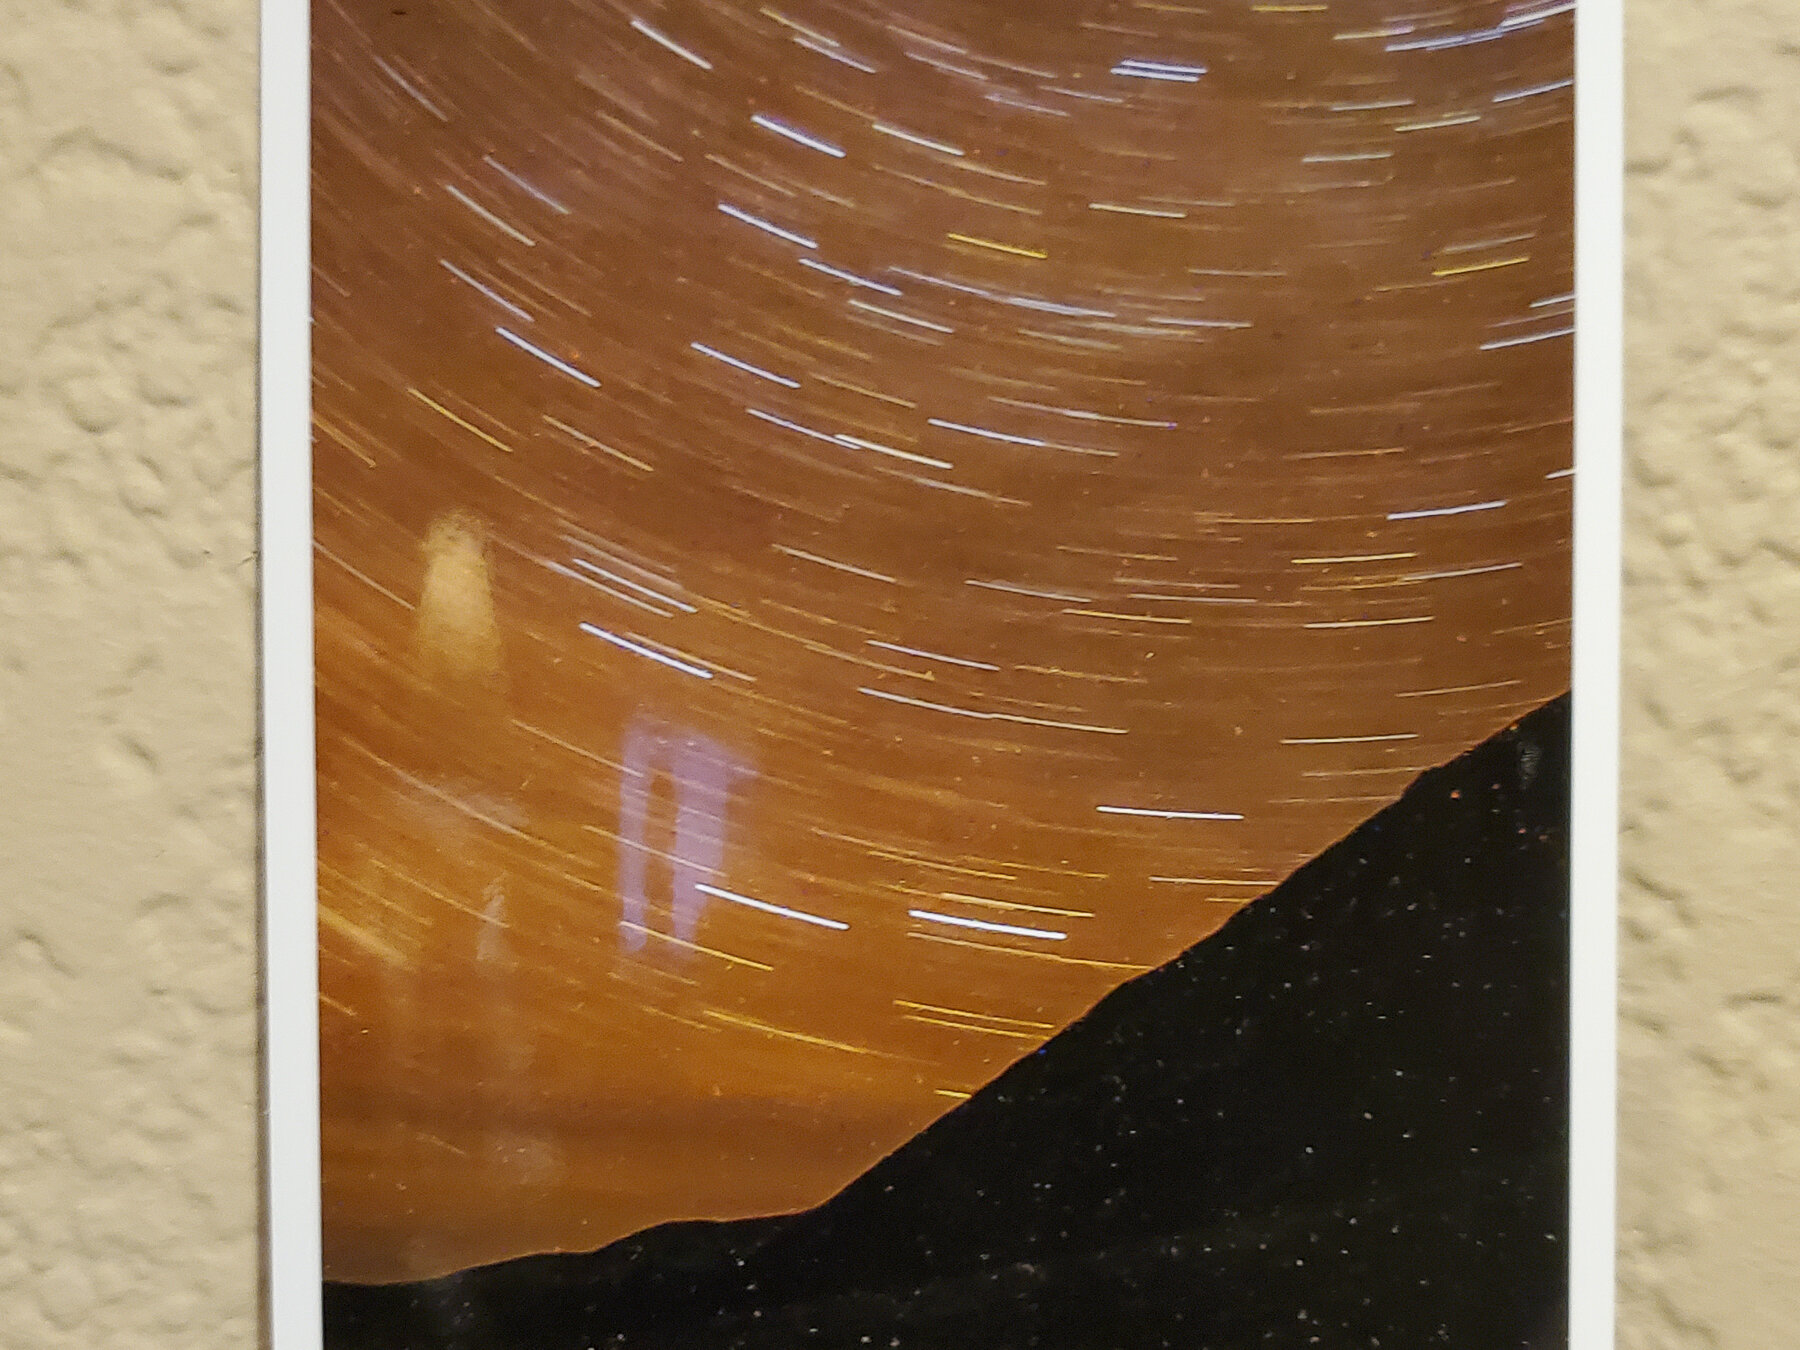
I recently found pictures of mine on a website that I have never heard of. I can see where they got them from, 500px. Which is interesting to me because one is not supposed to be able to download from there. They could be screen shots though. There are some that look grainy.

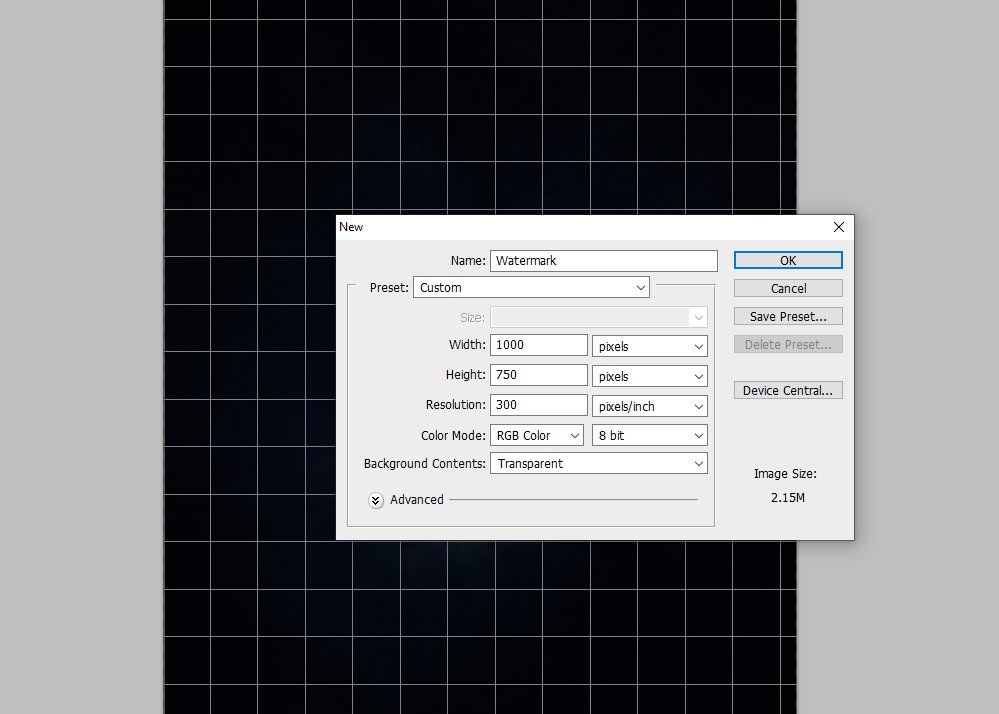
So, I am going back to watermarking my photos. I mentioned that I was going to start doing it again and was asked how to do it. It is not that hard if you know a little bit about layers. If you aren’t familiar with layers I wrote an introduction to them and I will link to that below. I am going to do a simple one with my initial using photoshop CS5. Open up a new file, name it watermark so it is easy to find. Make the background transparent and I am going with a 1000px by 750px at 300ppi. It is a good starting point for me because I generally shoot at 24mp.

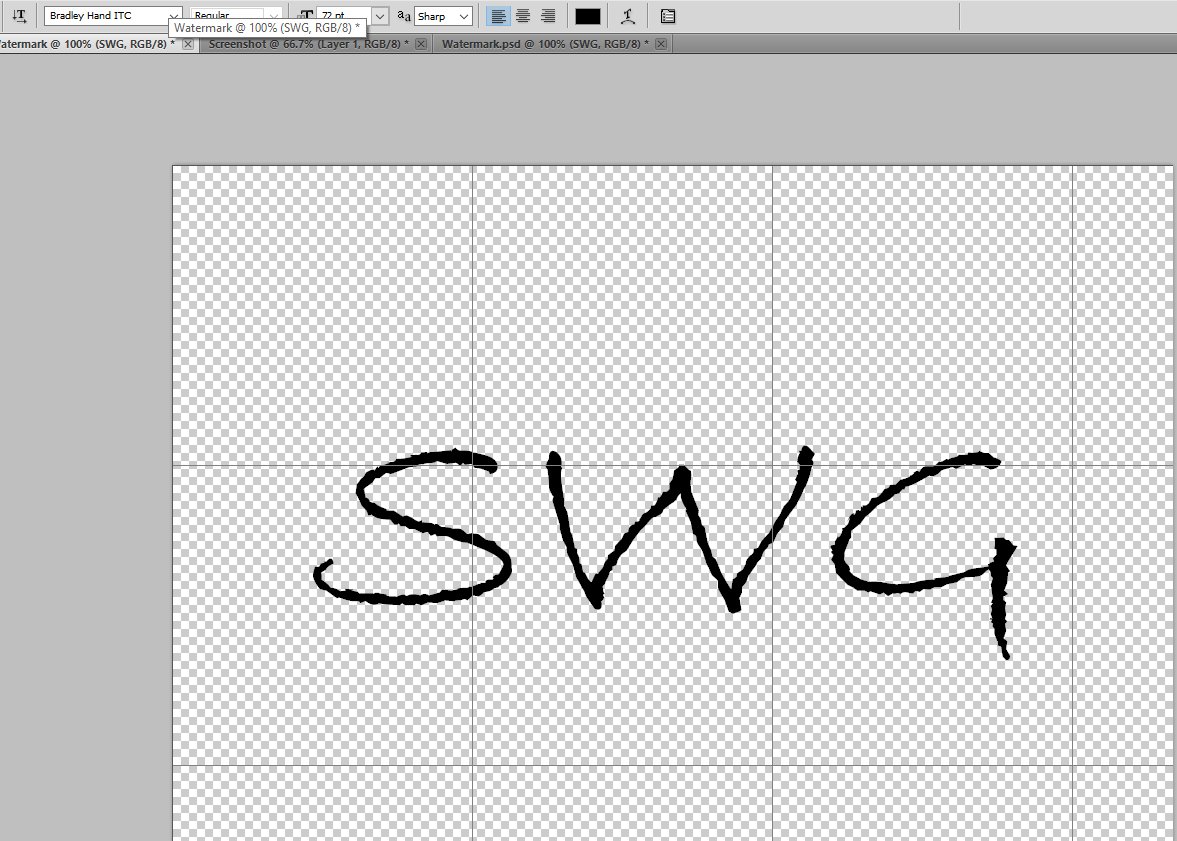
After I make the new transparent image I choose the text tool and put it right in the middle. Type whatever you would like, I am going with just my initials. After I type them out I select all then change the font and size to what I want, in this case it is Bradley Hand ITC and 72 pt.

One can leave it black or follow my lead and make it white. I find with most of my photography a black watermark limits the places that I can put it without it detracting from the actual image. I also will cut it to a smaller size. Then I save it as a photoshop .PSD file in an easy to find location. Once I process a picture I copy and paste the watermark onto it in a slightly conspicuous place. If someone really wants the picture they are going to get it. It is more of a discouragement to the majority of people.

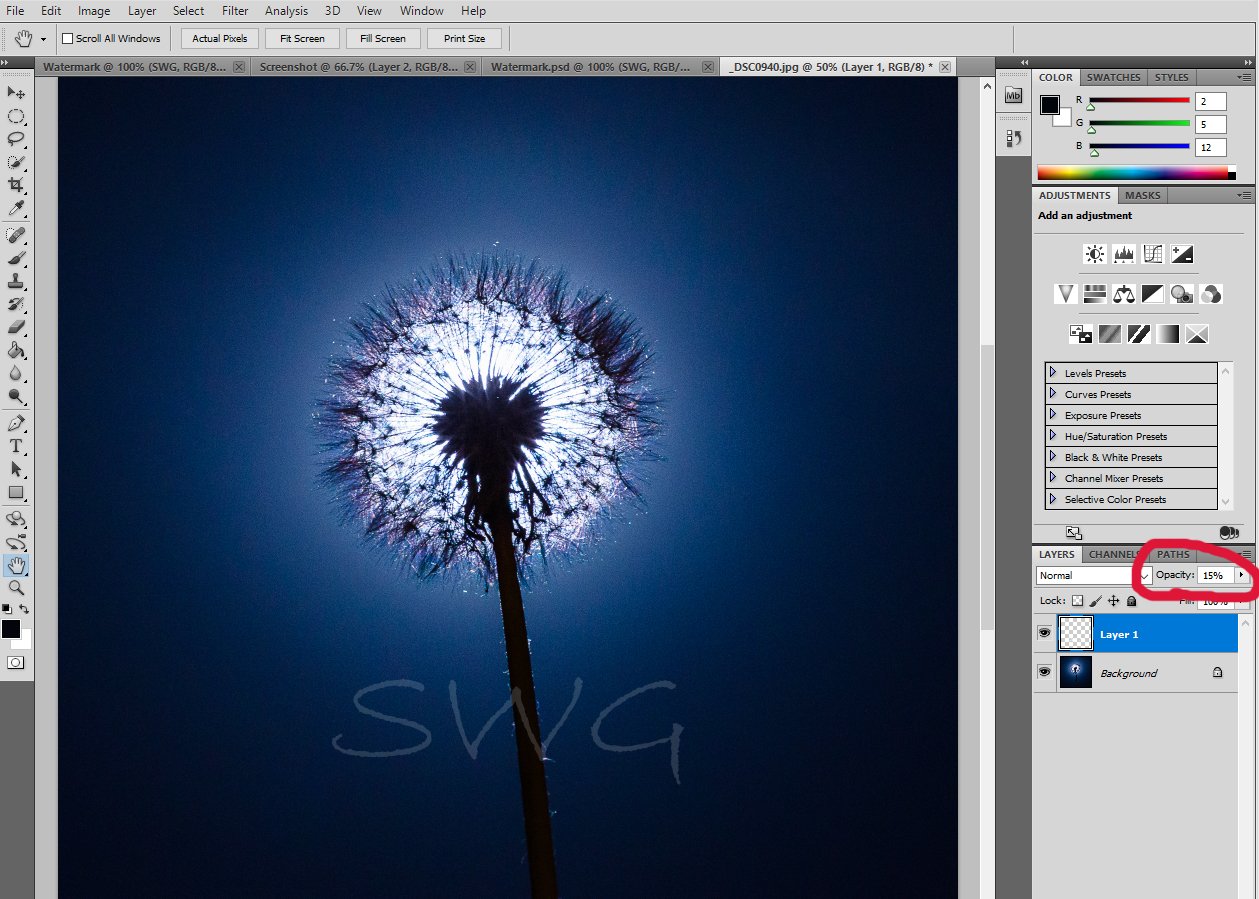
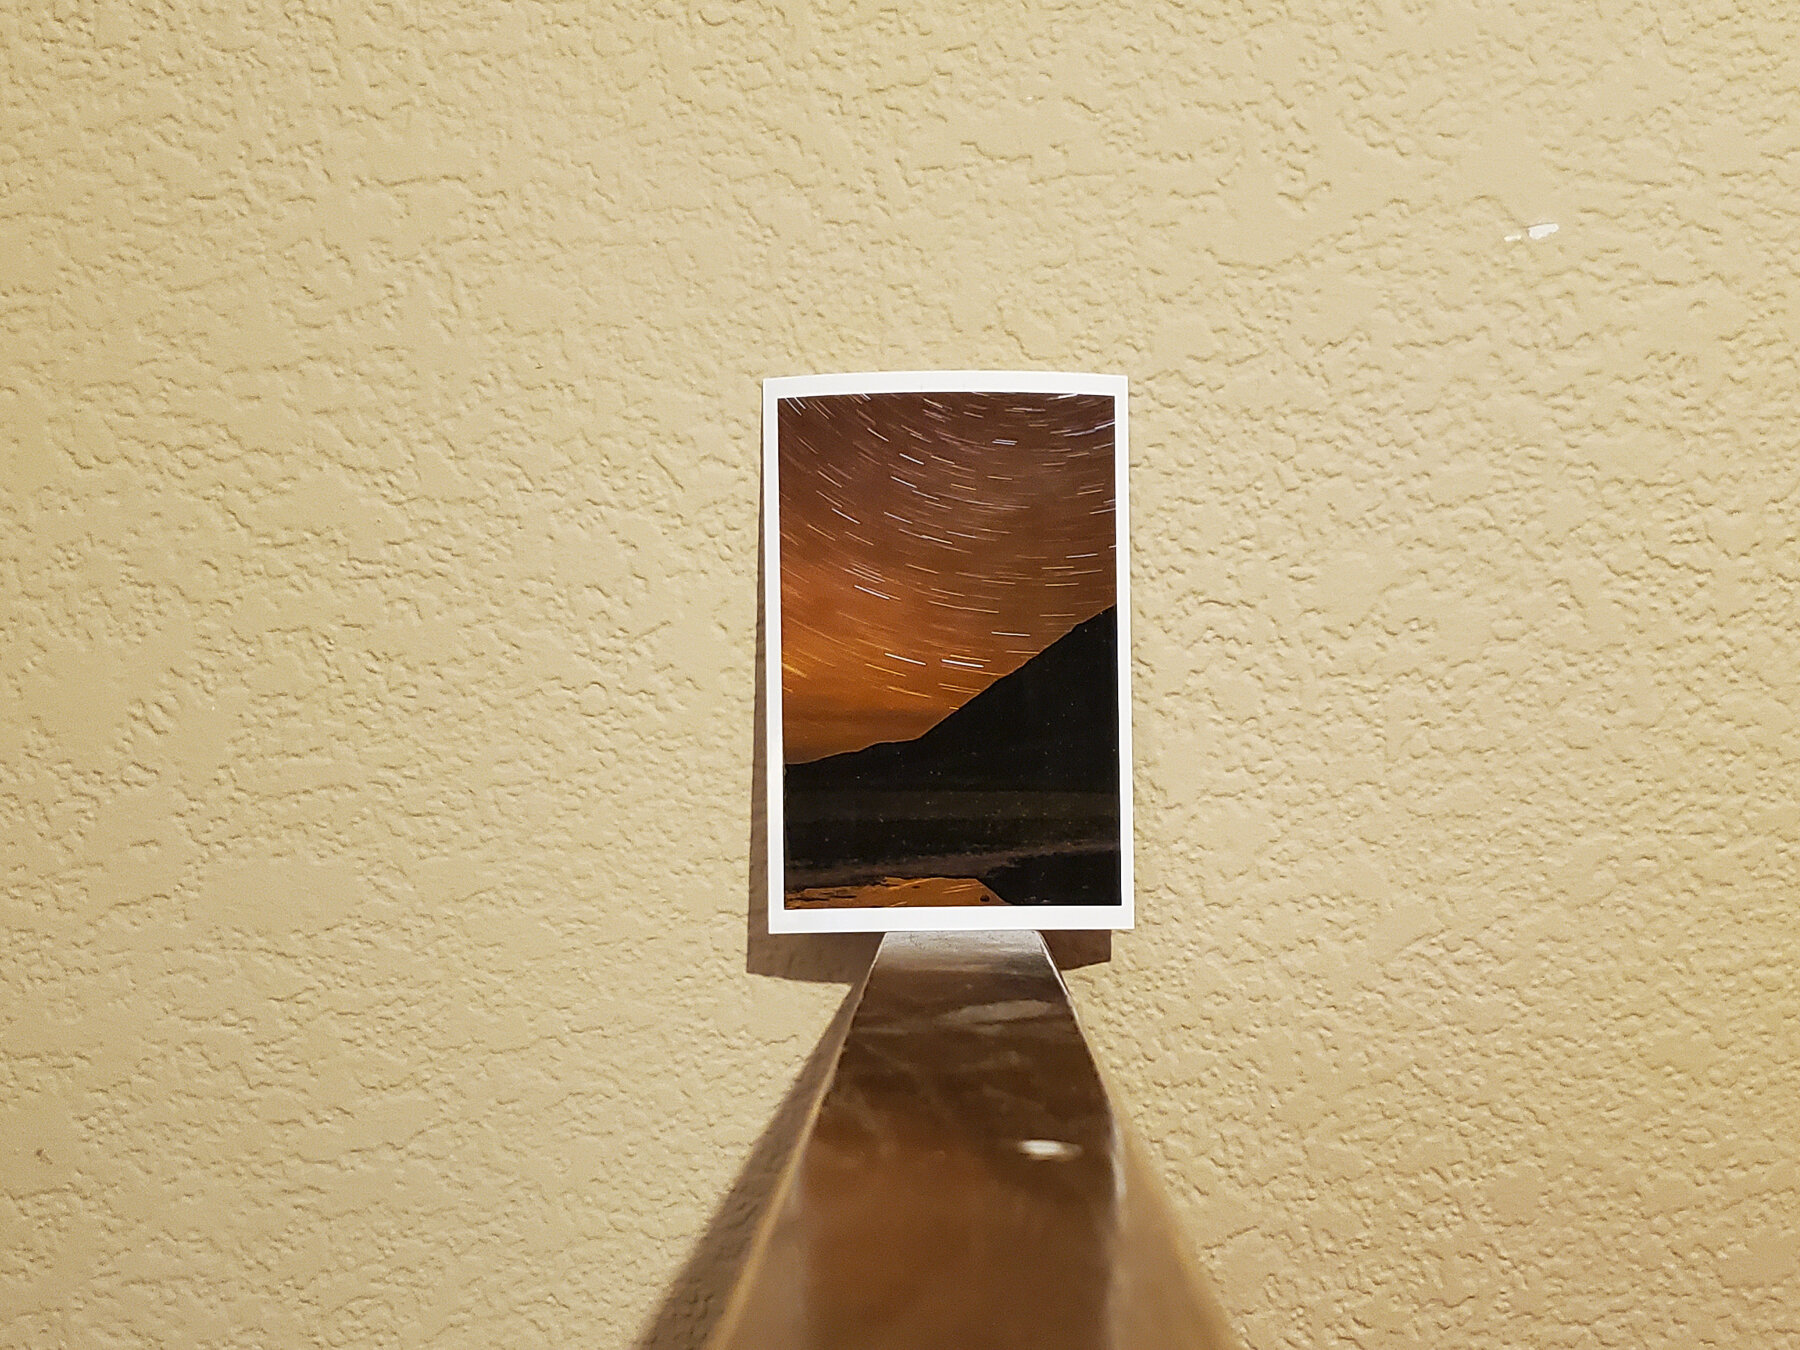
As seen above I put the watermark in an obvious place but not one that is blocking out the primary part of the picture. I decreased the Opacity to 15%. If this was the final picture I would probably lower it more. The watermark size can be changed before placing it too.

As mentioned before here is the link to the layers post. Layers — Scott W Gonzalez

~Scott

Monday 05.06.24
Posted by Scott W Gonzalez
 

Cropping a Full Frame

Good morning,

I just found out that my A7iii which is a full frame camera can be used as a crop sensor camera with a camera setting. It doesn’t maintain the 6000x4000 pixels it becomes a 10mp image at 3936x2624 pixels. The images appear to be the same whether I crop them to 10mp or if I just take them at 10mp. So a 300mm lens will become a 450mm. I already wrote about crop vs full frame here Crop Sensor vs Full Frame — Scott W Gonzalez

I recently got a new lens that is used for all these images. A Tamron 150-600mm so the images are going from a 600mm to an effective 900mm. I will talk about the lens at another time. All I can say about it is damn.

I know that the A7iii and the a7Riii do it and I can only guess that Sony’s other FF cameras do too. I did a little checking there are Canon and Nikon FF cameras that have the option too. Below are some uncropped pictures from from my yard. The first is at an actual 600mm and then an effective 900mm.

DSC06271.JPG
DSC06278.JPG
DSC06284.JPG
DSC06286.JPG
DSC06289.JPG
DSC06287.JPG
DSC06271.JPG DSC06278.JPG DSC06284.JPG DSC06286.JPG DSC06289.JPG DSC06287.JPG

It comes in real handy when you want to get a little closer to your subject. In all reality it is not changing the optics, it is like cropping the image to a 10mp image in the camera instead of doing it in post processing. To show this I took the rose pictures and cropped them to 1800x1200 without resizing them. They are below.

DSC06287 crop.JPG
DSC06289 crop.JPG
DSC06287 crop.JPG DSC06289 crop.JPG

The only reason that I know which is which is from the sun on the wall and even with that I had to look at them uncropped to make sure. It is super useful if you don’t want to do the cropping in post. One less step.

~Scott

tags: crop sensor, teaching, full frame, camera, post process, crop
Thursday 11.04.21
Posted by Scott W Gonzalez
 

Slumps (Only 36/24 exposures)

Good morning,

While I am waiting for this print to start I figured I would write about slumps again. I am currently in one, I am not sure if it is because I am just enjoying the moment or because I am not a fan of the new software that I am needing to learn to process raw files or something I am not thinking about.

One of the ways that I have gotten out of slumps before it to tell myself to treat it like I have one roll of film and that is all the pictures I am allowed to take that day. I still sometimes have to force myself to step out with the camera, once I start going I end up looking for the perfect shot of the subject because I only have 36 exposures for the day. You can go with 24 if you want. It is almost like reverse psychology. It is something that has helped me get out of a slump when other things didn’t.

DSC05362.jpg

This Flame Skimmer dragonfly got me out taking pictures a few days ago. I took 24 pictures of it. I wasn’t specifically trying to, I took so few because I had to get kids from school and I didn’t want to have to use the new software as much to make the image.

~Scott

Friday 09.24.21
Posted by Scott W Gonzalez
 

Flash 5 (color change)

Hello,

Today I am going to write about changing the color of flashes.

There are a few ways to do it.

The WB can be changed with a global image change. Daylight will keep it about the same, Cloudy and Shade will make it a more yellow/orange. Fluorescent will make it Purplish and Tungsten will make it Blue.

Another option is to change the color of the light coming from the flash by bouncing it off of something or by putting a filter over the flash. This is what I want to write about.

The short is paper or gels can change the color of the flash in select areas.

White lilies on a blue background, colors have been changed by 2 flashes with blue and red paper over them.

White lilies on a blue background, colors have been changed by 2 flashes with blue and red paper over them.

The above image is an example of changing the colors how (more or less) I wanted. The flash with the blue is on the ground pointing up towards the center of the forward facing flower. The red covered flash is being held and is facing down towards the center of the top flower. Below is a similar set up with yellow instead of blue and a picture with the supplies used.

_DSC6075.jpg
20210820_001249.jpg
_DSC6075.jpg 20210820_001249.jpg

The light from the flash with a yellow Post It was a wide flash and impacted all of the rest of the image. The blue of the background mixed with the yellow of the light and appears green. I used multiple pink Post It notes to get a red color which appears more orange because red and yellow make orange.

Clear gels can be found at stores, I have found construction paper and Post It notes do the job.

I originally figured this out years ago on a bored night off. I put a pink and a blue Post It over 2 flashes and again with lilies that I bought for my Wife.

Post It Lilies.jpg

Notice that there is some overlap that leads to a purple on the petals.

Go out and experiment.

~Scott

tags: learning, blend, flash, color, teaching
Wednesday 08.25.21
Posted by Scott W Gonzalez
 

Crop Sensor vs Full Frame

Happy Moon landing anniversary!

The short of it is that a crop sensor is smaller and to get the true/equivalent focal length the listed focal length needs to be multiplied by 1.5 (Sony, Minolta, Nikon, Pentax) or 1.6 (Canon) or 2 (Olympus). a 50mm becomes a 75mm/80mm/100mm. The same lens on a Full Frame would stay the same. If you want more details then continue reading if not then check out the pictures for examples.

The Strawberry Moon captured at 300mm with a Full Frame and with a Crop sensor. Same lens, same location, both 24mp Sony sensors, taken minutes apart. ISO 400 f8 1/1600th sec shutter.

300mm a7iii.jpg
300mm a77.jpg
300mm a7iii.jpg 300mm a77.jpg

I am writing this on the night of the first Moon landing in 1969. Considering the subject that I used I felt that it was a fitting date to finish writing the post.

Back in the days of film this was not really an issue. If you had a DSLR then you generally had the same size film as the other brands, 35mm. A full frame (FF) sensor is the same size 36x24mm. Crop sensors vary a little bit from APS-H @ 28.7x19mm to APS-C 23.6x15.7mm or 22.2x14.8mm to 17.3x13mm and need to multiply the focal length by 1.3, 1.5, 1.6, or 2 respectively to get the equivalent length.

I have only until recently had APS-C cameras. I have noticed that I don’t have as much reach with my FF as I used to. The reason is because the 300mm lens is actually 300mm not acting like a 450mm lens.

Through the pictures above there is a noticeable difference.

It can be an advantage or not depending on the type of photography that you plan on doing and budget. If it is a hobby and you want to take pictures of things far away a crop sensor might be the better option. A 300mm kit lens becomes a 450mm or 480mm or 600mm depending on the manufacturer. Getting a lens with the same reach for a FF camera can easily get expensive. For example a lens from Sigma or Tamron that reaches 400mm starts around $800 dollars. A zoom lens that gets to 300mm can be gotten for less than half that price, some manufactures even have them as part of kits.

200mm a7iii.jpg
200mm a77.jpg
300mm a7iii.jpg
200mm a7iii.jpg 200mm a77.jpg 300mm a7iii.jpg

Here is the Moon at 200mm, iso 400, f8, 1/1600th second shutter same lens different cameras. The a77 is a APS-C sensor and is really 300mm. The 3rd image is from the FF at 300mm to show that they are relatively the same size on the sensor. They are different lens, all the other settings are the same though.

~Scott

Wednesday 07.21.21
Posted by Scott W Gonzalez
 

Printing: Viewing distance.

Good morning,

So I have been sending out free prints to various groups over the last several months. Mainly healthcare workers. I am printing them at home and have been noticing that viewing distance is a question that needs to be asked. Some of the photos that I have are older so smaller sized and some have digital noise. If someone was viewing either of those pictures at really close they don’t look that great. However if there is an 8x10 print it is probably not going to be viewed at a few inches or even a foot. More likely it will be put on a wall or a shelf and not viewed from less than an arms length away (in my case that is about 2.5ft). At that distance minor noise will not be seen and a lower resolution image will look fine.

A common idea for printing images is 300 pixels per inch or PPI. So a 4x6 would need 1200x1800 pixels or a 2.16 megapixel image. A high definition TV is around the same 1980x1080 at 2.14 mp. We aren’t viewing it from inches away though it is across the room and it looks great.

I have printed 10mp images at 20x30 inches and they look great with 129 PPI and 16mp images at 24x36 inches at 136 PPI. Again they are not being looked at inches away and even if they were it would be a higher pixel density than a 40 inch HD TV.

20210621_000528.jpg
20210621_000544.jpg
20210621_000528.jpg 20210621_000544.jpg

Above is a picture I recently sent out it was printed at 13x19 inches at 276 PPI. The 4x6 print is a test at roughly full size. I took the pictures of the 4x6 with my cell phone. 1st is several inches away and the 2nd is about 2 ft. I cropped them to the same size so it is a mock of how a person would see the print at different distances. The most noticeable noise is on the black mountain. The 1st image it is speckled all over in the 2nd image a few are visible. Most people aren’t viewing a 13x19 inch print from 2 feet away it is from 4 or more feet away so this noise would even be less prominent than show above.

Viewing images 1 to 1 on your screen is a neat thing to be able to do, it is not often needed in my opinion. Also don’t be afraid of a little noise when printing.

~Scott

Monday 06.21.21
Posted by Scott W Gonzalez
 

Bait and Switch

Again it has been a while. I need to do better.

The short version of this post is that Willoughby’s Camera Emporium runs a scam online, to buy from reputable companies who don’t, and to buy from ones who are authorized dealers of the gear that you are planning on getting. The detailed version is below.

Main topic of this post is the practice of Bait and Switch. I was unaware that there were decent sized camera sellers out there that were still participating in this practice.

324.jpg

My Wife bought me a new camera for my birthday. First off it arrived late even though she paid for faster shipping so that it arrived on time. It arrived on a day that I was working a night shift so I didn’t open it which turned out to be a good thing. Jennifer told me where she bought it from and I looked them up (Willoughby’s Camera Emporium) during slow periods of my shift. The price seemed good, so I was happy she got a good deal. The next day I talked to her and found out that the price on the website was not what she paid.

After she placed the order she was sent an email telling her to call someone at the company. She did and was told that the model she bought was the international version and that it would not work with lenses that I already had. Then she was told that she could change the order to the US version for about $400 more it would come with an extended warranty and a spare battery. This seemed super shady to me. So I called the company, to see about returning it because of the bait and switch. I was told there wasn’t a bait and switch and that there would be a 20% restocking fee which I would have to send them in the form of a cahiers check and that once they received it they would provide a return authorization number. I said okay. I went onto their site and filled out the contact form to ask about the restocking fee, it said they would get back to me within 24 hours. I have yet to hear back, that was filled out on 09FEB21.

On 11FEB21 I looked into the cost and resigned myself to getting ripped off. I took a closer look at the camera box and saw that the only writing in English were trade names and thought that was odd. So, I contacted Sony and was told that it was most likely an international model. If you recall my wife paid extra for the US version.

I called Willoughby’s again and explained that they sent me an international model. The person that I talked to said “Sorry we made a mistake and will send the US version out.” I told them that I just wanted to return it for a refund because of the problems I have had with the company so far. I was told that exchanges were free but returns had a 20% restocking fee. I said that seems criminal and was hung up on. I called back and talked to Pham and was basically told the same thing. After I said I just wanted a return because I didn’t trust the company, he said that they wanted another chance for my business. I explained that what they did was called a bait and switch. He said that a mistake was made and someone grabbed the wrong box. I told him I was familiar with the tactic because a car dealer I worked at used similar tactics. He replied, “So it is okay for you to do it in your business but not for our business to do?” (to me this is an acknowledgement that they know they are doing a bait and switch). I told him that I just wanted to return the camera and that the tactic is not okay for anyone to do, then asked why there was a 20% fee for restocking but not returns as it is the same amount of work. He answered saying it is store policy and nothing could be done. I said I want to talk to a manager and was transferred, the line rang a couple of times and went to a voicemail with an indecipherable name with no mention of Willoughby’s camera or manager. I left a message and have not heard back.

Jen contacted the BBB after seeing multiple reports of similar happenings reported to them. We are supposed to be getting a check in the mail on the 13th of March for a camera that was bought over a month ago. Her telling of the incident is posted under the BBB page for Willoughby’s. Once we get the check a new camera from an authorized dealer will be bought and I can’t wait.

~Scott

Saturday 03.13.21
Posted by Scott W Gonzalez
 

Appreciating and learning from others

Hello it has been too long, I hope everyone is staying safe and healthy.

Sometimes I come across pictures from other photographers and am stunned by them. It is usually in part because the type of photography that they do is not my usual type. I find some astrophotography amazing, along with some macro. I dabble in each as can be seen in my Celestial and Macro galleries. I feel that I am better at landscapes and cityscapes than anything else. So I look at other photographers work to admire and figure out how they took the images so I can do something in that genre of photography.

Lately I have been seeing pictures of the Moon that have color in them and I figured that it was from using an HDR process. Through Twitter I have been coming across more of them including ones from Cory Schmitz (@TheAstroShake) a co-founder of PhotographingSpace.com. There is an abundance of information about astrophotography there. So I asked how he got the color in the Moon and he explained that it was increasing the saturation in a RAW file that is not overexposed. I took his advice and an it worked like magic.

_DSC3621-5.jpg
_DSC3621-6.jpg

The images above are the same picture the only difference is that the Saturation and Vibrance are set at 0 on the first copy and at 100 on the second. Something so easy was outside of my grasp because it is not my usual type of photography. Always learning and asking questions are things that can be done to better ourselves.

Stay safe, wear a mask, and learn something new.

Scott

tags: learning, teaching, question, ask, other people, editing
Saturday 10.24.20
Posted by Scott W Gonzalez
 

The Moon

I hope anyone reading this is staying safe. I am doing my best to which is staying away from as many people as I can and wearing a mask when I can’t.

So I went out to get pictures of NEOWISE with a friend at Seven Magic Mountains outside of Las Vegas. We got some pictures of it. While we were there I pointed my camera at the moon and he seemed surprised when I told him my settings. They were 210mm, iso 400, f4.0, and 1/1250. From my experience of taking pictures of the moon only manual exposure works. If I had a greater focal length then it might not be an issue, currently though I am limited to 300mm max well technically it would be 450mm with the crop factor. It might work with adjusting the exposure compensation. I am of a mind that if I have the time I might as well go full manual if I need to adjust exposure comp.

The problem with small bright objects in a night frame is that they get blown out. The camera tries to bring the whole screen to an even exposure. A night scene generally doesn’t want that. A night sky is supposed to look nearly black. At 300mm the Moon doesn’t take up enough room in the frame to make a big difference to the sensor. So it treats it as a mostly dark frame and over exposes the moon, which leaves a bright spot in a black frame because the sensor is trying to get a curve in the histogram. It can’t because there is to much difference between the bright Moon and the dark sky. So you get an overexposed moon with very little detail. This was taken at 210mm 1/15 second iso 400 f5 which is what my camera meter said was was exposed properly. Click on it to zoom in for detail.

_DSC3166.jpg
_DSC3166-2.jpg

As seen above the camera doesn’t always know what is correct. Granted this has limited editing, I only changed the WB. If I wanted I could bring down some of the highlights and get more detail. Or I could not listen to the camera and get a better exposure. I took it again with what looked correct to me in manual. The camera said it was very under exposed. Click to zoom.

_DSC3167.jpg
_DSC3167-2.jpg

I included the full image in here to illustrate how little of the frame the moon will fill. With a longer focal length this might be a non issue. Even with a 300mm lens attached to a crop sensor it is still an issue. I hope this was informative. If you have any questions feel free to ask and I will do my best to answer. Again stay safe and wear a mask.

~Scott

tags: education, moon, focal length, histogram, zoom, telephoto
Sunday 08.30.20
Posted by Scott W Gonzalez
 

Sunglasses

Hello,

So the other day I went driving for a bit and ended up outside of Red Rock Canyon which is closed due to the pandemic. There were wildflowers all over though so I decided to take some pictures. It started off East of the entrance and close to the road meaning close to my vehicle. I got the pictures that I wanted then drove to see if I could frame things differently. I ended up walking for a few minutes and realized that I took off my CPL (polarizing) filter and left it on the passenger seat. I also enjoyed the way that the sky looked and didn’t want to lose it so I didn’t go back to the vehicle.

This was just East of the entrance with a CPL filter on. More are in the Red Rock folder

This was just East of the entrance with a CPL filter on. More are in the Red Rock folder

So instead of going back and losing the cloud dispersion I took off my sunglasses and put them over the lens. They aren’t as good as a CPL but they can work in a pinch. They can also work as an ND filter.

Taken with sunglasses instead of a CPL filter. If you compare the two images the strength difference can be seen. I deleted the ones I took without the CPL or glasses.

Taken with sunglasses instead of a CPL filter. If you compare the two images the strength difference can be seen. I deleted the ones I took without the CPL or glasses.

I am not saying get rid of your CPL and ND filters. I am saying that sunglasses can be used in a pinch.

Depending on the camera and glasses it is possible to wedge them together.

Depending on the camera and glasses it is possible to wedge them together.

There are a few caveats, the polarizing effect only works if they are polarizing lenses, effectiveness is proportional to the size of the glasses and the size of the lens opening, the more scratches on the glasses the more imperfect the image will be, and the glasses probably will change what your WB should be. Those are the major ones.

If you have any stories or images of how you have used something related to photography for another purpose please feel free to share.

~Scott

tags: improvise, ND, CPL, polarizer, neutral density, photography, learning, teaching, landscape
Sunday 05.03.20
Posted by Scott W Gonzalez
 

Flash: Snoots

So with the pandemic going on, I have been staying home more than normal. The pictures of the mushroom that I took not to long ago needed some different lighting that just a flash. A flash was involved but there was a home made snoot on it.

*If you are familiar with snoots you can probably skip ahead to after the picture. If not read on.

So a snoot is a light modifier that contains the spread of the light. Think flashlight versus a lamp. Basically it is to make it so the flash is on one specific subject or even part of the subject. In doing so it can make the subject stand out from the rest of the picture. One can also be used to isolate the subject turning nearly everything else in the frame either in shadow or blacked out.

Now a snoot is basically an opaque cylinder that fits over the front of a flash. I have seen some a while back that had reflective surfaces inside of them. I have seen others that are collapsible and ones where the size of the opening can be changed.

A tiny mushroom I found growing on the side of a seed starter pot. It was less smaller than a 1/4 inch. Marco lens, lit from above on a wooden cutting board, 1/60 second, f13, iso 100, camera was tripod mounted with a timer some I could hand hold th…

A tiny mushroom I found growing on the side of a seed starter pot. It was less smaller than a 1/4 inch. Marco lens, lit from above on a wooden cutting board, 1/60 second, f13, iso 100, camera was tripod mounted with a timer some I could hand hold the flash.

Today I will show you how I made a simple one with an adjustable opening. First you get a piece of construction paper that is black, next you roll it into tube, then you adjust the roll until it fits around your off camera flash on one side and has the opening size that you want on the other side. Finally if you want to keep it that specific size then tape the paper together. Below is a picture of todays subject.

The conjoined crimson clover that was in the backyard. To give an idea of how close everything is in the coming set of pictures.

The conjoined crimson clover that was in the backyard. To give an idea of how close everything is in the coming set of pictures.

First the construction paper wrapper around the flash. The second was actually taken last and is the conjoined clovers with no flash (all the pictures were taken within 12 minutes) to show the lighting that was there. The third image is of a flash with no snoot from nearly were it would mount on the camera. The fourth is with the snoot but wide so it light both flower heads. Finally the fifth picture is with the snoot with a small opening only big enough to completely light one flower head.

_DSC9924.jpg
_DSC9939.jpg
_DSC9931.jpg
_DSC9933.jpg
_DSC9936.jpg

It isn’t hard and it can be very useful in the right situations. Given the current situation with the pandemic it is something that can be tried without leaving home. Stay safe and as always I would love to see what you can do with this new information. Pictures and comments are welcome

tags: photography, pictures, flash, snoot, paper, construction, off camera
Thursday 04.02.20
Posted by Scott W Gonzalez
 

Less than good weather

Hello,

So in quite a few parts of the US it is cloudy, rainy, and stormy. For some this is the time to figure out something else to do rather than going outside and taking pictures. Catching up on a blog, studying other’s work to figure out how that shot was done, reading a good book, editing pictures, cleaning gear, and a plethora of other things that aren’t going out in cloudy, rainy weather.

Don’t be sad like this little girl because of the rain. Grab an umbrella and enjoy the change from clear skies.

Don’t be sad like this little girl because of the rain. Grab an umbrella and enjoy the change from clear skies.

I am going to say go out into that not so sunny day and take pictures. Landscapes come alive with clouds in them, rivers look full of action, cityscapes become reflected, rocky cliffs become waterfalls, car lights double, there is a possibility for lightning  and waterfalls increase in volume.

Granted some of those are only if it is actively raining others are post rain and clouds. One of my favorite parts is that a lot of people don’t go out when it is raining. I have gone to normally busy locations to hike and been alone. Normally there would be hundreds of people and no parking.

I have been to some stunning places in my life and not always to photograph. To me a clear blue sky is rather boring. Give me some clouds to break it up, some water on the road or rocks to add some dimension. It could be because I have been in the desert so long that rain and clouds have become something special to me. I believe the Las Vegas area has around 300 days of sunshine a year. The clouds and rain are few and far between.

_DSC0243.jpg
_DSC7939.jpg
_DSC0259.jpg

I know that the pictures above are of foggy, cloudy, and rainy situations. I am realizing that I don’t have many pictures with clear blue skies in them. Not to say that you can’t take good pictures with clear skies I have multiple, the sky is not usually the focus of the image though. We all have our preferences as to how to produce an image, I am just encouraging you all to not discount the less than perfect weather days.

I would enjoy seeing images you all have taken even if they are bright blue skies. As always comments and questions are welcome. I will try not to let so much time go by before the next post.

~Scott

tags: clouds, cloudy, weather, rain, sunshine, photography
Friday 03.13.20
Posted by Scott W Gonzalez
 

Upgrading Gear

Good afternoon,

So I was talking to a friend about cameras a couple of weeks ago and upgrading cameras came up. We went back and forth about the pros and cons of getting a new camera.

Some of the pros are obvious; newest/newer gear, more capability (ISO, dynamic range, aperture, focal length, etc). Some are not so obvious; increased desire to take photographs because of new equipment, needing to learn how to use the new gear,

The cons are a little simpler; cost, needing to learn how to use the new gear, possibly needing new software to work with the gear (primarily with cameras and raw conversion), researching equipment, compatibility issues with other gear, and some others that haven’t affected me personally.

Yes I know that learning “how to use it” is in both because it can be a blessing or a curse depending on where you are on the learning curve.

Granted my friend and I were discussing upgrading cameras specifically most of what we discussed applied to most upgrades. I heard it many years ago and still believe it today. Buy the best that you can comfortably afford. I did and I generally am upgrading my cameras every 6 to 7 years. I currently use a Sony a57 and an a77 tech from March 2012 and August 2011 respectively. Both of them are still serving me well, and some of my lenses are from the 80s. I believe that the newest (other than cameras) gear that I have is a flash made in the mid 2000s that does exactly what it is supposed to do.

For example with me I am looking at getting a new Sony camera that is full frame soon. My current lenses won’t fit it unless I purchase an adapter (a $300+ purchase), my flashes won’t fit the new camera and I would need to purchase an adapter or a new flash that will control the others wirelessly (I haven’t looked into it much it could potentially be a couple $100), I use lightroom to process raw files which and they switched to a service (additional $10/month), that isn’t even putting the cost of the camera in there yet which at it’s least expensive I have seen it around $1700. I looked into going full frame a couple of years ago but couldn’t justify the purchase with only a few gains. Increasing usable ISO, in my opinion, by 2 stops, and it being a full frame camera. The other changes were nominal to me. The camera I am looking at now is 3 stops of ISO, which to me makes it worth it.

My point is that there could be many factors to take into account with simply upgrading a camera. If you are upgrading flashes or lens some of this doesn’t apply. The idea of buying the best you can comfortably afford probably does though. Well built equipment can serve you well for years if not decades. What gear have you upgraded from.

~Scott

Some of the cameras I have upgraded from. A Vivitar that I had in elementary school, a family slide camera that I found in a desk at my Dads (my daughters later used it), a Minolta DSLR that is the same model that my Dad and Stepdad used when I was …

Some of the cameras I have upgraded from. A Vivitar that I had in elementary school, a family slide camera that I found in a desk at my Dads (my daughters later used it), a Minolta DSLR that is the same model that my Dad and Stepdad used when I was younger, and my first digital camera that I bought for a fishing trip to Baja.

tags: gear, change, upgrade, new
Monday 01.20.20
Posted by Scott W Gonzalez
 

Meteor Showers

Good morning,

With a meteor shower just recently passing and one coming up, I thought that I would write about how I take meteor shower images. They happen every month or so, for example the shower that happened recently was the Leonids in mid November and the Geminids are coming in mid December. If you are not familiar meteor showers are loosely named by the constellation they appear to radiate from. Leonids radiate from Leo, Geminids radiate from Gemini.

This was done a while back, iso 100, f3.5, 28mm, 140 seconds.

This was done a while back, iso 100, f3.5, 28mm, 140 seconds.

So what I do just do a long exposure of the sky with a remote and a wide angle lens. I pick a spot in the sky and stick with it. I have tried changing the spot in the sky without much luck. I have watched multiple shooting stars go just outside of the frame so I moved it over to capture those and the next ones close by were outside of the frame on the other side. It takes some luck. I prefer to have some foreground in the frame, that is me though.

The better part of having the camera on a set and forget type of control is that you can enjoy the meteor shower. Seeing dozens of meteors streak across the sky is something to behold even if you don’t catch a single one on a sensor.

The Geminids are coming up on the 13th/14th of December so if you can find a dark spot I recommend going out and seeing them and not just to photograph them. I know that I will be. If you do capture any I would love to see them.

tags: astrophotography, long exposure, learning, teaching, wide angle, celestial, meteor
Saturday 11.30.19
Posted by Scott W Gonzalez
 

Over Head Portraits

So it is fall and people are prone to wanting holiday pictures. I rather enjoy fall leaves to the point that I planted multiple trees that get fall colors even in Las Vegas. Crape Myrtles, a Pomegranate tree, and I used to have a Plum tree.

I have put children on ladders to have the leaves as a background, had them pose with leaves, in chairs under the tree and some others. This year quite a few leaves have already fallen because of some winds which made me decide on a different approach. I got on the step ladder and they laid down in the grass and leaves.

_DSC7269.jpg
_DSC7333.jpg
_DSC7426.jpg
_DSC7484.jpg

There was good lighting, I think that the worst part was getting the kids to not squint from looking at a daylit sky. Getting the towels hidden was a bit of a pain. I will try to remember to not use white ones when the subject is wearing something other that white.

Alright that is it good luck with any and all holiday photos. I would love to see what others are shooting. Also if you have any photography questions then feel free to put them in the comments and I will get to them.

~Scott

tags: family, fall, photoshoot, leaves, overhead, portrait
Monday 11.11.19
Posted by Scott W Gonzalez
 
Newer / Older

Powered by Squarespace.