Good afternoon,
Now I will move onto ISO (International Standards Organization) or ASA (American Standards Association which might be seen in older publications) which is a measurement of how sensitive to light a sensor or film is. I sometimes shoot film still and enjoy it, I even have had my daughters use film.
The ISO can usually be changed in almost any setting on a DSLR type camera, and if I recall quite a few point and shoot cameras as well. Unless it is turned to auto. Auto from my experience doesn't use the whole range that the camera is capable of. I have cameras that are a few years old and they are both capable of 16,000 (more on this in a bit). I don't ever use them at that setting but it is there, I have gone up to 3200 with decent results though. ISO goes up/down in stops, it doubles every time for one full stop. 50, 100, 200, 400, 800, 1600, 3200, etc... from 12800 to 16000 isn't a full stop though and higher end cameras can go in between full stops (64, 120, and so on). If you are in A or S priority then the setting will double or half when decreasing or increasing the ISO in full stops accordingly.
Some of you might be thinking "why not always use the highest ISO?" Well every increase in ISO adds noise or grain to the image. It is the price that we pay for more light gathering ability. Somethings the noise isn't an issue with (things not needing fine detail, documenting events or just needing to have a photo, night shots) and others it is (wanting fine detail, portraits, stationary items).

I kept the aperture at f5.6 while changing the shutter speed to compensate from 30 seconds at 50 ISO to 1/10 of a second at 16000 ISO. To see the detail lost look at the books and the wood grain. These are 100% crops of the pictures.
*I changed it from the previous pictures. I felt these demonstrated the ISO difference better.
The highest acceptable ISO depends on what we are taking pictures of and what we are using the image for. Landscapes low ISOs work well because we usually mount on a tripod for them for sharpness and high dof. Action we want a high ISO to stop the motion and get a sharp stopping of it. Indoor either high ISO or a flash, my personal experience is that an image taken at a get together is not usually going to be blown up to a large enough size to make higher ISO degrade the print.
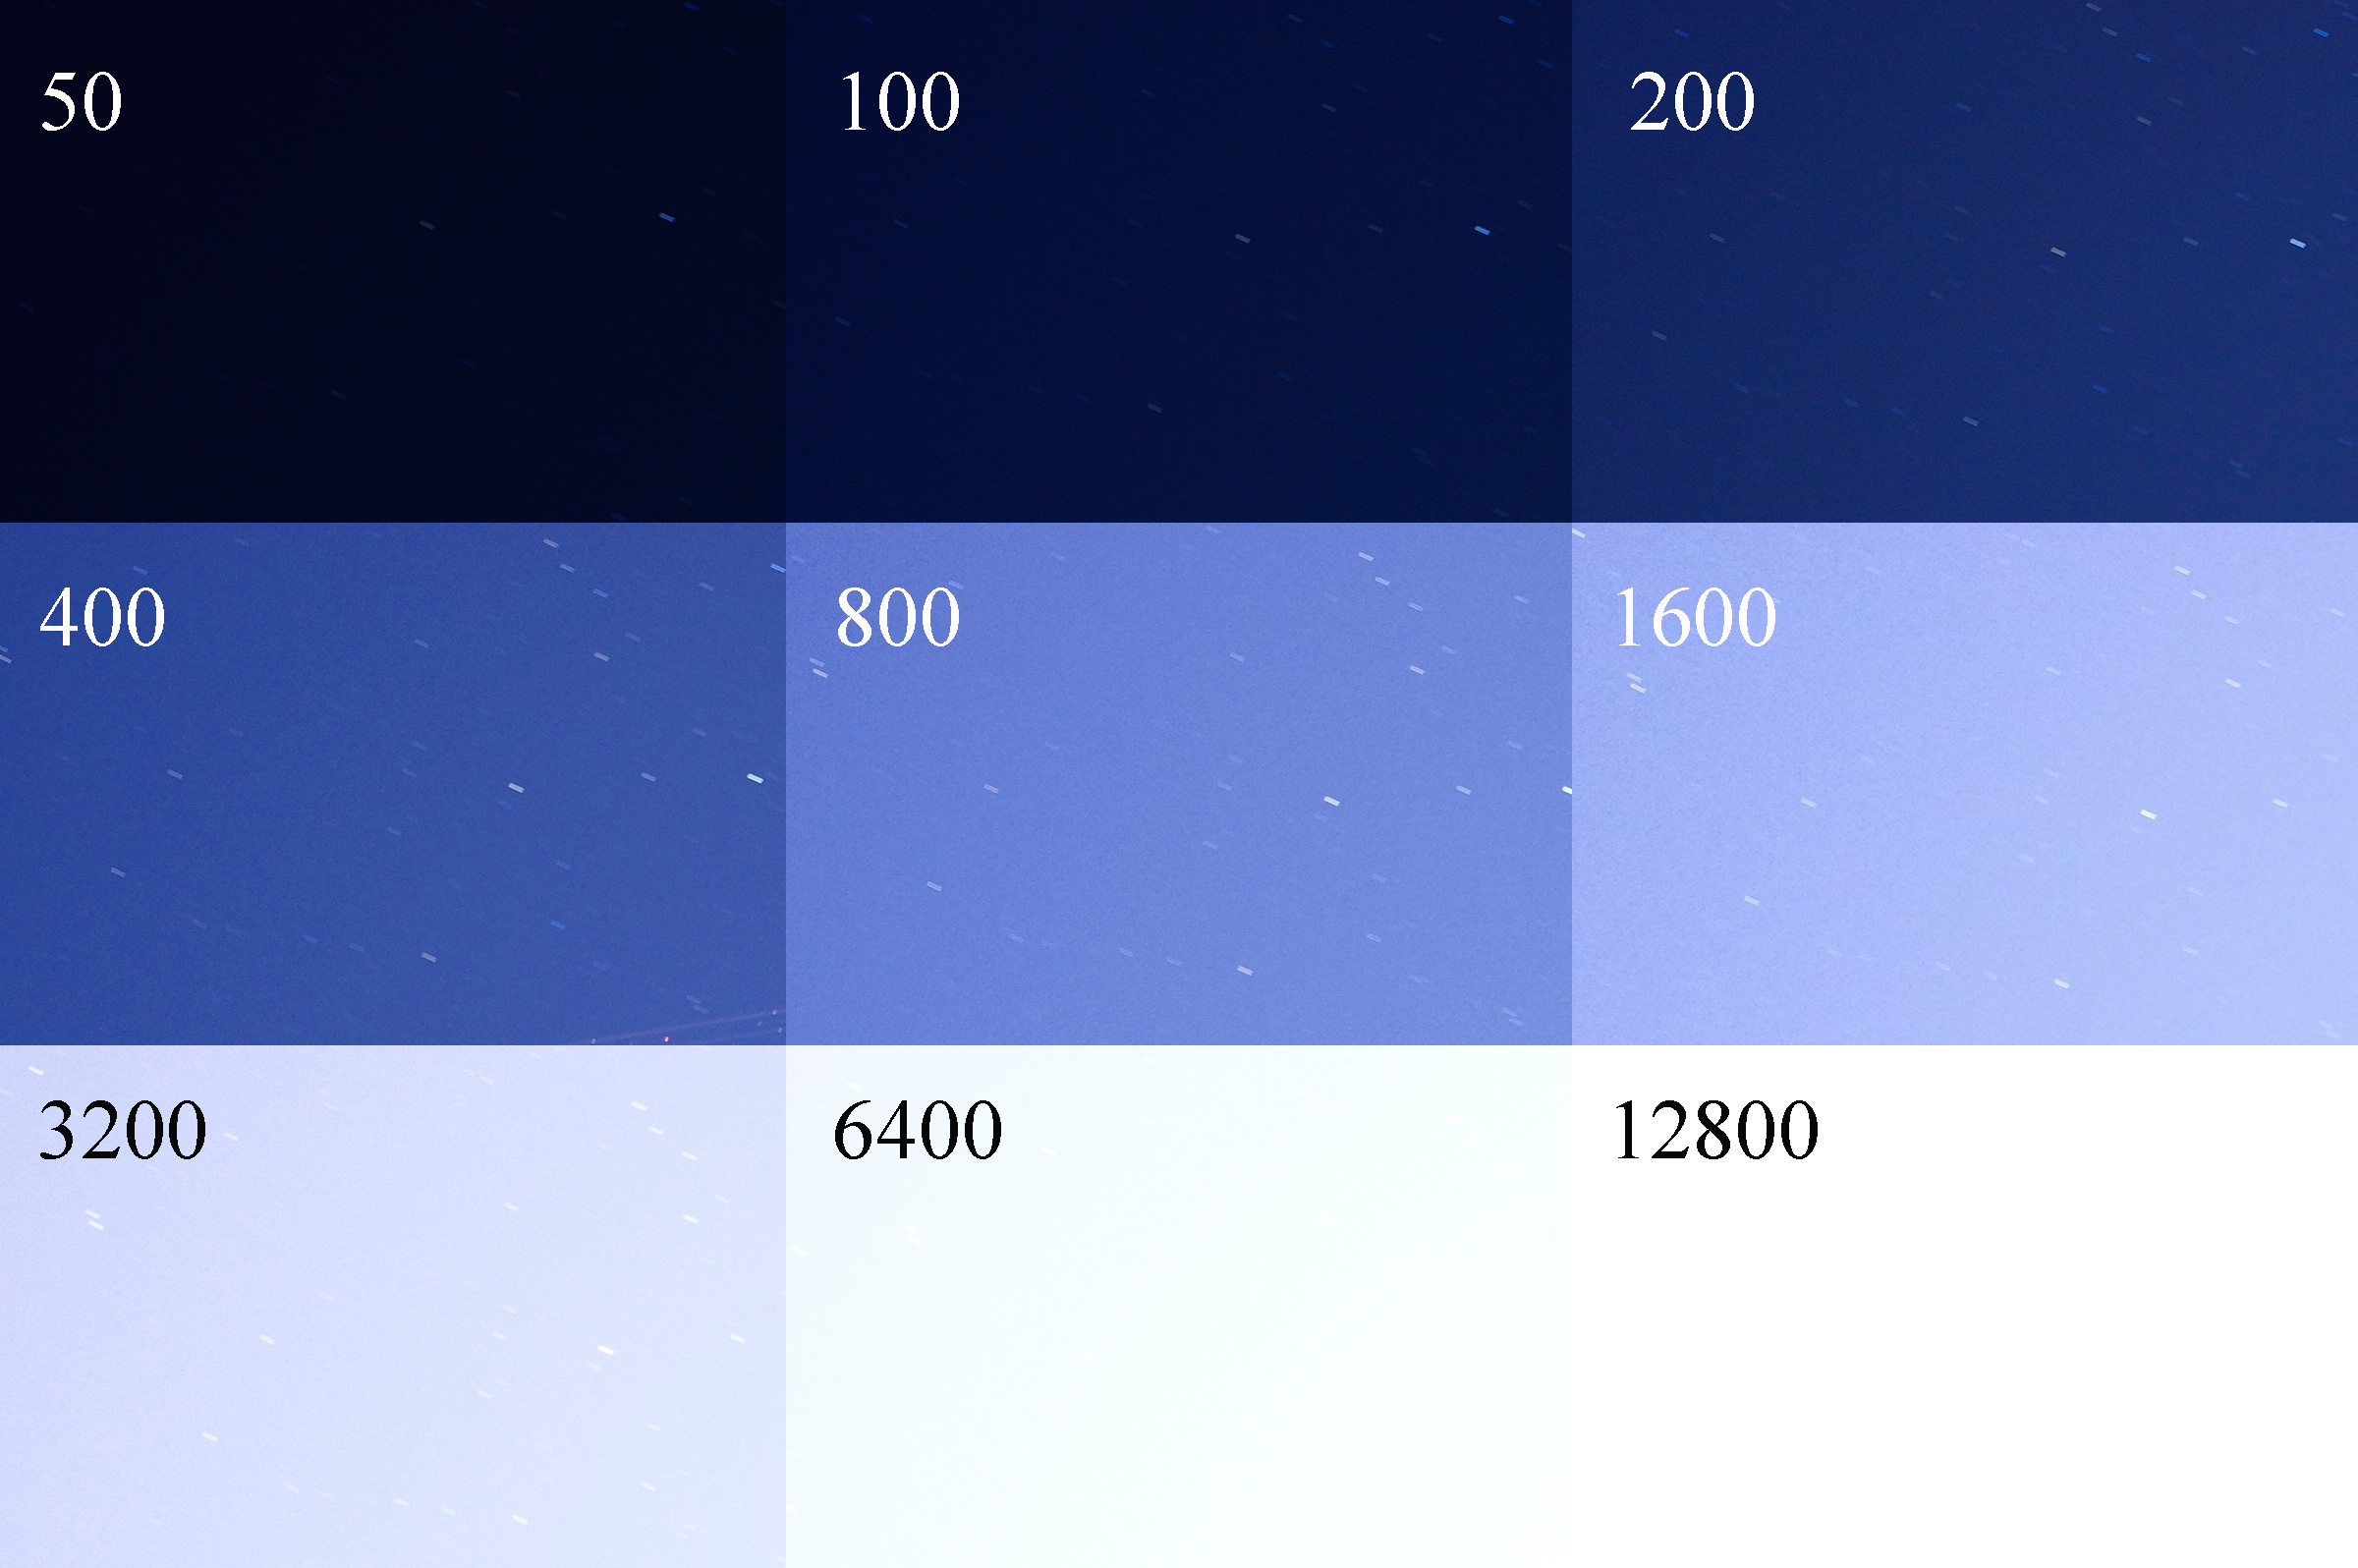
I kept the aperture at f2.8 and the shutter at 30 seconds, the ISO was changed to show the difference between the light sensitivity. More stars can be seen until it gets blocked out by ambient light. At 400 there was a plane flying through the frame.
*I changed the image to 100% crops of the upper left corner so the stars would be more visible.
So far we have covered the points on the exposure triangle, next week I think that we should move onto the Histogram which more or less defines a "perfect exposure." Go on out and shoot, experiment with new knowledge. Change your settings and see what you can do.
~Scott