Good evening,
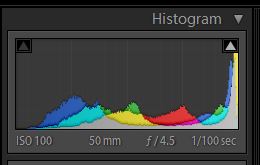
Today I am going to talk about the histogram which is I believe the defining thing for a "perfect exposure." The histogram is a graph of how much brightness vs darkness you have in an image. On the left we have black and on the right we have white, then bottom to top is how much you have in each. Some histograms like below have colors to go along with them and others just have a black and white graph.

Perfect
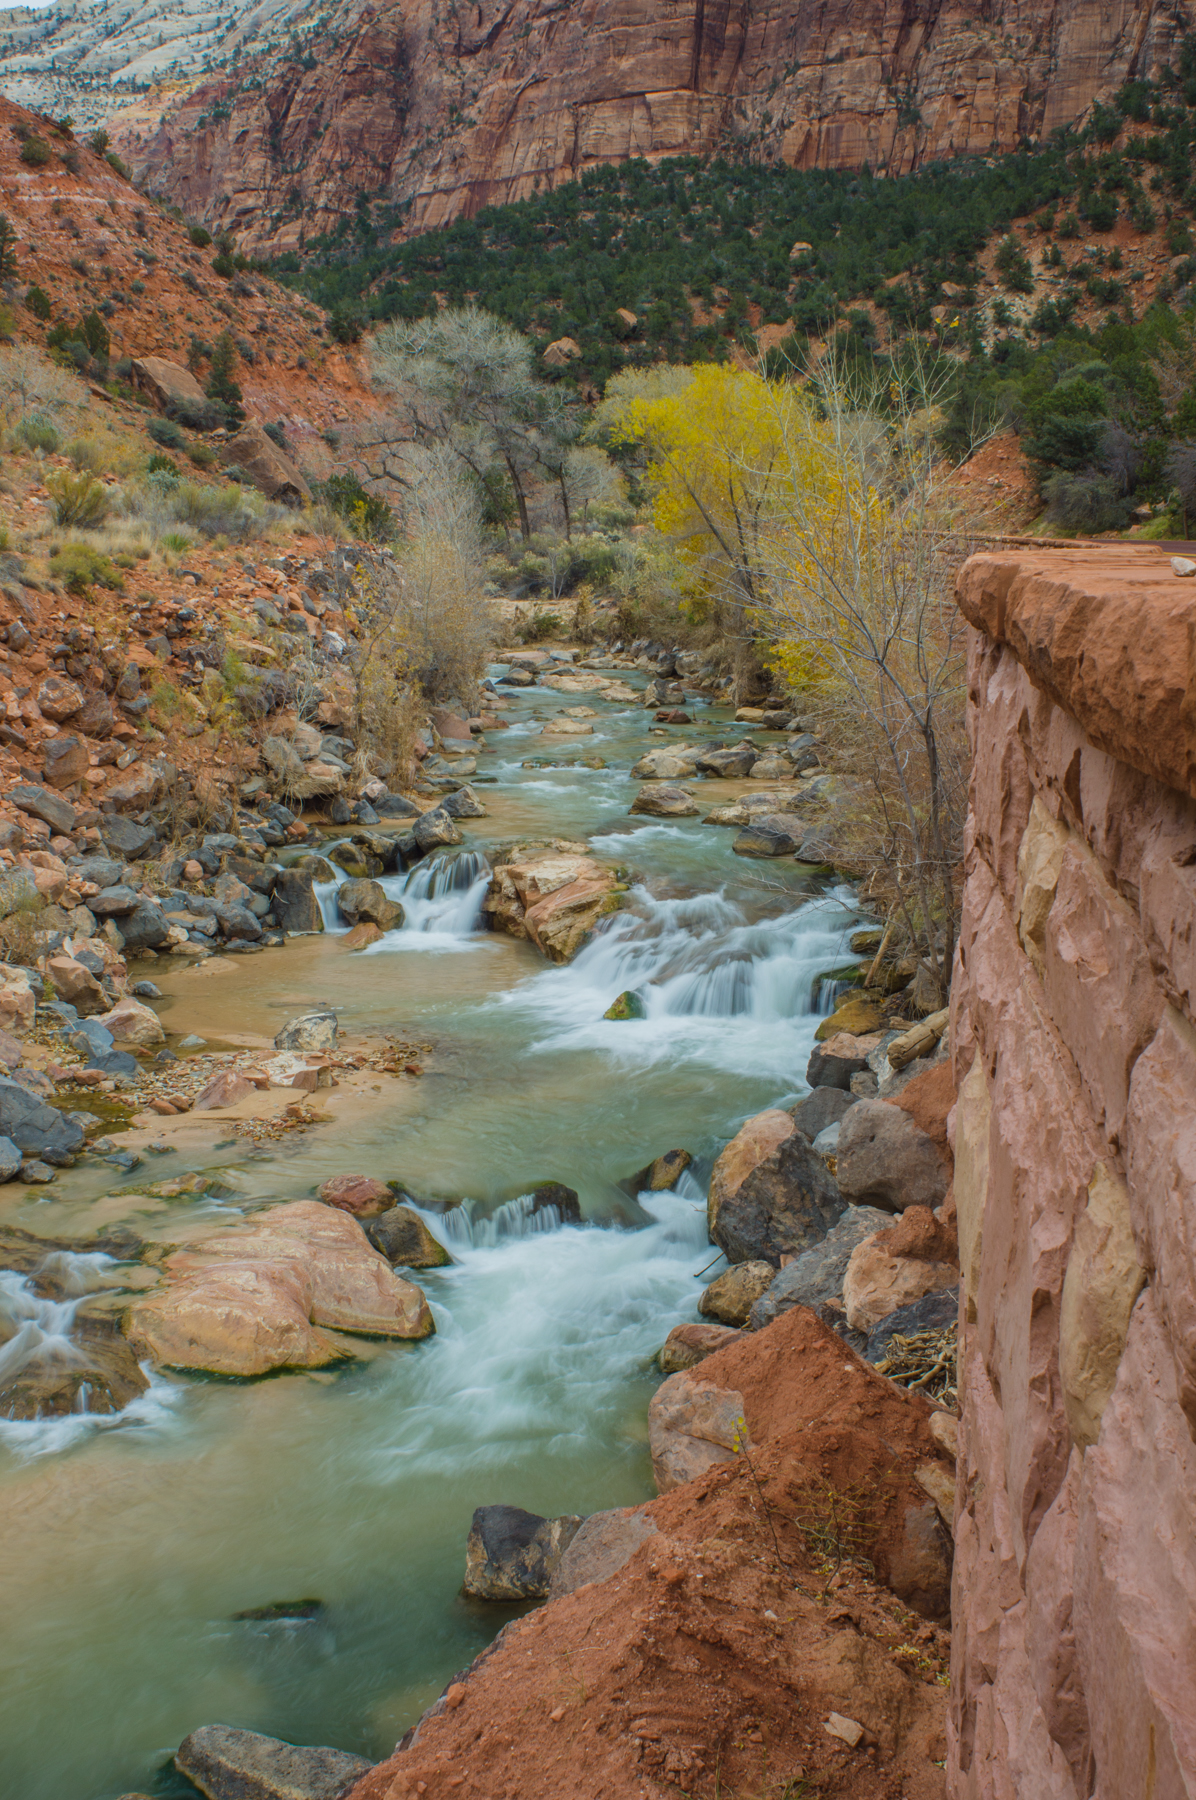
This is what our histogram would say is a "perfect" exposure. Not that there is anything wrong with it. Notice on the histogram that everything is right in the middle nothing goes all the way off to the sides or the top.
Highlight

Here we have a highlight image. My daughter was sitting in a little alcove to get out of the sun. If you notice on the histogram there is a spike all the way to the right and some even goes off of it. This is called clipping, in this case highlight clipping, which means there is no image detail in that area it is just white. Generally not a desired characteristic in images. Leaving the image with the highlights shows that it was a really bright day and there was a need to seek shade from the blazing sun. Not "perfect." It works though with what I wanted to express.

Shadow

Now it is the opposite end, shadow clipping. Parts of the pier have no detail, there is also highlights in this where the sun is. I can brighten it but then I start to get to many highlights, I would prefer to just leave the pier as a silhouette so that I can retain colors in the sky and the reflection. Again not "perfect." It portrays what I wanted though and the way that I saw it.
The camera wants to make the images be in middle ground. Sometimes that doesn't leave us with an image that portrays the mood or feel of what we see at the moment. So we change it and take control away from the camera. If we are in the semi manual modes then we can use exposure compensation (it looks like a little +/- icon) to make the image our own. or go to full manual and have complete control over the exposure.
In manual if we want it a little darker or brighter we can just make an adjustment to the shutter, aperture, or iso to achieve the desired effect. each one can change the way the picture looks as previously discussed. Now go out and shoot. Enjoy it, experiment.
~Scott